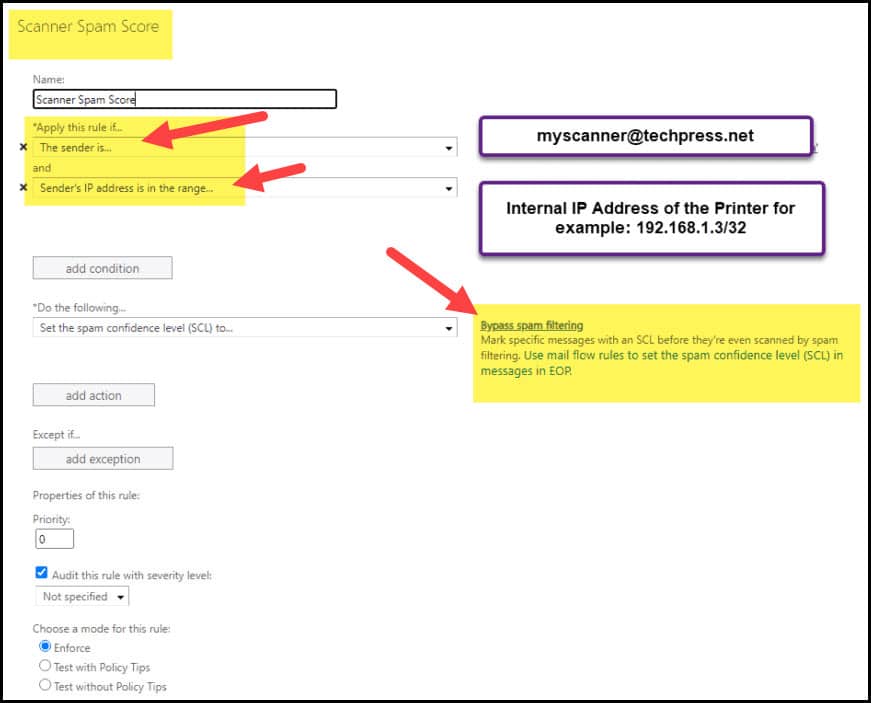
Any organization that handles sensitive data must be diligent in its security efforts, which include regular pen testing. Even a small data breach can result in significant damage to an organization’s reputation and bottom line.
There are two main reasons why regular pen testing is necessary for secure web application development:
- Security: Web applications are constantly evolving, and new vulnerabilities are being discovered all the time. Pen testing helps identify vulnerabilities that could be exploited by hackers and allows you to fix them before they can do any damage.
- Compliance: Depending on your industry and the type of data you handle, you may be required to comply with certain security standards (e.g., PCI DSS, NIST, HIPAA). Regular pen testing can help you verify that your web applications meet these standards and avoid penalties for non-compliance.
How Often Should You Pentest?#
Many organizations, big and small, have once a year pen testing cycle. But what’s the best frequency for pen testing? Is once a year enough, or do you need to be more frequent?
The answer depends on several factors, including the type of development cycle you have, the criticality of your web applications, and the industry you’re in.
You may need more frequent pen testing if:
You Have an Agile or Continuous Release Cycle#
Agile development cycles are characterized by short release cycles and rapid iterations. This can make it difficult to keep track of changes made to the codebase and makes it more likely that security vulnerabilities will be introduced.
If you’re only testing once a year, there’s a good chance that vulnerabilities will go undetected for long periods of time. This could leave your organization open to attack.
To mitigate this risk, pen testing cycles should align with the organization’s development cycle. For static web applications, testing every 4-6 months should be sufficient. But for web applications that are updated frequently, you may need to test more often, such as monthly or even weekly.
Your Web Applications Are Business-Critical#
Any system that is essential to your organization’s operations should be given extra attention when it comes to security. This is because a breach of these systems could have a devastating impact on your business. If your organization relies heavily on its web applications to do business, any downtime could result in significant financial losses.
For example, imagine that your organization’s e-commerce site went down for an hour due to a DDoS attack. Not only would you lose out on potential sales, but you would also have to deal with the cost of the attack and the negative publicity.
To avoid this scenario, it’s important to ensure that your web applications are always available and secure.
Non-critical web applications can usually get away with being tested once a year, but business-critical web applications should be tested more frequently to ensure they are not at risk of a major outage or data loss.
Your Web Applications Are Customer-Facing#
If all your web applications are internal, you may be able to get away with pen testing less frequently. However, if your web applications are accessible to the public, you must be extra diligent in your security efforts.
Web applications accessible to external traffic are more likely to be targeted by attackers. This is because there is a greater pool of attack vectors and more potential entry points for an attacker to exploit.
Customer-facing web applications also tend to have more users, which means that any security vulnerabilities will be exploited more quickly. For example, a cross-site scripting (XSS) vulnerability in an external web application with millions of users could be exploited within hours of being discovered.
To protect against these threats, it’s important to pen test customer-facing web applications more frequently than internal ones. Depending on the size and complexity of the application, you may need to pen test every month or even every week.
You Are in a High-Risk Industry#
Certain industries are more likely to be targeted by hackers due to the sensitive nature of their data. Healthcare organizations, for example, are often targeted because of the protected health information (PHI) they hold.
If your organization is in a high-risk industry, you should consider conducting pen testing more frequently to ensure that your systems are secure and meet regulatory compliance. This will help protect your data and reduce the chances of a costly security incident.
You Don’t Have Internal Security Operations or a Pen testing Team#
This might sound counterintuitive, but if you don’t have an internal security team, you may need to conduct pen testing more frequently.
Organizations that don’t have dedicated security staff are more likely to be vulnerable to attacks.
Without an internal security team, you will need to rely on external pen testers to assess your organization’s security posture.
Depending on the size and complexity of your organization, you may need to pen test every month or even every week.
You Are Focused on Mergers or Acquisitions#
During a merger or acquisition, there is often a lot of confusion and chaos. This can make it difficult to keep track of all the systems and data that need to be secured. As a result, it’s important to conduct pen testing more frequently during these times to ensure that all systems are secure.
M&A also means that you are adding new web applications to your organization’s infrastructure. These new applications may have unknown security vulnerabilities that could put your entire organization at risk.
In 2016, Marriott acquired Starwood without being aware that hackers had exploited a flaw in Starwood’s reservation system two years earlier. Over 500 million customer records were compromised. This placed Marriott in hot water with the British watchdog ICO, resulting in 18.4 million pounds in fines in the UK. According to Bloomberg, there is more trouble ahead, as the hotel giant could “face up to $1 billion in regulatory fines and litigation costs.”
To protect against these threats, it’s important to conduct pen testing before and after an acquisition. This will help you identify potential security issues so they can be fixed before the transition is complete.
The Importance of Continuous Pen Testing#
While periodic pen testing is important, it is no longer enough in today’s world. As businesses rely more on their web applications, continuous pen testing becomes increasingly important.
There are two main types of pen testing: time-boxed and continuous.
Traditional pen testing is done on a set schedule, such as once a year. This type of pen testing is no longer enough in today’s world, as businesses rely more on their web applications.
Continuous pen testing is the process of continuously scanning your systems for vulnerabilities. This allows you to identify and fix vulnerabilities before they can be exploited by attackers. Continuous pen testing allows you to find and fix security issues as they happen instead of waiting for a periodic assessment.
Continuous pen testing is especially important for organizations that have an agile development cycle. Since new code is deployed frequently, there is a greater chance for security vulnerabilities to be introduced.
Pen testing as a service models is where continuous pen testing shine. Outpost24’s PTaaS (Penetration-Testing-as-a-Service) platform enables businesses to conduct continuous pen testing with ease. The Outpost24 platform is always up-to-date with an organization’s latest security threats and vulnerabilities, so you can be confident that your web applications are secure.
- Manual and automated pen testing: Outpost24’s PTaaS platform combines manual and automated pen testing to give you the best of both worlds. This means you can find and fix vulnerabilities faster while still getting the benefits of expert analysis.
- Provides comprehensive coverage: Outpost24’s platform covers all OWASP Top 10 vulnerabilities and more. This means that you can be confident that your web applications are secure against the latest threats.
- Is cost-effective: With Outpost24, you only pay for the services you need. This makes it more affordable to conduct continuous pen testing, even for small businesses.
The Bottom Line#
Regular pen testing is essential for secure web application development. Depending on your organization’s size, industry, and development cycle, you may need to revise your pen testing schedule.
Once-a-year pen testing cycle may be enough for some organizations, but for most, it is not. For business-critical, customer-facing, or high-traffic web applications, you should consider continuous pen testing.
Outpost24’s PTaaS platform makes it easy and cost-effective to conduct continuous pen testing. Contact us today to learn more about our platform and how we can help you secure your web applications.
Found this article interesting? Follow us on Twitter and LinkedIn to read more exclusive content we post.
Source :
https://thehackernews.com/2023/01/is-once-yearly-pen-testing-enough-for.html


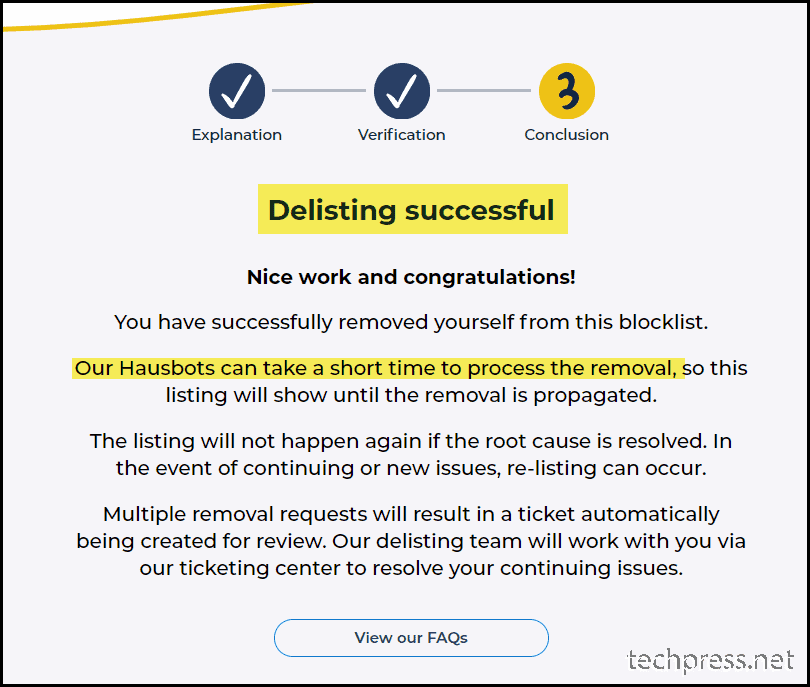


 A confirmation message appears.
 If you cannot find the PSID, contact the disk manufacturer.