As many as five security flaws have been disclosed in Netgear RAX30 routers that could be chained to bypass authentication and achieve remote code execution.
“Successful exploits could allow attackers to monitor users’ internet activity, hijack internet connections, and redirect traffic to malicious websites or inject malware into network traffic,” Claroty security researcher Uri Katz said in a report.
Additionally, a network-adjacent threat actor could also weaponize the flaws to access and control networked smart devices like security cameras, thermostats, smart locks; tamper with router settings, and even use a compromised network to launch attacks against other devices or networks.
The list of flaws, which were demonstrated at the Pwn2Own hacking competition held at Toronto in December 2022, is as follows –
CVE-2023-27357 (CVSS score: 6.5) – Missing Authentication Information Disclosure Vulnerability
A proof-of-concept (PoC) exploit chain illustrated by the industrial cybersecurity firm shows that it’s possible to string the flaws — CVE-2023-27357, CVE-2023-27369, CVE-2023-27368, CVE-2023-27370, and CVE-2023-27367 (in that order) — to extract the device serial number and ultimately obtain root access to it.
UPCOMING WEBINAR
Learn to Stop Ransomware with Real-Time Protection
Join our webinar and learn how to stop ransomware attacks in their tracks with real-time MFA and service account protection.Save My Seat!
“These five CVEs can be chained together to compromise affected RAX30 routers, the most severe of which enable pre-authentication remote code execution on the device,” Katz noted.
Users of Netgear RAX30 routers are advised to update to firmware version 1.0.10.94 released by the networking company on April 7, 2023, to address the flaws and mitigate potential risks.
It’s easy to think high-tech companies have a security advantage over other older, more mature industries. Most are unburdened by 40 years of legacy systems and software. They draw some of the world’s youngest, brightest digital natives to their ranks, all of whom consider cybersecurity issues their entire lives.
Perhaps it is due to their familiarity with technology that causes them to overlook SaaS security configurations. During the last Christmas holiday season, Slack had some private code stolen from its GitHub repository. According to Slack, the stolen code didn’t impact production, and no customer data was taken.
Still, the breach should serve as a warning sign to other tech companies. Stolen tokens allowed threat actors to access the GitHub instance and download the code. If this type of attack can happen to Slack on GitHub, it can happen to any high-tech company. Tech companies must take SaaS security seriously to prevent resources from leaking or being stolen.
Slack’s misfortune with GitHub wasn’t the first time a GitHub breach occurred. Back in April, a stolen OAuth token from Heroku and Travis CI-maintained OAuth applications were stolen, leading to an attacker downloading data from dozens of private code repositories.
MailChimp, a SaaS app used to manage email campaigns, experienced three breaches over 12 months spanning 2022-23. Customer data was stolen by threat actors, who used that data in attacks against cryptocurrency companies.
SevenRooms had over 400 GB of sensitive data stolen from its CRM platform, PayPal notified customers in January that unauthorized parties accessed accounts using stolen login credentials, and Atlassian saw employee data and corporate data exposed in a February breach.
Clearly, tech companies aren’t immune to data breaches. Protecting their proprietary code, customer data, and employee records that are stored within SaaS applications should be a top priority.
A strong SaaS posture is important for any company, but it is particularly important for organizations that store their proprietary code in SaaS applications. This code is especially tempting to threat actors, who would like nothing more than to monetize their efforts and ransom the code back to its creators.
Tech companies also tend to rely on a large number and mix of SaaS applications, from collaboration platforms to sales and marketing tools, legal and finance, data warehouses, cybersecurity solutions, and many more – making it even more challenging to secure the entire stack.
Tech employees heavily depend on SaaS apps to do their day-to-day work; this requires security teams to strictly govern identities and their access. Moreover, these users tend to log into their SaaS apps through different devices to maintain efficiency, which may pose a risk to the organization based on the device’s level of hygiene. On top of this, tech employees tend to connect third-party applications to the core stack without thinking twice, granting these apps high risk scopes.
The high-tech industry is known for periods of hyper-growth, followed by downsizing. Over the past few months, we’ve seen Facebook, Google, Amazon, Microsoft, LinkedIn, Shopify and others announce layoffs.
Deprovisioning employees from SaaS applications is a critical element in data security. While much of the offboarding of employees is automated, SaaS applications that are not connected to the company directory don’t automatically revoke access. Even those applications that are connected may have admin accounts that are outside the company’s SSO. While the primary SSO account may be disconnected, the user’s admin access through the app’s login screen is often accessible.
At the same time, the industry is ripe with mergers and acquisition announcements. As a result of M&As, the acquiring company needs to create a baseline for SaaS security and monitor all SaaS stacks of merged or acquired companies, while enabling business continuity. Whether the hyper growth is organic or through an M&A, organizations need to be able to ensure access is right-sized for their users, at scale and rapidly.
The majority of data breaches impacting tech companies stem from stolen credentials and tokens. The threat actor enters the system through the front door, using valid credentials of the user.
Identity Threat Detection and Response (ITDR) picks up suspicious events that would otherwise go unnoticed. An SSPM (SaaS Security Posture Management) solution with threat detection engines in place will alert when there is an Indicator of Compromise (IOC). These IOCs are based on cross-referencing of activities such as user geolocation, time, frequency, recurring attempts to login, excessive activities and more.
Maintaining a high SaaS security posture is challenging for high tech companies, who may mistakenly believe they are equipped and well trained to prevent SaaS attacks. SaaS Security Posture Management is essential to preventing SaaS breaches, while an SSPM with ITDR capabilities will go a long way toward ensuring that your SaaS data is secure.
A user is browsing your website. They go to your product page. Then to your pricing page. Then back to your product page as they forgot to check if you offer that specific feature. Finally, they navigate forward to your pricing page and finish their order.
As it turns out, it’s a pretty common scenario.
Chrome usage data shows that 1 in 10 (10%) navigations on desktop and 1 in 5 (20%) on mobile are either back or forward.
Truly spectacular numbers.
But…
The more important thing is – how can you guarantee that after navigating back and forward to your pages, they load immediately?
Enter back/forward cache (or bfcache).
In the following lines, you will learn everything about bfcache and how to implement it to improve speed and perceived performance.
Spoiler alert: it’s easier than you think.
What is the back/forward cache?
Bfcache is a feature that allows browsers to create and store a snapshot of an already visited web page in their in-memory. So the next time a visitor navigates back or forward to it, the browser can display it immediately.
The whole behind-the-scene process looks like this…
When a visitor requests to load a specific page, the browser goes through the following process:
Establishes a connection with the server
Downloads and parses the information
Constructs the Document Object Model (DOM) and CSS Object Model (CSSOM)
Renders the content
Makes the page interactive
If the back/forward cache isn’t enabled for the specific page, it means that every time you leave it and then navigate back to it, the browser will have to go through the whole 5-step process.
And that takes time.
On the contrary, with bfcache enabled, the browser “freezes” the page with all of its resources, so the next time you re-visit it, the browser won’t need to waste time rebuilding and will be able to load it instantly.
The following Addy Osmani’s video illustrates best how fast a web page loads with and without bfcache:
As you can see from the video, the loading time is almost non-existent. On top of that, bfcache will reduce your visitors’ data usage as they won’t have to re-download the same resources repeatedly.
And while all of these benefits sound incredible, a certain question might still bother you:
I already have an HTTP cache set up for my website. Do I need bfcache as well?
Here’s the answer…
What is the difference between bfcache and HTTP cache?
Put simply, bfcache is a snapshot of the entire page stored in-memory (including the JavaScript heap), whereas the HTTP cache includes only the previously requested resources.
“…it’s quite rare that all requests required to load a page can be fulfilled from the HTTP cache…”
Not all resources are allowed to be cached in the HTTP Cache. For instance, some sites don’t cache the HTML document itself, but only the resources. As a result, every time a visitor loads a specific page, the browser needs to re-download the document.
Another reason back/forward cache can be faster is the difference between in-memory and disk cache.
It’s true that loading resources from the disk cache (HTTP cache) could be much faster than requesting them over the network. But there’s an extra boost from not even having to read them from disk and fetching the entire page directly from the browser’s in-memory.
What browsers support the back/forward cache?
All of them – Chrome, Safari, Firefox, Opera, and Edge:
The truth is back/forward cache isn’t a new concept. Safari added support for this feature back in 2009. Firefox has supported it since version 1.5.
Edge and Chrome were the latest to join the party, with the former introducing bfcache in 2020, while the latter did it a year later.
Now that you know that all major browsers support it let’s see how you can check if your page is served from the bfcache.
How can I check if my site can be served from the back/forward cache?
The best thing about back/forward cache is that itjust works in the majority of cases because browsers automatically do all the work for you.
In some cases, however, your pages will not be restored by the bfcache.
The easiest way to check if everything works correctly is to run a PageSpeed Insights audit.
Using Google PageSpeed Insights
Since the release of Lighthouse v10, there’s been a new PSI audit called “Page prevented back/forward cache restoration.”
The audit will fail if the page you tested cannot be restored from bfcache for any reason. Clicking on the warning, a drop-down menu will open, and you’ll see a list with reasons and the frame(s) that caused the issue.
Actionable: You can fix these issues to enable caching.
Pending Support: Chrome doesn’t support these features yet, so they prevent caching. However, once supported, Chrome removes these limitations.
Not Actionable: You can’t fix these issues on this page. Something that is outside the page’s control prevents caching.
Using Chrome DevTools
Another option is to use Chrome’s Developer Tools, following these steps:
1. Open Chrome DevTools on the page you want to test:
2. Navigate to Application > Cache > Back/forward cache:
3. Click Test back/forward cache
If bfcache works on your page, you’ll see this message:
If not, you will see a list of issues:
Now that you know how to test it, let’s see how you can optimize your pages for bfcache and fix PSI’s warning.
How to fix the “Page prevented back/forward cache restoration” warning in PageSpeed Insights
Even if you don’t see the warning, meaning your page is eligible for bfcache, it’s good to know that it won’t stay there indefinitely.
That’s why it’s crucial to know how to optimize for back/forward cache.
Here are some best practices you can use to make it as likely as possible that browsers bfcache your pages:
1. Avoid using the unload event
The most surefire way to optimize for bfcache is to avoid using the unload event at all costs.
The unload event fires when the user navigates away from the page (by clicking on a link, submitting a form, closing the browser window, etc.).
On desktop, Chrome and Firefox consider a page ineligible for bfcache if it uses the unload event. Safari, on the other hand, will cache some pages that fire the unload event listener, but to reduce potential breakage, it will not run it when a user is navigating away.
On mobile, Chrome and Safari will cache a page that uses the event, but Firefox won’t.
In general, avoid using the unload event and instead go for the pagehide event. Otherwise, you’re risking slowing down your site, and your code won’t even run most of the time in Chrome and Safari.
Also, there’s an ongoing discussion between browsers to deprecate unload.
2. Be careful with adding beforeunload listeners
It’s ok to use beforeunload events in Chrome and Safari, but keep in mind that Firefox will flag your pages as ineligible for bfcache.
However, there are legitimate use cases for the beforeunload event, unlike the unload event. One example is when you must caution the user about losing unsaved changes if they exit the page. It’s advisable to attach beforeunload event listeners only when there are unsaved changes and to remove them promptly after saving those changes.
3. Use Cache-Control: no-store only with information-sensitive pages
If a page contains sensitive information and caching is inappropriate, then Cache-Control: no-store should be used to prevent it from being eligible for bfcache. On the other hand, if a page doesn’t contain sensitive information and always requires up-to-date content, Cache-Control: no-cache or Cache-Control: max-age=0 can be used. These directives prompt the browser to revalidate the content before serving it and don’t impact a page’s eligibility for bfcache.
4. Update sensitive data after bfcache restore
The bfcache isn’t supposed to work for pages that contain sensitive data. For instance, when a user signs out of a website on a public computer, the next user shouldn’t be able to sign back in just by hitting the back button.
To achieve that, it’s a good practice to update the page after a pageshow event if event.persisted is true.
Whenever possible, use rel=”noopener” instead of window.opener references. The opened window or the opener won’t be eligible for bfcache if your site opens windows and controls them through window.postMessage().
Always close connections and disconnect observers during the pagehide and freeze event
When the page is stored in the bfcache, all JavaScript tasks are paused and resumed as soon as it is taken out of the cache.
If these tasks only access APIs isolated to the current page, there won’t be any problems.
However, if these tasks are connected to APIs that are also accessible from other pages in the same origin, then they may prevent code in other tabs from running properly.
If that’s the case, some browsers will not put a page in bfcache in the following scenarios:
The best thing you can do is to permanently close connections and remove or disconnect observers during pagehide or freeze events if your page uses any of these APIs. By doing this, the browser can cache the page without worrying about other open tabs being affected.
Key Takeaways
For something handled by browsers, we’ve covered a lot of information.
So here are the key takeaways from this article:
Bfcache allows browsers to create and store a snapshot of an already visited web page in their in-memory, making the subsequent back/forward navigation load instantly.
The benefits of your page being served from the bfcache include reduced data usage, better perceived performance, improved Core Web Vitals, and user experience.
The difference between bfcache and HTTP cache is that the former stores a snapshot of the whole page while the latter only the previously used resources. Also, with bfcache, the content is restored from the browser’s in-memory, while with HTTP cache is from a disk cache.
All major browsers support back/forward cache.
You can check if a particular page is eligible for back/forward caching using PageSpeed Insights or Chrome DevTools.
То optimize your pages for bfcache and fix the “Page prevented back/forward cache restoration” warning by doing the following:
Avoid using the unload event
Be careful with adding beforeunload listeners
Use Cache-Control: no-store only with information-sensitive pages
Avoid window.opener references
Always close connections and disconnect observers during the pagehide and freeze event
As always, don’t forget to test. Back/forward cache is a great feature, but remember that not every page should be eligible for it. Your visitors’ experience should always be a first priority.
This tutorial will help you in disabling cloud-based clipboard (WIN+V) history feature in Windows 10. Once you follow the steps given in this guide, you’ll be able to prevent or restrict Windows 10 as well as other users from enabling cloud-clipboard feature from Settings and accessing your copied data from cloud-clipboard fly-out.
Newer versions of Windows 10 come with new cloud-based Clipboard feature which allows users to copy and paste multiple items from the clipboard. Users can copy multiple items to the new clipboard and then they can select and paste desired copied items from cloud-clipboard to anywhere they want such as Notepad, MS Word, etc.
The new cloud-based clipboard can be used by pressing WIN+V keys together. To copy items you need to use the good old Ctrl+C hotkey but to paste the copied text from new cloud-based clipboard, you need to use the new WIN+V keyboard shortcut.
When you press WIN+V keys together to access cloud-clipboard, Windows 10 launches the new cloud-based clipboard fly-out as shown in following screenshot:
To paste an item, you need to click on the item and it’ll be immediately pasted at current cursor position in your program window.
Users can enable/disable cloud-clipboard using Windows 10 Settings app. Open Settings app (WIN+I) and go to System -> Clipboard section. Now you can turn on/off Clipboard History option to allow/disallow Windows 10 from copying items to new cloud-clipboard as shown in following screenshot:
We posted a detailed tutorial reviewing cloud-based clipboard feature at following link:
Although it’s a good feature but many Windows 10 users may not like the new cloud-clipboard feature and they may want to disable or deactivate it due to privacy and security reasons.
In this tutorial, we’ll tell you how to permanently disable cloud-clipboard feature in Windows 10 so that no one can access your copied data by pressing WIN+V hotkey.
Once deactivated or disabled, when anyone will try to open Settings -> System -> Clipboard page in your Windows 10 device, he’ll notice that Clipboard History option is grayed out i.e. disabled and he can’t change it. So users will be unable to activate or enable cloud-clipboard feature without your permission. Also a message “Some of these settings are hidden or managed by your organization” will be displayed at the top of the page as shown in following screenshot:
If anyone will try to press WIN+V hotkey in Notepad or any other program to access cloud-clipboard feature, the new clipboard fly-out will open blank or empty. Windows 10 will no longer store your copied items to cloud-clipboard.
Following methods will help you in disabling cloud-clipboard feature in Windows 10 operating system:
METHOD 1: Using Group Policy Editor
1. Press WIN+R keys together to launch RUN dialog box. Now type gpedit.msc and press Enter. It’ll open Group Policy Editor.
2. Now go to:
Computer Configuration -> Administrative Templates -> System -> OS Policies
3. In right-side pane, look for following options:
Allow Clipboard History
Allow Clipboard synchronization across devices
4. Double-click on both options one by one and set both of them to Disabled.
That’s it. It’ll permanently disable cloud-clipboard feature in Windows 10.
PS: In future, if you decide to restore default settings and restore cloud-clipboard feature, set the above mentioned options to Not Configured again in Group Policy Editor.
METHOD 2: Using Registry Editor
If you are using Home edition of Windows, you’ll not be able to run gpedit.msc command because this edition doesn’t come with Group Policy Editor.
If you can’t use or don’t want to use Group Policy Editor, you can take help of Registry Editor for the same task. Just follow these simple steps:
1. Press WIN+R keys together to launch RUN dialog box. Now type regedit and press Enter. It’ll open Registry Editor.
3. In right-side pane, right-click on empty area and select New -> DWORD (32-bit) Value option. Set the new DWORD name as AllowClipboardHistory and keep its value to 0
Again right-click on empty area and select New -> DWORD (32-bit) Value option. Set the new DWORD name as AllowCrossDeviceClipboard and keep its value to 0
4. Close Registry Editor. You may need to restart your computer to take effects.
That’s it. It’ll completely disable cloud-clipboard feature in Windows 10.
PS: In future, if you decide to restore default settings and restore cloud-clipboard feature, delete the DWORD values created in above mentioned steps from Registry Editor.
About the author: Vishal Gupta (also known as VG) has been awarded with Microsoft MVP (Most Valuable Professional) award. He holds Masters degree in Computer Applications (MCA). He has written several tech articles for popular newspapers and magazines and has also appeared in tech shows on various TV channels.
Keeping up with your email inbox can be a daunting task. It’s easy to get bogged down in long, rambling messages or get overwhelmed by a million unimportant emails and miss the important information buried within. Fortunately, there’s a solution that can help.
With Zapier and OpenAI’s GPT-3, summarizing your email’s essential details has never been easier. With just a few clicks, you can automatically get a summary for each email in Slack or a handy daily digest that includes all the critical info you need from each email all in one go.
In this article, we’ll walk you through the steps of setting up this powerful Zap—our word for Zapier’s automated workflows. Whether you’re a busy professional or simply seeking to optimize your process, this tutorial will help you streamline your email management and stay on top of your inbox.
Looking for GPT-4? GPT-4 may be available with our OpenAI integration in the future. In the meantime, users with a paid subscription to ChatGPT Plus can access GPT-4 via our ChatGPT integration now—allowing you to add ChatGPT-powered conversations into apps like Slack.
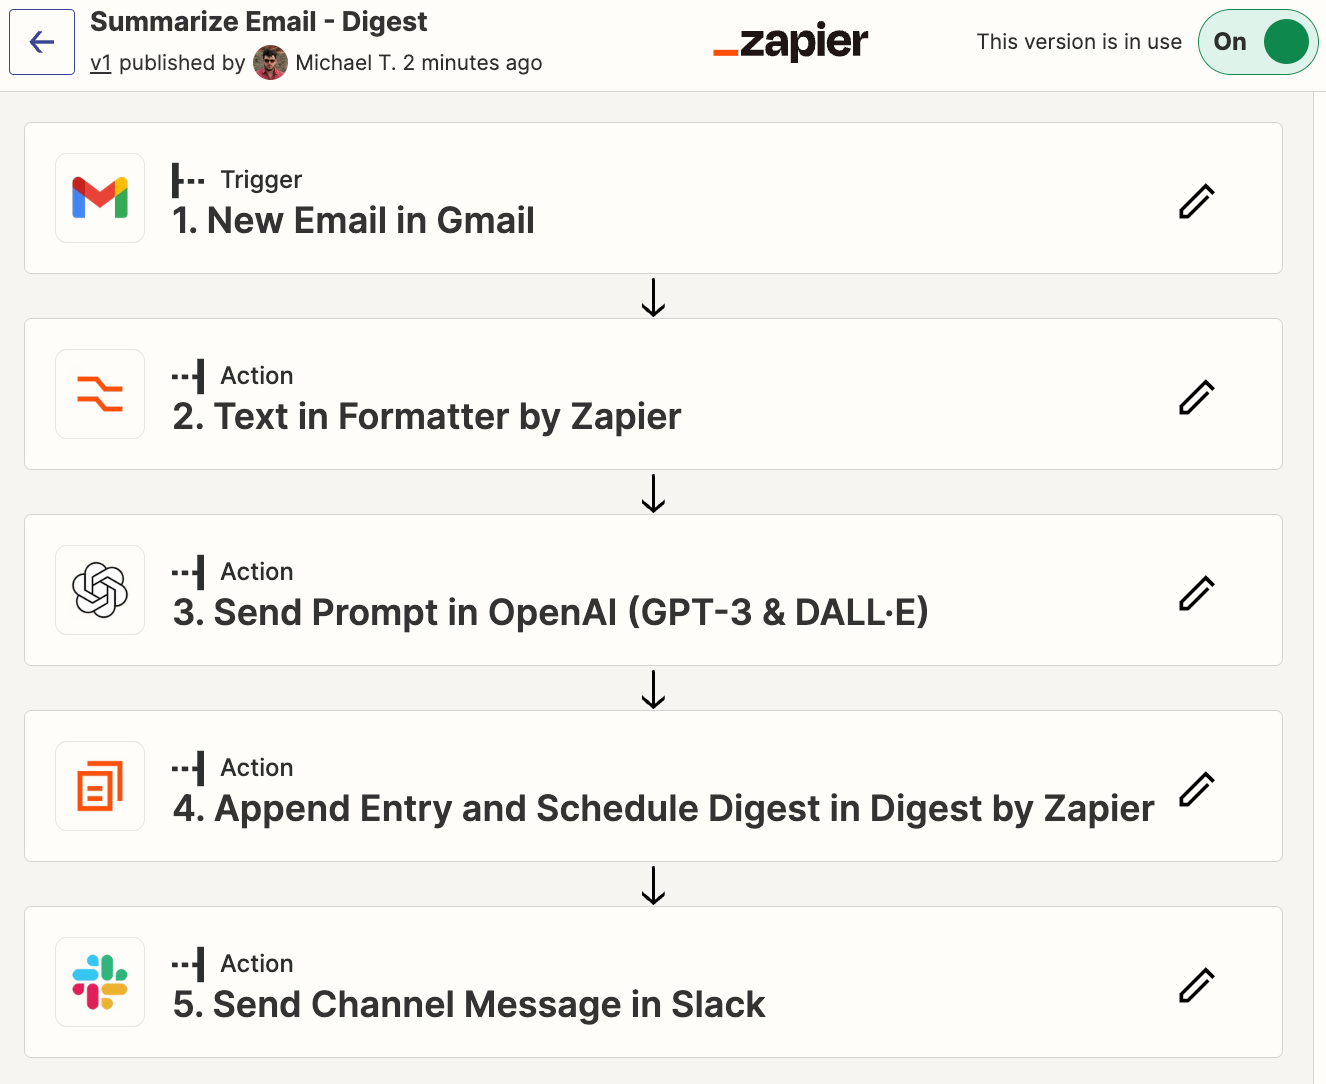
How it works
For this project, we’ll be using OpenAI’s GPT-3 to summarize our emails, and then we’ll send the summaries to Slack.
If you’d like to start with a template, click on the Zap template below to go to the Zap editor. You’ll need to create a Zapier account if you don’t already have one. Then, follow the directions below to set up your Zap.
Get an OpenAI-generated email summary in Slack for new Gmail emails
Alternatively, if you prefer to receive the notifications as a daily digest rather than individually, we’ll walk through how you can use Digest by Zapier for this purpose.
If you’d like to go the digest route, you can start with the following Zap template:
Get an AI-generated daily digest of your emails in Slack
Gmail, Digest by Zapier, Formatter by Zapier, OpenAI (GPT-3, DALL·E, Whisper), Slack
Gmail + Digest by Zapier + Formatter by Zapier + 2 moreMore details
Before we begin developing our Zap, you’ll also need an OpenAI account if you don’t already have one. Go to platform.openai.com to sign up for your account. You’ll also need a free Slack account, which you can sign up for at www.slack.com.
Are you ready to build this yourself? Let’s get started!
New to Zapier? It’s a tool that helps anyone connect apps and automate workflows—without any complicated code. Sign up for free.
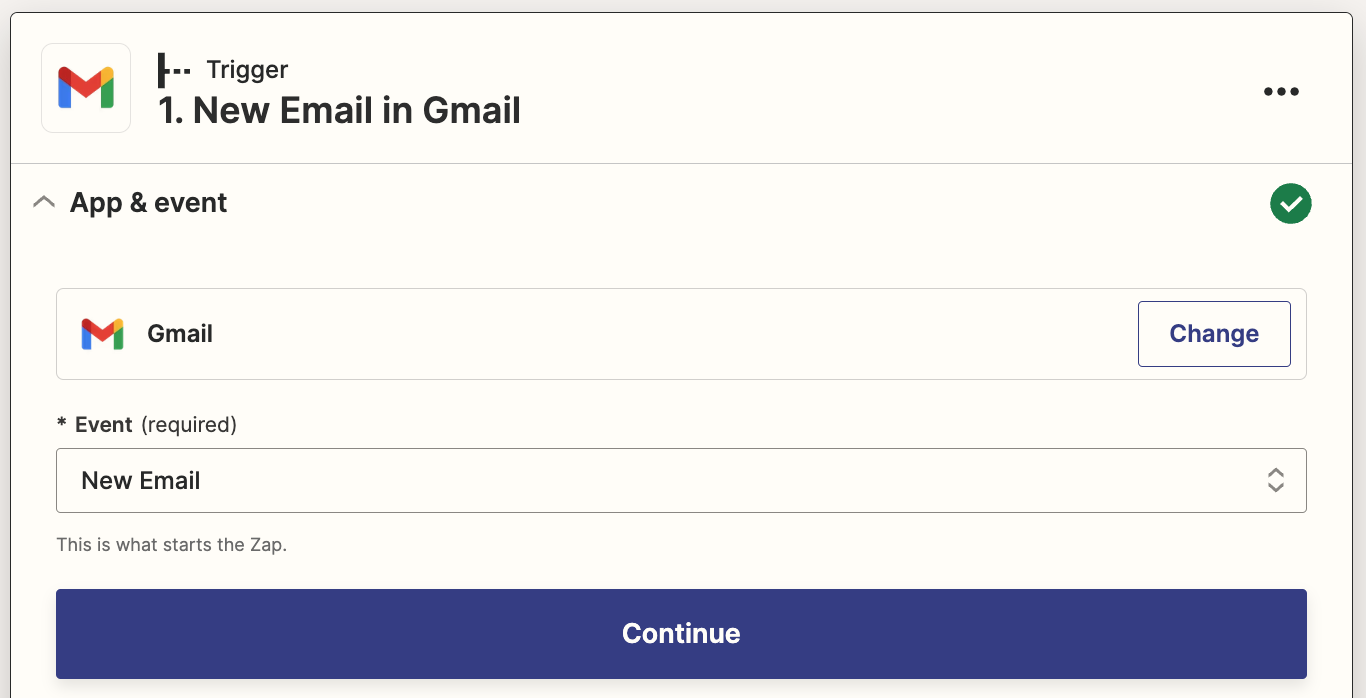
Step 1: Set up your Gmail trigger step
Head over to Zapier, and click the Create Zap button to create a new Zap.
Search for and select Gmail for the trigger app and New Email in Gmail for the trigger event (if you’re using the Zap template, these will already be selected for you).
Next, connect your Gmail account if you haven’t already connected it to Zapier.
In the Label/Mailbox field, select INBOX. You can optionally leave this blank to trigger for all emails. But since that will also trigger for sent messages and drafts, INBOX is the best choice unless you do heavy email filtering/labeling to remove emails from your inbox.
Click Test Trigger, and you should see a recent email from your inbox, as shown below:
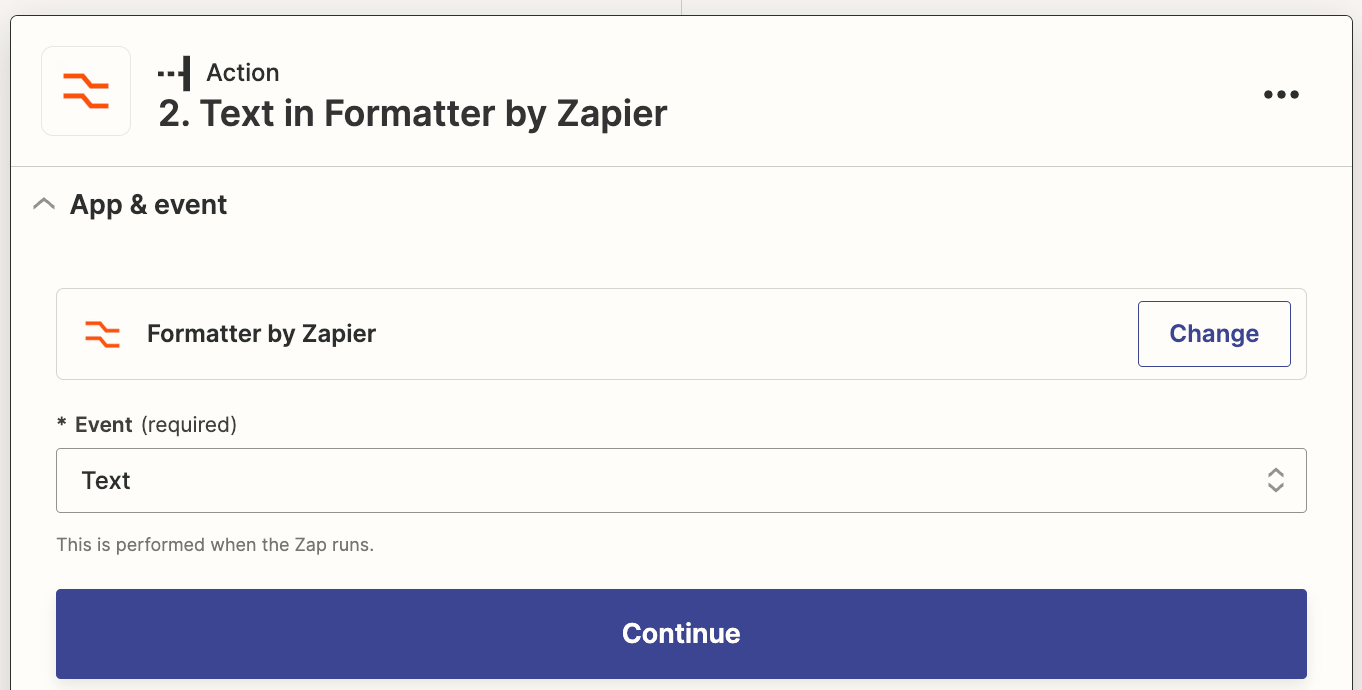
Step 2: Set up a formatter step to truncate your email
Currently, GPT-3 only allows you to send a limited amount of data to summarize, so we’ll need to truncate our email to make sure we don’t exceed this limit. In the future, OpenAI plans to develop new models with higher limits, or possibly no limits, but for now, this is a necessary step.
Click the + symbol beneath your Gmail trigger, then search for and select Formatter by Zapier for the action app and Text for the event.
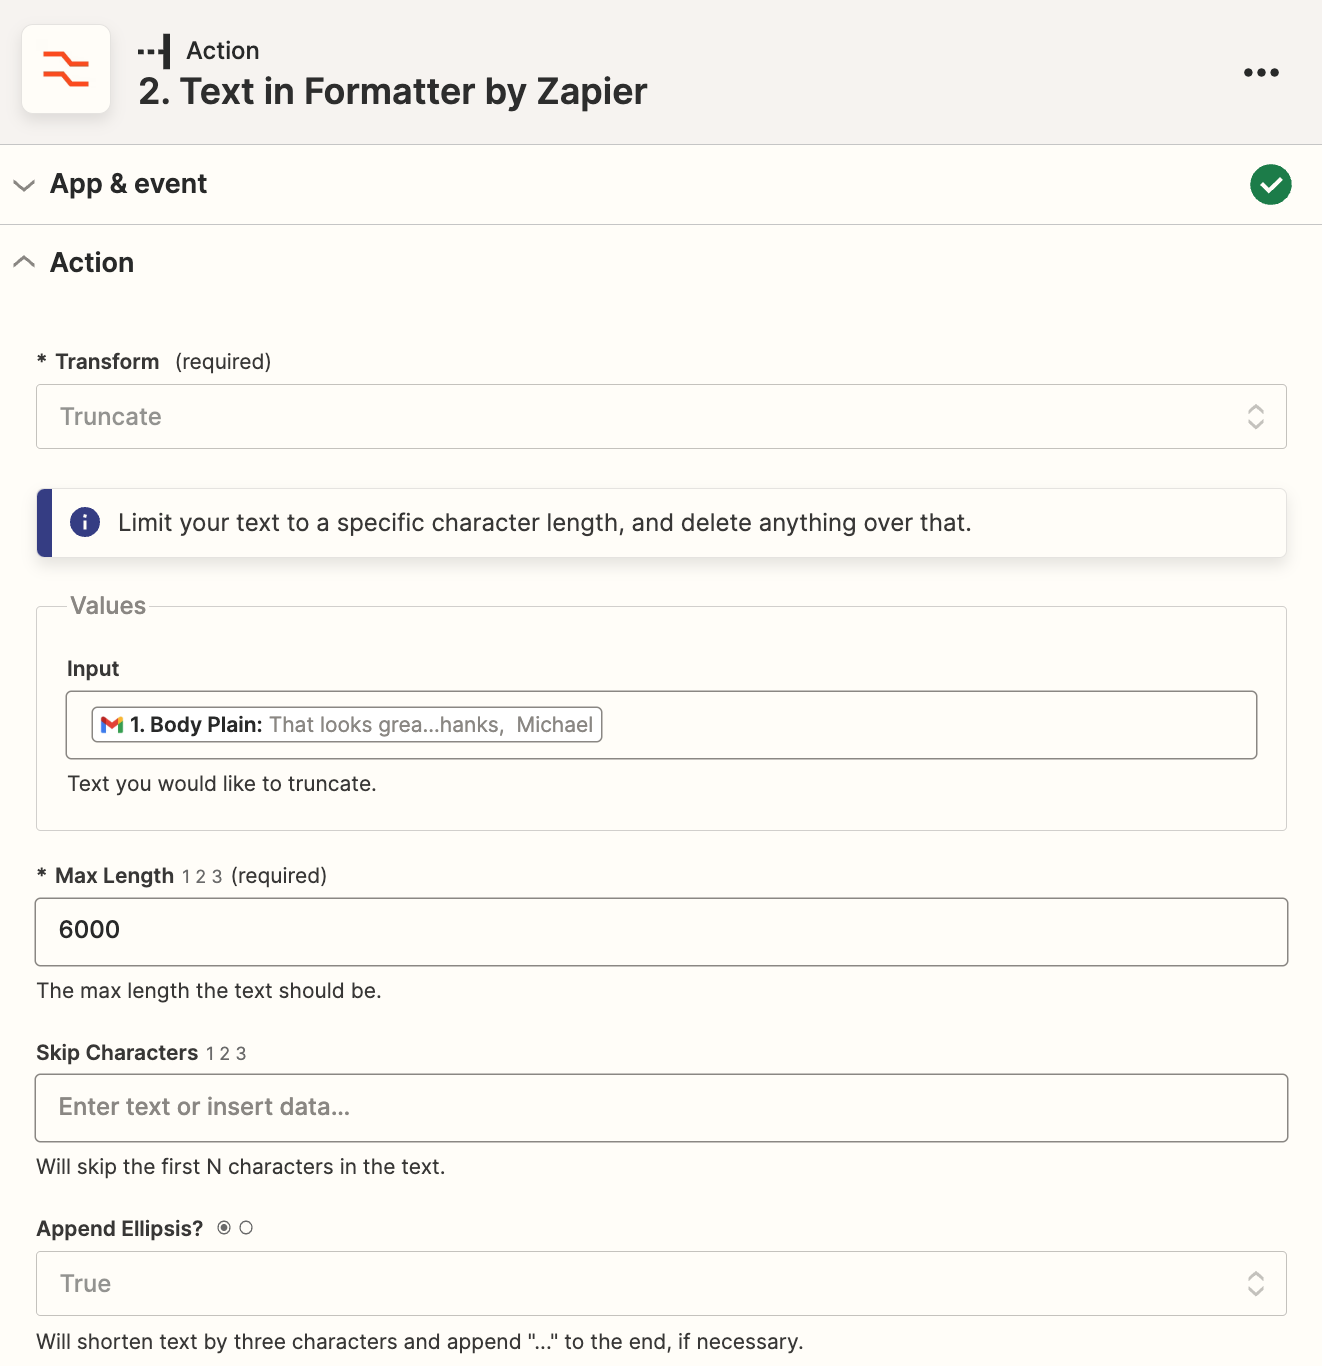
Select Truncate as your transform action. Click in the Input field, and select Body Plain from the data dropdown from your Gmail trigger—this contains the plain-text body of the email.
In the Max Length field, enter 6000, and then select True for the Append Ellipsis option. Here’s what your complete action step should look like:
This 6000-character truncation means that if the email is shorter than 6000 characters, we’ll keep the entire thing, but if it’s longer, we’ll only keep the first 6000. 6000 characters is quite long, but I do often see emails that go over this limit. Most commonly, this will be longer newsletters or long back-and-forth email threads, as Gmail will include the entire thread in the body that Zapier receives. Because Gmail processes their email threads in reverse chronological order, this truncation will keep the most recent emails in the thread.
Next, click Test Action to ensure everything is working properly. Next, we’ll set up our prompt to send to OpenAI.
Step 3: Set up your OpenAI email summary prompt
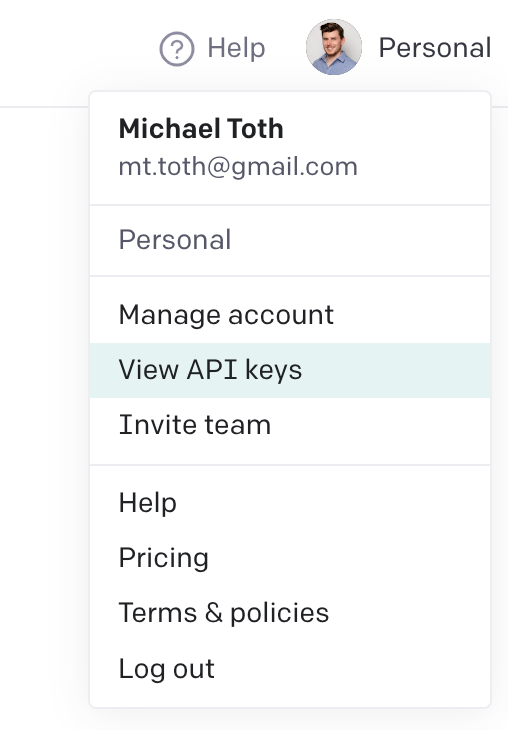
If you haven’t set up your Zapier connection to OpenAI, you’ll have to do that now. To start, head back over to platform.openai.com to log into your account. At the top right of the page, click on your profile icon and click View API Keys:
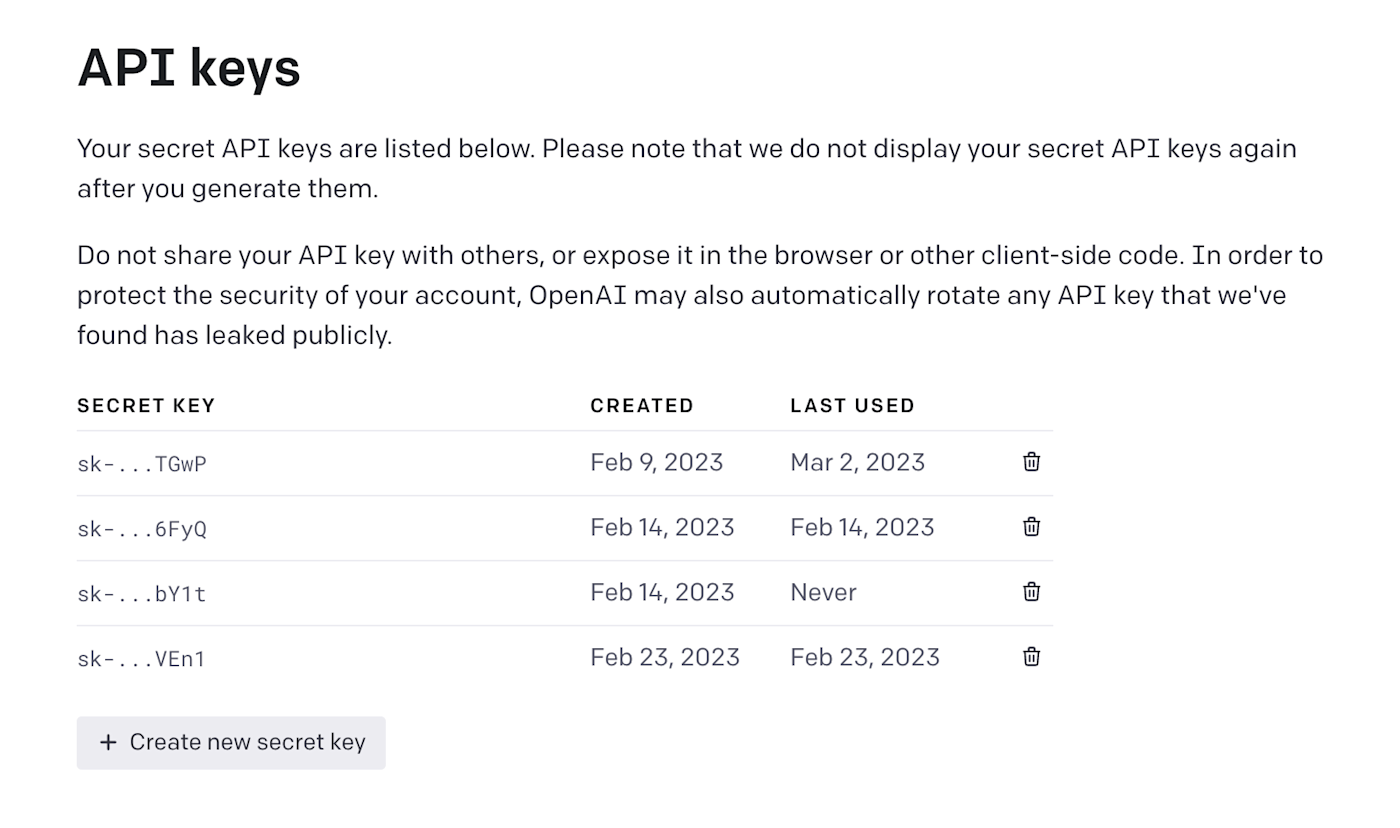
From that page, click on the + Create new secret key button to generate a new API key. You’ll need this key to connect to your OpenAI account within Zapier. Copy this key and store it somewhere safe!
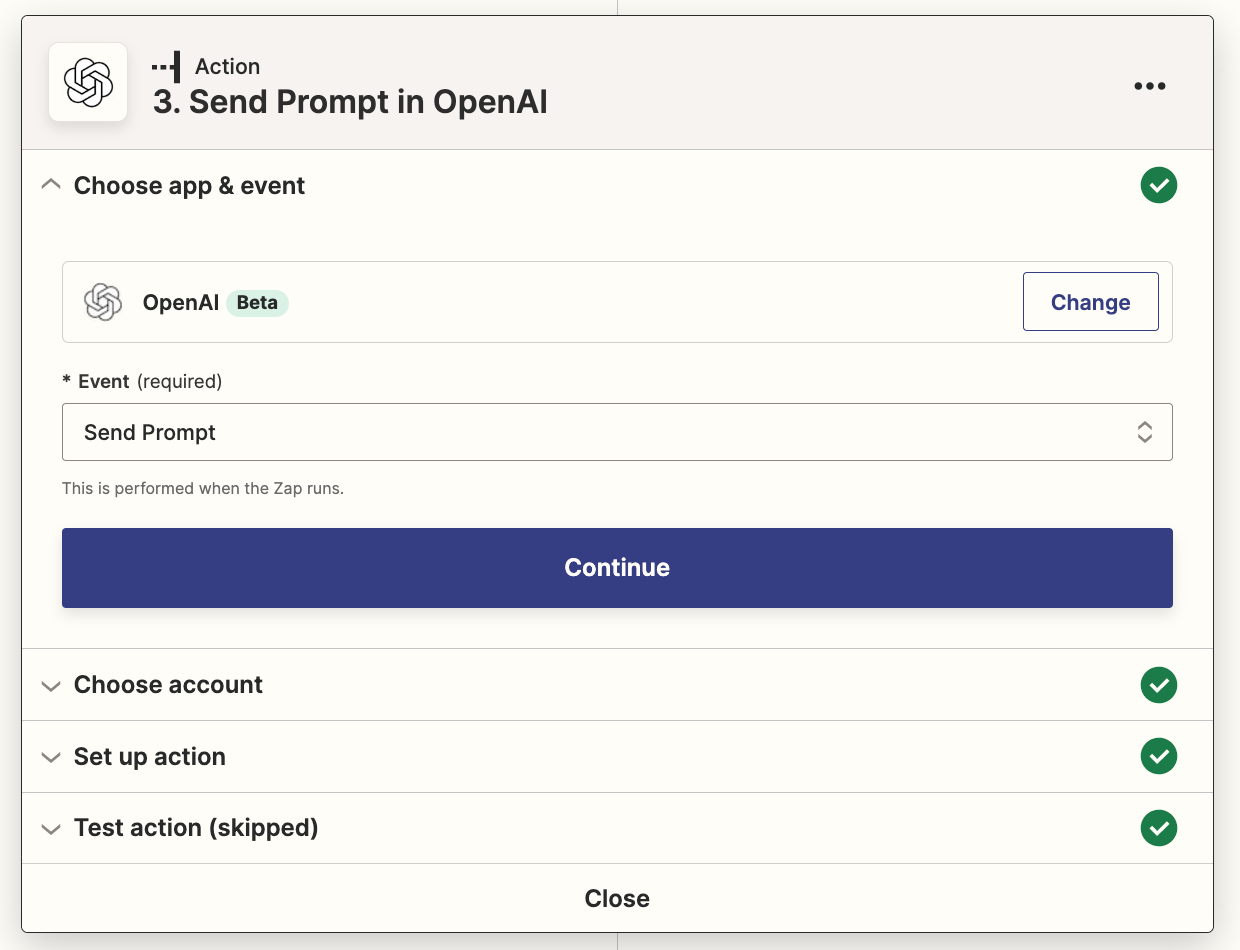
Head back over to Zapier and add a new action step at the bottom of your Zap. Search for the OpenAI app and choose the Send Prompt event:
Click on Choose account, and set up a new account by providing the API key you just generated in OpenAI. If you already have set up your account connection, simply select your existing account.
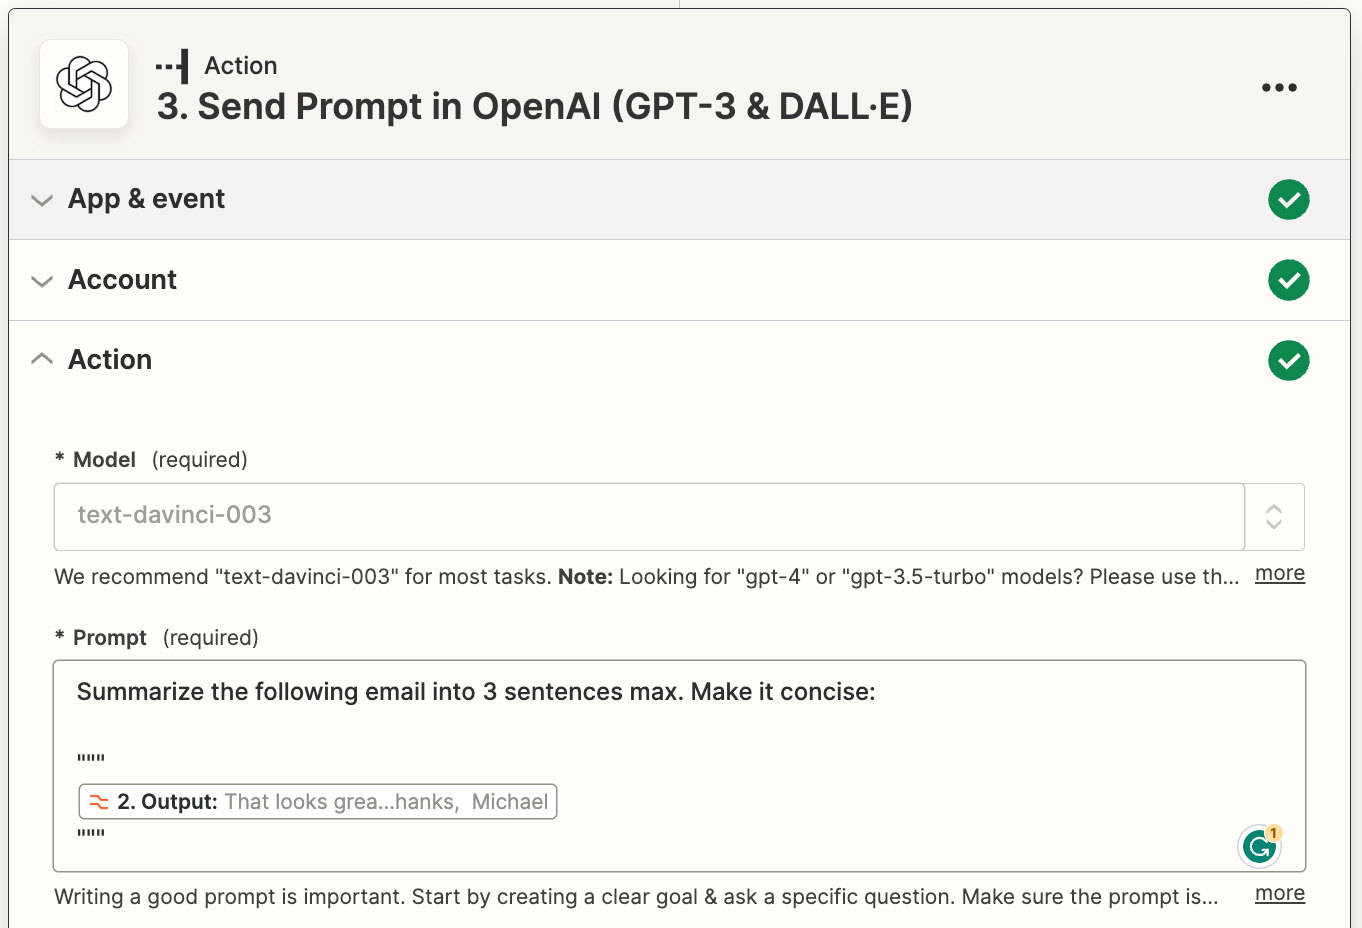
Head to the Set up action section to set up the prompt we’ll be sending over to OpenAI. In the Prompt field, copy and paste the following:
Summarize the following email into 3 sentences max. Make it concise:
"""
<Output from Formatter by Zapier>
"""
Replace the bracketed content with the Output variable from your Formatter by Zapier step by selecting Output from the Insert Data dropdown.
The triple quotes help GPT-3 to understand where the email starts and stops.
If you want, you can give more specific instructions for the summary depending on your use case. For example, if you’re using this for your work email, you might provide information about your role at your company and the type of information that is or isn’t important to you. You might also consider providing additional context about the services or products your company offers so that GPT-3 can incorporate some of those details into the summary. For now, we’ll keep it simple with the prompt I show above.
You can leave all of the other fields for this step set to their default values.
Click Test Action to send the email over to OpenAI. Review the summary and make sure everything looks okay.
If you want to get a notification in Slack for each email you receive, continue to the next step.
If you want to get a daily digest of all of your emails, skip ahead.
Get notifications for each email step 4: Set up your Slack message
Next, we’ll set up the action step that will send the email summary back to you in a Slack message. This could also be set up to send as an email or SMS if you prefer, but we’ll be using Slack for this example.
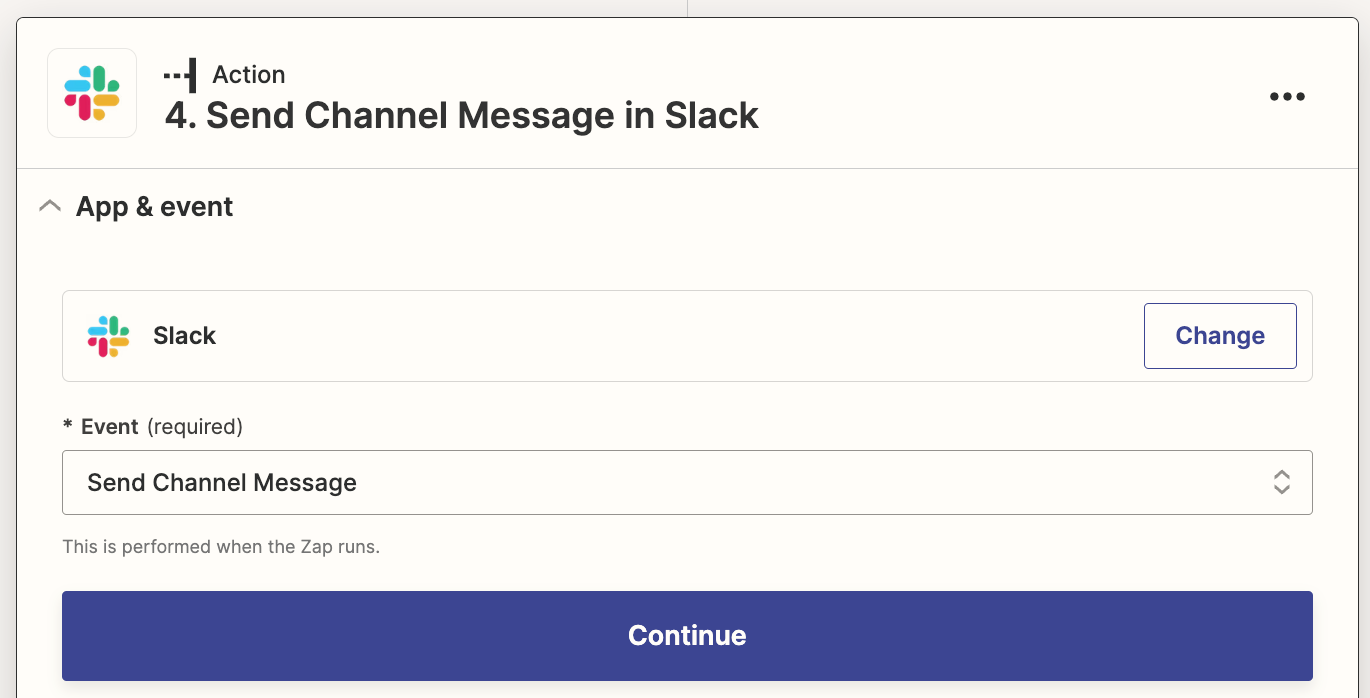
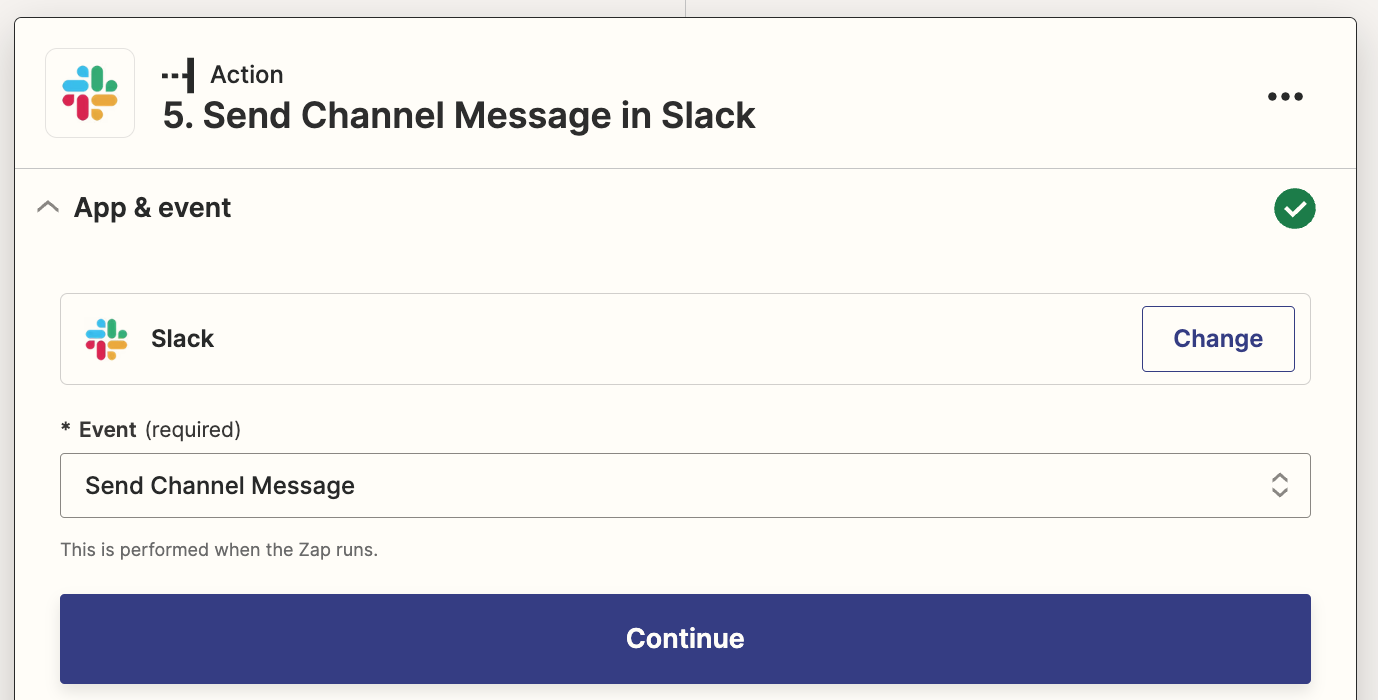
Add a fourth action step and search for the Slackapp. Select the Send Channel Message event.
Connect your Slack account if you haven’t already connected it to Zapier.
Next, we’ll set up the action step. Select the Slack channel you want these messages to be sent to. I created a new channel called email-summaries for this purpose.
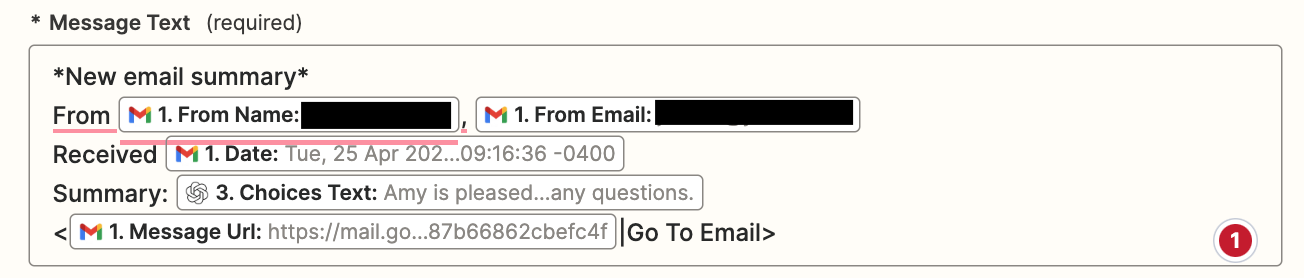
In the Message Text field, copy and paste the following, replacing the bracketed content with data from your previous Zap steps, which you can select from the Insert Data dropdown:
*New email summary*
From {Gmail From Name}, {Gmail From Email}
Received {Gmail Date}
Summary: {OpenAI Choices Text}
<{Gmail Message URL}|Go To Email>
Your Message Text field should look like the following image when complete:
This will create a message in Slack that includes the sender name and email address, the date and time the email was received, the summary generated by OpenAI, and a link to open the email directly in Gmail for easy responding.
Switch the Include a link to this Zap? field to No and leave the remaining fields as is.
Next, click Test Action to send the summary message to your Slack channel and make sure everything is working properly. If everything looks good, you’re now ready to use your Zap.
Get a daily digest step 4: Set up your digest entries
If the idea of receiving instant notifications for every email you receive sounds too distracting, the daily digest is an ideal solution for you. Instead of setting up a Slack notification for the fourth step, we can use a built-in Zapier tool called Digest by Zapier to store up the email summaries throughout the day and then release them to us all at once at a designated time.
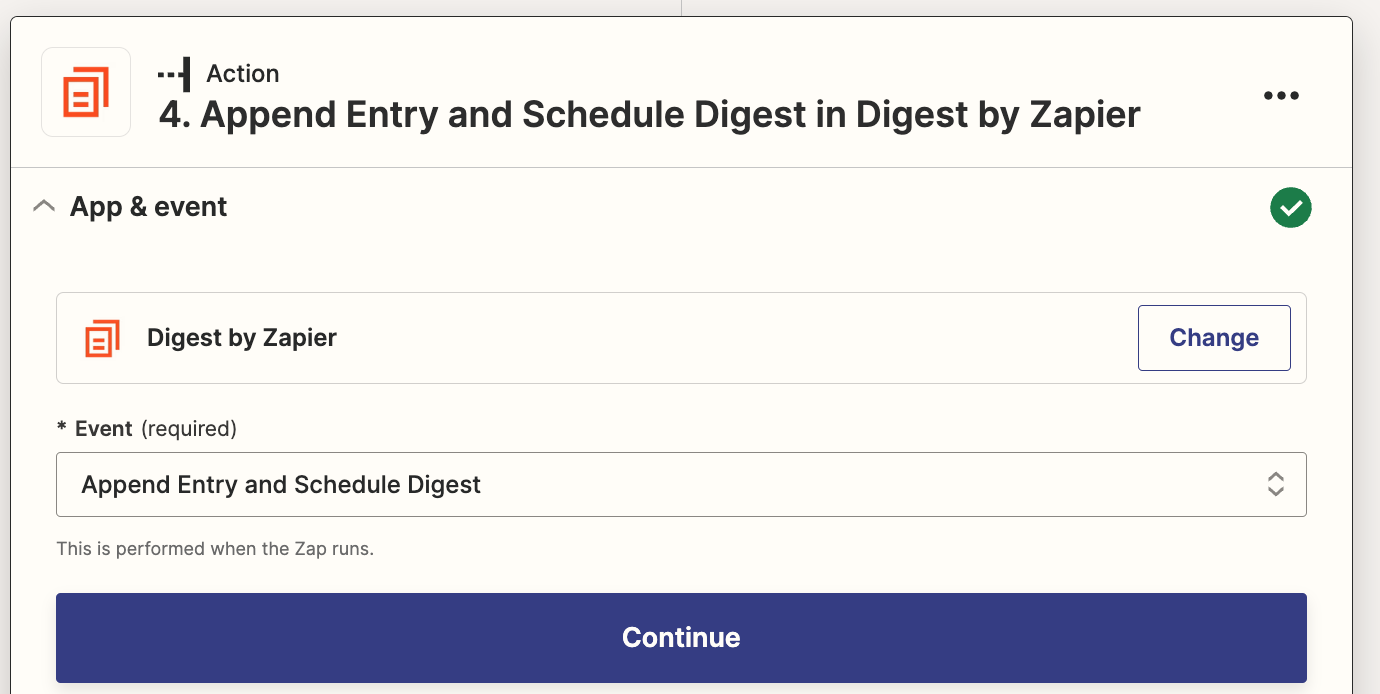
Add a new action step to the bottom of your Zap. Select Digest by Zapier for your action app and Append Entry and Schedule Digest for your action event.
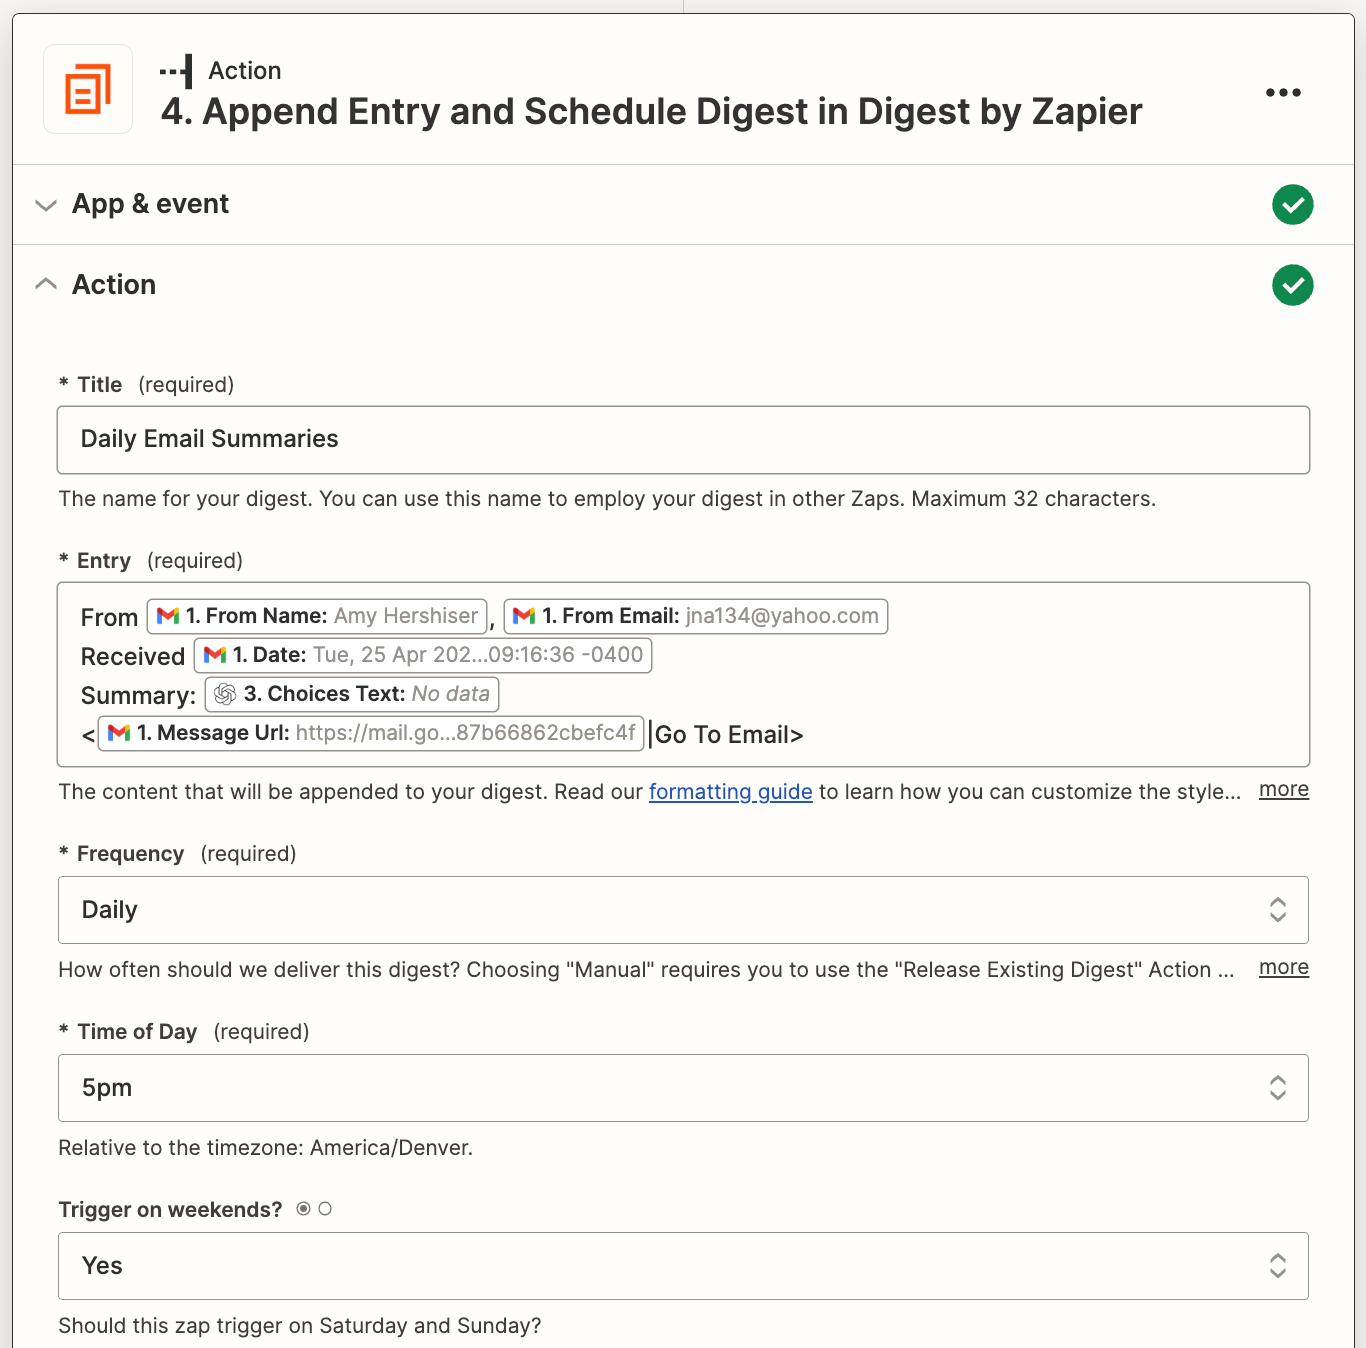
Navigate to the Action section and give your digest a descriptive title like Daily Email Summaries.
For the Entry field, simply copy and paste the copy below. Then replace the bracketed content with the variables from the prior steps by selecting them from the Insert Data dropdown.
From {Gmail From Name}, {Gmail From Email}
Received {Gmail Date}
Summary: {OpenAI Choices Text}
<{Gmail Message URL}|Go To Email>
For the Frequency field, select Daily, and for the Time of Day field, choose when you’d like to receive the digest. Your completed action step should look like this:
Click Test Action to add an entry to your digest and make sure your action step is set up correctly.
Get a daily digest step 5: Set up the Slack action to release your daily digest
Finally, we’ll set up the action step that will release your daily digest and send all of the email summaries to you in a Slack message. This digest message will automatically send at the Time of Day you specified in the prior action step.
Add an action step and search for the Slackapp. Select the Send Channel Message event.
Click on the Actionsection. As before, select the channel you want these messages to be sent to. I created a new channel called email-summaries for this purpose.
In the Message Text field, copy and paste the following, replacing the bracketed content with the data received from your previous digest step by selecting them from the insert Data dropdown:
*You received {Digest Count} emails today*
{Current Digest}
Your Message Text field should look like the following image when complete:
This will create a message in Slack that includes the total number of emails received and the digest with all of the email summaries that were created throughout the day, formatted as we specified in the prior step.
Switch the Include a link to this Zap? field to No and leave the remaining fields as is.
Next, click Test Action to send the summary digest to your Slack Channel and make sure everything is working properly. If everything looks right, you’re now ready to use your Zap!
Putting it all together
Whether you’re a busy professional or simply looking to optimize your email management process, setting up either of these workflows can help streamline your day and keep you on top of your inbox. Give it a try and see the difference it can make!
Almost five months after Google added support for passkeys to its Chrome browser, the tech giant has begun rolling out the passwordless solution across Google Accounts on all platforms.
Passkeys, backed by the FIDO Alliance, are a more secure way to sign in to apps and websites without having to use a traditional password. This, in turn, can be achieved by simply unlocking their computer or mobile device with their biometrics (e.g., fingerprint or facial recognition) or a local PIN.
“And, unlike passwords, passkeys are resistant to online attacks like phishing, making them more secure than things like SMS one-time codes,” Google noted.
Passkeys, once created, are locally stored on the device, and are not shared with any other party. This also obviates the need for setting up two-factor authentication, as it proves that “you have access to your device and are able to unlock it.”
Users also have the choice of creating passkeys for every device they use to login to Google Account. That said, a passkey created on one device will be synced to all the users’ other devices running the same operating system platform (i.e., Android, iOS/macOS, or Windows) and if they are signed in to the same account. Viewed in that light, passkeys are not truly interoperable.
It’s worth pointing out that both Google Password Manager and iCloud Keychain use end-to-end encryption to keep the passkeys private, thereby preventing users from getting locked out should they lose access to their devices or making it easier to upgrade from one device to another.
Additionally, users can sign in on a new device or temporarily use a different device by selecting the option to “use a passkey from another device,” which then uses the phone’s screen lock and proximity to approve a one-time sign-in.
“The device then verifies that your phone is in proximity using a small anonymous Bluetooth message and sets up an end-to-end encrypted connection to the phone through the internet,” the company explained.
“The phone uses this connection to deliver your one-time passkey signature, which requires your approval and the biometric or screen lock step on the phone. Neither the passkey itself nor the screen lock information is sent to the new device.”
While this may be the “beginning of the end of the password,” the company said it intends to continue to support existing login methods like passwords and two-factor authentication for the foreseeable future.
Google is also recommending that users do not create passkeys on devices that are shared with others, a move that could effectively undermine all its security protections.
Found this article interesting? Follow us on Twitter and LinkedIn to read more exclusive content we post.
Advisory ID: cisco-sa-spa-unauth-upgrade-UqhyTWW First Published: 2023 May 3 16:00 GMT Version 1.0: Final Workarounds: No workarounds available Cisco Bug IDs: CSCwe50762 CVSS Score: Base 9.8 Base 9.8 CVSS:3.1/AV:N/AC:L/PR:N/UI:N/S:U/C:H/I:H/A:H/E:X/RL:X/RC:X
Summary
A vulnerability in the web-based management interface of Cisco SPA112 2-Port Phone Adapters could allow an unauthenticated, remote attacker to execute arbitrary code on an affected device.This vulnerability is due to a missing authentication process within the firmware upgrade function. An attacker could exploit this vulnerability by upgrading an affected device to a crafted version of firmware. A successful exploit could allow the attacker to execute arbitrary code on the affected device with full privileges.Cisco has not released firmware updates to address this vulnerability. There are no workarounds that address this vulnerability.This advisory is available at the following link: https://sec.cloudapps.cisco.com/security/center/content/CiscoSecurityAdvisory/cisco-sa-spa-unauth-upgrade-UqhyTWW
Affected Products
Vulnerable ProductsThis vulnerability affects all firmware releases for Cisco SPA112 2-Port Phone Adapters.Products Confirmed Not VulnerableOnly products listed in the Vulnerable Products section of this advisory are known to be affected by this vulnerability.
Workarounds
There are no workarounds that address this vulnerability.
Fixed Software
Cisco has not released and will not release firmware updates to address the vulnerability that is described in this advisory. Cisco SPA112 2-Port Phone Adapters have entered the end-of-life process. Customers are advised to refer to the end-of-life notice for the product:End-of-Sale and End-of-Life Announcement for the Cisco SPA112 2-Port Phone Adapter and SPA122 ATA with RouterCustomers are encouraged to migrate to a Cisco ATA 190 Series Analog Telephone Adapter.When considering a device migration, customers are advised to regularly consult the advisories for Cisco products, which are available from the Cisco Security Advisories page, to determine exposure and a complete upgrade solution.In all cases, customers should ensure that the new device will be sufficient for their network needs and that current hardware and software configurations will continue to be supported properly by the new product. If the information is not clear, customers are advised to contact the Cisco Technical Assistance Center (TAC) or their contracted maintenance providers.
Exploitation and Public Announcements
The Cisco Product Security Incident Response Team (PSIRT) is not aware of any public announcements or malicious use of the vulnerability that is described in this advisory.
Source
Cisco would like to thank CataLpa of Dbappsecurity Co., Ltd. Hatlab, for reporting this vulnerability.
Would you like to learn how to create and access an Amazon AWS EC2 Windows virtual Machine? In this tutorial, we are going to show you how to create a new account at Amazon AWS, how to create a Windows virtual machine instance and how to access the new virtual machine remotely using Rdesktop.
Amazon AWS Playlist:
On this page, we offer quick access to a list of videos related to Amazon AWS.
To access a Windows Virtual Machine on AWS, first, you need to create a private Key.
Open your browser, access the Amazon AWS website and enter your login information.
After a successful login, you will be sent to the AWS Dashboard.
Access the COMPUTE menu and select the EC2 option.
On the EC2 Dashboard, access the Network & Security menu and click on the Key Pairs option.
On the Key Pairs screen, click on the Create Key Pair button.
You will have to enter a name to the new Key Pair.
You will have to save locally your private key.
In our example, we created a key pair named TEST.
In our example, we saved a file named TEST.PEM.
Tutorial – How to Create an AWS EC2 Windows
On the EC2 Dashboard, access the Instances menu and click on the Instances option.
On the EC2 Instance screen, click on the Launch Instance button.
Now, it is time to select the desired Operational system image.
On the list presented, locate and select the Windows image.
As the second step, you will have to select the type of virtual machine that will run Windows.
Basically, you will select the number of processors and the amount of RAM that you want.
If you do not want to specify the amount of hard disk available to this virtual machine, click on the Review and Launch button.
If you want to specify the amount of hard disk available to this virtual machine, click on the Configure instance detail button.
On the summary screen, click on the Launch button.
Select the Key pair authorized to connect to the new virtual machine and click on the Launch Instances.
In our example, the key pair named TEST was selected.
On the EC2 Dashboard, access the Instances menu and click on the Instances option.
As you can see a new virtual machine was created.
In our example, the virtual machine got the Dynamic IP address: 34.217.14.140
Tutorial – How to Access an AWS EC2 Windows
To access the EC2 Windows virtual machine you will have to right click on the Virtual machine and select the Get Windows password option.
To retrieve the default administrator password you will have to click on the Browse button, locate the private key file and click on the Decrypt password button.
In our example, a file named TEST.PEM was selected.
The new screen will show you the default administrator password.
In our example, the password presented was: bSrQz5.mCQD
Open the remote desktop client and enter the IP address of your EC2 Windows virtual machine.
In our example, the username administrator was used.
In our example, the password bSrQz5.mCQD was used.
In our example, the IP 34.217.14.140 address was used.
You have successfully created an EC2 Windows virtual Machine on Amazon AWS.
Would you like to learn how to create an EC2 key pair to access a virtual machine on Amazon AWS cloud? In this tutorial, we are going to show you how to create a new private key which is required to remotely access a virtual machine.
Amazon AWS Playlist:
On this page, we offer quick access to a list of videos related to Amazon AWS.
Would you like to learn how to create an Amazon AMI Windows image? In this tutorial, we are going to show you how to create a Windows image from a virtual machine and how to deploy a new EC2 virtual machine using an AMI image.
Amazon AWS Playlist:
On this page, we offer quick access to a list of videos related to Amazon AWS.