By Michael Toth · May 1, 2023
Keeping up with your email inbox can be a daunting task. It’s easy to get bogged down in long, rambling messages or get overwhelmed by a million unimportant emails and miss the important information buried within. Fortunately, there’s a solution that can help.
Do more with OpenAI
Discover more ways to add AI to your workflows.
With Zapier and OpenAI’s GPT-3, summarizing your email’s essential details has never been easier. With just a few clicks, you can automatically get a summary for each email in Slack or a handy daily digest that includes all the critical info you need from each email all in one go.
In this article, we’ll walk you through the steps of setting up this powerful Zap—our word for Zapier’s automated workflows. Whether you’re a busy professional or simply seeking to optimize your process, this tutorial will help you streamline your email management and stay on top of your inbox.
Looking for GPT-4? GPT-4 may be available with our OpenAI integration in the future. In the meantime, users with a paid subscription to ChatGPT Plus can access GPT-4 via our ChatGPT integration now—allowing you to add ChatGPT-powered conversations into apps like Slack.
How it works
For this project, we’ll be using OpenAI’s GPT-3 to summarize our emails, and then we’ll send the summaries to Slack.

If you’d like to start with a template, click on the Zap template below to go to the Zap editor. You’ll need to create a Zapier account if you don’t already have one. Then, follow the directions below to set up your Zap.
Get an OpenAI-generated email summary in Slack for new Gmail emails

- +2

Gmail, Formatter by Zapier, OpenAI (GPT-3, DALL·E, Whisper), Slack
Gmail + Formatter by Zapier + OpenAI (GPT-3, DALL·E, Whisper) + 1 moreMore details
Alternatively, if you prefer to receive the notifications as a daily digest rather than individually, we’ll walk through how you can use Digest by Zapier for this purpose.
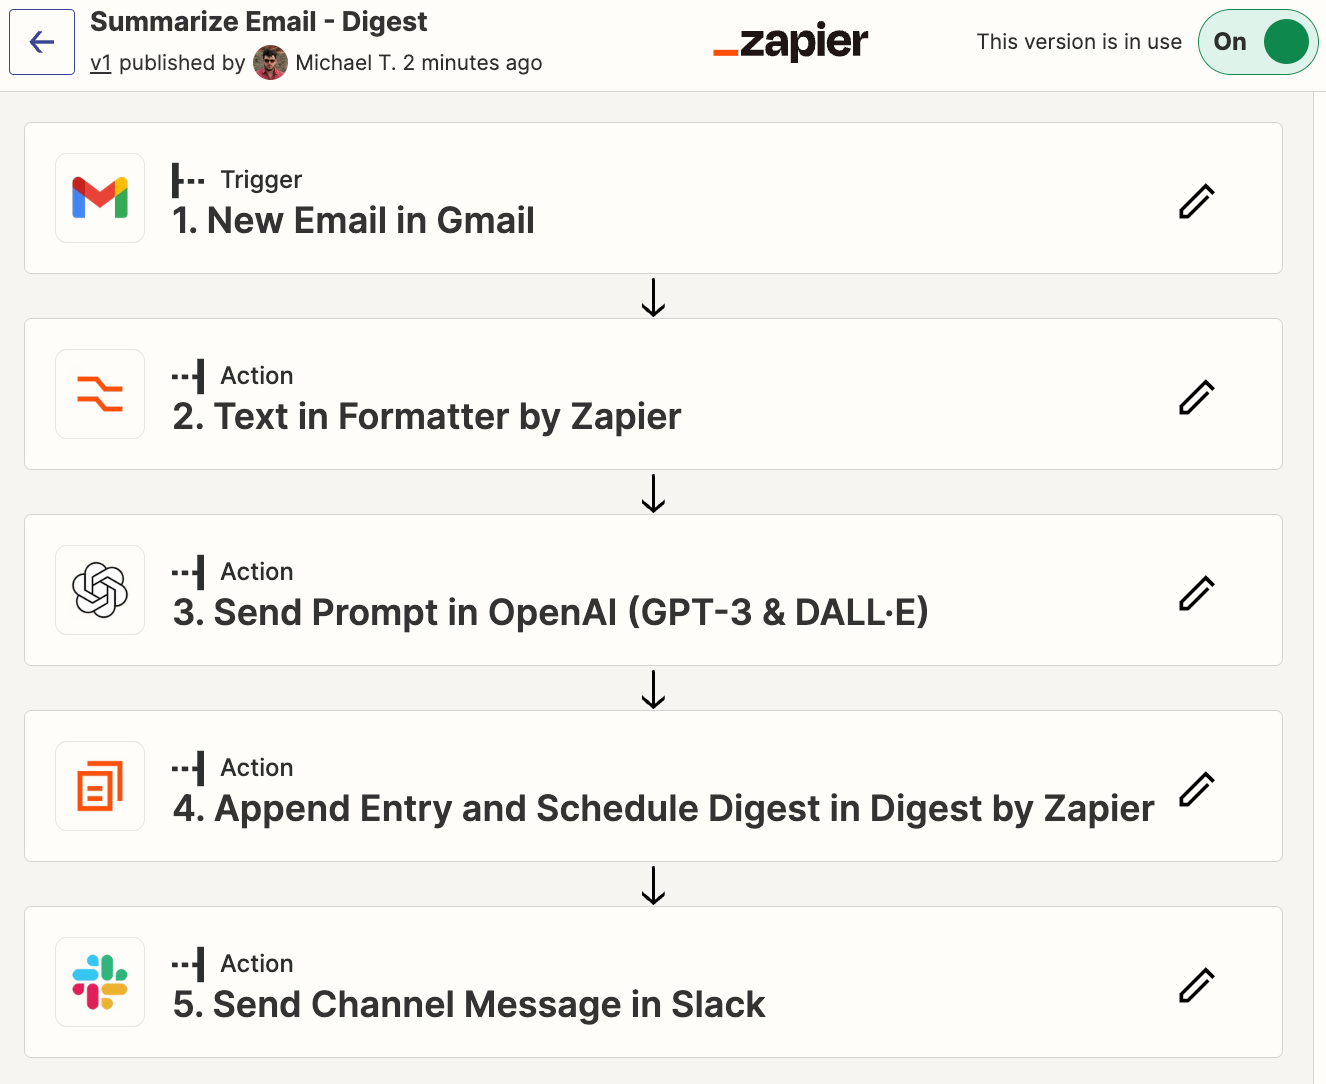
If you’d like to go the digest route, you can start with the following Zap template:
Get an AI-generated daily digest of your emails in Slack
- +3
Gmail, Digest by Zapier, Formatter by Zapier, OpenAI (GPT-3, DALL·E, Whisper), Slack
Gmail + Digest by Zapier + Formatter by Zapier + 2 moreMore details
Before we begin developing our Zap, you’ll also need an OpenAI account if you don’t already have one. Go to platform.openai.com to sign up for your account. You’ll also need a free Slack account, which you can sign up for at www.slack.com.
Are you ready to build this yourself? Let’s get started!
New to Zapier? It’s a tool that helps anyone connect apps and automate workflows—without any complicated code. Sign up for free.
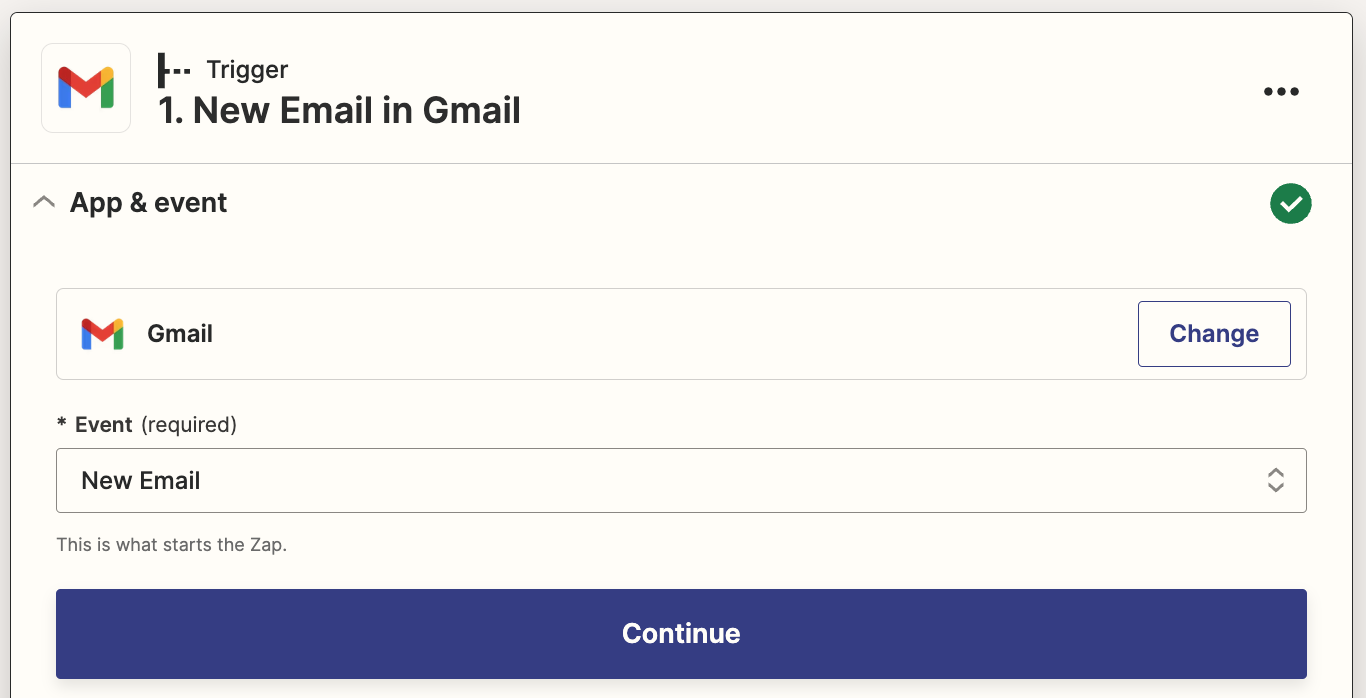
Step 1: Set up your Gmail trigger step
Head over to Zapier, and click the Create Zap button to create a new Zap.
Search for and select Gmail for the trigger app and New Email in Gmail for the trigger event (if you’re using the Zap template, these will already be selected for you).
Next, connect your Gmail account if you haven’t already connected it to Zapier.
In the Label/Mailbox field, select INBOX. You can optionally leave this blank to trigger for all emails. But since that will also trigger for sent messages and drafts, INBOX is the best choice unless you do heavy email filtering/labeling to remove emails from your inbox.

Click Test Trigger, and you should see a recent email from your inbox, as shown below:

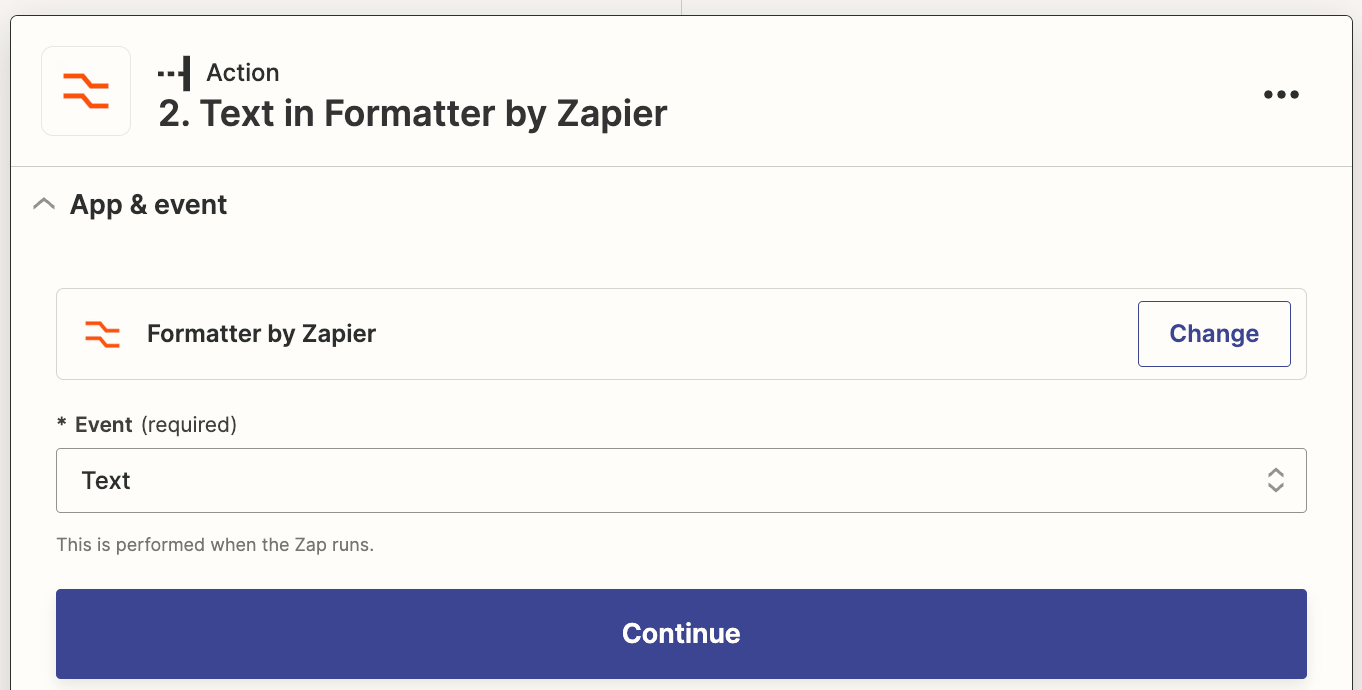
Step 2: Set up a formatter step to truncate your email
Currently, GPT-3 only allows you to send a limited amount of data to summarize, so we’ll need to truncate our email to make sure we don’t exceed this limit. In the future, OpenAI plans to develop new models with higher limits, or possibly no limits, but for now, this is a necessary step.
Click the + symbol beneath your Gmail trigger, then search for and select Formatter by Zapier for the action app and Text for the event.
Select Truncate as your transform action. Click in the Input field, and select Body Plain from the data dropdown from your Gmail trigger—this contains the plain-text body of the email.
In the Max Length field, enter 6000, and then select True for the Append Ellipsis option. Here’s what your complete action step should look like:
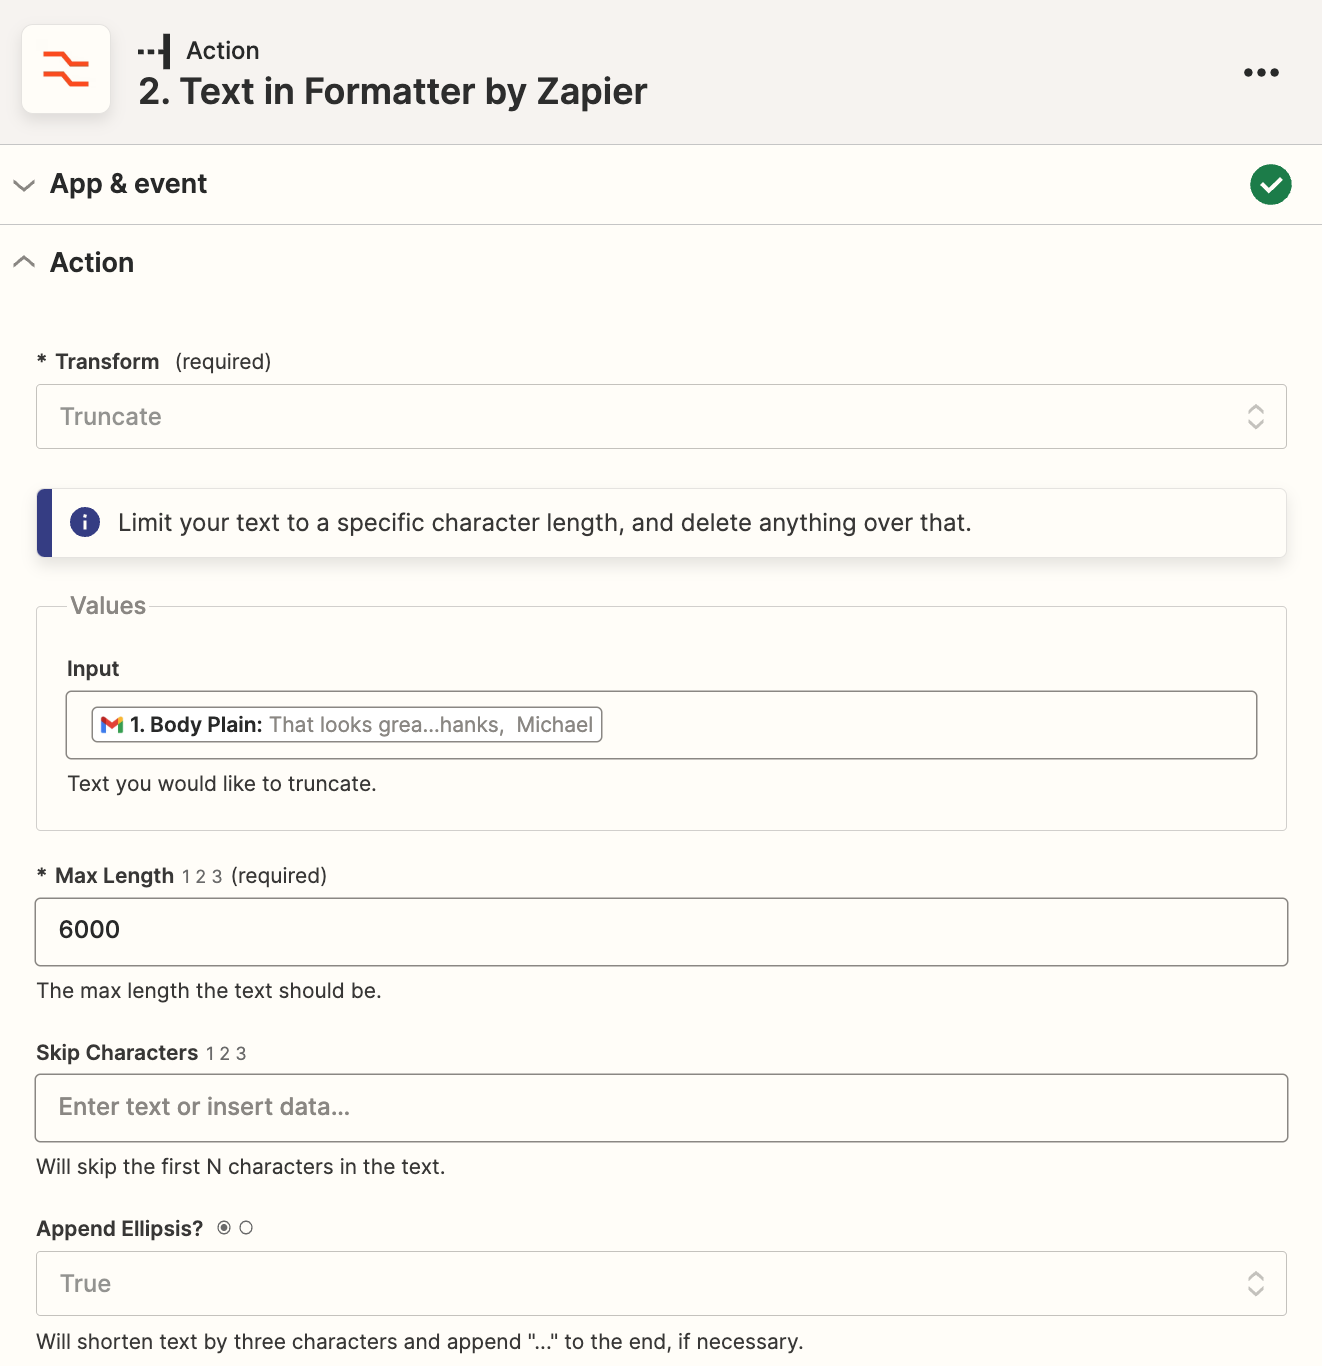
This 6000-character truncation means that if the email is shorter than 6000 characters, we’ll keep the entire thing, but if it’s longer, we’ll only keep the first 6000. 6000 characters is quite long, but I do often see emails that go over this limit. Most commonly, this will be longer newsletters or long back-and-forth email threads, as Gmail will include the entire thread in the body that Zapier receives. Because Gmail processes their email threads in reverse chronological order, this truncation will keep the most recent emails in the thread.
Next, click Test Action to ensure everything is working properly. Next, we’ll set up our prompt to send to OpenAI.
Step 3: Set up your OpenAI email summary prompt
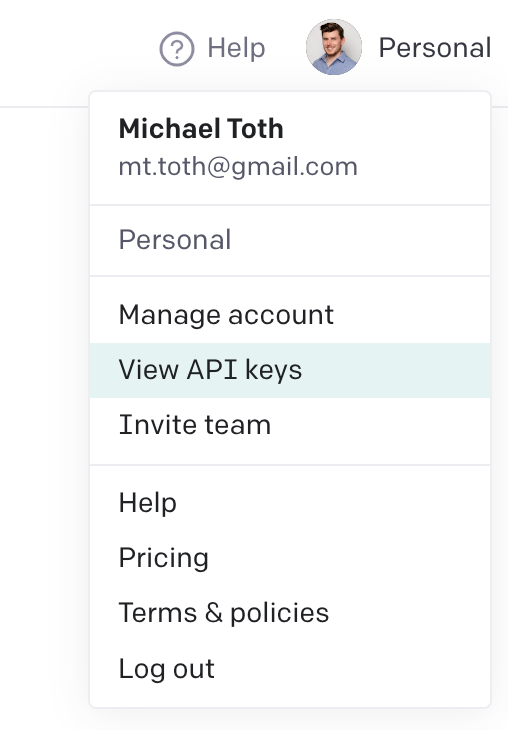
If you haven’t set up your Zapier connection to OpenAI, you’ll have to do that now. To start, head back over to platform.openai.com to log into your account. At the top right of the page, click on your profile icon and click View API Keys:
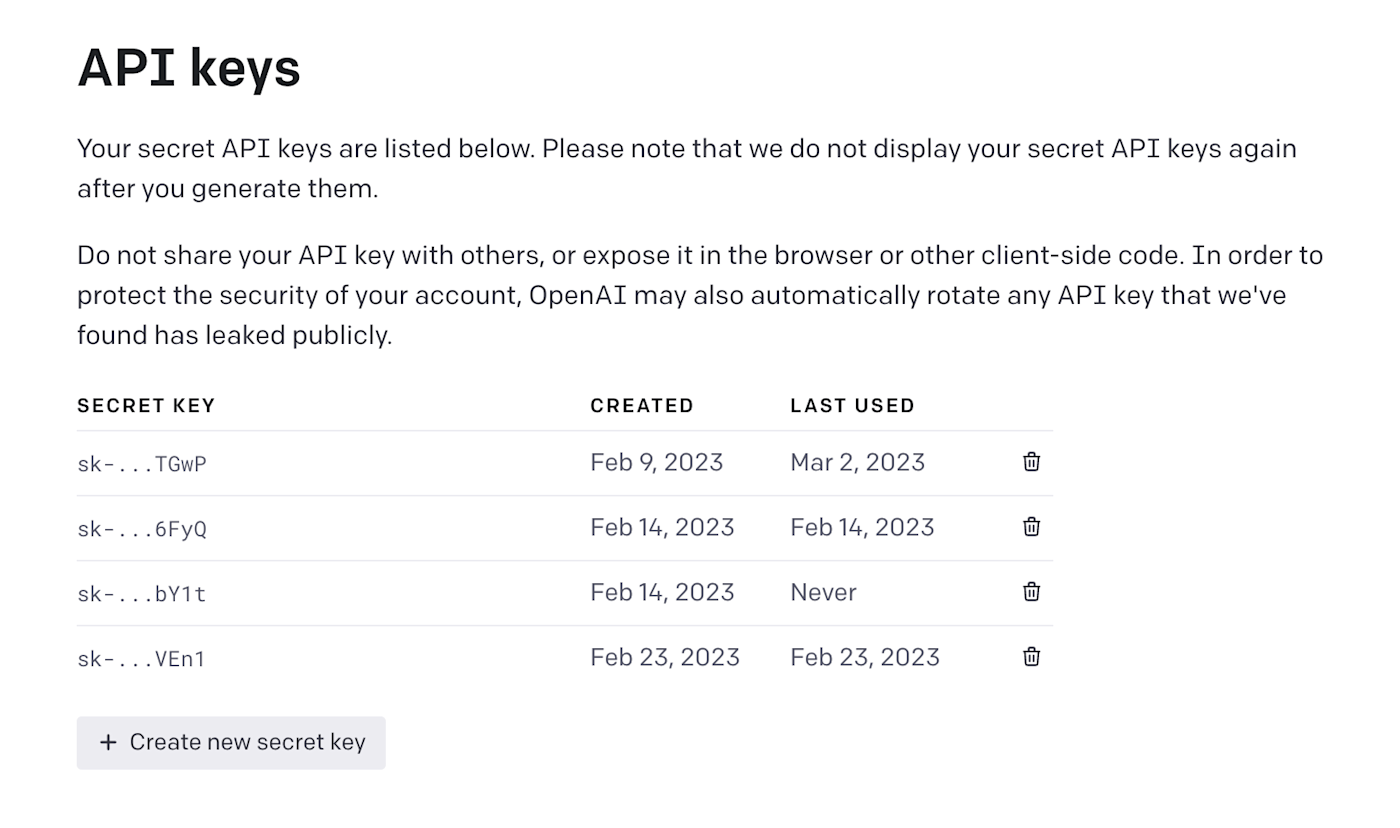
From that page, click on the + Create new secret key button to generate a new API key. You’ll need this key to connect to your OpenAI account within Zapier. Copy this key and store it somewhere safe!
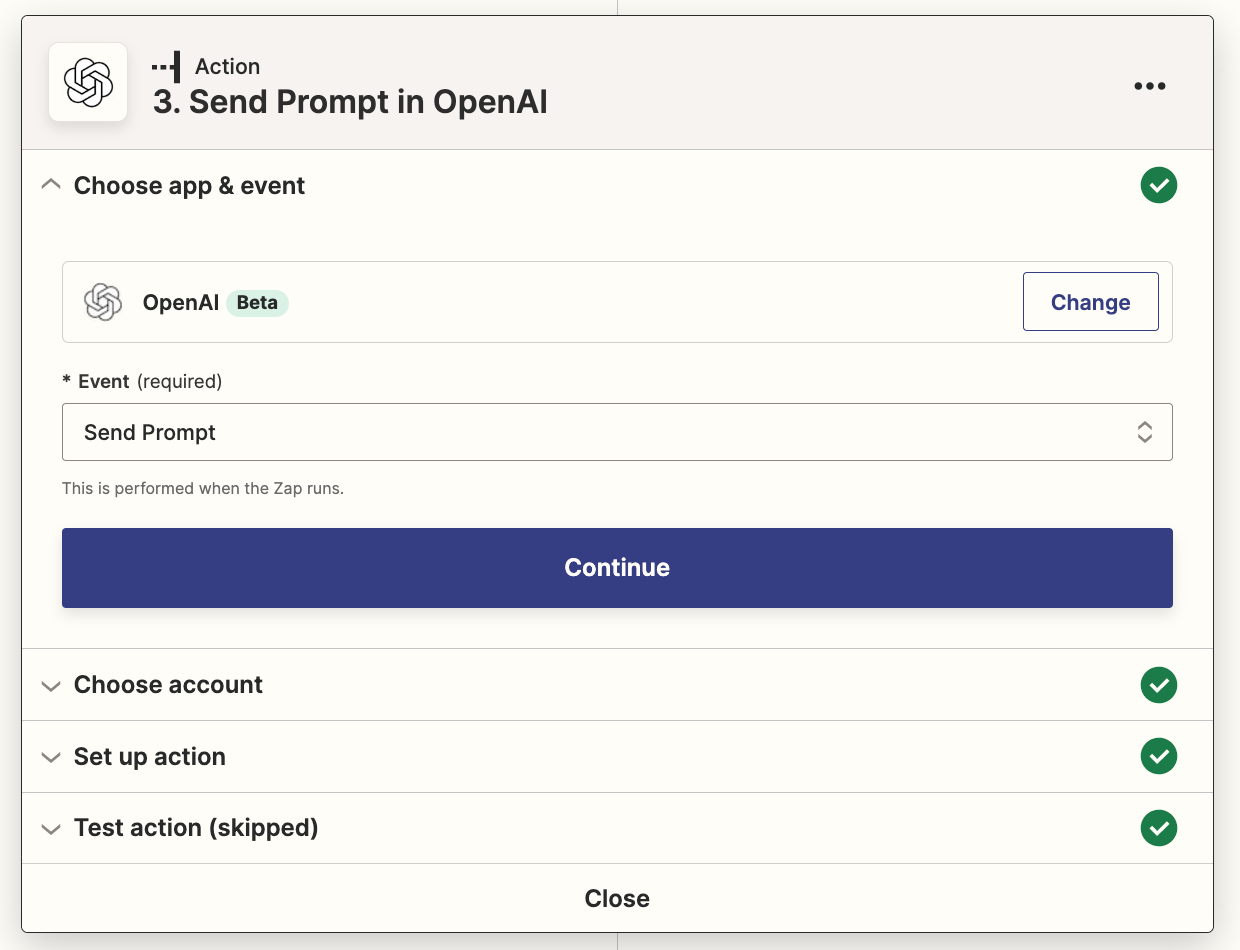
Head back over to Zapier and add a new action step at the bottom of your Zap. Search for the OpenAI app and choose the Send Prompt event:
Click on Choose account, and set up a new account by providing the API key you just generated in OpenAI. If you already have set up your account connection, simply select your existing account.
Head to the Set up action section to set up the prompt we’ll be sending over to OpenAI. In the Prompt field, copy and paste the following:
Summarize the following email into 3 sentences max. Make it concise:
"""
<Output from Formatter by Zapier>
"""
Replace the bracketed content with the Output variable from your Formatter by Zapier step by selecting Output from the Insert Data dropdown.
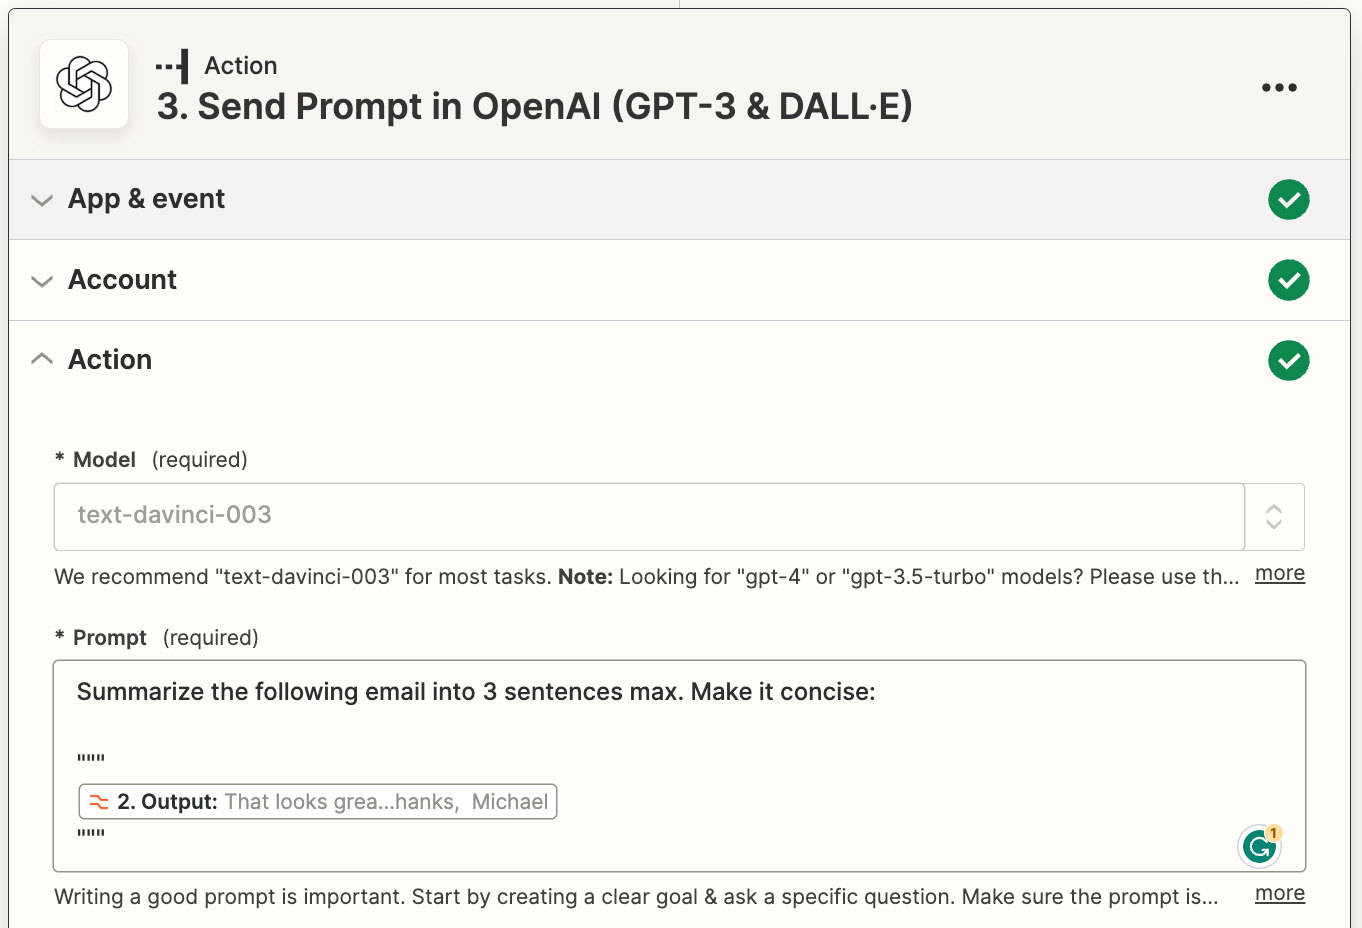
The triple quotes help GPT-3 to understand where the email starts and stops.
If you want, you can give more specific instructions for the summary depending on your use case. For example, if you’re using this for your work email, you might provide information about your role at your company and the type of information that is or isn’t important to you. You might also consider providing additional context about the services or products your company offers so that GPT-3 can incorporate some of those details into the summary. For now, we’ll keep it simple with the prompt I show above.
You can leave all of the other fields for this step set to their default values.
Click Test Action to send the email over to OpenAI. Review the summary and make sure everything looks okay.
If you want to get a notification in Slack for each email you receive, continue to the next step.
If you want to get a daily digest of all of your emails, skip ahead.
Get notifications for each email step 4: Set up your Slack message
Next, we’ll set up the action step that will send the email summary back to you in a Slack message. This could also be set up to send as an email or SMS if you prefer, but we’ll be using Slack for this example.
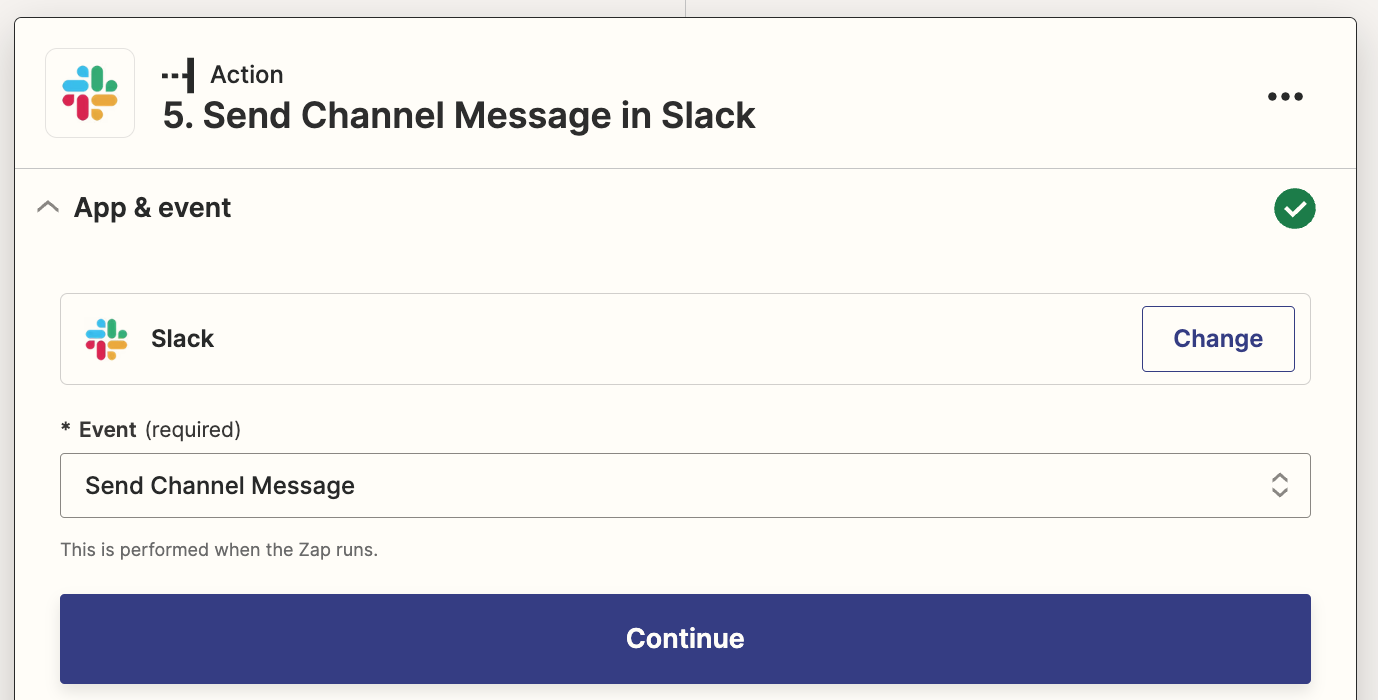
Add a fourth action step and search for the Slackapp. Select the Send Channel Message event.
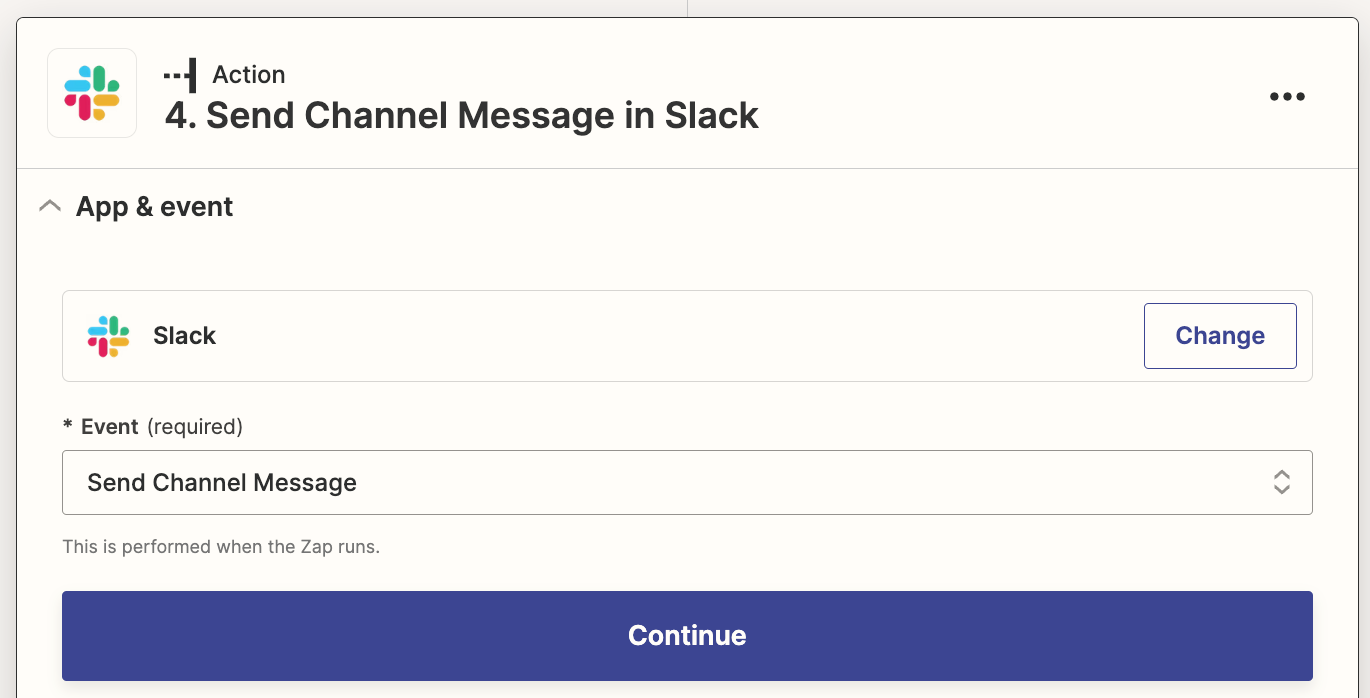
Connect your Slack account if you haven’t already connected it to Zapier.
Next, we’ll set up the action step. Select the Slack channel you want these messages to be sent to. I created a new channel called email-summaries for this purpose.
In the Message Text field, copy and paste the following, replacing the bracketed content with data from your previous Zap steps, which you can select from the Insert Data dropdown:
*New email summary*
From {Gmail From Name}, {Gmail From Email}
Received {Gmail Date}
Summary: {OpenAI Choices Text}
<{Gmail Message URL}|Go To Email>
Your Message Text field should look like the following image when complete:
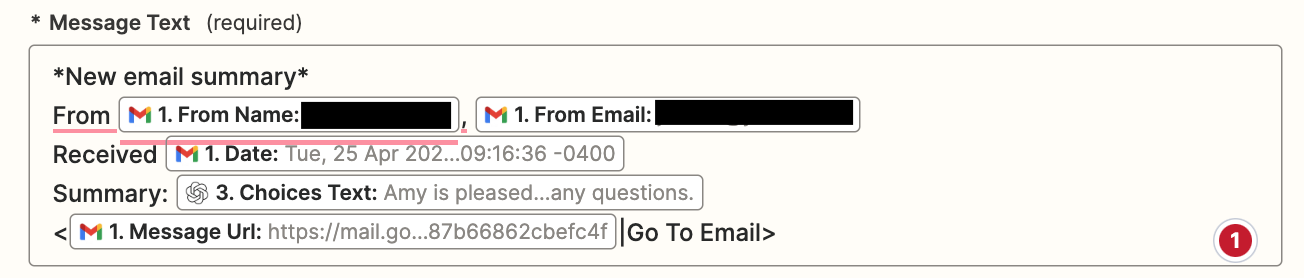
This will create a message in Slack that includes the sender name and email address, the date and time the email was received, the summary generated by OpenAI, and a link to open the email directly in Gmail for easy responding.
Switch the Include a link to this Zap? field to No and leave the remaining fields as is.
Next, click Test Action to send the summary message to your Slack channel and make sure everything is working properly. If everything looks good, you’re now ready to use your Zap.
Get a daily digest step 4: Set up your digest entries
If the idea of receiving instant notifications for every email you receive sounds too distracting, the daily digest is an ideal solution for you. Instead of setting up a Slack notification for the fourth step, we can use a built-in Zapier tool called Digest by Zapier to store up the email summaries throughout the day and then release them to us all at once at a designated time.
Add a new action step to the bottom of your Zap. Select Digest by Zapier for your action app and Append Entry and Schedule Digest for your action event.
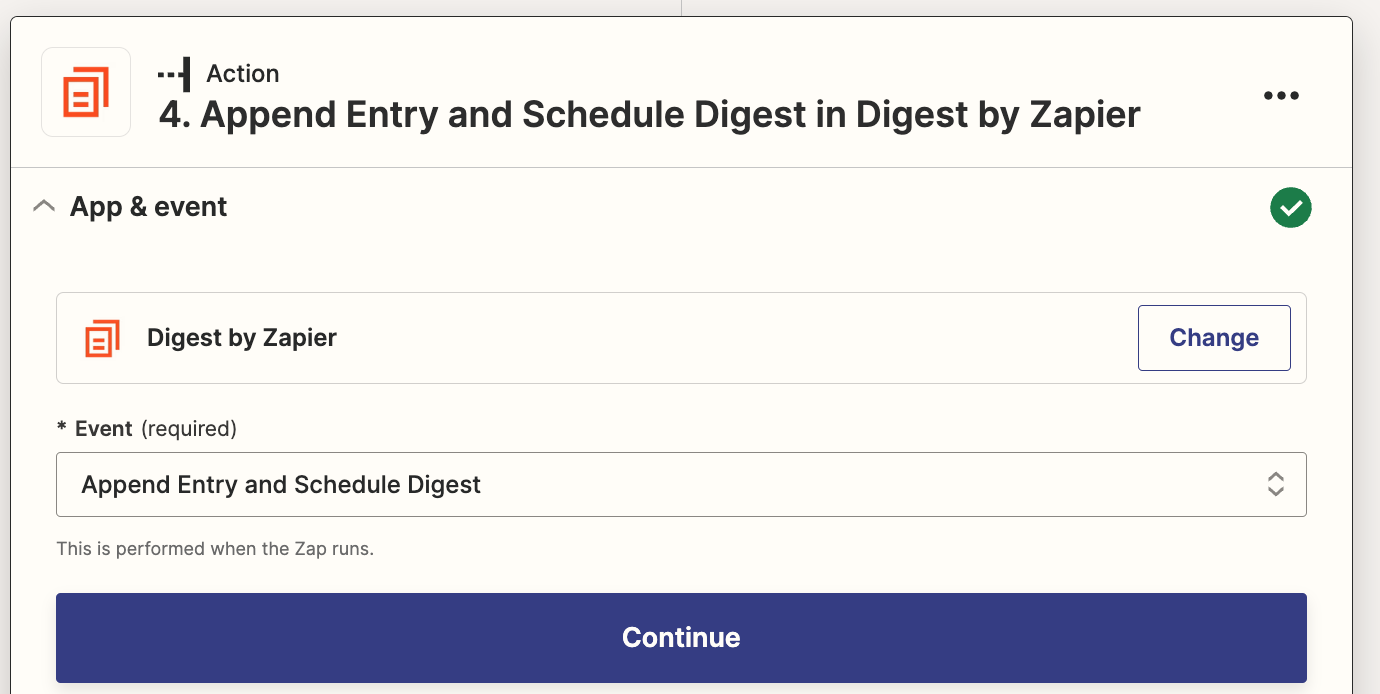
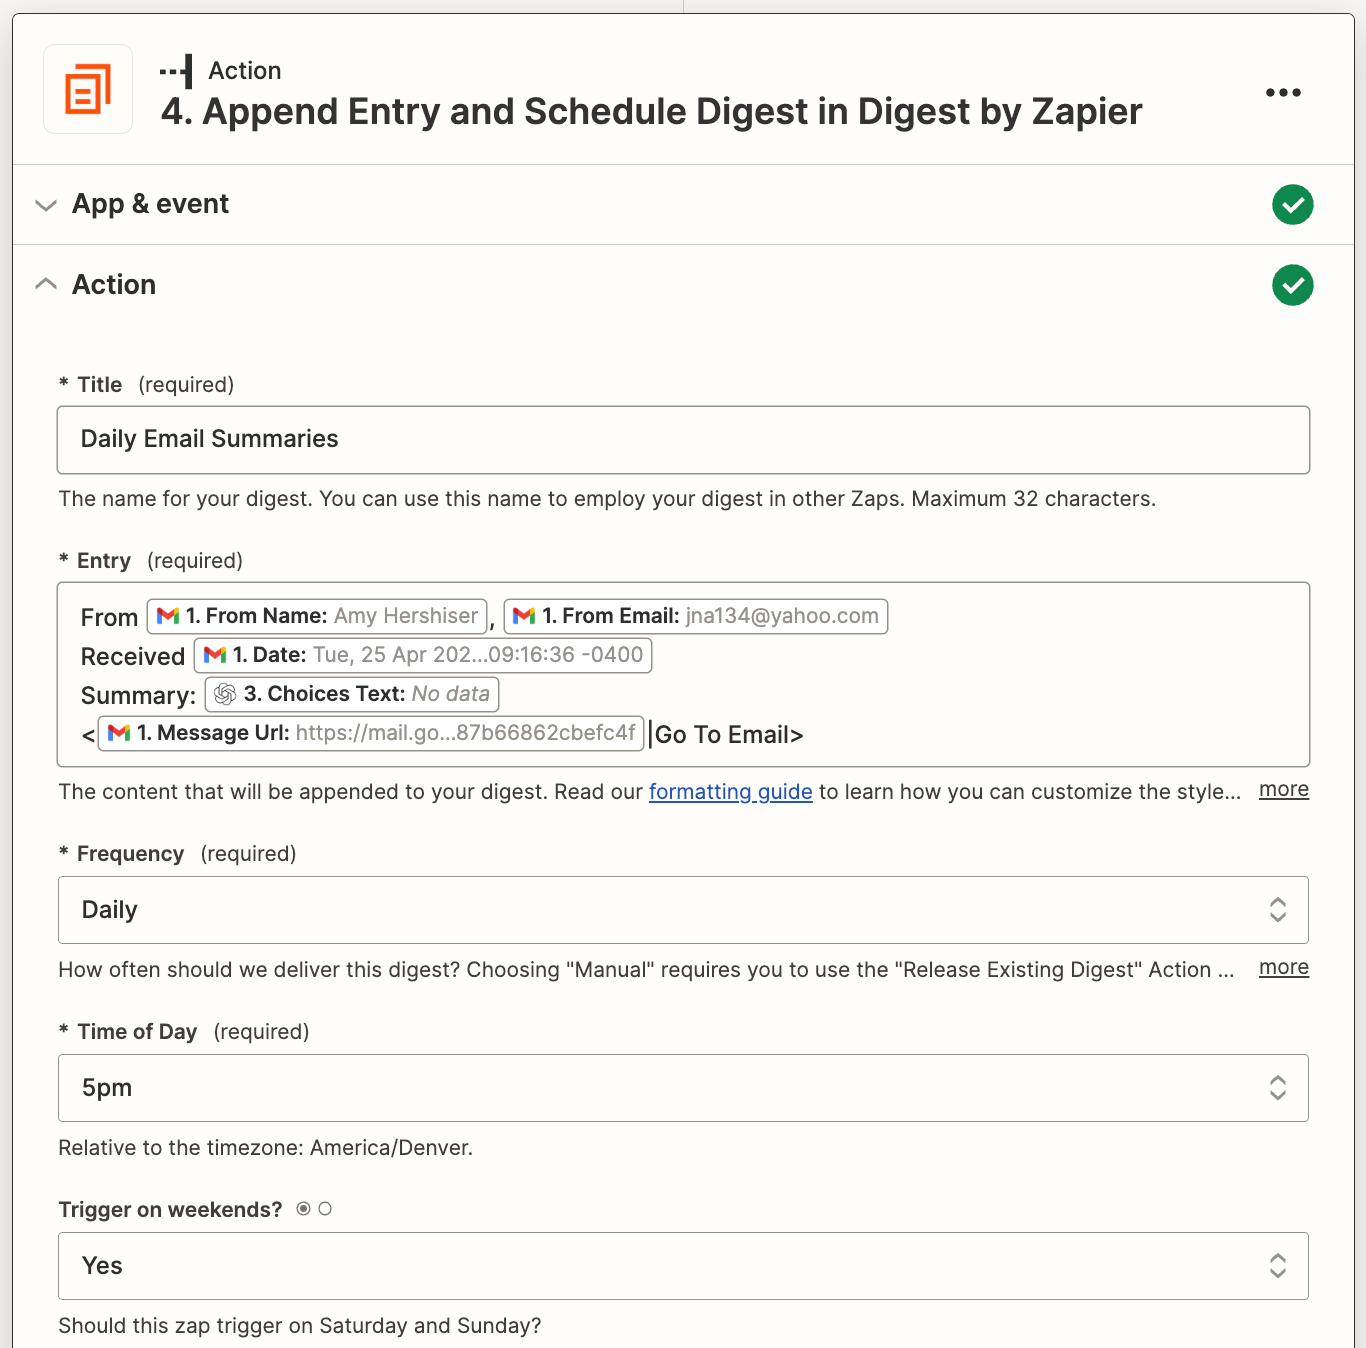
Navigate to the Action section and give your digest a descriptive title like Daily Email Summaries.
For the Entry field, simply copy and paste the copy below. Then replace the bracketed content with the variables from the prior steps by selecting them from the Insert Data dropdown.
From {Gmail From Name}, {Gmail From Email}
Received {Gmail Date}
Summary: {OpenAI Choices Text}
<{Gmail Message URL}|Go To Email>
For the Frequency field, select Daily, and for the Time of Day field, choose when you’d like to receive the digest. Your completed action step should look like this:
Click Test Action to add an entry to your digest and make sure your action step is set up correctly.
Get a daily digest step 5: Set up the Slack action to release your daily digest
Finally, we’ll set up the action step that will release your daily digest and send all of the email summaries to you in a Slack message. This digest message will automatically send at the Time of Day you specified in the prior action step.
Add an action step and search for the Slackapp. Select the Send Channel Message event.
Click on the Actionsection. As before, select the channel you want these messages to be sent to. I created a new channel called email-summaries for this purpose.
In the Message Text field, copy and paste the following, replacing the bracketed content with the data received from your previous digest step by selecting them from the insert Data dropdown:
*You received {Digest Count} emails today*
{Current Digest}
Your Message Text field should look like the following image when complete:

This will create a message in Slack that includes the total number of emails received and the digest with all of the email summaries that were created throughout the day, formatted as we specified in the prior step.
Switch the Include a link to this Zap? field to No and leave the remaining fields as is.
Next, click Test Action to send the summary digest to your Slack Channel and make sure everything is working properly. If everything looks right, you’re now ready to use your Zap!
Putting it all together
Whether you’re a busy professional or simply looking to optimize your email management process, setting up either of these workflows can help streamline your day and keep you on top of your inbox. Give it a try and see the difference it can make!
Related reading:
- How to use AI to write business emails
- How to use AI and Zapier to summarize articles
- Create meeting summaries with OpenAI and Zapier
Source :
https://zapier.com/blog/generate-email-summaries-with-ai/