There are too many to-do list apps. Trying them all would be a massive task, and I know because I did.
Why are there so many apps for something easily done on sticky notes? Because managing tasks is an intensely personal thing. People will reject anything that doesn’t feel right. That’s a good instinct, but it makes it hard to find the right app.
Make the most of your to-do list with Zapier
To that end, we’ve been hard at work researching the best to-do apps, trying to find the right ones for various use cases. Research for these pieces was exhaustive. We started by finding the best apps for every platform: Android, Windows, macOS, and iPhone/iPad. We then tried the top-rated apps in every respective app store, and spent way too much time migrating our personal to-do lists from one app to another.
And now I’m offering you what I feel is the cream of the crop. Whatever you’re looking for, one of these apps is going to be right for you. Click on any app to learn more about why I chose it, or keep reading for more context on to-do list apps.
The best to-do list apps
- Todoist for balancing power and simplicity
- TickTick for embedded calendars and timers
- Microsoft To Do for Microsoft power users (and Wunderlist refugees)
- Things for elegant design
- OmniFocus for specific organizational systems
- Habitica for making doing things fun
- Google Tasks for Google power users
- Any.do for people who forget to use to-do apps
- Other options, including project management software, note-taking apps, and other tools that can do the job
What makes the best to-do list app?
How we evaluate and test apps
All of our best apps roundups are written by humans who’ve spent much of their careers using, testing, and writing about software. We spend dozens of hours researching and testing apps, using each app as it’s intended to be used and evaluating it against the criteria we set for the category. We’re never paid for placement in our articles from any app or for links to any site—we value the trust readers put in us to offer authentic evaluations of the categories and apps we review. For more details on our process, read the full rundown of how we select apps to feature on the Zapier blog.
I’ve written about technology in general, and productivity specifically, since 2009. In that time, I’ve personally tried basically every to-do list app that has come out, and I’m usually depending on at least one of them to function.
Of course, when it comes to managing a to-do list online, everyone has different criteria. I kept this in mind as I tested, and I noticed a few features that made certain apps stand out.
The best to-do list apps:
- Make it fast to add and organize tasks. Ideally, a task is added and categorized in a couple taps or keystrokes.
- Offer multiple ways to organize your tasks. Tags, lists, projects, and due dates are all helpful, and the best to-do apps offer at least a few categories like this.
- Remind you about self-imposed deadlines. Notifications, widgets, emails—if you’re using an online to-do list, it should help you track what needs to happen when.
- Offer clean user interfaces. The best to-do app fits into your workflow so you can get back to what you’re supposed to be doing.
- Sync between every platform you use. Which platforms will depend on what you personally use, but I didn’t consider anything that doesn’t sync between desktop and mobile.
I tried to find the task list apps that balance these things in various ways. None of these options will be right for everyone, but hopefully one of them is right for you. Let’s dive in.
Make 2023 your most efficient year yet
Start the year off right with our five-email course that helps you streamline work across your whole business.
Best to-do list app for balancing power and simplicity
Todoist (Web, Windows, macOS, Android, iPhone, iPad)
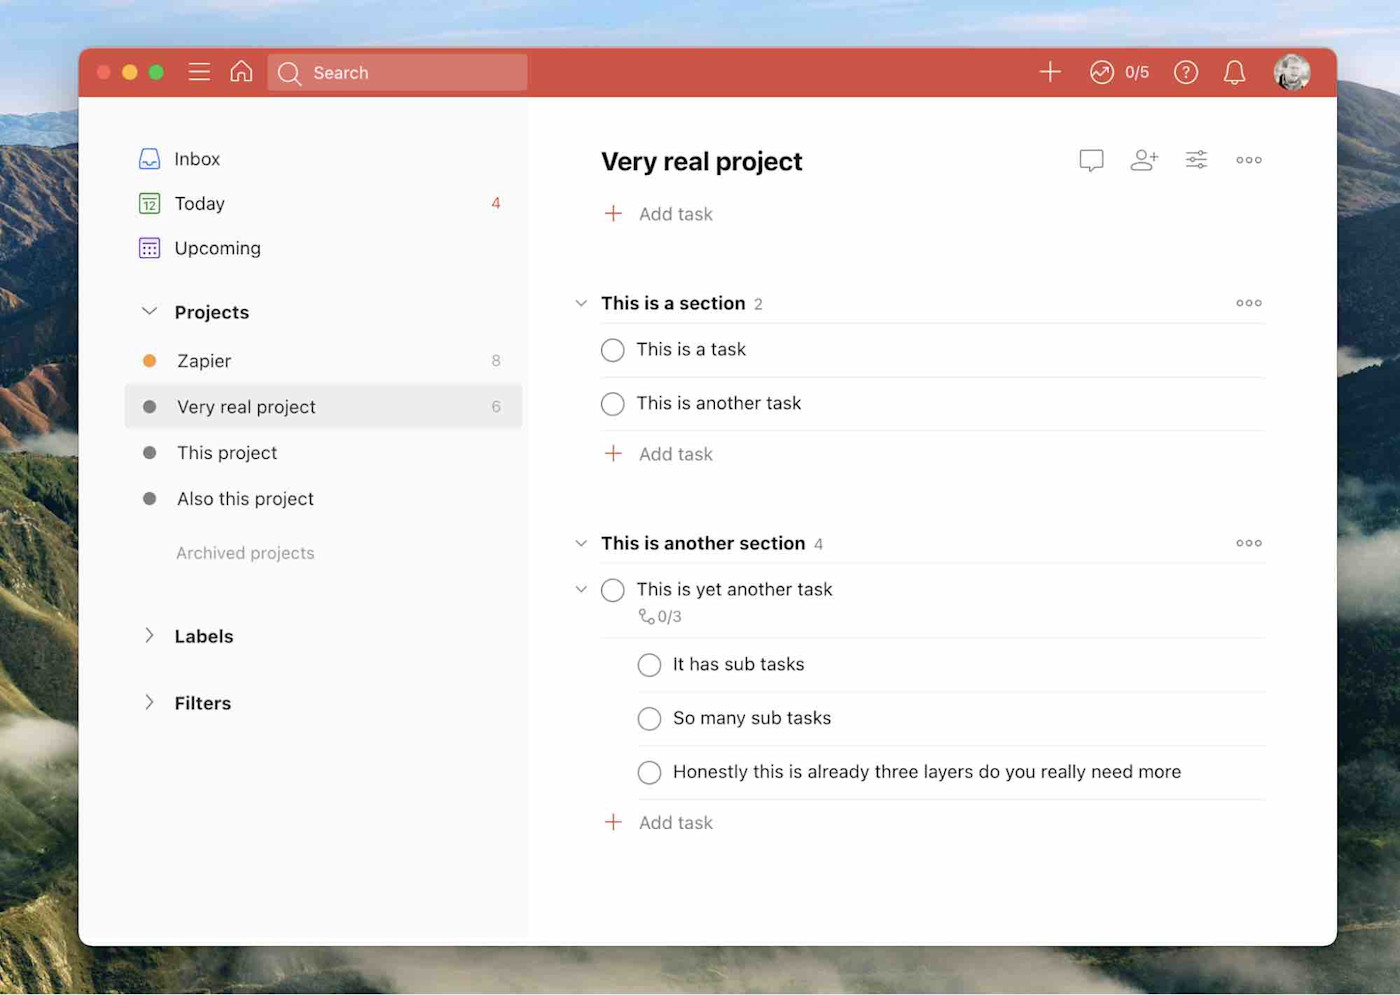
Todoist isn’t the most powerful to-do list website out there. It’s also not the simplest. That’s kind of the point: this app balances power with simplicity, and it does so while running on basically every platform that exists. That’s a strong selling point—which is probably why Todoist is one of the most popular to-do lists right now.
Adding tasks was quick on every platform in my tests, thanks in part to natural language processing (type “buy milk Monday” and the task “buy milk” will be added with the next Monday set as your due date). You can put new tasks in your Inbox and then move them to relevant projects; you can also set due dates. Paid users can create custom filters and labels, and there are also some basic collaboration features.
Todoist is flexible enough to adapt to most workflows but not so complicated as to overwhelm. And it adds new features regularly: you can view projects as a Kanban board, for example, and navigating the app by keyboard is much smoother after recent updates. Overall, this is a great first to-do list app to try out, especially if you don’t know where to start.
Todoist also integrates with Zapier, which means you can automatically create tasks in Todoist whenever something happens in one of your favorite apps. Here are some examples.
Add new Google Calendar events to Todoist as tasks
Google Calendar, Todoist
Google Calendar + TodoistMore details
Add new starred emails to Todoist as tasks [Business Gmail Accounts Only]
Gmail, Todoist
Gmail + TodoistMore details
Add new Trello cards to Todoist as tasks
Trello, Todoist
Trello + TodoistMore details
Todoist price: Free version available; paid version from $4/month.
Check out more ideas for automating Todoist with Zapier.
Best to-do list app with embedded calendars and timers
TickTick (Web, Android, Windows, macOS, iPhone and iPad)
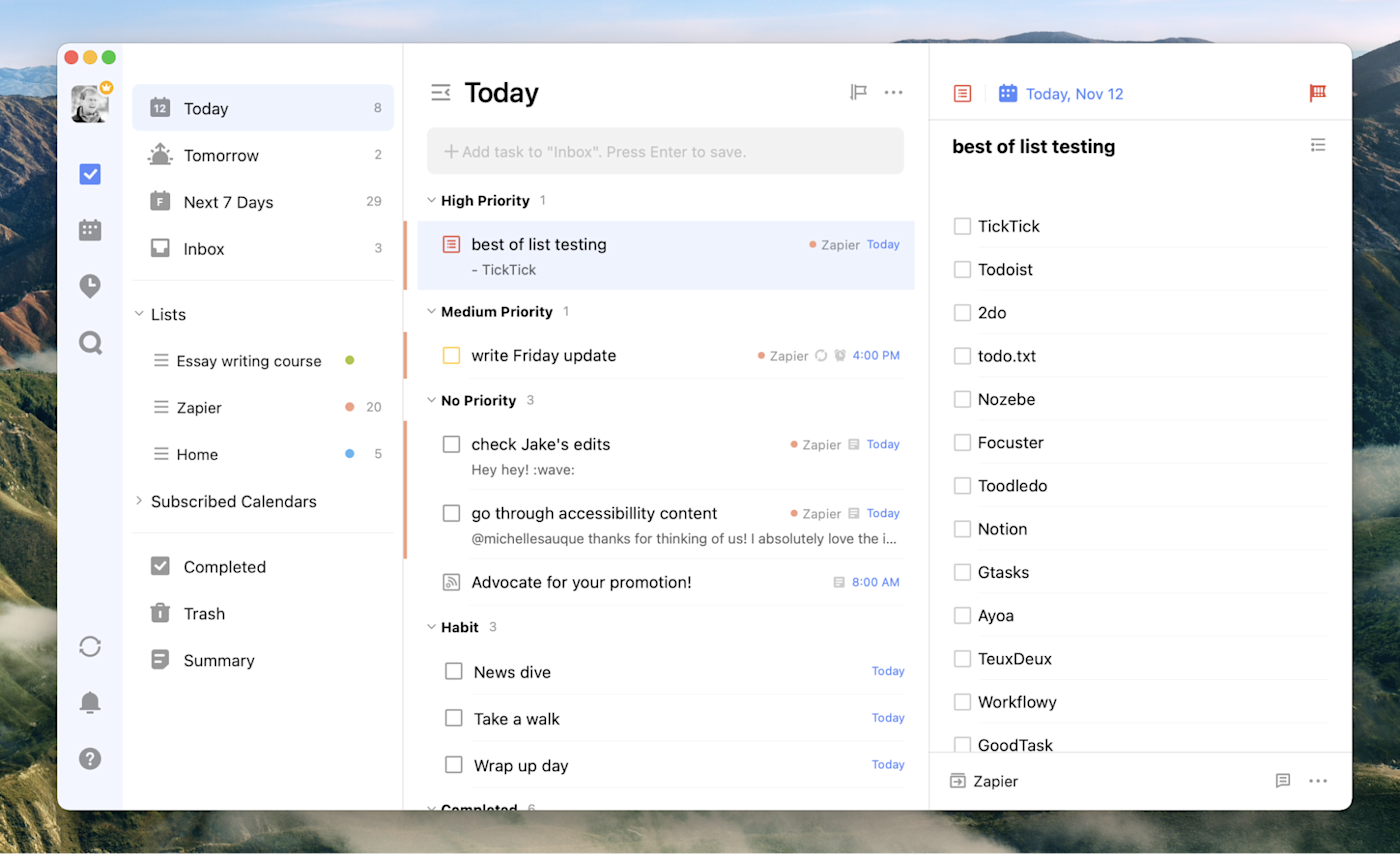
TickTick is a fast-growing task list app that offers a wide array of features on just about every platform you can imagine. Adding tasks is quick thanks to natural language processing. There’s also a universal keyboard shortcut offered on the desktop versions and pinned notifications and widgets on mobile, which makes it quick to add a task before getting back to what you’re doing. Tasks can be organized using lists, tags, and due dates, and there’s also the ability to add subtasks to any task.
TickTick offers all of this with apps that feel native—the macOS version is distinct from the Windows version, for example, in ways that make sense given the differences between those two systems. TickTick also offers a few features that are above and beyond what other apps offer.
First, there’s a built-in Pomodoro timer, allowing you to start a 25-minute work session for any of your tasks (complete with numerous white noise options, if you want). Second, there’s integration with various third-party calendars, allowing you to see your tasks and your appointments in one place, and even do some time blocking. There’s also a built-in habit-tracking tool, allowing you to review how many days you did or didn’t stick to your exercise and diet commitments. And an Eisenhower Matrix view allows you to prioritize your tasks based on what’s urgent and what’s important. It’s a great collection of features, unlike anything else on the market.
With TickTick’s Zapier integration, you can connect TickTick to the other tools in your tech stack to automatically create tasks whenever you get new leads, deals, or emails.
Create TickTick tasks for newly-labeled Gmail emails [Business Gmail Accounts Only]
Gmail, TickTick
Gmail + TickTickMore details
Generate TickTick tasks from new Facebook Leads
Facebook Lead Ads, TickTick
Facebook Lead Ads + TickTickMore details
Generate TickTick tasks from new HubSpot deals
HubSpot, TickTick
HubSpot + TickTickMore details
TickTick price: Free version available; paid version from $2.40/month.
Check out other ways you can automate TickTick with Zapier.
Best to-do list app for Microsoft power users (and Wunderlist refugees)
Microsoft To Do (Web, Android, Windows, iPhone and iPad)
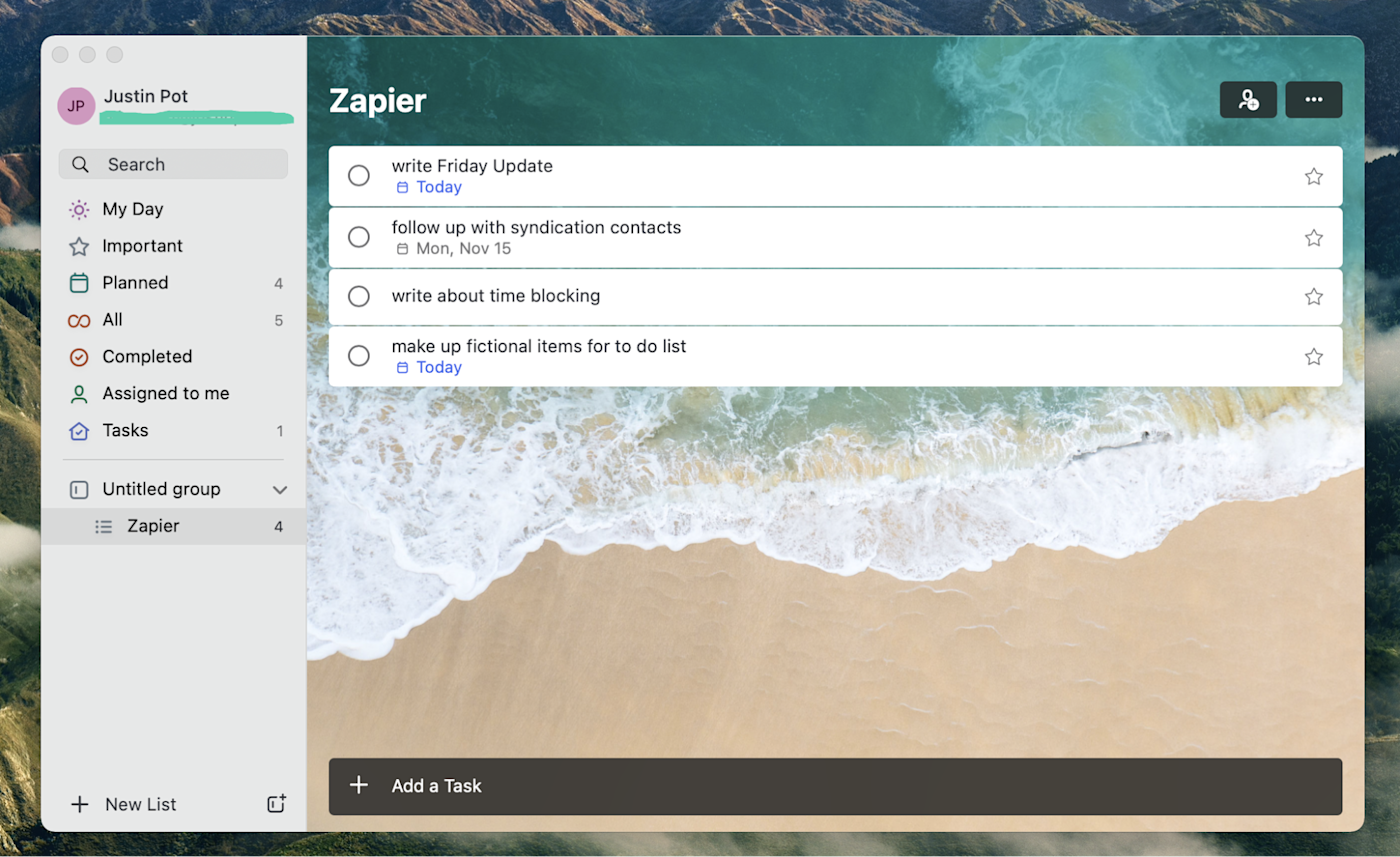
In 2015, Microsoft bought Wunderlist and put that team to work on a new to-do list app. Microsoft To Do is the result of that, and you can find Wunderlist’s DNA throughout the project. The main interface is clean and friendly, adding tasks is quick, but there’s a lot of flexibility below the surface.
But the real standout feature here is the deep integration with Microsoft’s ecosystem. Any email flagged in Outlook, for example, shows up as a task. Outlook users can also sync their tasks from that app over to Microsoft To Do, meaning there’s finally a way to sync Outlook tasks to mobile. Windows users can add tasks using Cortana or by typing in the Start menu. For example, you can type “add rice to my shopping list,” and rice will be added to a list called “shopping.” If you’re a Windows user and an Outlook user, this is the app for you.
This is also the prettiest to-do list app on the market, in my opinion. You can set custom background images for every one of your lists, allowing you to tell at a glance which list you’re looking at. You’re going to be looking at your task list all day—it might as well look good.
Microsoft To Do integrates with Zapier, which means you can make sure Microsoft To Do is talking to all the other apps you use, not just the Microsoft ones. Here are some examples to get started.
Create Workboard action items from new tasks in Microsoft To-Do
Microsoft To Do, Workboard
Microsoft To Do + WorkboardMore details
Send direct Slack messages with new Microsoft To-Do lists
Microsoft To Do, Slack
Microsoft To Do + SlackMore details
Create Microsoft To-Do tasks from new Salesforce leads
Salesforce, Microsoft To Do
Salesforce + Microsoft To DoMore details
Microsoft To Do price: Free
Learn how you can make Microsoft To Do a productivity powerhouse with Zapier.
The best to-do list app with elegant design
Things (macOS, iPhone, iPad)
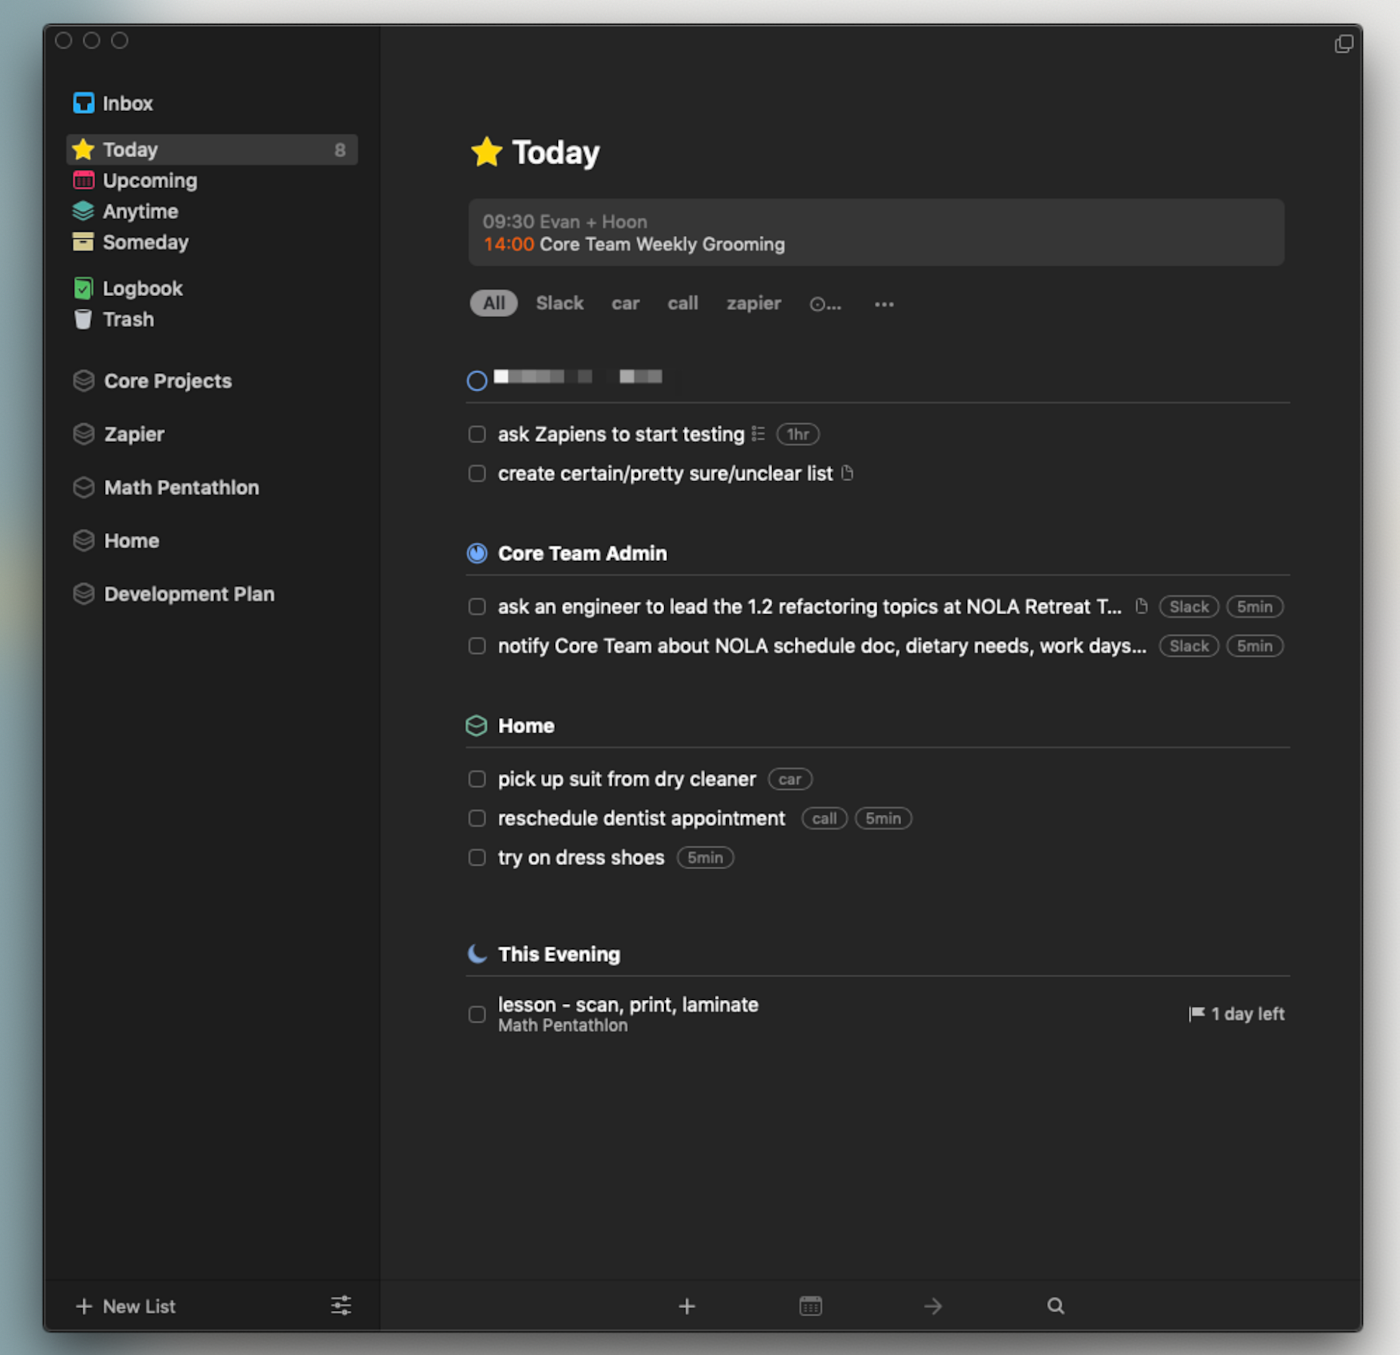
To-do list apps tend to fall into two categories: the complex and the minimalist. Things is somehow both.
That’s about the highest praise I can give a to-do list app. This is an app with no shortage of features, and yet it always feels simple to use. Adding tasks is quick and so is organizing them, but there’s seemingly no end of variation in ways to organize them. Areas can contain tasks or projects; projects can contain tasks or headers that can also contain tasks; and tasks can contain subtasks if you want. It sounds confusing, but it isn’t, which really speaks to how well Things is designed.
Other apps offer these features, but Things does it in a way that never feels cluttered, meaning you can quickly be done with looking at your to-do list and get back to whatever it is you’re doing. Combine this blend of functionality and beauty with features like a system-wide tool for quickly adding tasks, integration with your calendar so you can see your appointments while planning your day, intuitive keyboard shortcuts, reminders with native notifications, and syncing to an iPhone and iPad app.
The only downside here is the complete lack of versions for Windows and Android, though this decision is probably part of what allows the team to focus on making such a clean product. If you’re an Apple user, you owe it to yourself to try out Things.
You can automatically add to-dos to Things from your other apps with Things’ integrations on Zapier. Here’s some inspiration.
Add saved Slack messages to Things as to-dos
Slack, Things
Slack + ThingsMore details
Add new Trello cards to Things as to-dos
Trello, Things
Trello + ThingsMore details
Create Things to-dos from starred emails in Gmail [Business Gmail Accounts Only]
Gmail, Things
Gmail + ThingsMore details
Things price: $49.99 for macOS (15-day free trial), $19.99 for iPad, $9.99 for iPhone.
Best to-do list app for users with a very specific organizational system
OmniFocus (Web, macOS, iPhone, iPad)
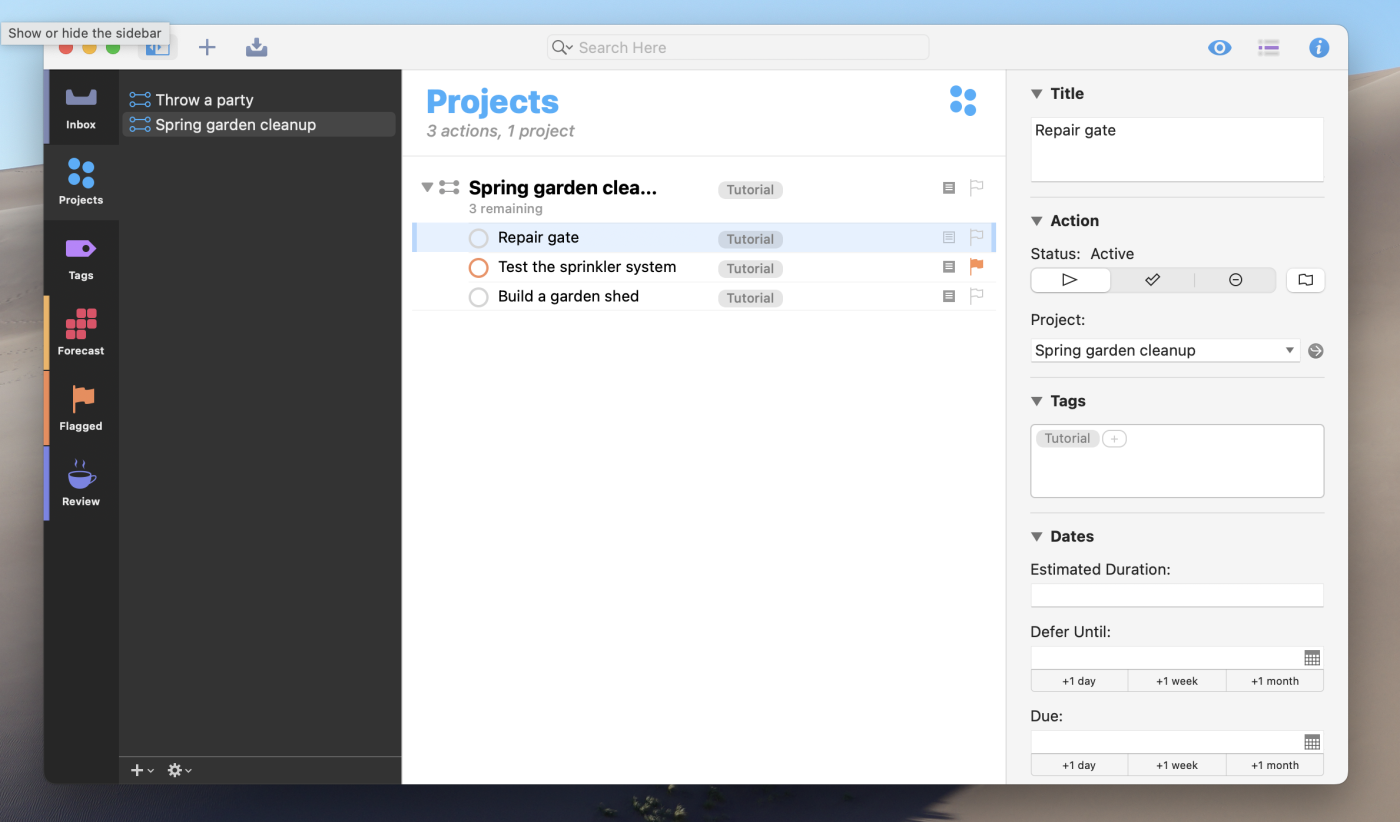
OmniFocus is nothing if not flexible. This Apple-exclusive application is built around the Getting Things Done (GTD) philosophy trademarked by David Allen, but an array of features means it can be used for just about any organizational system you can imagine. There are three different kinds of projects you can set up, for example, depending on whether you need to do tasks in a specific order or not. There are six main views by default, allowing you to organize your tasks by things like due date, projects, and tags. You can even add more views, assuming you have the Pro version.
You get the idea. OmniFocus is a power user’s dream, with more features than anyone can hope to incorporate into a workflow, which is kind of the point: if there’s a feature you want, OmniFocus has it, so you can organize your tasks basically any way you can imagine.
Syncing is offered only between Apple devices. There’s a web version that’s intended for occasional usage away from your Apple machines, but non-Apple users should probably look elsewhere.
You can connect OmniFocus to your other favorite apps with OmniFocus’s Zapier integration. Whenever something happens in another app that you want to keep track of in OmniFocus, Zapier will automatically send it there.
Create OmniFocus tasks from new saved Slack messages
Slack, OmniFocus
Slack + OmniFocusMore details
Create OmniFocus tasks for new starred emails on Gmail
Gmail, OmniFocus
Gmail + OmniFocusMore details
Create OmniFocus tasks from new or moved Trello cards
Trello, OmniFocus
Trello + OmniFocusMore details
OmniFocus price: From $99.99/year for the recurring plan, which includes all apps and the web version. Also available as a one-time purchase from $49.99 (14-day free trial).
Best to-do list app for making doing things fun
Habitica (Web, Android, iPhone and iPad)
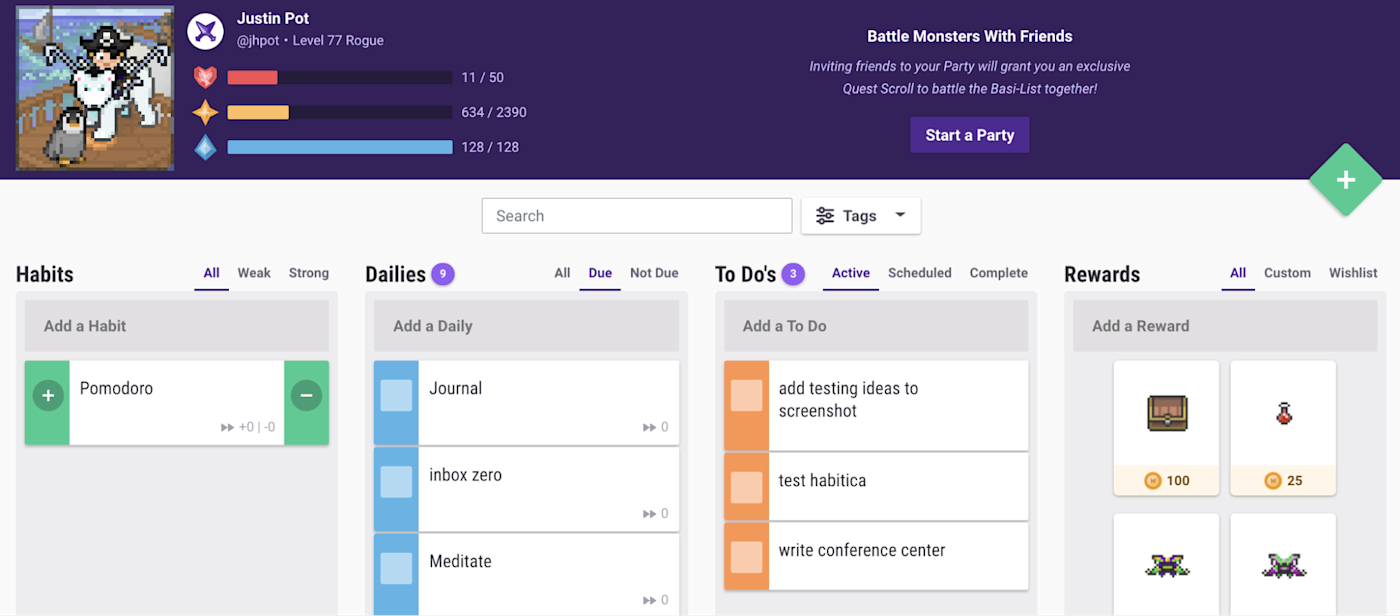
Games are fantastic at motivating mundane activity—how else can you explain all that time you’ve spent on mindless fetch quests? Habitica, formerly known as HabitRPG, tries to use principles from game design to motivate you to get things done, and it’s remarkably effective. You can add tasks, daily activities, and habits to a list. You also have a character, who levels up when you get things done and takes damage when you put things off. You can also earn in-game currency for buying offline rewards, such as a snack, or in-game items like weapons or even silly hats.
This is even better when you join a few friends and start a party. You can all fight bosses together, but be careful: fail to finish some tasks on time and your friends will take damage. If that doesn’t motivate you, nothing will.
What’s the downside? Habitica isn’t a great to-do list for managing long-term projects, so you might need something else for that. But if motivation is your problem, Habitica is well worth a spin.
Habitica price: Free version available; paid version from $5/month.
Best to-do list app for Google power users
Google Tasks (Web, Android, iPhone and iPad)

If you live in Gmail and Google Calendar, Google Tasks is an obvious free to-do list app to try out. That’s because it lives right in the sidebar of those two apps, and offers more than a few integrations. Plus, there’s a dedicated mobile app.
The app itself is spartan. Adding tasks is quick, particularly if you spend a lot of time in Gmail anyway, but there’s not a lot of organizational offerings. There are due dates, lists, descriptions, subtasks, and the ability to “Star” tasks. There’s not much beyond that, which is ok. On the desktop, the integration with Gmail is a key selling point. You can drag an email to Google Tasks to turn it into a task, for example. You also can see your tasks on your Google Calendar, if you want.
The best to-do app is one that’s always handy. If you’re the kind of person who always has Gmail open on your computer, it’s hard for any app to be handier than Google Tasks. The mobile versions make those tasks accessible on the go.
You can automatically move information between Google Tasks and your other apps with Google Tasks’ integration on Zapier. Here are a few examples of workflows you can automate, so you can stop manually moving your tasks.
Create Trello cards from new Google Tasks tasks
Google Tasks, Trello
Google Tasks + TrelloMore details
Add new Google Tasks to Todoist as tasks
Google Tasks, Todoist
Google Tasks + TodoistMore details
Add Google Tasks tasks for new Google Calendar events
Google Calendar, Google Tasks
Google Calendar + Google TasksMore details
Google Tasks price: Free
Take a look at how you can power up all of your Google apps using automation.
Best to-do list app for people who forget to use to-do apps
Any.do (Web, Android, iPhone and iPad)
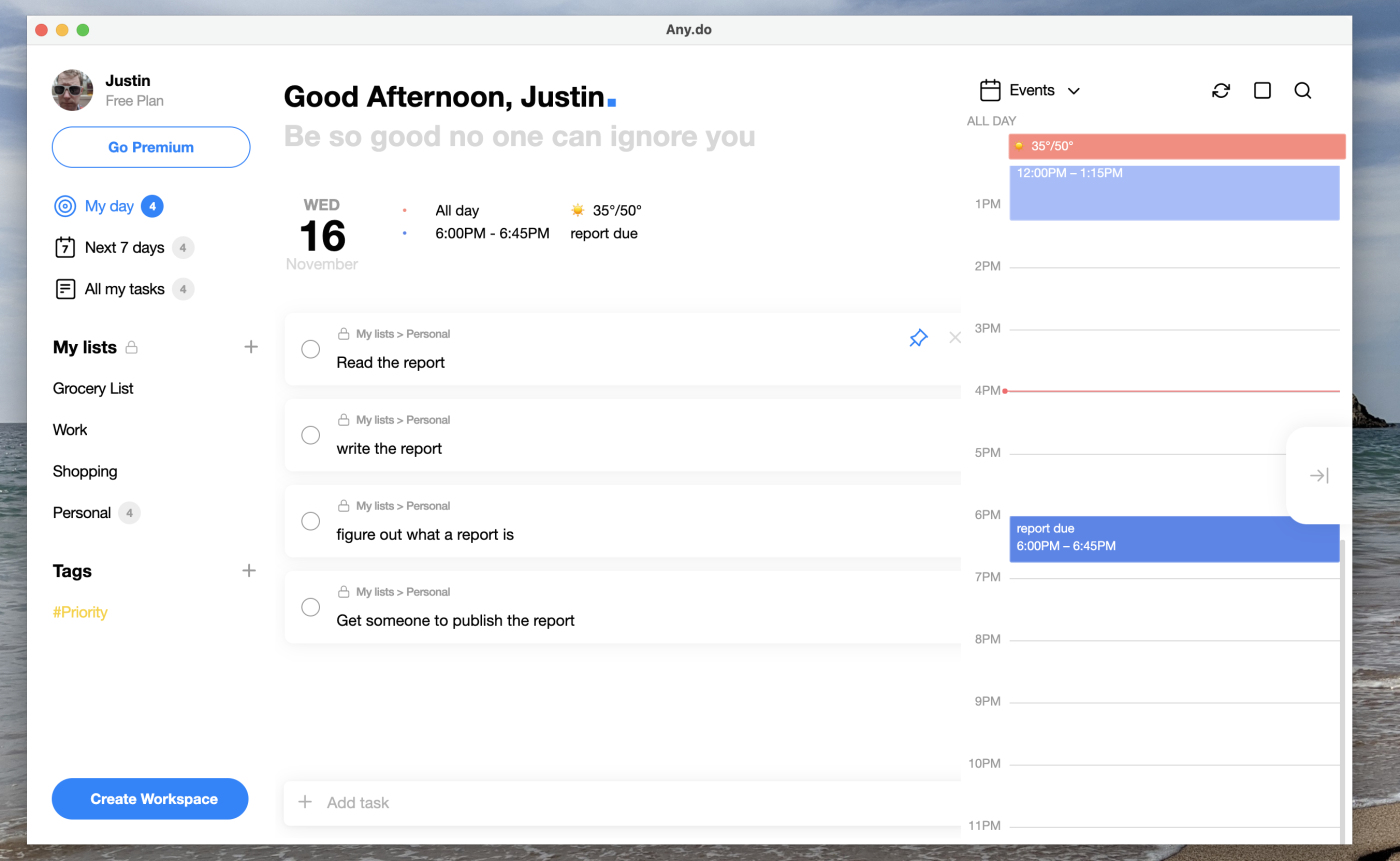
Any.do offers a really slick mobile app that makes it quick to add tasks, organize them into lists, and add due dates. But where it really shines is with its daily “Plan my Day” feature, which forces you to schedule when you’ll accomplish your various tasks, so that you remember to actually do things. Any.do also integrates nicely with Google and Outlook calendars, allowing you to see your appointments and your tasks in one place. This is exactly what you need if you’re the kind of person who adds things to a list and forgets about them.
The desktop version isn’t quite as slick as the mobile version—it feels cluttered and is more than a little confusing. Still, Any.do’s mobile version alone makes a compelling reason to give it a shot, especially if that’s where you do most of your task management.
Any.do integrates with Zapier, so you can automatically add tasks to Any.do whenever there’s a new calendar event, note, or task in your other apps.
Add Evernote reminders to Any.do as tasks
Evernote, Any.do
Evernote + Any.doMore details
Create tasks in Any.do for new saved messages in Slack
Slack, Any.do
Slack + Any.doMore details
Add new incomplete Todoist tasks to Any.do
Todoist, Any.do
Todoist + Any.doMore details
Any.do price: Free version available; paid version from $2.99/month.
Other to-do list options
We focused on dedicated to-do list apps in this roundup, but plenty of other software can fulfill the same function. Here are a few ideas if none of the above quite fit what you’re looking for:
- Project management apps like Trello and Asana can be used as to-do lists, especially if you already use them to manage your other work.
- Note-taking apps like Evernote, OneNote, and Google Keep also have to-do list features, if you want to combine your to-do lists and notes.
- You can use Notion as a to-do list if that’s where you spend most of your time, and the various Notion alternatives work just as well.
- Time-blocking apps are another solid option. These combine a task list with your calendar, encouraging you to decide when you’ll do what.
- Google Sheets can be your to-do list. Zapier’s CEO even uses Gmail as his to-do list.
- Sticky note apps can also do the trick. So can a piece of paper. Don’t overthink things!
Finding the right task management system is hard because it’s so personal. To that end, let me know if there’s anything you think I missed.
Related reading:
- 5 ways to automate your to-do list
- 7 creative ways to visualize your to-do list
- Some tasks belong on your calendar, not your to-do list
This post was originally published in April 2018 by Andrew Kunesh. The most recent update was in November 2022.
Source :
https://zapier.com/blog/best-todo-list-apps/


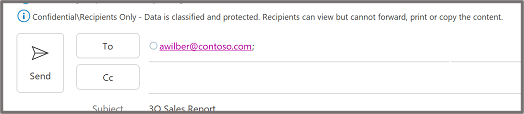
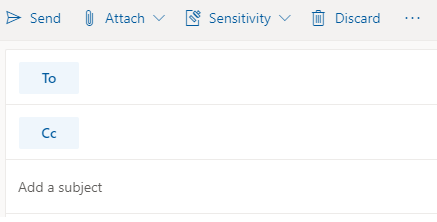 Important: Sensitivity is not available if your Office account isn’t a work account, and if your administrator hasn’t configured any sensitivity labels and enabled the feature for you.
 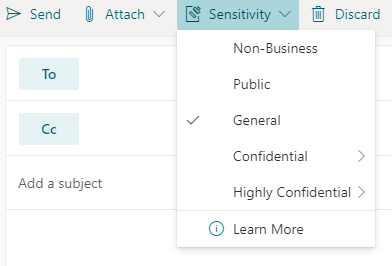 Note: If your organization has configured a website to learn more about their sensitivity labels, you will also see a Learn More option.
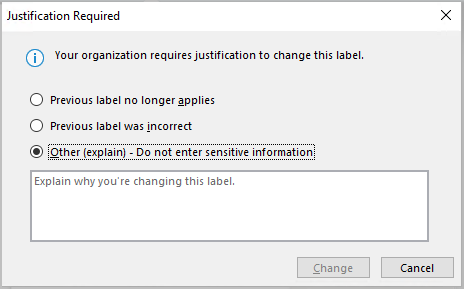
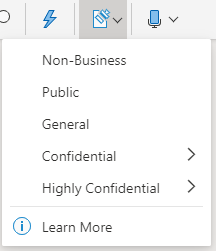 Note: If your organization has configured a website to learn more about their sensitivity labels, you will also see a Learn More option.

 NOTE: All the APIs required for configuring Port Forwarding will be listed in this Article.


 TIP: If you are creating only one Address Object then the First command should be sufficient, if you are creating multiple address objects then the second command should be used.
 CAUTION: I have the add.Json file saved on to my desktop and hence I was able to call it into the command, if you have created the Json the file in a different location then make sure you are executing the command from that location.