By Vladan SEGET | Last Updated: June 28, 2023
PHD Virtual Backup 6.0 – Backup, Restore, Replication and Instant recovery. PHD Virtual has released their new version of backup software for VMware vSphere environments. PHD Virtual backup 6.0 comes up with several completely new features. Those features that are specific to virtualized environments. In this review I’ll focus more on those new features instead on the installation process, which is fairly simple. This review contains images, which can be clicked and enlarged (most of them) to see all the details from the UI.
Now first something that I was not aware of. Even if I work as a consultant, I must say I focus most of the time on the technical side of a solution which I’m implementing and I leave the commercial (licensing) part to vendors or resellers. But with this review I would like to point out that PHD Virtual Backup 6.0 is licensed on a per-host basis. Not CPU Socket like some vendors do, but also not per site like other vendors do. As a result, their price is a fraction of the cost of competitive alternatives.
Introduction of PHD Virtual Backup and Recovery 6.0
The PHD Virtual Backup 6.0 comes up with quite a few new features that I will try to cover in my review. One of them is the Instant Recovery, which enables to run VM directly from a backup location and initiate storage vMotion from within VMware vSphere to move the VM back to your SAN.
But PHD Virtual goes even further by developing a proprietary function to initiate the move of the VM by using PHD Motion. What is it? It’s an alternative for SMB users which does not have VMware Enterprise and Enterprise Plus License, which includes storage vMotion.
PHD Motion does not require VMware’s storage vMotion in order to work. It leverages multiple streams, intelligent data restore, direct storage recovery to copy a running state of a VM back to the SAN, while the VM still runs in the sandbox at the storage location. Therefore, it is much faster at moving the data back to production than storage vMotion.
The delta changes to the VM are maintained in another, separate temporary location. So the final switch back to SAN happens fairly quickly since only the deltas of changes between the VM which runs from the backup and the VM which is located back on SAN, are quickly copied. So small planned downtime (about the time for a VM reboot) is necessary.
Installation of the Software

The installation will take like 5 minutes, just to deploy the OVF into vCenter and configure the network interface, storage …. and that’s it. Pretty cool!
One of those differences from previous version of PHD Virtual backup is the Instant Recovery Configuration TAB, since this feature has just been introduced in the PHD Virtual Backup 6.0.
The Instant recovery feature is available for Virtual Full backups only. The full/incremental backup types are not currently supported for instant recovery, so if you select the full/incremental option, you might see that the Instant Recovery option isn’t available. Use Virtual Full option when configuring your backup jobs to take benefit of Instant recovery.

PHD Virtual backup 6.0 – Replication of VMs.
Replication – This feature requires at least one PHD VBA installed and configured with access to both environments – but if you will be using replication in larger environments, you may need additional PHD VBAs. For instance, one PHD VBA deployed at the primary site would be configured to run regular backups of your VMs while a second PHD VBA could be deployed to the DR site configured to replicate VMs from the primary site to the secondary location.
The replication of VMs is functionality that is very useful for DR plans. You can also configure the replication within the same site as well, and choose a different datastore ( and ESXi host) as a destination. This is my case, because I wanted to test this function, since my lab don’t have two different locations.
The replication job works the way that only the first replica is full copy. PHD VM replication takes data from existing backups and replicates those to a cold standby VM. After the VM is initially created during the first pass, PHD uses its own logic to transfer only the changes from the previous run.
You can see the first and second job, when finishes on the image below. The latter one took only 51 s.

Testing Failover – After the replica VM is created, you have the option to test each replica to validate your standby environment or to failover to your replicated VMs. There is a Start Test button in order to proceed.

What’s happening during the test. At first, another snapshot is created of the Replica VM. This is only to have the ability to get back to the state before the test. See the image below.

This second snapshot is deleted the moment when you’re done with the testing of that failover VM, you tested that the application is working etc…. The VM is powered off and it is rolled back to the state it was in prior to testing mode.
So when you click the Stop Test button (it changed text), the replica Status is changed back to STANDBY, once again click Refresh button to refresh the UI.
If you lose your primary site, you can go to the PHD console at the DR site and failover the VMs which has been replicated there. You can recover your production environment there by starting the VMs that has been replicated. And now, when you run your production (or at least the most critical VMs) from DR site, and because you don’t have a failover site anymore, you should consider start backing up those VMs in failover mode….. it will be helpful when failing back to the main primary site, when damages there gets repaired.
Why one would have to start doing backups as soon as the VMs are in failover state ? …. Here is a quick quote from the manual:
When ending Failover, any changes made to the replica VM will be lost the next time replication runs. To avoid losing changes, be sure to fail back the replica VM (backup and restore) to a primary site prior to ending Failover mode.
I can only highly recommend to read the manual where you’ll find all the step-by-steps and all those details. In this review I can’t focus to provide all those step-by-step procedures. The manual is a PDF file very good quality, with many screenshots and walk through guides. In addition, there are some nice FAQ which were certainly created as a result of feedback from customer’s sites. One of them is for example a FAQ for increasing backup storage and the step-by-step follows. Nice.
You can see the possibility to end the failover test with the Stop Test button.

Seeding – If you have some huge amount of data to replicate for the DR site you can seed the VMs data before configuring the replication process. The seeding process is process when you pre-populate the VMs to the DR site first. This can be done through removable USB drives, or small NAS device. When the seeding is complete, you can start creating the replication jobs to move only the subsequent changes.
In fact the seeding process is fairly simple. Here is the outline. First create full backup of VMs > copy those backups to NAS or USB for transport > Go to the DR site and deploy PHD VBA and add the data that you have with you as a replication datastore > create and run replication job to replicate all the VMs from the NAS (USB) to your DR site > Remove the replication datastore and the NAS and create the replication job where you specify the the primary site datastore as a source. Only the small, incremental changes will be replicated and sent over the WAN.
PHD Virtual Backup 6.0 – File level Recovery
File level recovery is a feature that is used at most in virtual environments, when it comes to console manipulations. I think, since more frequently you (or your users) are in need for file restore, than VM crashes or corruption, so the full VM needs to be restored.
I’ve covered the the FLR process in the 5.1 version by creating an iSCSI target and then mounting the volume as an additional disk in computer management, but the option was greatly simplified in PHD Virtual Backup 6.0. In fact when you run the assistant, you have the now a choice between the creation of iSCSI target and create windows share. I took the option Create Windows share.

All the backup/recovery/replication tasks are done through assistants. The task is composed with just few steps:
First selecting the recovery point , then create a windows share (or iSCSI target) > and mount this share to finally be able to copy-paste the files that needs to be restored from withing that particular VM.
The process is fast and direct. It takes few clicks to get the files back to the user’s VM. You can see the part of the process on the images at left and bellow.

PHD Virtual Backup 6.0 – Instant VM Recovery and PHD Motion – as said in the beginning of my review, the PHD virtual backup 6.0 has the ability to run VMs directly from backup location.
The Instant VM Recovery works out of the box without further necessity to setup the temporarily storage location, but if needed, the location for temporary changes can be changed from the defaults. But there is usually no need to do so.
You can do it in Configuration > Instant VM Recovery.
There is a choice between the attached virtual disk and VBA’s backup storage.

Then we can have a look and see how the Instant VM recovery option works. Let’s start by selecting the recovery point that we would want to use for that. An XP VM which I backed up earlier will do. Right Click the point in time from which one you want to recover (usually the latest), and choose recover.

At the next screen there is many options. I checked the Power On VM after recovery and Recover using original storage and network settings from backup. Like this the VM is up and running with network connectivity as soon as possible. I did also checked the option to Automatically start PHD Motion Seeding, which will start copying the VM back to my SAN.
When the copy finishes I’ll receive a confirmation e-mail….. Note that you have a possibility to schedule this task as well.

On the next screen you can see the final screen before you hit the submit button. You can make changes there if you want.

The VM is registered in my vCenter and started from the backup location. 1 min later my VM was up. The VM was running from temporary storage created by PHD Virtual backup 6.0. The temporary storage that I configured before, when setting up the software.
You can see on the image below which tasks are performed by PHD Virtual backup 6.0 in the background.

So, we have the Instant VM Recovery tested and our VM is up and running. Now there are two options, depending if you have storage vMotion licensed or not.
With VMware Storage vMotion – If that’s the case, you can initiate storage vMotion from the temporary datastore created by PHD Virtual back to your datastore located on your SAN.
When the migration completes, open the PHD Console and click Instant VM Recovery. In the Current tab, select the VM that
you migrated and click End Instant Recovery to remove the VM from the list.
Using PHD Motion – If you don’t have storage vMotion, you can use PHD Motion. How it works… Let’s see. You remember that during the assistant launching the Instant VM recovery, we selected an option to start PHD Motion seeding.
This option will start to copy the whole VM back to the datastore on the SAN (in my case it’s the Freenas datastore). I checked that option to start Automatically PHD Motion seeding when setting up the job, remember?
You can see it in the properties of the VM being run in the Instant VM recovery mode. On the image below you can see the temporary datastore (PHDIR-423…….) and the final destination’s datastore of the VM (the Freenas datastore).

This process will take some time. So when you go back to the PHD Virtual console, you choose the Instant VM Recovery Menu option > Current Tab, you’ll see that Complete PHD Motion is grayed out. That’s because of the above mentioned copy hasn’t finished. Well it really does not matter, since you (or your users) can still work and use the VM.

And you can see on the image below that when the seeding process has finished, the button Complete PHD Motion became activ. (In fact, the software drops you an e-mail that the seeding process has finished copying

And then, after few minutes the VM dissapears from this tab. The process has finished the copy of the deltas and the VM can be powered back on. It’s definitely a time saver, and when no storage vMotion licenses (in SMBs) are available, this solution can cut the the downtime quite impressively. The History tab shows you the details.

PHD Virtual Backup 6.0 – The E-mail Reporting Capabilities.
PHD Virtual Backup 6.0 has got the possibility to report on backup/replication jobs success (failure). The configuration of it it’s made mores simpler now than in previous release, since there is a big Test button there in order to send test e-mail. I haven’t had any issues after entering the information for my e-mail server, but in case you’re using different ports or you’re behind a firewall, this option is certainly very useful.

In v6, PHD made the email reports WAY more attractive. They have a great job summary at the job and lots of great information in a nicely formatted chart that shows details for each VM and each virtual disk. They even color code errors and warnings. Very cool.

PHD Exporter
PHD Virtual Backup .60 has also few tools bundled within the software suite which can be useful. PHD Exporter is one of them. This application can help when you need to archive VMs with data. Usually you would want to install this software on physical windows server which has got a tape library attached. It’s great because you can schedule existing backups to be exported as compressed OVF files. So if you ever had to recover from an archive, you wouldn’t even need PHD to do the recovery.
The tool basically connects itself to the location where the backups are stored and through an internal processing does extract those backup files to be stored temporary in a location that you configure when you setting up – it’s called staging location. Usually it’s a local storage. Then the files are sent to tape for archiving purposes.
Through the console you configure exporting jobs where the VM backups are exported to staging location.

PHD Virtual Backup 6.0 is Application Aware Backup Solution
PHD virtual Backup 6.0 can make a transactionally-consistent backups of MS Exchange with the possibility to truncate the logs. Log truncation is supported for Microsoft Exchange running on Windows 2003 Server 64 bit SP2 and later and Windows Server 2008 R2 SP1 and later.
When an application aware backup is started, PHD Guest Tools initiates the quiesce process and an application-consistent VSS snapshot is created on the VM. The backup process continues and writes the data to the backup store while this snapshot exists on disk. When the backup process completes, post-backup processing options are executed and the VSS snapshot is removed from the guest virtual machine.
PHD Virtual Backup 6.0 provides small agent called PHD Guest Tools, which is installed inside of the VM. This application performs the necessary application aware functions, including Exchange log truncation. Additionally, you can add your own scripts to perform tasks for other applications. Scripts can be added before and after a snapshot, and after a backup completes. So it looks like they’ve got all the bases covered for when you might want to execute something on your own. I’ve tested with an Exchange 2010 VM and it worked great!
I was nicely surprised with the deduplication performance at the destination datastore. Here is a screenshot from the dashboard where you can see that the Dedupe ration is 33:1 and saved space 1.4 TB.

During the few days that I had the chance and time to play with the solution in my lab I did not have to look often in the manual, but if you do plan using the replication feature with several remote sites, I highly recommend to read the manual which is as I already told you, good quality.
PHD Virtual Backup 6.0 provides many features that are useful and provide real value for VMware admins. Replication and Instant Recovery are features which becomes a necessity providing short RTO.
PHD Virtual Backup 6.0 is an agent-less backup solution (except VMs which needs Application aware backups) which don’t use physical hardware, but runs as a virtual appliance with 1CPU and 1Gigs of RAM. This backup software solution can certainly have its place in today’s virtualized infrastructures running VMware vSphere.
Please note that this review was sponsored by PHD Virtual.
Source :
https://www.vladan.fr/phd-virtual-backup-6-0/


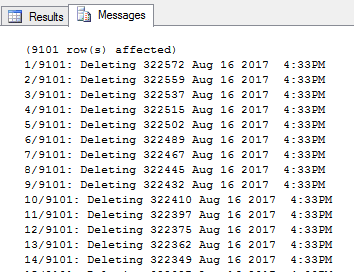
 Fun fact: In my environment that change made the deletions go 30 times faster!!!