Wondering how to improve your website’s SEO and increase web traffic fast? There are plenty of actionable steps you can take today. Most don’t even require a web developer or coding knowledge to get started.
Below we’ll review 12 best practises you can easily work into your business plans to help you:
- Rank higher in search engines
- Grow your audience
- Attract more leads
We’ll also give you tips on how GoDaddy can help you on your journey, plus share plenty of free resources you can refer to along the way.
1. Optimize your URLs
Optimizing your URLs is a good way to improve SEO quickly. It’s something that takes little effort but can help boost your rankings when done right. Here are a few best practices to look out for.
Go for shorter URL titles
When it comes to URLs, you want to keep them short and compelling. Shorter URLs are often easier to remember, which makes them more shareable and higher ranking. Make sure your URL is free of fluff words (like “and” or “for”) and easy to understand.
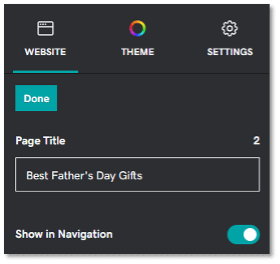
Note: GoDaddy’s Website Builder automatically optimizes your URL title for you by limiting it to 25 characters. Simply type in your URL title into the designated text box for “Page Title” and you’re done. It also fills in any spaces with hyphens following web convention.
Include primary keywords
Adding a primary keyword to your URL is another best practice for optimization and should also be applied to your:
- Meta title: This is the blue header in the search engine results page
- Meta description: This is the copy that sits beneath the meta title
- On-page title: This is the actual title of your work at the top
Aim for placing your keyword closer to the beginning of your URL title for optimal results.
Keep it relevant
URLs should also be relevant to the content you’re displaying on that specific page. Keeping them aligned with the page copy allows Google’s search bots to easily understand and identify the information for search queries.The more relevant your information is to a search query, the higher it ranks on Google.
Think about how relevant it will be for future use. You don’t want it to be overly specific that it becomes less relevant over time.
For example, you can make a URL more applicable for future use if you avoid adding a specific year at the end. Peek the following URL endings to see how they contrast.
Instead of a URL that ends in: .com/best-fathers-day-gifts-2022
Go for something like: .com/best-fathers-day-gifts
If other websites link to your page, the URL without the year enables that page to keep hold of any authority and associated rankings in the future.
A note on changing URL titles
Editing your URL title is an option using GoDaddy’s Website Builder, but it’s not recommended you make any changes when dealing with older existing pages.
Changing an existing URL can hurt your SEO and result in decreased traffic, since it’s likely you have backlinks attached to the post you’re trying to change. This means that anytime someone finds the old link through a partnering site or newsletter, they might end up at the dead link instead.
Unless you really need to for rebranding purposes, it’s best you avoid this route to prevent any damage to you SEO.
2. Optimize metadata

The term “metadata” comes up a lot when researching how to improve SEO quickly. It refers to the data on a webpage that provides Google with information about a particular site. In other words, it’s data that describes other data.
By itself, metadata won’t affect SEO rankings. But it can help in the following areas:
- Boost engagement
- Increase click-through rates
- Give you the upper edge over your competitors
It’s a small piece of the SEO puzzle that is often overlooked but can be beneficial when combined with other best practices. Let’s look at two ways to improve your meta data below.
Meta descriptions
Meta descriptions appear in the search results page underneath the meta title. It often gives a quick snippet of what the web page is about and typically includes a call to action (CTA) to encourage more clicks.
Examples of these CTAs could look like:
- “Shop now”
- “Schedule an appointment”
- “Click here to read more”
As noted earlier, you’ll want to include a primary keyword within the description and keep the copy to 155 characters or less. The primary keyword will also appear in bold anytime it matches a searcher’s query.
Meta titles
The meta title (aka title tag) is the text shown in large blue font in the search engine results page. It’s often the first thing searchers will see and can sometimes be confused with the H1 tag.

However, the meta title and H1 tag are two separate things.
The meta title is named with SEO and Google in mind, while an H1 tag is more for the user’s benefit. A lot of times digital marketers will use the same title for both the meta title and H1 tag to cause less confusion for users.
When naming your meta title, you should always:
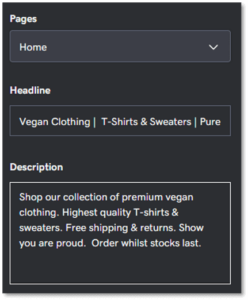 Screenshot of meta title editor inside GoDaddy Website Builder.Include a primary keyword at the start. An exception should be made for well-known brands or local businesses who should add their business name to the start.
- Accurately describe what’s on page. Make sure you showcase what people want to see and use actionable words that’ll generate more clicks.
- Ensure each title tag is unique. Look at competitors for ideas but don’t copy. Keep it short and sweet like: Tall Men’s Clothing | Tall Jeans, Pants & Coats | ABC.
- Keep it to 65 characters or less. This includes spaces, so avoid going over if you don’t want search engines to automatically truncate it for you. Title tags may be rewritten by Google if it thinks there’s a more suitable one for the searcher’s query. If you need to test the length, you can use free online tools like this meta title counter to help you.
Editing the meta title and meta description is easy using GoDaddy’s Website Builder. Simply use the editor and go to the page you need optimized. Click on Settings (cog symbol) and then select Get Found on Google to edit what you need.
3. Check your speed
An important element of improving SEO is speed. The time it takes for your webpage to load will affect whether your users stay to engage or bounce back in search of something better.
Between July and August 2021, Google rolled out a measure of core web vitals (CWV) to help website owners evaluate their overall page performance.
This report is based on real-world user data (or field data) and includes three segments that evaluates a user’s experience loading a webpage — two of which are related to a site’s speed.
Here’s a quick breakdown of each one for reference:
- Largest contentful paint (LCP): This refers to the largest block of text, video, or visuals that take up the most amount of time to load after a user clicks on your site.
- First input delay (FID): This is the amount of time it takes for a browser to respond to a user’s first interaction on your site (typically when they click on a link or tap on a button).
- Cumulative layout shift (CLS): This has to do with any layout shifts your user be experiencing as they interact with your page. Too many unexpected shifts could result in a bad user experience if left unchecked.
One best practice is to score below 1.3 seconds when reaching the First Byte. This means that the overall responsiveness and speediness of your website should fall within this time frame after a user clicks onto your site from a search query.
How to optimize your CWV score
Rankings are affected by a CWV score, so it’s best to aim high in good rankings to increase web traffic.
Google’s search advocate, John Mueller, noted in a recent YouTube discussion that if a site had lost or gained traffic steadily over the period of the CWV roll out, then it was likely related to the website’s CWV score.
GoDaddy’s Website Builder scores nearly 68% in good CWV rankings and outperforms most other competitors. It’s a great option to consider if you’re looking for low-hassle performance speed on your site. Plus, it includes other fool-proof elements like SSL certificates and more.

For non-GoDaddy sites, your biggest priority is to minimize image sizes before uploading to your site. Try using an image compressor to cut down on load time and apply a lazy loading plugin if you have a WordPress site. This will display all images below the fold only when the user scrolls down.
4. Find the right keywords for your content
Improving SEO means creating content Google can easily comprehend. That’s why optimizing with keywords helps. It allows Google bots to decipher what your page is about so that it can provide relevant results to search queries.
Let’s take a look at some best practices for keyword usage.
How to choose the best keywords
When creating content for your site, try to think of phrases and terms your target audience may be typing into a search query. For example, if you’re a retailer that specializes in kid’s clothing, you could aim for keywords like:
- Toddler girl dresses for spring
- Zipper onesies for baby boys
- Activewear for boys and girls
Keep an eye on your competitors and note how they utilize their keywords for search queries.
It’s important to know the keywords your competitors are ranking for that you are not.
Let these findings guide you when deciding what keywords to create for your own content. Ensure your version is better optimized and more informative to win the upper edge.
Where to include primary keywords
Here are other areas where you should include primary keywords throughout your text:
- Each page on your site: Include a primary keyword for every 60 – 150 words in each of your posts. Ensure they sound natural and avoid keyword stuffing to prevent Google from penalizing you.
- On-page title: Make sure each page on your website has a primary keyword within the on-page title at the top.
- First 100 words of every page: Include a primary keyword in your opening paragraph for each post. The sooner you introduce it, the better.
It’s also best to add a secondary keyword that’s similar in meaning to your primary keyword. This provides Google with extra information (or clues) to what your page is about.
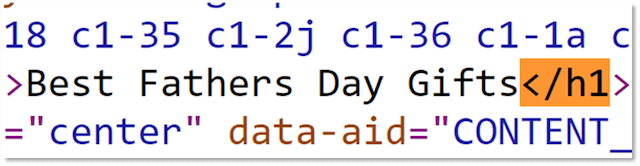
Editor’s Note: GoDaddy’s website builder automatically assigns your primary keyword as a required H1 header tag in the backend, so there’s no extra coding necessary for you. This makes things easier any time you want to adjust the font size or style. Simply edit as you go.
Keyword length
When it comes to keyword length, there are two things to remember:
- Short keywords with a large volume are harder to rank for and are more competitive
- Longer keyword phrases with three to five words are easier to rank for and are less competitive
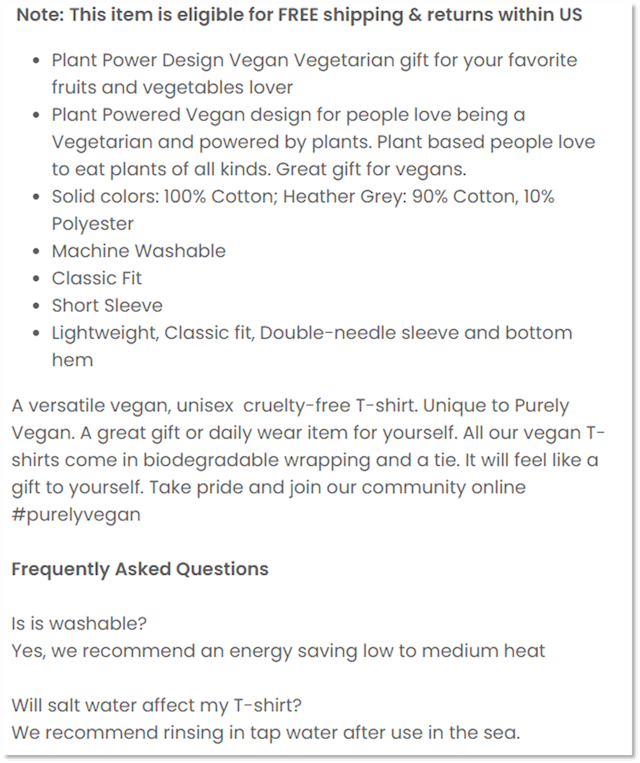
Let’s imagine you run a clothing shop. Instead of choosing a generalized keyword like “T-shirts,” you can opt for something more specific like “cruelty-free vegan T-shirts.” The competition for the longer phrase is lower and has a better chance at ranking higher on Google.
Duplicate keywords
On a similar note, you want to avoid including the same keywords and phrases on multiple pages of your website. This is known as keyword cannibalization and could lead users to the wrong page when they enter your site from a search query. It’s also not good for bounce-back rates.
The same goes for duplicate content. Try to avoid creating posts that are similar in topic, since this could confuse the search engine bots.
An example would be targeting “divorce lawyer near Los Angeles” on one page and “how to find a divorce lawyer near me” on another. The angles are too similar for Google to recognize the difference.
Helpful tools and resources
To help you optimize strategically, you can use the following tools when deciding which keywords to go for:
- Google’s Keyword Planner: This is a tool for finding keywords that many digital marketers tend to utilize – especially in advertising. But you don’t need to be an advertiser to use it. Anyone can sign up for free and use it for insight on keyword search volume.
- KWFinder: If you’re looking for a tool with more advanced features, try KWFinder. It offers a free trial and helps you find keywords that are easy to rank for.
- Keyword Tool: Ecommerce store owners can find extra ideas using predictive search tools like this one. It gives you free keyword search suggestions for Amazon, eBay and more.
Remember, it’s best to avoid using keywords that have volumes in the highest and lowest categories. Refer to these tools any time you need help.
5. Write for your audience
Developing content that improves SEO quickly should be centred around your audience first and foremost.
You need to know who you are trying to target before you begin writing posts for your website.
This will allow you to create content that is genuinely helpful to potential customers visiting your site. It’s also something Google will reward you for in rankings and will lead users to CTAs that apply to:
- Purchases
- Email sign-ups
- Inquiries and more
When drafting content for your site, you should note that there are two main categories to consider:
- Standard pages and blog posts: These typically consist of informational content. A standard page should have a minimum of 300 words, while a blog post should have 700 or more.
- Ecommerce product pages: Ecommerce pages focus more on product details. The recommended word count for these pages should range between 120-200 words.
Let’s discuss them even further to help you better understand why both are important for improving SEO.
Pages and blog posts
Pages and blog posts provide informational content to users but differ in the type of content displayed. Pages are more static and don’t often need updating (like About Me or Contact pages), while blog posts provide constant updates to queries that are relevant to your product or service.
Google ranks all web pages according to a mixture of:
- Relevancy for the searcher
- Value of content on a page
- The page’s uniqueness
- A website’s overall authority
Authority takes time and is something you earn as your audience grows. It’s not something you can control right away. But optimizing the other categories can help you achieve authority success down the line.
Dwell time
Google rewards websites with higher rankings if searchers stick around for a while (aka dwell time).
To increase dwell time, owners should write for their prospective customer and not for Google.
Write as if you are encouraging a friend to take the next step with your business offer. Use words that inspire and provide informative content that helps users with pain points.
Ecommerce product pages
Ecommerce pages provide users with information about your product or service, but also convinces them to follow-through with a purchase.
Many ecommerce sites miss out on visibility due to lack of content, which makes it hard to rank.
A general recommendation to improve SEO is to start by optimizing product and service pages first. You can do this by:
- Using long-tail keywords: This helps increase opportunities in competitive spaces and even converts better with keywords that are low in search volume. It’s better to have a small increase in web traffic and sales, rather than none.
- Hitting the 120-200 minimum word count: Do this for all products in your online catalogue and avoid writing beyond this range. Writing too much could be a distraction to the potential sale.
- Uploading enticing images: Try to aim for at least three images per product, including one that shows it in use. You might also consider adding product-specific text to images that highlight dimensions and special features.
- Avoid copying manufacturer descriptions: Google will consider this duplicate content and you’ll end up taking a hit to your SEO.
Related: How to boost ecommerce search rankings in 8 steps
6.Leverage SEO with a blog
Blogging is the most efficient way to increase web traffic online. They serve many purposes but are often used for informational content. Even Airbnb and Paypal use blog posts to attract visitors to their site.
Here are just a few ways blogs can improve SEO rankings for your site:
- Drive organic traffic to your site: Incorporating long tail keywords into your posts can help bring new users into your site via Google.
- Increase dwell time: Posts that have engaging content will keep users on your site longer.
- Boost authority: Informational posts are often picked up by other sites who want to linkback to your site as a source.
Focus on quality over volume
When it comes to blog content, you want to ensure your posts offer users valuable information that’s helpful and relevant.Don’t post articles for the sake of filling up space on your site.
Instead, aim to solve customer problems by answering common questions they might have.
For example, a wedding planner might write a long form article titled “What does a wedding planner do?” to address a common query users search for.
Remember to focus on one primary keyword per blog post and scatter it throughout the text naturally. Combining words like “How”, “What” and “Why” with your keyword will make it sound more helpful for users and Google alike.
Ensure your posts are easy to read
You can make readability more convenient for your users by:
- Using short sentences
- Keeping paragraphs concise
- Optimizing images for quicker page loads
This will allow users to quickly scan the text for information they need. Plus, it makes it easier for Google bots to crawl you site for ranking purposes.
Another best practise is to highlight important information by:
- Adding bold text
- Making bulleted points
- Italicizing blocks of text
Google’s John Mueller confirmed that bolding important words in a paragraph can improve SEO.
It’s also useful for ecommerce sites to include links to priority products and category pages on relevant blog posts. Just remember to make it sound natural and not too spammy.
Continue to audit older posts
Do revisit your old blog posts on a regular basis and update or extend them when possible. Google hates inactive dusty sites and will reward sites with fresh new content.
Don’t forget that your blog posts must also include a title tag and meta description. Be sure you include your keywords in the meta data and that it is up-to-date with Google’s standards.
Related: Blog post SEO: Step-by-step guide to writing a search-friendly blog article
7. Optimize images

Images are the second-most popular way to search online. They help users find what they’re looking for and serve as a visual guide in their buying journey.
But if you’re not optimizing your images before uploading, you might be missing out on valuable SEO rankings.
A couple of good ways you can improve SEO using images is so to:
- Include alt text: Alt text (aka image alt or alt attributes) helps search engines understand what the image is about. It also helps with accessibility for users with screen readers and displays when browsers can’t process images correctly.
- Compress images: This helps boost your on-page loading speed and can be done using Photoshop or by using a site like TingPNG before uploading.
Optimizing for both areas will make it easier for Google to crawl and decipher your site. But if you need a little more help with alt text, read the section below.
Key notes for writing alt text
Despite the latest advances in technology, search engine crawlers can’t see images like humans do. They must rely on the accompanying alt text to help them out.
One best practice for alt text is to keep it simple. These descriptions are meant be short and should include 125 characters or less (including spaces). There’s no need for gimmicks or extra filler worlds like “this is an image of …” Simply describe what the image is about in the most direct way possible.
For example, the alt text for the image above could be, “Close up of someone holding a pair of glasses.”
Image optimization made easy
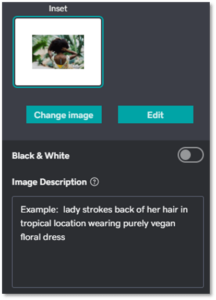
GoDaddy’s Website Builder makes it easy to edit alt text on images. Simply click on an image insider the editor and write your alt text in the box designated for “Image description.”
You can also use GoDaddy’s Website Builder to automatically compress your images, along with any other large files you may have already uploaded.
8. Is your site mobile friendly?
Making your site mobile-friendly is an important factor for Google rankings. It’s a primary reason why mobile-first indexing was created and adds to the overall convenience for users on-the-go.
Users should be able to experience your website on a mobile or tablet device the same way they do on a desktop.
It needs to be easily accessible without needing to pinch or squeeze to view your content.
Google’s Mobile-Friendly tool is a great way to test your website when optimizing for mobile devices. Or if you don’t want to hassle with checking yourself, GoDaddy’s Website Builder has standard built-in mobile responsiveness.
9. Submit your sitemap
A sitemap helps search engines crawl your website and index it faster. It consists of a file that contains all the URLs on your page, plus metadata that shows each one’s importance and the date they were last updated.
If you’re not using GoDaddy or a content management system (CMS) like WordPress, you’ll need to create one using a tool like XML sitemap generator.
Submitting your sitemap to Google is the last step in this process. You can do this by logging into your Google Search Console (GSC) account and entering it in the “Sitemaps” tab in the side bar.
Backlinko has a great step-by-step guide if you need extra help importing your sitemap link into your account.
10. Experiment with backlinking
Sometimes other websites will link to your site when they want to refer to you as a source of information. This is considered backlinking and it helps boost your authority when Google notices they are coming from relevant and reputable websites.
Another tactic is to partner with other websites in your industry and guest blog on their site. This allows you to share your expertise with similar audiences so that you can backlink and gain new leads.
It also helps to include links to other relevant blogs on your site whenever you find valuable information you can share with your audience.
Additionally, Google and major search engines consider a backlink from a site you don’t own as a vote for your business. Numerous studies suggest that backlinks from quality websites can help increase a site’s rankings and traffic.
Related: How to get backlinks to a small business website
11. Local business

Local businesses can make use of additional opportunities in search engines with things like Google My Business (GMB). This allows brick and mortar or service businesses to reach local audiences in the surrounding area through rich search results.
In other words, your business can have a dedicated profile with Google that appears any time someone submits a query for relevant businesses in their area. It typically includes things like:
- Your website’s URL address
- Photos that highlight your business or services
- Customer reviews and more
All of this info can be optimized to improve SEO and there are plenty of other distinct things to do to increase website’s traffic locally. You can find more information about local SEO with this handy guide from our blog.
12. Measure your success
Google Analytics (GA) is a free tool for monitoring website traffic from any source. Many digital marketers use it to collect insight on:
- Target audiences
- Website performance
- Ad campaigns
However, it can be a bit intimidating if you’ve never used it before. GA contains a wide variety of reports and data that take time learning how to navigate.
It can also be a challenge to set it up, since it requires a bit of coding knowledge to get started.
To make things easier, GoDaddy’s Website Builder integrates with Google Search Console to track search engine performance for you. It also provides technical SEO suggestions to help improve your website.
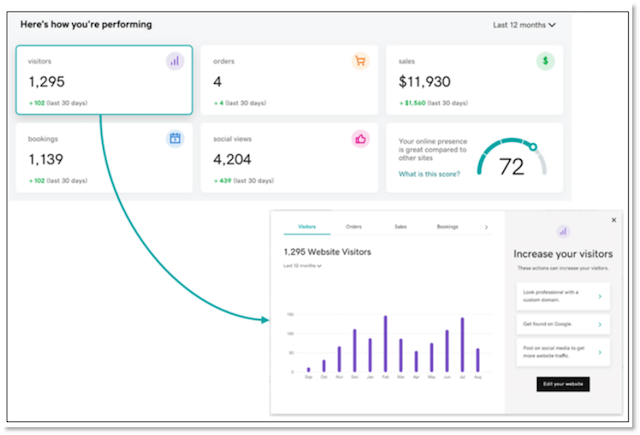
Most plans for GoDaddy’s Website Builder also include a simplified window inside the platform for essential organic performance. This makes is so there’s no need to log in anywhere else until you’re ready for more advanced steps. It’s a great launching point for beginners interested in learning more about GA.
Check out Google Analytics’ Analytics Academy playlist for more information.
Final takeaways
If you want to have a competitive edge in today’s online marketplace, you need to ensure your business is ranking on search engines. The best way to do that is to improve SEO on your site, so that search bots can crawl it and easily determine what your site is about.The more SEO-friendly your site is, the higher it’ll rank in search queries.
Users with GoDaddy’s Website Builder have the upper hand since it includes built-in benefits like:
- Standardized mobile optimization
- Automatic XML sitemaps that don’t need to be maintained
- SSL certificate with HTTPS for data encryption
- Access to Google Search Console
You also get the added benefit of 24/7 support in case you need extra help determining your next move. And you can even opt for additional plans (like GoDaddy’s SEO Services) to help boost your online presence even more.
Remember, improving SEO for your site is all about time and dedication. Now’s the time to jump in and capitalize on opportune moments that get your business noticed online.
Source :
https://www.godaddy.com/garage/how-to-improve-seo-fast/


