What is Shadow IT and why is it so risky?

Shadow IT refers to the practice of users deploying unauthorized technology resources in order to circumvent their IT department. Users may resort to using shadow IT practices when they feel that existing IT policies are too restrictive or get in the way of them being able to do their jobs effectively.

An old school phenomenon

Shadow IT is not new. There have been countless examples of widespread shadow IT use over the years. In the early 2000s, for example, many organizations were reluctant to adopt Wi-Fi for fear that it could undermine their security efforts. However, users wanted the convenience of wireless device usage and often deployed wireless access points without the IT department’s knowledge or consent.

The same thing happened when the iPad first became popular. IT departments largely prohibited iPads from being used with business data because of the inability to apply group policy settings and other security controls to the devices. Even so, users often ignored IT and used iPads anyway.

Of course, IT pros eventually figured out how to secure iPads and Wi-Fi and eventually embraced the technology. However, shadow IT use does not always come with a happy ending. Users who engage in shadow IT use can unknowingly do irreparable harm to an organization.

Even so, the problem of shadow IT use continues to this day. If anything, shadow IT use has increased over the last several years. In 2021 for example, Gartner found that between 30% and 40% of all IT spending (in a large enterprise) goes toward funding shadow IT.

Shadow IT is on the rise in 2022

Remote work post-pandemic

One reason for the rise in shadow IT use is remote work. When users are working from home, it is easier for them to escape the notice if the IT department than it might be if they were to try using unauthorized technology from within the corporate office. A study by Core found that remote work stemming from COVID requirements increased shadow IT use by 59%.

Tech is getting simpler for end-users

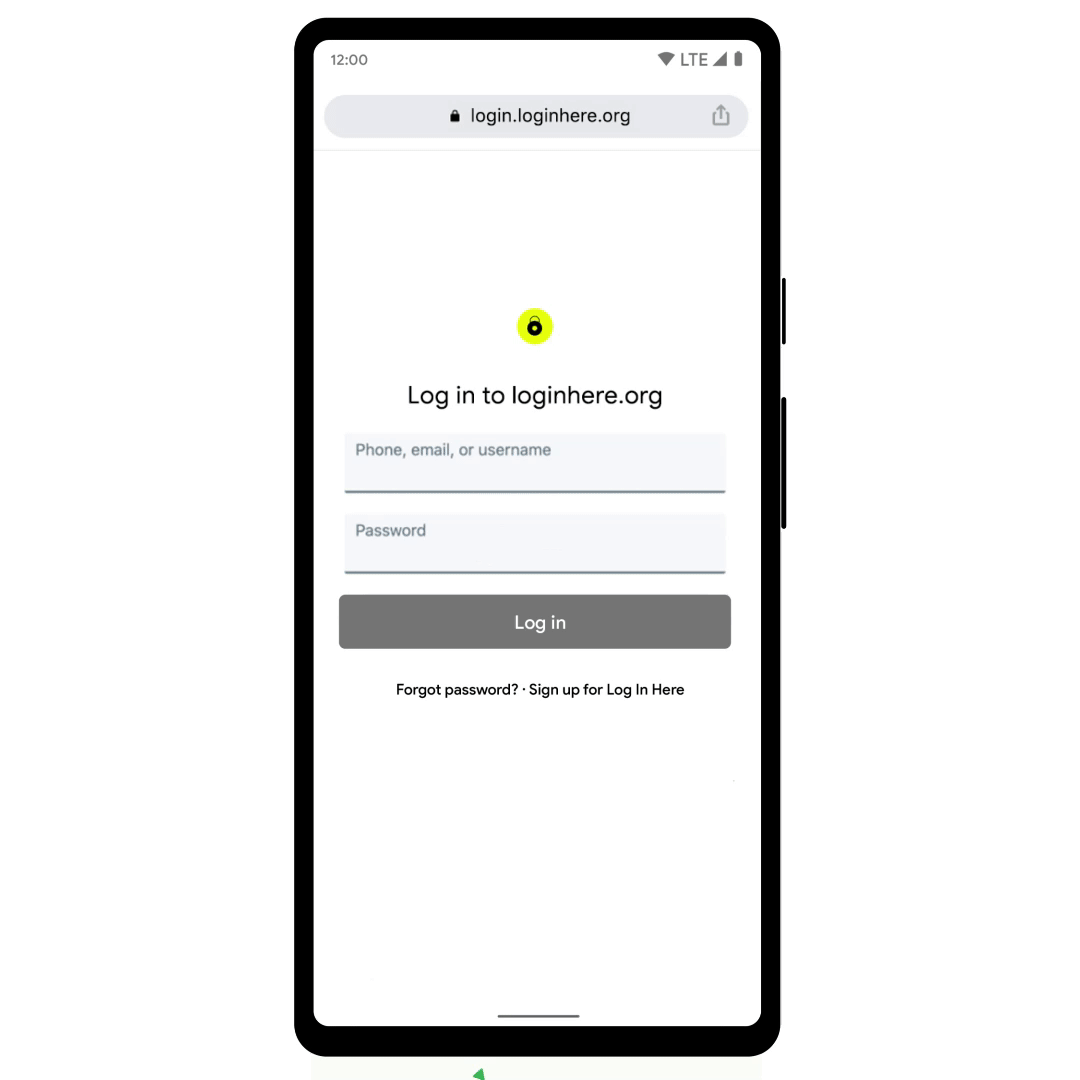
Another reason for the increase in shadow IT is the fact that it is easier than ever for a user to circumvent the IT department. Suppose for a moment that a user wants to deploy a particular workload, but the IT department denies the request.

A determined user can simply use their corporate credit card to set up a cloud account. Because this account exists as an independent tenant, IT will have no visibility into the account and may not even know that it exists. This allows the user to run their unauthorized workload with total impunity.

In fact, a 2020 study found that 80% of workers admitted to using unauthorized SaaS applications. This same study also found that the average company’s shadow IT cloud could be 10X larger than the company’s sanctioned cloud usage.

Know your own network

Given the ease with which a user can deploy shadow IT resources, it is unrealistic for IT to assume that shadow IT isn’t happening or that they will be able to detect shadow IT use. As such, the best strategy may be to educate users about the risks posed by shadow IT. A user who has a limited IT background may inadvertently introduce security risks by engaging in shadow IT. According to a Forbes Insights report 60% of companies do not include shadow IT in their threat assessments.

Similarly, shadow IT use can expose an organization to regulatory penalties. In fact, it is often compliance auditors – not the IT department – who end up being the ones to discover shadow IT use.

Of course, educating users alone is not sufficient to stopping shadow IT use. There will always be users who choose to ignore the warnings. Likewise, giving in to user’s demands for using particular technologies might not always be in the organization’s best interests either. After all, there is no shortage of poorly written or outdated applications that could pose a significant threat to your organization. Never mind applications that are known for spying on users.

The zero-trust solution to Shadow IT

One of the best options for dealing with shadow IT threats may be to adopt zero trust. Zero-trust is a philosophy in which nothing in your organization is automatically assumed to be trustworthy. User and device identities must be proven each time that they are used to access a resource.

There are many different aspects to a zero-trust architecture, and each organization implements zero-trust differently. Some organizations for instance, use conditional access policies to control access to resources. That way, an organization isn’t just granting a user unrestricted access to a resource, but rather is considering how the user is trying to access the resource. This may involve setting up restrictions around the user’s geographic location, device type, time of day, or other factors.

Zero-trust at the helpdesk

One of the most important things that an organization can do with regard to implementing zero trust is to better secure its helpdesk. Most organizations’ help desks are vulnerable to social engineering attacks.

When a user calls and requests a password reset, the helpdesk technician assumes that the user is who they claim to be, when in reality, the caller could actually be a hacker who is trying to use a password reset request as a way of gaining access to the network. Granting password reset requests without verifying user identities goes against everything that zero trust stands for.

Specops Software’s Secure Service Desk can eliminate this vulnerability by making it impossible for a helpdesk technician to reset a user’s password until that user’s identity has been proven. You can test it out for free to reduce the risks of shadow IT in your network.

Source :
https://thehackernews.com/2022/06/what-is-shadow-it-and-why-is-it-so-risky.html

Staying safe online with our updated Google Password Manager

Strong, unique passwords are key to helping keep your personal information secure online. That’s why Google Password Manager can help you create, remember and autofill passwords on your computer or phone: on the web in Chrome, and in your favorite Android and iOS apps.

Video showing how Google Password Manager is built into Chrome and Android, and how you can set it up as your passwords' provider on your iPhone.

Today we’ve started rolling out a number of updates that help make the experience easier to use, with even stronger protections built in.

A consistent look and feel, across web and apps

We’re always grateful for feedback, and many of you have shared that managing passwords between Chrome and Android has been confusing at times: “It’s the same info in both places, so why does it look so different?” With this release, we’re rolling out a simplified and unified management experience that’s the same in Chrome and Android settings. If you have multiple passwords for the same sites or apps, we’ll automatically group them. And for your convenience, you can create a shortcut on your Android home screen to access your passwords with a single tap.

GIF showing new Google Password Manager shortcut on an Android homescreen.

You can now add a shortcut to Google Password Manager to your Android homescreen.

More powerful password protections

Google Password Manager can create unique, strong passwords for you across platforms, and helps ensure your passwords aren’t compromised as you browse the web. We’re constantly working to expand these capabilities, which is why we’re giving you the ability to generate passwords for your iOS apps when you set Chrome as your autofill provider.

Image showing how Chrome can automatically generate strong passwords on iOS

You can now create strong passwords on your computer or mobile, on any operating system.

Chrome can automatically check your passwords when you enter them into a site, but you can have an added layer of confidence by checking them in bulk with Password Checkup. We’ll now flag not only compromised credentials, but also weak and re-used passwords on Android. If Google warns you about a password, you can now fix them without hassle with our automated password change feature on Android.

Image showing how the Password Checkup feature flags compromised passwords on Android

For your peace of mind, Password Checkup on Android can flag compromised, weak and reused passwords.

To help protect even more people, we’re expanding our compromised password warnings to all Chrome users on Android, Chrome OS, iOS, Windows, MacOS and Linux.

Simplified access and password management

Google built its password manager to stay out of your way — letting you save passwords when you log in, filling them when you need them and ensuring they aren’t compromised. However, you might want to add your passwords to the app directly, too. That’s why, due to popular demand, we’re adding this functionality to Google Password Manager on all platforms.

GIF showing how you can add your passwords directly on all platforms.

Adding your passwords directly is now possible on all platforms.

In 2020, we announced Touch-to-Fill to help you fill your passwords in a convenient and recognizable way. We’re now bringing Touch-to-Login to Chrome on Android to make logging in even quicker by allowing you to securely log in to sites directly from the overlay at the bottom of your screen.

GIF showing new touch-to-login feature

Touch-to-Login signs you in directly from a recognizable overlay.

Many of these features were developed at the Google Safety Engineering Center (GSEC), a hub of privacy and security experts based in Munich, so Guten Tag from the team! Of course, our efforts to create a safer web are a truly global effort – from our early work on 2-step verification, to our future investments in technologies like passkeys – and these updates that we are rolling out over the next months are an important part of that work.

Source :
https://blog.google/products/chrome/password-manager-update/

Your Guide to WordPress Favicons

Recognition is crucial for your website to succeed. From creating a great logo to developing key messaging and delivering great content, the easier it is for visitors to recognize your brand, the better the chances they’ll remember your site and make the move from content curiosity to sales conversion.

But reliable recognition isn’t just about the big things — done well, even the smallest details of your WordPress website can help it stand out from the crowd and attract customer notice. This is the role of the favorite icon or “favicon” that’s used in web browser tabs, bookmarks, and on mobile devices as the app image for your site.

Not sure how favicons work or how to get them up and running on your site? We’ve got you covered with our functional guide to favicons — what they are, why they matter, and how to enable them in WordPress.

Grow Your Business With HubSpot’s Tools for WordPress Websites

If you would rather follow along with a video, here’s a walkthrough created by Elegant Themes:

https://youtube.com/watch?v=B4pmaGumOWY%3Ffeature%3Doembed

What is a WordPress Favicon?

The official WordPress support page defines a favicon as “an icon associated with a particular website or web page.” This description doesn’t do the term justice — in fact, favicons are everywhere and are intrinsically associated with your brand.

Let’s take a closer look at how favicons look and why they matter below. 

WordPress Favicon Size

The typical size of a WordPress favicon is 512 x 512 pixels. These icons are stored as .ico files in the root directory of your WordPress server.

But what does a favicon look like in real life? For a quick example, take a look at the browser tab of this webpage if you’re on a desktop or the area just under the address bar on your mobile device. Notice anything? That orange symbol with lines and circles is HubSpot’s favicon — and it shows up anytime you’re on our site.

In most cases, favicons are the same as brand logos scaled down to fit web and mobile browsers. Where this isn’t possible — such as cases where your logo is too complex or detailed — site owners typically opt for similar color schemes and thematic elements to ensure brand consistency.

Once you start seeing favicons you can’t unsee them; from webpages to tabs to bookmarks and mobile applications, the icon you choose for your favicon is inextricably linked to your site and your brand — so make sure you choose wisely.

Why Favicons Matter

Favicons are the visual currency of your brand. They’re everywhere — from browsers to bookmarks to mobile apps — and become an integral part of your site’s overall branding strategy.

As result, effective favicon design and deployment offers three broad benefits:

Improved Brand Recognition

Think of your favicon like your calling card — the icon needs to be simple, recognizable and consistent. The more places your favicon appears, the better, since this makes it easy for users to connect your WordPress site with your icon image.

Consistency is also key as users open multiple browser tabs and the available space for text descriptions naturally shrinks. Open enough tabs and all that’s left is — you guessed it — room for the favicon.

Increased Consumer Confidence

While visitors may not be able to define what a favicon is or how it works, these icons are inherently familiar. So familiar, in fact, that sites without favicons often stand out from the crowd for all the wrong reasons.

Much like relevant social media content and secure site connections, favicons are critical to boosting consumer confidence in the products or services you offer on your site.

Integrated Mobile Consistency

The impact of mobile devices can’t be ignored, with smartphones and tablets now outpacing desktops as the primary means of consumer online interaction. Favicons make it possible to ensure your brand easily translates to mobile — when users create website bookmarks on mobile home screens, your favicon stands in for the link.

Favicon Creation Guidelines

Not sure how to get started creating your site’s favicon? Let’s break down some best-practice guidelines.

1. Get the size right.

As noted above, favicons are typically 512 x 512 pixels in size. While it’s possible to use a larger WordPress favicon size, the platform will often ask you to crop the image down.

2. Keep it simple.

While it’s possible to add background colors and other customization to your favicon, keeping it simple is often the best choice. Here, simplicity includes opting for transparency over background colors and keeping the number of foreground colors in your favicon to one or two at most.

Ideally, your favicon will look almost identical to your brand’s logo — if that’s not possible, try to pull elements from your logo such as shapes or color schemes that help tie in your new favicon.

3. Choose wisely.

Site owners can update their favicon at any time, but it’s a good idea to keep the number of changes to a minimum. Here’s why: If users see a different favicon every time they log on to your website, they won’t have an opportunity to associate a specific image with your brand.

Bottom line? Better to go without a favicon until you find one that works for your site and that you don’t plan on changing.

How to Enable WordPress Favicons

To get your favicon up and running on your WordPress site, you’ve got three options:

  1. Use the Site Icon feature
  2. Install a favicon plugin
  3. Upload the new favicon yourself

Let’s break down each method in more detail.

1. Use the site icon feature.

As of WordPress version 4.3, the content management system (CMS) includes a Site Icon function that enables favicons. Simply prepare your image file — which can be a .jpeg, .ico, .gif or .png file — and head to the Administration page of your WordPress Site.

Next, click on “Appearance” and then “Customize”, then click “Site Identity.” Now, click “Select Image” under the Site Icon subheading and upload the file you’ve prepared. You should see a screen like this:

Using site icon feature in WordPress dashboard to create favicon

If you like the favicon you’ve created, no further action is required. If not, you can easily remove the file or upload a new image.

2. Install a favicon plugin.

You can also use a plugin — such as Favicon by RealFaviconGenerator — to create and deploy your favicon. This must-have WordPress plugin not only lets you customize your favicon but also ensures that multiple versions are created to satisfy the requirements of different operating systems and device versions.

As long as the image you upload to the plugin is at least 70 x 70 pixels, the RealFaviconGenerator will take care of the rest.

3. Upload the new favicon yourself.

If you’d rather do the legwork yourself, you can create and upload your own favicon to your WordPress site.

First, create an image that’s at least 16 x 16 pixels and is saved as a .ico file. Then, use an FTP client to upload this file to the main folder of your current WordPress theme — typically the same place as your wp-admin and wp-content folders.

While this should display your favicon in most web browsers, some older browser versions will require you to edit WordPress header HTML code. The result? DIY favicons aren’t recommended unless you’re familiar with more technical WordPress functions.

Final Favicon Thoughts

Whie favicons form only a small part of your WordPress website build, they’re critical for website recognition. Consistent and clear favicons make it easy for visitors to remember your site and carry this mental connection across desktop, tablet, and mobile devices.

Source :
https://blog.hubspot.com/website/wordpress-favicon#:~:text=WordPress%20Favicon%20Size&text=These%20icons%20are%20stored%20as,directory%20of%20your%20WordPress%20server.

What are the IP addresses for PayPal NVP/SOAP servers?

When API (Application Programming Interfaces) calls are made to the NVP/SOAP servers, PayPal strongly recommends that you use Domain Name Service (DNS) results with the default Time To Live (TTL) values, to determine the IP addresses of our servers.

PayPal does not recommend adding IPs to an allow list. If you must allow list the IP addresses for any of these domains, use the following ranges: 

  • 173.0.80.0/20
  • 64.4.240.0/21
  • 64.4.248.0/22
  • 66.211.168.0/22
  • 91.243.72.0/23

The above IPs are applicable to the following Live and Sandbox Endpoints:

LiveAPI Endpointsapi.paypal.com api-3t.paypal.com svcs.paypal.com Ipnpb.paypal.comSFTP Endpointsaccounts.paypal.com batch.paypal.com disputes.paypal.com reports.paypal.comPayflow Endpointsmanager.paypal.com  payflowlink.paypal.com  payflowpro.paypal.com  partnermanager.paypal.compayments-reports.paypal.com/reportingengine  paypalmanager.paypal.comregistration.paypal.comxml-reg.paypal.comInformative Domainnotify.paypal.com
SandboxAPI Endpointsapi.sandbox.paypal.comapi-3t.sandbox.paypal.comsvcs.sandbox.paypal.comIpnpb.sandbox.paypal.comSFTP Endpointsaccounts.sandbox.paypal.com batch.sandbox.paypal.com disputes.sandbox.paypal.com reports.sandbox.paypal.com dropzone.sandbox.paypal.comPayflow Endpointspilot-payflowpro.paypal.compilot-payflowlink.paypal.compayments-reports.paypal.com/test-reportingengineInformative Domainipn.sandbox.paypal.com

See also:

  • NVP/SOAP API developer documentation

    Source :
    https://www.paypal.com/us/smarthelp/article/what-are-the-ip-addresses-for-live-paypal-servers-ts1056

Google Workspace Now Warns Admins of Sensitive Changes

Google this week announced that new warnings added in the Google Workspace Alert Center will keep administrators notified of critical and sensitive configuration changes.

Previously known as G Suite, Google Workspace provides secure collaboration and productivity tools for enterprises of all sizes. Accessible from anywhere in Google Workspace, the Alert Center delivers real-time security alerts and insights, to help admins mitigate threats such as phishing and malware.

With the new alerts in place, admins will also receive notifications whenever select changes are made to their Google Workspace configurations.

Specifically, warnings will be displayed when the primary admin is changed, when the password for a super admin account has been reset, and when changes are made to SSO profiles – when a third-party SSO profile has been added, updated, or deleted for the organization.

“These additional intelligent alerts will closely monitor several sensitive actions, making it easier for admins to stay on top of high-risk changes to their environment and potentially malicious actions being taken by bad actors,” Google explains.

An email notification containing key details on the event will be delivered to admins and super admins for each alert. The security investigation tool will allow admins to further investigate the reported incident.

The alerts and their associated email notifications are enabled by default and cannot be turned off.

The new capability is rolling out to all Google Workspace customers, including legacy G Suite Basic and Business customers, and is expected to become visible for everyone in the next couple of weeks.

Earlier this year, Google boosted malware and phishing protections in Workspace with updated comment notifications that now also include the commenter’s email address, so that users can better assess the legitimacy of the message.

Source :
https://www.securityweek.com/google-workspace-now-warns-admins-sensitive-changes

Vulnerability in Amazon Photos Android App Exposed User Information

Cybersecurity firm Checkmarx has published details on a high-severity vulnerability in the Amazon Photos Android application that could have allowed malicious apps to steal an Amazon access token.

With more than 50 million downloads, Amazon Photos offers cloud storage, allowing users to store photos and videos at their original quality, as well as to print and share photos, and to display them on multiple Amazon devices.

In November 2021, Checkmarx researchers identified an issue in the application that could have leaked the Amazon access token to malicious applications on the user’s device, potentially exposing the user’s personal information. The bug was addressed in December 2021.

The leaked Amazon access token is used for user authentication across Amazon APIs, including some that contain personal information such as names, addresses, and emails. Through the Amazon Drive API, for example, the attacker could access the user’s files, Checkmarx says.

The issue, the researchers explain, resided in a misconfigured component that was “exported in the app’s manifest file, thus allowing external applications to access it.”

The issue resulted in the access token being sent in the header of a HTTP request, but the most important aspect was the fact that an attacker could control the server receiving this request.

“The activity is declared with an intent-filter used by the application to decide the destination of the request containing the access token. Knowing this, a malicious application installed on the victim’s phone could send an intent that effectively launches the vulnerable activity and triggers the request to be sent to a server controlled by the attacker,” Checkmarx notes.

The leaked token could provide the attacker with access to all of the user information available through the Amazon API. Using the Amazon Drive API, the attacker could access users’ files and read, re-write, or delete their contents.

The researchers also explain that the access token could have allowed anyone to modify files and erase their history, to prevent recovery, or could have completely deleted files and folders from the user’s Amazon Drive account.

“With all these options available for an attacker, a ransomware scenario was easy to come up with as a likely attack vector. A malicious actor would simply need to read, encrypt, and re-write the customer’s files while erasing their history,” the researchers say.

The vulnerability might have had a wider impact, given that the potentially affected APIs that the researchers identified represent only a small subset of the entire Amazon ecosystem, Checkmarx also notes.

Source :
https://www.securityweek.com/vulnerability-amazon-photos-android-app-exposed-user-information

AstraLocker 2.0 infects users directly from Word attachments

A lesser-known ransomware strain called AstraLocker has recently released its second major version, and according to threat analysts, its operators engage in rapid attacks that drop its payload directly from email attachments.

This approach is quite unusual as all the intermediate steps that typically characterize email attacks are there to help evade detection and minimize the chances of raising red flags on email security products.

According to ReversingLabs, which has been following AstraLocker operations, the adversaries don’t seem to care about reconnaissance, evaluation of valuable files, and lateral network movement.

Instead, they are performing “smash-n-grab” attacks to his immediately hit with maximum force aiming for a quick payout.

From document to encryption

The lure used by the operators of AstraLocker 2.0 is a Microsoft Word document that hides an OLE object with the ransomware payload. The embedded executable uses the filename “WordDocumentDOC.exe”.

To execute the payload, the user needs to click “Run” on the warning dialog that appears upon opening the document, further reducing the chances of success for the threat actors.

Unknown publisher warning
Unknown publisher warning (ReversingLabs)

This bulk approach is in line with Astra’s overall “smash-n-grab” tactic, choosing OLE objects instead of VBA macros that are more common in malware distribution.

Another peculiar choice is the use of SafeEngine Shielder v2.4.0.0 to pack the executable, which is such an old and outdated packer that reverse engineering is almost impossible.

After an anti-analysis check to ensure that the ransomware isn’t running in a virtual machine and that no debuggers are loaded in other active processes, the malware prepares the system for encryption using the Curve25519 algorithm.

The preparation includes killing processes that could jeopardize the encryption, deleting volume shadow copies that could make restoration easier for the victim, and stopping a list of backup and AV services. The Recycle Bin is simply emptied instead of encrypting its contents.

AstroLocker 2.0 ransom note
AstraLocker 2.0 ransom note (ReversingLabs)

AstraLocker background

According to the code analysis of ReversingLabs, AstraLocker is based on the leaked source code of Babuk, a buggy yet still dangerous ransomware strain that exited the space in September 2021.

Additionally, one of the Monero wallet addresses listed in the ransom note is linked to the operators of Chaos ransomware

This could mean that the same operators are behind both malware or that the same hackers are affiliates on both ransomware projects, which is not uncommon.

Judging from the tactics that underpin the latest campaign, this doesn’t seem to be the work of a sophisticated actor but rather one who is determined to deliver as many destructive attacks as possible.

Source :
https://www.bleepingcomputer.com/news/security/astralocker-20-infects-users-directly-from-word-attachments/

Microsoft Exchange servers worldwide backdoored with new malware

Attackers used a newly discovered malware to backdoor Microsoft Exchange servers belonging to government and military organizations from Europe, the Middle East, Asia, and Africa.

The malware, dubbed SessionManager by security researchers at Kaspersky, who first spotted it in early 2022, is a malicious native-code module for Microsoft’s Internet Information Services (IIS) web server software.

It has been used in the wild without being detected since at least March 2021, right after the start of last year’s massive wave of ProxyLogon attacks.

“The SessionManager backdoor enables threat actors to keep persistent, update-resistant and rather stealth access to the IT infrastructure of a targeted organization,” Kaspersky revealed on Thursday.

“Once dropped into the victim’s system, cybercriminals behind the backdoor can gain access to company emails, update further malicious access by installing other types of malware or clandestinely manage compromised servers, which can be leveraged as malicious infrastructure.”

SessionManager’s capabilities include, among other features:

  • dropping and managing arbitrary files on compromised servers
  • remote command execution on backdoored devices
  • connecting to endpoints within the victim’s local network and manipulating the network traffic

In late April 2022, while still investigating the attacks, Kaspersky found that most of the malware samples identified earlier were still deployed on 34 servers of 24 organizations (still running as late as June 2022).

Additionally, months after the initial discovery, they were still not flagged as malicious by “a popular online file scanning service.”

After deployment, the malicious IIS module allows its operators to harvest credentials from system memory, collect information from the victims’ network and infected devices, and deliver additional payloads (such as a PowerSploit-based Mimikatz reflective loader, Mimikatz SSPProcDump, and a legitimate Avast memory dump tool).

SessionManager targets
SessionManager targets (Kaspersky)

“The exploitation of exchange server vulnerabilities has been a favorite of cybercriminals looking to get into targeted infrastructure since Q1 2021. The recently discovered SessionManager was poorly detected for a year and is still deployed in the wild,” added Pierre Delcher, a Senior Security Researcher at Kaspersky’s GReAT.

“In the case of Exchange servers, we cannot stress it enough: the past year’s vulnerabilities have made them perfect targets, whatever the malicious intent, so they should be carefully audited and monitored for hidden implants, if they were not already.”

Kaspersky uncovered the SessionManager malware while continuing to hunt for IIS backdoors similar to Owowa, another malicious IIS module deployed by attackers on Microsoft Exchange Outlook Web Access servers since late 2020 to steal Exchange credentials.

Gelsemium APT group links

Based on similar victimology and the use of the OwlProxy malware variant, Kaspersky’s security experts believe the SessionManager IIS backdoor was leveraged in these attacks by the Gelsemium threat actor as part of a worldwide espionage operation.

This hacking group has been active since at least 2014, when some of its malicious tools were spotted by G DATA’s SecurityLabs while investigating the “Operation TooHash” cyber-espionage campaign. In 2016, new Gelsemium indicators of compromise surfaced in a Verint Systems presentation during the HITCON conference.

Two years later, in 2018, VenusTech unveiled malware samples linked to the Operation TooHash and an unknown APT group, later tagged by Slovak internet security firm ESET as early Gelsemium malware versions.

ESET also revealed last year that its researchers linked Gelsemium to Operation NightScout, a supply-chain attack targeting the update system of the NoxPlayer Android emulator for Windows and macOS (with over 150 million users) to infect gamers’ systems between September 2020 and January 2021.

Otherwise, the Gelsemium APT group is mainly known for targeting governments, electronics manufacturers, and universities from East Asia and the Middle East and mostly flying under the radar.

Source :
https://www.bleepingcomputer.com/news/security/microsoft-exchange-servers-worldwide-backdoored-with-new-malware/

How to Send Email to WordPress Users Without Code

Do you want to send email to WordPress users from your admin dashboard?

It’s actually quite simple to use WordPress for sending emails to your registered users. This can be useful if you have a membership site and want to send email announcements or other updates to your site members.

In this article, we’ll show walk you through the steps for sending emails to WordPress users without needing any code.

When Should You Send Email to WordPress Users?

WordPress automatically sends transactional emails to your customers like order receipts and password reset links. But you can also send mass emails to your entire list of users from WordPress. While this isn’t a recommended practice, it’s a good option to have in case you don’t have a proper email list maintained in an email marketing service.

If your website allows users to register, learning how to email users right from your WordPress dashboard is always an important skill. You may want to send emails about new product updates, changes to your website, or other important announcements.

How to Send Email to All WordPress Registered Users

To send emails to your WordPress users, just follow the steps below. First, we’ll set up WP Mail SMTP to take care of your WordPress email delivery from the backend. Then, we’ll set up another plugin that lets you select your WordPress email recipients, compose an email, and send it.

In This Article

Let’s begin.

1. Set Up WP Mail SMTP

First, you’ll need WP Mail SMTP on your site to deliver your emails reliably to intended recipients.

By default, WordPress uses PHP Mail for emails which is commonly responsible for poor email delivery and spam blocks by mailing servers.

A much more dependable method for sending emails takes advantage of SMTP. In SMTP, your emails are properly authenticated, so their legitimacy is easy to verify. As a result, your WordPress emails are able to avoid spam filters and reach recipients without fail.

WP Mail SMTP for sending email to wordpress users

To install WP Mail SMTP on your site, first select a plan that’s appropriate for your needs.

You’ll be able to log into your WP Mail SMTP account area once you’ve purchased a plan and created your account. From your account area, click on the Downloads tab.Download WP Mail smtp

Now, press the Download Mail SMTP button to start the ZIP file download.

Download WP Mail SMTP ZIP file

While the download is in progress, it’s a good idea to use this moment to copy your WP Mail SMTP license key. You’ll need this later on.

WP Mail SMTP License

When the file has finished downloading, open your WordPress dashboard. Then, go to Plugins » Add New.

add new plugin

Here, you can upload the plugin file that you just downloaded. Click on the Choose File button and locate your WP Mail SMTP zip file in your download folder.

select plugin file

After selecting the file, click on Install Now. It will only take a few seconds for WordPress to install this plugin.

install plugin

Press the blue Activate Plugin to activate WP Mail SMTP on your site.

Activate plugin

Great job! Now we just have to configure a mailer with WP Mail SMTP to finish the setup.

2. Integrate WP Mail SMTP With a Mailer

WP Mail SMTP needs an API connection with a mailer service in order to deliver your WordPress emails properly.

The WP Mail SMTP setup wizard allows you to set up a connection between your WordPress site and a mailer service very easily.

After you activate the plugin, the setup wizard should launch automatically. But if for any reason it didn’t start, you can launch it manually.

From your WordPress dashboard, go to WP Mail SMTP » Settings.  Underneath the Mail section, find and click the Launch Setup Wizard button.

Launch setup wizard

The wizard will ask you to select an SMTP mailer service from a wide range of options.

Select SendLayer option

If you need a reliable and reasonably priced mailer, we recommend SendLayer. However, you’re free to choose from other available options.

When you’ve selected a mailer, click Save and Continue. You’ll need to fill out a few fields to configure the mailer connection.

If you need help setting up a particular mailer, click one of the links below for detailed instructions.

Mailers available in all versionsMailers in WP Mail SMTP Pro
SendLayerAmazon SES
SMTP.comMicrosoft 365 / Outlook.com
SendinblueZoho Mail
Google Workspace / Gmail
Mailgun
Postmark
SendGrid
SparkPost
Other SMTP

In the final step of the setup, WP Mail SMTP will ask you to check the features that you want to enable. If you have the paid version, you can enable extra features like email logs (which we highly recommend for the purposes of this topic).

Email logs summaries on WP Mail SMTP

If you check the Pro features, the setup wizard will then require you to add your license key (which we copied in an earlier step). Insert your license key and then press Verify License Key.

verify license key

The wizard will now send a test email to make sure your configuration is properly set up. If all is good, move to the next step.

3. Get the Send Users Email Plugin

Now that you have WP Mail SMTP configured, you can rest assured that your emails originating from any plugin on your site will always deliver successfully.

But by default, there’s no way in WordPress to write an email and send it to your WordPress users at will.

To be able to send emails to any recipient of your choice in WordPress, you’ll need to install a plugin called Send Users Email.

Send users email

If you need help setting up this plugin, you can check out this guide on installing WordPress plugins.

When the plugin is installed and activated on your site, you can start sending emails to your WordPress users easily.

4. Send Email to Registered Users

Open your WordPress admin area and then click Email to Users » Email Roles.

email roles

You should now see a page with options to send emails to people selected by their assigned WordPress roles. If you want to send the email to all of your WordPress subscribers, checkmark the box against Subscriber.

Select subscribers

You can also select other types of users as your recipients such as administrators and authors. The email subject field lets you write a subject line for your email. There’s also a rich text field for composing the body of your email message.

After selecting recipients and writing the email, press the Send Message button,

Send message

Your email will now start sending to all WordPress users that you selected by role above.

But what if you only want to email individual users rather than mass emailing your entire list?

The Send Users Email includes a feature that lets you individually select each registered WordPress user you wish to send your email to.

To access this feature, go to Email to Users » Email Users. Here, you’ll see a list of all registered WordPress users on your site. You can simply select the users that you want to send emails to from this list.

email to individual

As before, you can use the email subject field and email message fields to customize your subject line and email content.

Press the blue Send Message button to send your email to individually selected WordPress users.

Send message

Congratulations! You now have the necessary tools to send emails to WordPress users entire individually or to your entire subscriber list.

5. Track Your WordPress Emails (Optional)

Generally, WordPress isn’t the best way to send emails and run email marketing campaigns. This is because of the inherent limitations of the platform when it comes to email functionalities.

WordPress is primarily a content management system, so its email capabilities are only basic. For the best results and much easier management, you should consider using a dedicated email marketing service (Sendinblue, Constant Contact, and MailerLite to name a few).

However, if you are going to send some of your emails from WordPress, then it’s wise to log and track your emails.

One of the many benefits of WP Mail SMTP Pro is that it includes email tracking features. With this feature, WP Mail SMTP can track how many times your emails were opened and clicked by your subscribers.

To enable this feature, navigate to WP Mail SMTP » Settings. 

WP Mail SMTP settings menu

On the top of the Settings page, click on the Email Log tab.

Email log settings tab

Here, make sure that the Email Log option is enabled.

Enable WordPress email logging

Now scroll down to view additional email tracking settings. You can enable open and click tracking to collect open and click rate data for every WordPress email you send to users.

Open and click tracking in WordPress

With email tracking enabled, you will be able to see engagement metrics for each email right within your WordPress dashboard.

Opens and clicks in WordPress email log

This information is extremely helpful as it allows you to experiment with different subject lines to produce higher engagement levels.

For more information, see our guide on tracking WordPress emails.

And that’s all! You now know how to send email to WordPress users (by role and individually) and also track the performance of your emails from your admin area!

Next, Take Email Tracking to the Next Level

There are only a few WordPress plugins that offer email tracking features. If you’d like to see a quick comparison of the best email tracking plugins, we’ve got a detailed guide just for you!

Also, if you’re being bombarded by spam on your site, check out our WordPress spam prevention tips to tackle this problem.

Fix Your WordPress Emails Now

​​Ready to fix your emails? Get started today with the best WordPress SMTP plugin. WP Mail SMTP Elite includes full White Glove Setup and offers a 14-day money-back guarantee.

Source :
https://wpmailsmtp.com/how-to-send-email-to-wordpress-users/

Securing Port 443: The Gateway To A New Universe

At Wordfence our business is to secure over 4 million WordPress websites and keep them secure. My background is in network operations, and then I transitioned into software development because my ops role was at a scale where I found myself writing a lot of code. This led me to founding startups, and ultimately into starting the cybersecurity business that is Wordfence. But I’ve maintained that ops perspective, and when I think about securing a network, I tend to think of ports.

You can find a rather exhaustive list of TCP and UDP ports on Wikipedia, but for the sake of this discussion let’s focus on a few of the most popular ports:

  • 20 and 21 – FTP
  • 22 – SSH
  • 23 – (Just kidding. You better not be running Telnet)
  • 25 – Email via SMTP
  • 53 – DNS
  • 80 – Unencrypted Web
  • 110 – POP3 (for older email clients)
  • 443 – Web encrypted via TLS
  • 445 – Active Directory or SMB sharing
  • 993 – IMAP (for email clients)
  • 3306 – MySQL
  • 6378 – Redis
  • 11211 – Memcached

If you run your eye down this list, you’ll notice something interesting. The options available to you for services to run on most of these ports are quite limited. Some of them are specific to a single application, like Redis. Others, like SMTP, provide a limited number of applications, either proprietary or open-source. In both cases, you can change the configuration of the application, but it’s rare to write a custom application on one of those ports. Except port 443.

In the case of port 443 and port 80, you have a limited range of web servers listening on those ports, but users are writing a huge range of bespoke applications on port 443, and have a massive selection of applications that they can host on that port. Everything from WordPress to Drupal to Joomla, and more. There are huge lists of Content Management Systems.

Not only do you have a wide range of off-the-shelf web applications that you can run on port 443 or (if you’re silly) port 80, but you also have a range of languages they might be coded in, or in which you can code your own web application. Keep in mind that the web server, in this case, is much like an SSH or IMAP server in that it is listening on the port and handling connections, but the difference is that it is handing off execution to these languages, their various development frameworks, and ultimately the application that a developer has written to handle the incoming request.

With SSH, SMTP, FTP, IMAP, MySQL, Redis and most other services, the process listening on the port is the process that handles the request. With web ports, the process listening on the port delegates the incoming connection to another application, usually written in another language, running at the application layer, that is part of the extremely large and diverse ecosystem of web applications.

This concept in itself – that the applications listening on the web ports are extremely diverse and either home-made or selected from a large and diverse ecosystem – presents unique security challenges. In the case of, say, Redis, you might worry about running a secure version of Redis and making sure it is not misconfigured. In the case of a web server, you may have 50 application instances written in two languages from five different vendors all on the same port, which all need to be correctly configured, have their patch levels maintained, and be written using secure coding practices.

As if that doesn’t make the web ports challenging enough, they are also, for the most part, public. Putting aside internal websites for the moment, perhaps the majority of websites derive their value from making services available to users on the Internet by being public-facing. If you consider the list of ports I have above, or in the Wikipedia article I linked to, many of those ports are only open on internal networks or have access to them controlled if they are external. Web ports for public websites, by their very nature, must be publicly accessible for them to be useful. There are certain public services like SMTP or DNS, but as I mentioned above, the server that is listening on the port is the server handling the request in these cases.

A further challenge when securing websites is that often the monetary and data assets available to an attacker when compromising a website are greater than the assets they may gain compromising a corporate network. You see this with high volume e-commerce websites where a small business is processing a large number of web-based e-commerce transactions below $100. If the attacker compromises their corporate network via leaked AWS credentials, they may gain access to the company bank account and company intellectual property, encrypt the company’s data using ransomware, or perhaps even obtain customer PII. But by compromising the e-commerce website, they can gain access to credit card numbers in-flight, which are far more tradeable, and where the sum of available credit among all cards is greater than all the assets of the small business, including the amount of ransom that business might be able to pay.

Let’s not discount breaches like the 2017 Equifax breach that compromised 163 million American, British and Canadian citizen’s records. That was extremely valuable to the attackers. But targets like this are rare, and the Web presents a target-rich environment. Which is the third point I’d like to make in this post. While an organization may run a handful of services on other ports, many companies – with hosting providers in particular – run a large number of web applications. And an individual or company is far more likely to have a service running on a web port than any other port. Many of us have websites, but how many of us run our own DNS, SMTP, Redis, or another service listening on a port other than 80 or 443? Most of us who run websites also run MySQL on port 3306, but that port should not be publicly accessible if configured correctly.

That port 443 security is different has become clear to us at Wordfence over the years as we have tracked and cataloged a huge number of malware variants, web vulnerabilities, and a wide range of tactics, techniques, and procedures (TTP) that attackers targeting web applications use. Most of these have no relationship with the web server listening on port 443, and nearly all of them have a close relationship with the web application that the web server hands off control to once communication is established.

My hope with this post has been to catalyze a different way of thinking about port 443 and that other insecure port (80) we all hopefully don’t use. Port 443 is not just another service. It is, in fact, the gateway to a whole new universe of programming languages, dev frameworks, and web applications.

In the majority of cases, the gateway to that new universe is publicly accessible.

Once an attacker passes through that gateway, a useful way to think about the web applications hosted on the server is that each application is its own service that needs to have its patch level maintained, needs to be configured correctly, and should be removed if it is not in use to reduce the available attack surface.

If you are a web developer you may already think this way, and if anything, you may be guilty of neglecting services on ports other than port 80 or 443. If you are an operations engineer, or an analyst working in a SOC protecting an enterprise network, you may be guilty of thinking about port 443 as just another port you need to secure.

Think of port 443 as a gateway to a new universe that has no access control, with HTTPS providing easy standardized access, and with a wide range of diverse services running on the other side, that provide an attacker with a target and asset-rich environment.

Footnote: We will be exhibiting at Black Hat in Las Vegas this year at booth 2514 between the main entrance and Innovation City. Our entire team of over 30 people will be there. We’ll have awesome swag, as always. Come and say hi! Our team will also be attending DEF CON immediately after Black Hat.

Written by Mark Maunder – Founder and CEO of Wordfence. 

Source :
https://www.wordfence.com/blog/2022/06/securing-port-443/

Exit mobile version