02/20/2024
Description
This article explains about how to integrate Content Filtering Service with LDAP (With Single Sign On) by using SonicOS 7.0.1 or older.
Restricted user group on the active directory is imported to SonicWall and give restricted web access to those users in that group.
Where in the Full Access User group has full access or partial access to websites.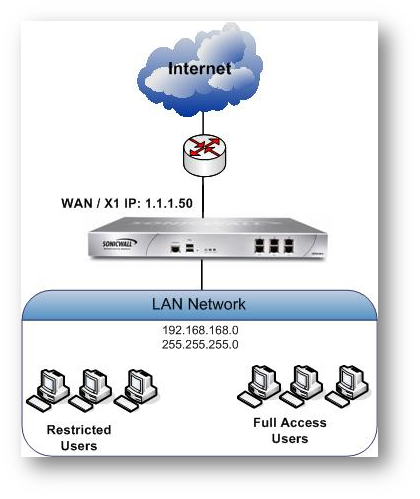
Resolution
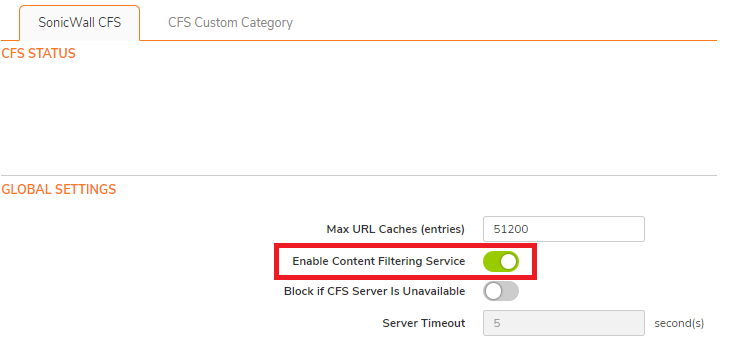
- Enable Content Filtering Service from Policy | Security Services | Content Filter
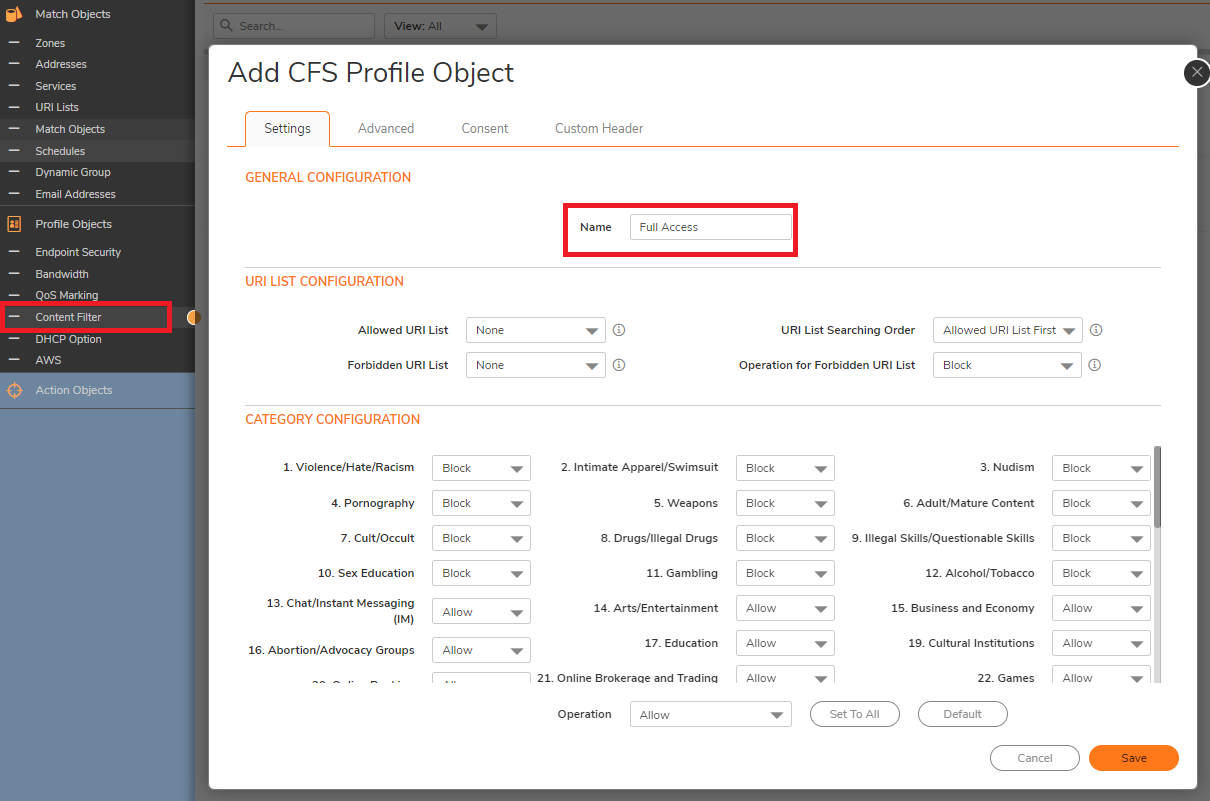
- Navigate to Profile Objects| Content Filter and access the Profile Objects tab. Create the new Content Filter Profile and Allow/Block for each category according with your need.
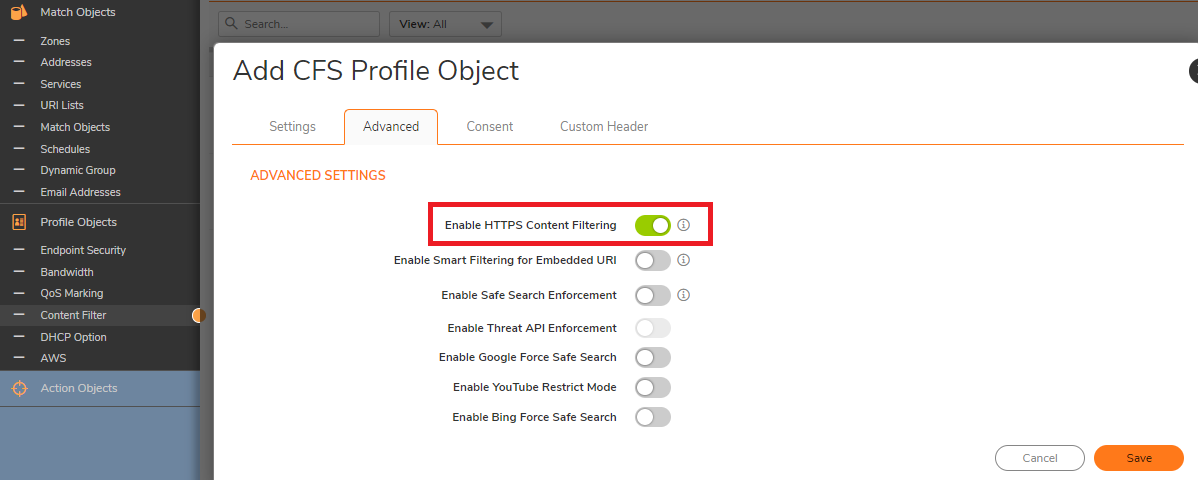
- Make sure to Enable HTTPS content Filtering. This option is disabled by default.
4. Create another Content Filter Profile as Restricted Access CFS Policy for Restricted User Group.Click on Add, Add a Policy for Restricted Group with most of the categories enabled (Depends on what should be Blocked)
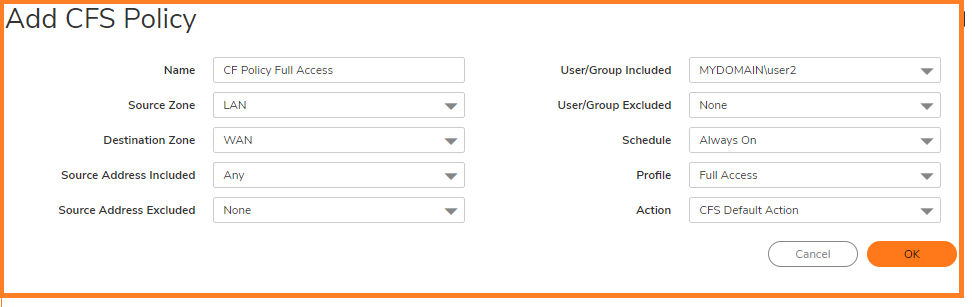
5. Creating a Full Access CFS Policy for Full Access User Group.Add second Policy for the Full Access Group with certain category enabled or all categories enabled (Depends on what should be allowed).
Configuring LDAP on SonicWall
For more information about how to enable LDAP on Sonicwall, please reach below link.
- Navigate to Users | Settings page, in the Authentication method for login drop-down list, select LDAP + Local Users and click Configure.

 On the Settings tab of the LDAP Configuration window, configure the following fields.
Name or IP address: IP address of the LDAP serverPort Number: 389 (Default LDAP Port)Server timeout (seconds): 10 Seconds (Default)Overall operation timeout (minutes): 5(Default)Select Give login name/location in tree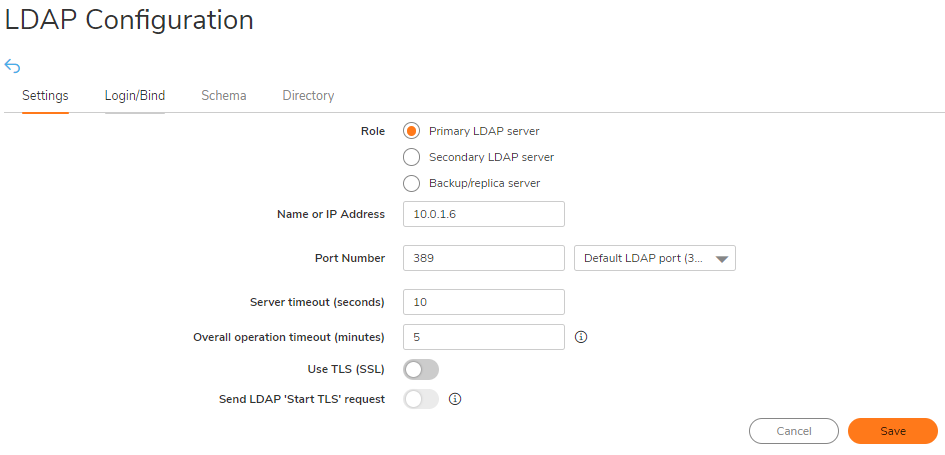
- On the Login/Bind, Give login name/loction in three. Set the admin user and password to access on your LDAP server.
- On the Schema tab, configure the following fields: LDAP Schema:Microsoft Active Directory.
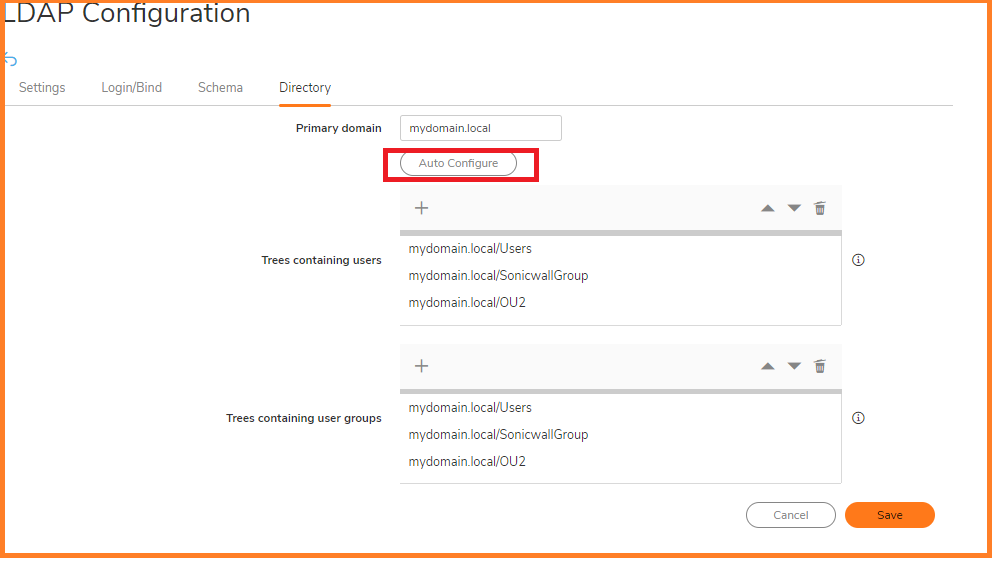
- On the Directory tab, configure the following fields.
- Primary domain:The user domain used by your LDAP implementation.
- User tree for login to server:The location of where the tree is that the user specified in the settings tab.
- Click Auto-configure. (This will populate the Trees containing users and Trees containing user groups fields by scanning through the directories in search of all trees that contain user objects.)
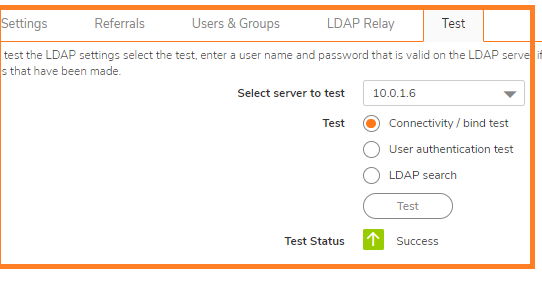
- On the LDAP Test tab, Test LDAP connectivity to make sure that the communication is successful.
Importing Groups from LDAP to the SonicWall unit
- Navigate to Users | Local Groups.
- Click Import from LDAP
- Click Configure for the Group that is imported from LDAP.
- Go to CFS Policy tab , Select the appropriate CFS Policy from the drop down and Click OK.
Configuring Single Sign-On Method on SonicWall
For more information about how to enable SSO Agent and Enable SSO on Sonicwall, please reach below link.
- Navigate to Users | Settings.
- In the Single-sign-on method , select SonicWall SSO Agent and Configure
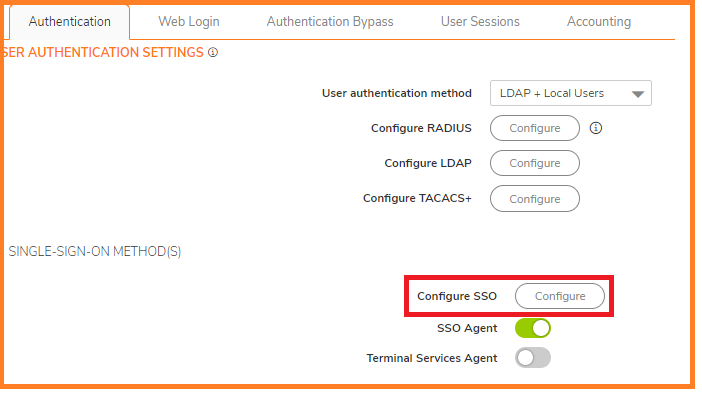
- Click Configure button. The SSO configuration page is displayed.
- Under the Settings tab, Click Add button to add the IP address of the work station that has SSO agent running.
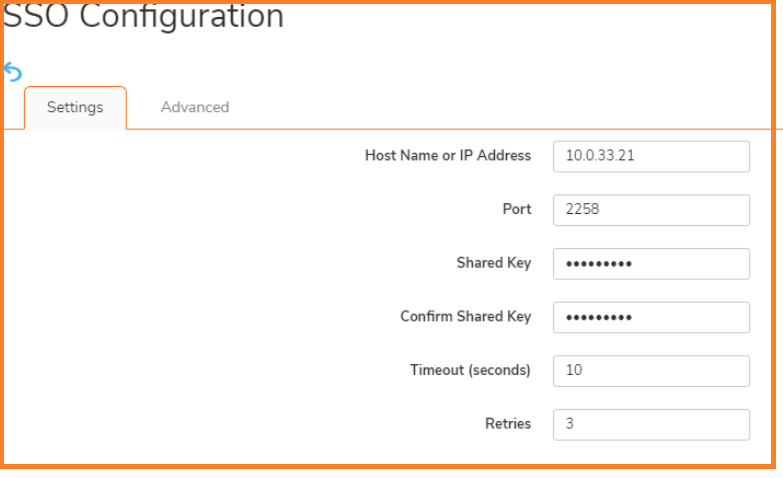
- Click on the ADD button: settings window is displayed
- In the Host Name or IP Address field, enter the name or IP Address of the workstation on which SonicWall SSO Agent is installed
- In Port Number, enter the port number of the workstation on which SonicWall SSO Agent is installed. The default port is 2258
- In the Shared Key field, enter the shared key that you created or generated in the SonicWall SSO Agent.
The shared key must match exactly. Re-enter the shared key in the Confirm Shared Key field.
Click Apply.
- Once the SSO Agent is successfully added, under the Authentication Agent Settings a green light is shown for status.
- Click Test tab. The Test Authentication Agent Settings page displays.
- Select the Check agent connectivity radio button then click the Test button. This will test communication with the authentication agent. If the SonicWall security appliance can connect to the agent, you will see the message Agent is ready.
- Select the Check user radio button, enter the IP address of a workstation in the Workstation IP address field, then click Test. This will test if the agent is property configured to identify the user logged into a workstation.
 NOTE: Performing tests on this page applies any changes that have been made. TIP: If you receive the messages Agent is not responding or Configuration error, check your settings and perform these tests again.
 - When you are finished, click OK.
Enabling CFS for the LAN Zone and applying Imported LDAP Group
 CAUTION: It is not recommended to do this change on a Production Environment because this changes are instant and can affect all the computers on the LAN. So it is best to schedule a downtime before proceeding further.
- Navigate to Network | Zones, click Configure Button for LAN Zone.
- Check the box Enforce Content Filtering Service, select the Default CFS Policy from the drop down.
How to TEST
- Log out from the windows domain computer and log in back with a user from either the full access or restricted access groups and check whether the policy is getting enforced correctly for the user.
Related Articles
- DDNS Dyn.com showing network error
- How to view Threat Logs in the Sonicwall firewall
- How to export access rules from a Sonicwall firewall
Categories
- Firewalls > SonicWall SuperMassive E10000 Series > Content Filtering Service
- Firewalls > SonicWall SuperMassive 9000 Series > Content Filtering Service
- Firewalls > TZ Series > Content Filtering Service
- Firewalls > NSa Series > Content Filtering Service
- Firewalls > NSv Series > Content Filtering Service