Eventually, if you’re shutter-happy enough, you’ll need to transfer your iPhone’s photos to your Mac to save the precious space on your mobile device. Simply sending a few photos as an email attachment is fine for a small number of photos, but in this article, we share several easier and more convenient ways of exporting your iPhone’s photos to your Mac.
Transfer Photos from iPhone to Mac with a USB Cable
Connecting your device using a Lightning-to-USB cable is the most common way of transferring pictures from an iPhone to a Mac. Below are several ways you can do this using a few different apps.
How to Use Finder to Transfer Photos from iPhone to Mac
Starting with macOS Catalina, there is no iTunes. However, you can easily sync your iPhone with your Mac using Finder. Here’s how to do it:
1. Connect your iPhone to your Mac with a Lightning-to-USB cable.
2. Open Finder. Your iPhone should appear in Finder’s sidebar under Locations.
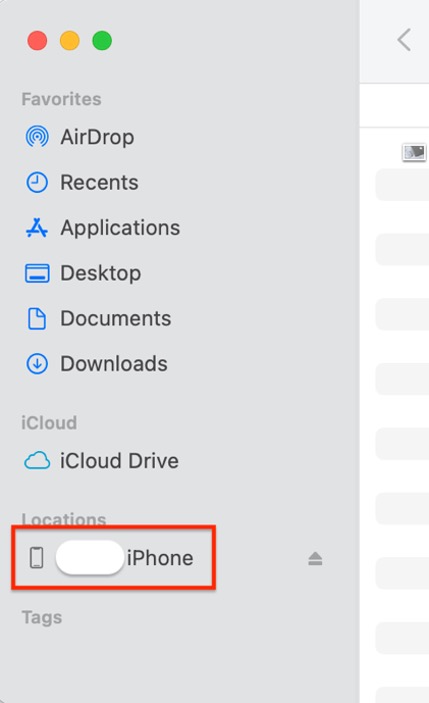
3. In the sidebar, select your iPhone. If prompted, confirm that you trust your iPhone.
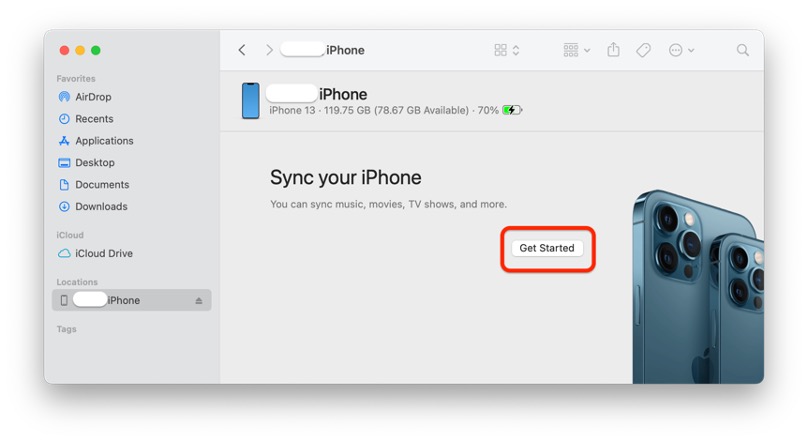
4. Click Get Started.
5. At the top of the window, click Photos and then check the Sync photos to your device from: box.
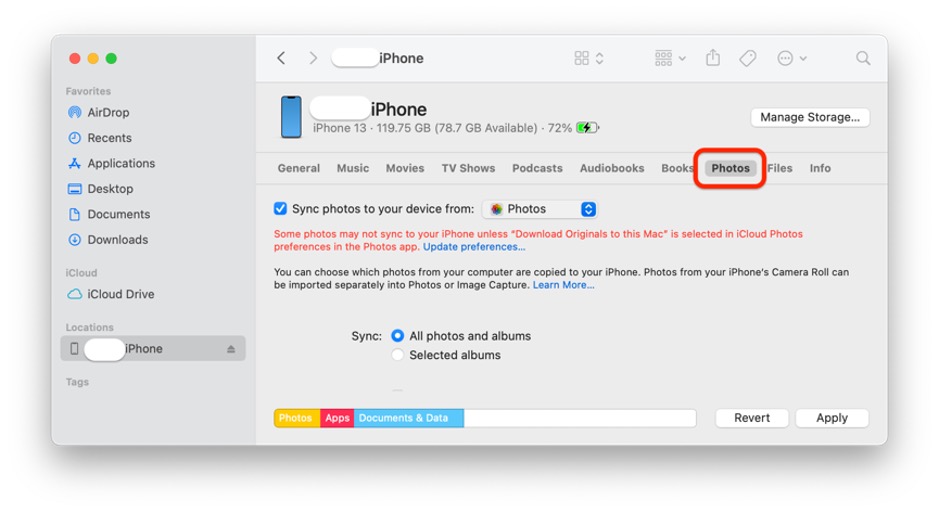
6. Use the drop-down menu to choose the folder or app on your iPhone that you want to sync photos from.
7. Use the checkboxes at the bottom of the window to choose whether you want to sync all your photos and albums or only selected albums.
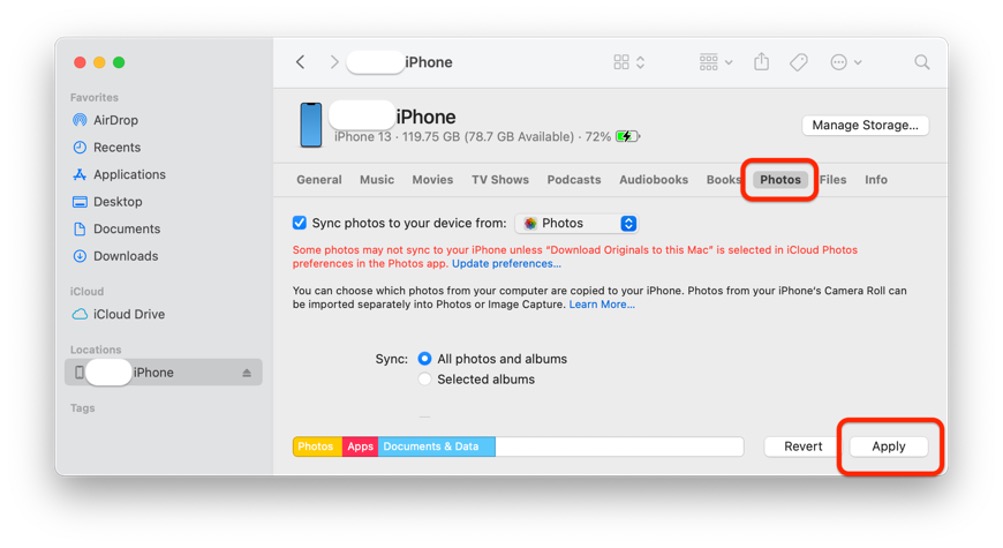
8. Click Apply.
How to Use the Photos App to Transfer Photos from iPhone to Mac
Below are instructions on how to transfer photos from iPhone to Mac using the Photos app:
1. Connect your iPhone to Mac using a Lightning-to-USB cable.
2. Once prompted, confirm that you are using a trusted device. You will only need to do this if you haven’t synced your photos using this method before.
3. Open the Photos app on your Mac if it doesn’t automatically open.
4. In the sidebar, select your iPhone.
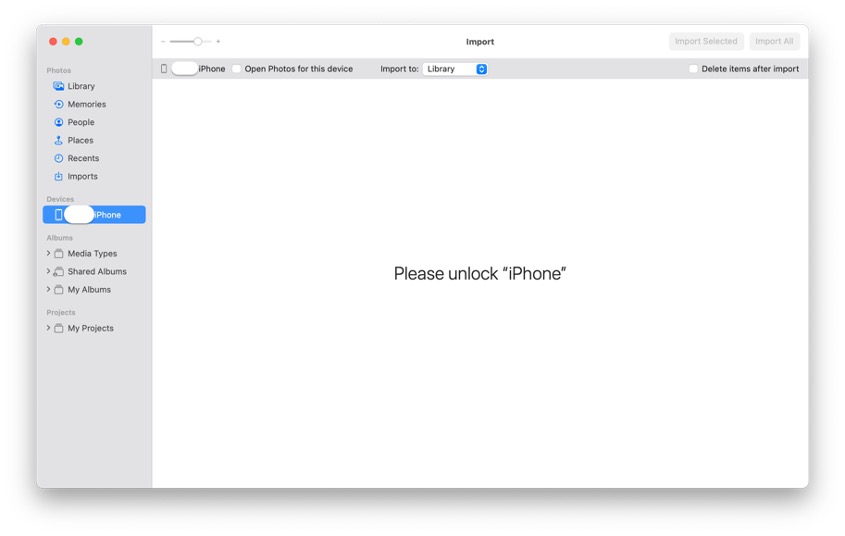
5. In the upper menu of the Photos app, choose Import.
6. Click Import All New Photos, or select the photos you need and click Import Selected.

Use Image Capture to Transfer Photos from iPhone to Mac
Another method for transferring photos from your iPhone to your Mac involves using the native Image Capture app. This method lets you quickly and easily download your photos to a folder of your choice.
It is primarily intended for use with digital cameras and scanners, but it can also be used with iPhones with no issue.
1. Connect your iPhone to your Mac using a Lightning-to-USB cable and allow access to the device when prompted.
2. Open Image Capture on your Mac.
3. In the sidebar, select your iPhone under the Devices category.
4. At the bottom of the window, use the Import To drop-down menu to choose the location to save your pictures.
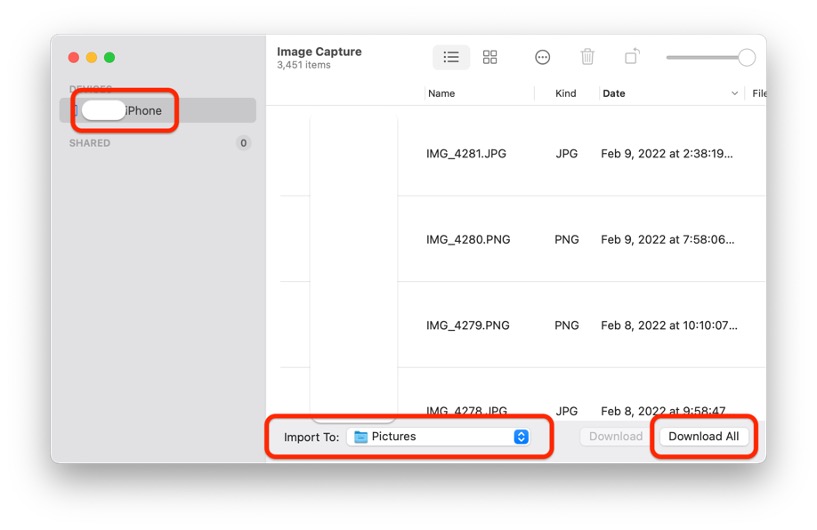
5. Select the pictures you want to import and click the Download button, or if you want to transfer all your photos, click Download All.
Transfer Photos from iPhone to Mac wirelessly
There are several options for transferring photos even if you don’t have a Lightning-to-USB cable. Here they are:
Use AirDrop to Transfer Photos from iPhone to Mac
AirDrop works great for transferring photos between your iPhone and Mac, and vice versa. Please ensure both devices are connected to the same Wi-Fi network and no more than around 30 feet from each other.
1. First, make sure your Mac is discoverable by everyone. Open Finder on your Mac, click Go in the menu bar, and select AirDrop. A Finder window will open with the AirDrop icon at the bottom.
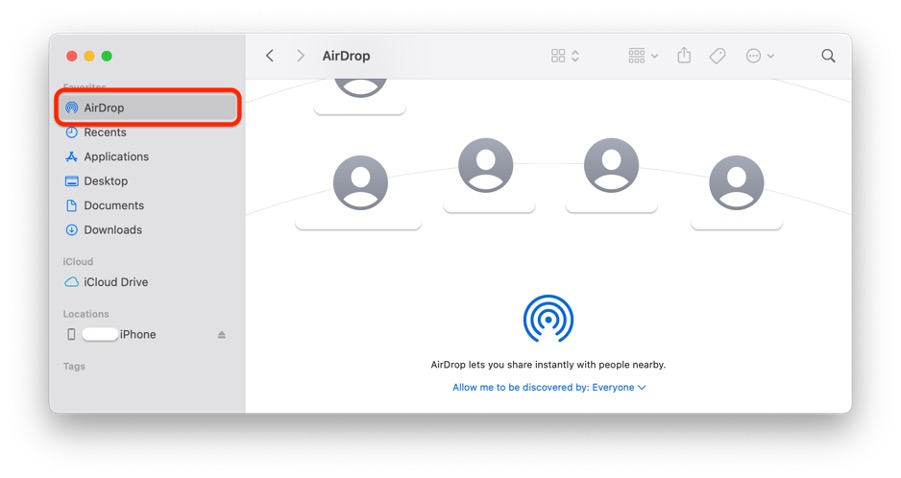
2. Make sure that Everyone is selected under the Allow me to be discovered by: drop-down menu.
3. On your iPhone, open the Photos app and select the pictures you want to transfer.
4. Tap the Share button and select AirDrop.

5. Select the device you want to transfer your photos to and click Done. Depending on your Mac’s settings, you may be asked where you want to save the photos.
Use iCloud to Transfer Photos from iPhone to Mac
iCloud lets you synchronize your photos between your iPhone and Mac. Because the two devices will be regularly synchronized, this method is very efficient.
1. Make sure to sign in to your Apple ID on your iPhone and Mac and that they are both connected to Wi-Fi.
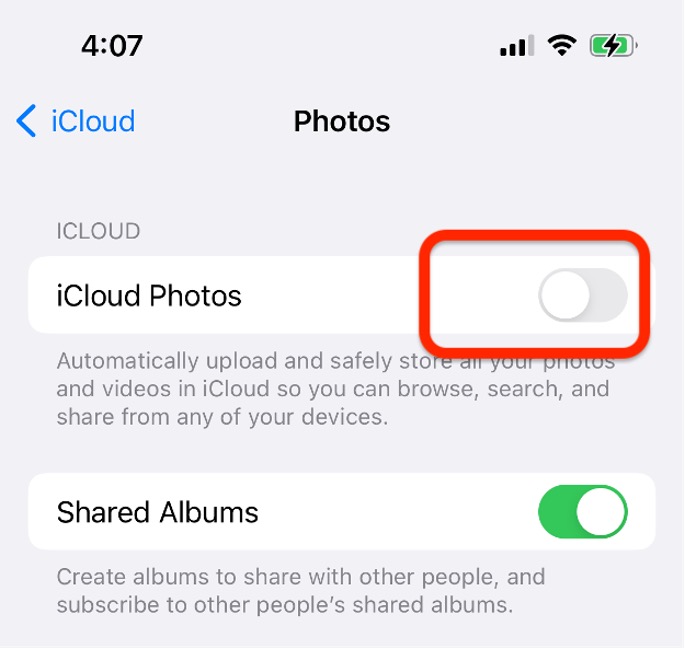
2. On your iPhone, go to Settings > Your Apple ID > iCloud > Photos.
3. Enable the slider next to iCloud Photos.
4. On your Mac, go to the Apple menu and select System Preferences.
5. For macOS Catalina or later (Big Sur and Monterey), go to iCloud or Apple, then choose iCloud.
6. Check the boxes next to iCloud Drive and Photos.
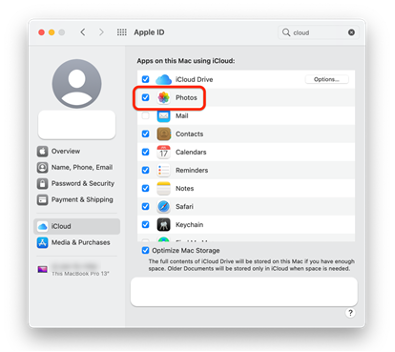
Note: remember to switch off sync after transferring if you want to delete photos on your iPhone and keep them on your Mac because as long as sync is enabled, any changes you make to photos on one device will automatically be synced to the other.
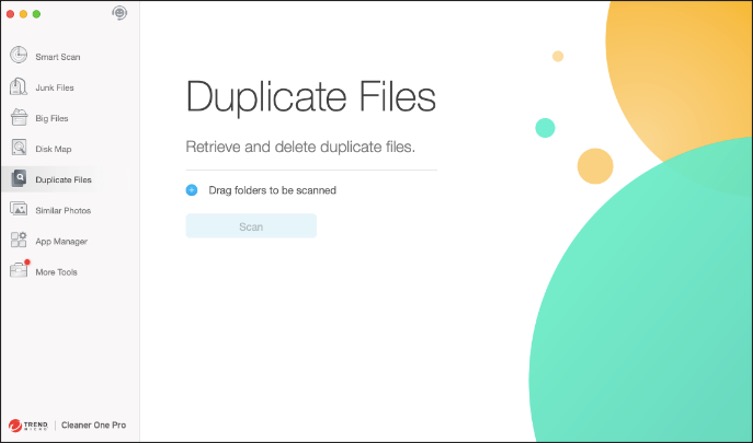
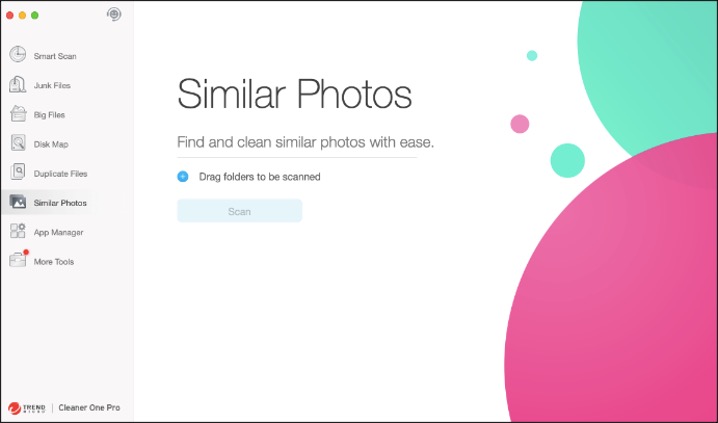
Got lots of duplicates?
Transferring photos to your Mac is a great way to reclaim some of the precious storage space on your iPhone, but if you’ve got lots of duplicate photos, you’re going to have a nightmare of a time sorting through them on your Mac. Fortunately, Cleaner One Pro is on hand to help out!
Cleaner One Pro makes the time-consuming process of finding and removing similar photos and duplicate files a thing of the past! Simply run a quick scan on your Mac to detect and remove everything hogging storage space.
Source :
https://news.trendmicro.com/2022/02/22/how-to-transfer-photos-from-iphone-to-mac/