Managing lots of files at once can be difficult, especially when dealing with large ones. When struggling with the problem of moving lots of documents and files, an excellent solution is to create a zip file that compresses the files down to a more manageable size.
The good news is that macOS has a built-in tool for creating and unzipping zip files called Archive Utility. The bad news, however, is that it often receives quite a few complaints about things such as its disappointing compression ratio and limited feature set.
In this article, we’re going to tell you about one of the best archive utilities Mac users can use to get the very best results. Keep on reading to learn more!
Mac’s Built-in Archiver Utility
Archive Utility, the built-in archiver utility that comes pre-installed on macOS, can handle zip files, but when it comes to files in other formats or particularly big files, it may not be the best choice. Below are some of its drawbacks.
1. Only one supported format
There are some very common archive formats that Archive Utility simply can’t handle, including the very popular rar format.
2. Disappointing compression ratio
While it does reduce file size, Archive Utility doesn’t have as great of a space-saving impact on disk space as other archiving apps.
3. Limited key features
Archive Utility is missing key features such as archiving, encryption, and volume compression. This is because Apple has not significantly updated Archive Utility in the time since these types of features have become standard.
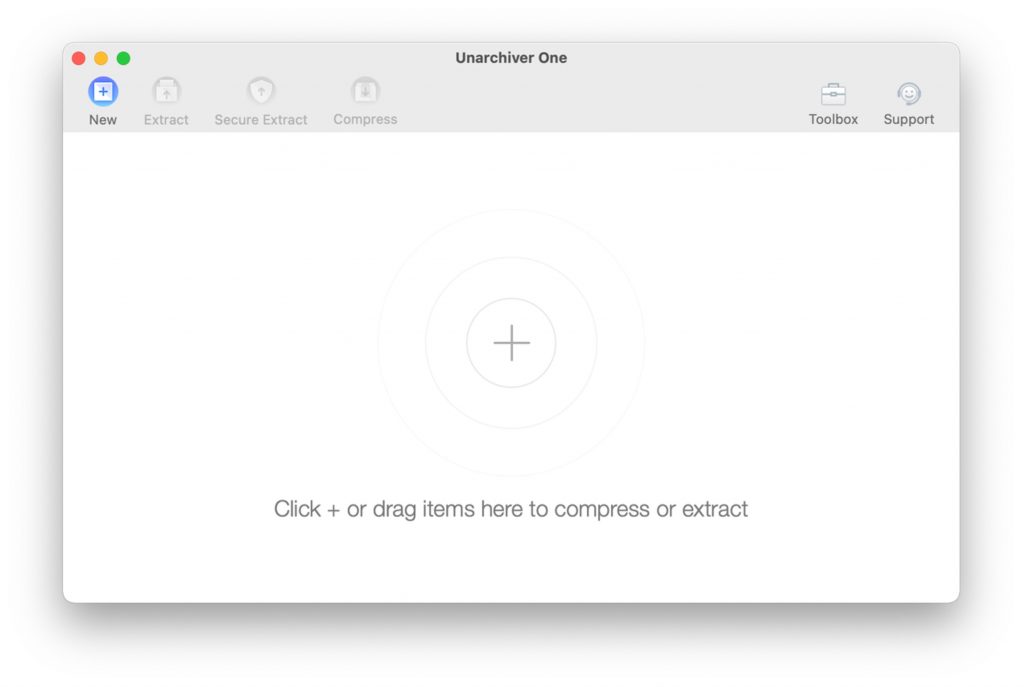
Create a zip file with Unarchiver One Mac
Unarchiver One Mac is the best free archiving tool for Mac. In seconds, it can archive and unarchive tons of file formats including RAR, Zip, 7z, gzip, bzip2, and lots more.
Unarchiver One can save you huge amounts of disk space by compressing large files into much smaller sizes. And unlike Archive Utility, it also supports encryption and volume compression.
1. How to set up Unarchiver One as the default unarchiving tool
Setting up Unarchiver One as your default unarchiving tool couldn’t be easier. To do so, follow the simple steps below.
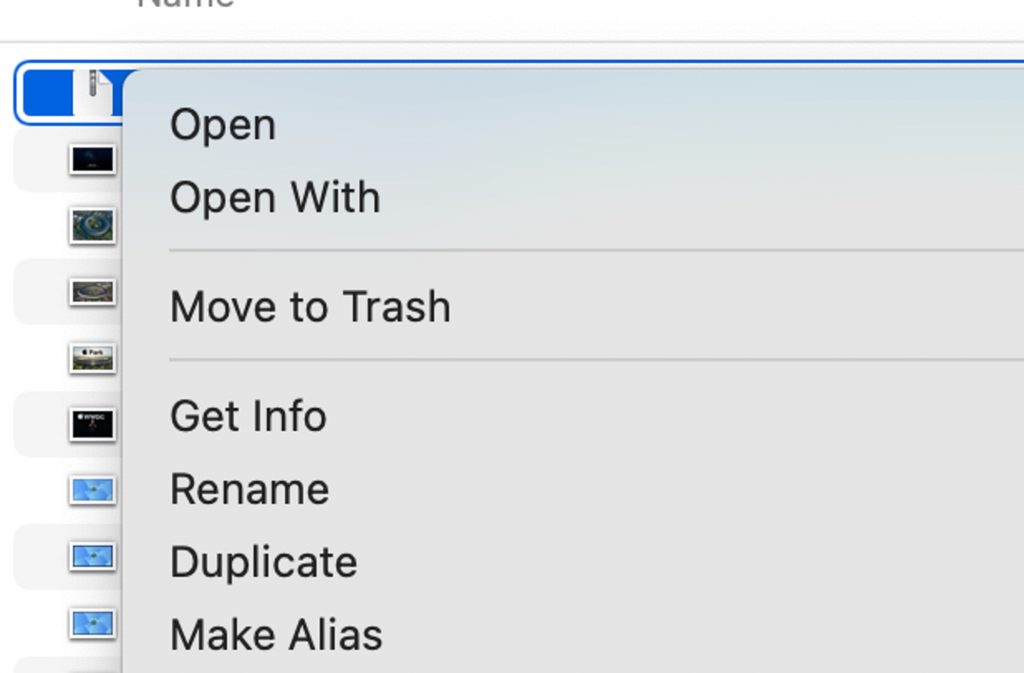
(1) Right-click on any compressed file and select ‘Get Info’.
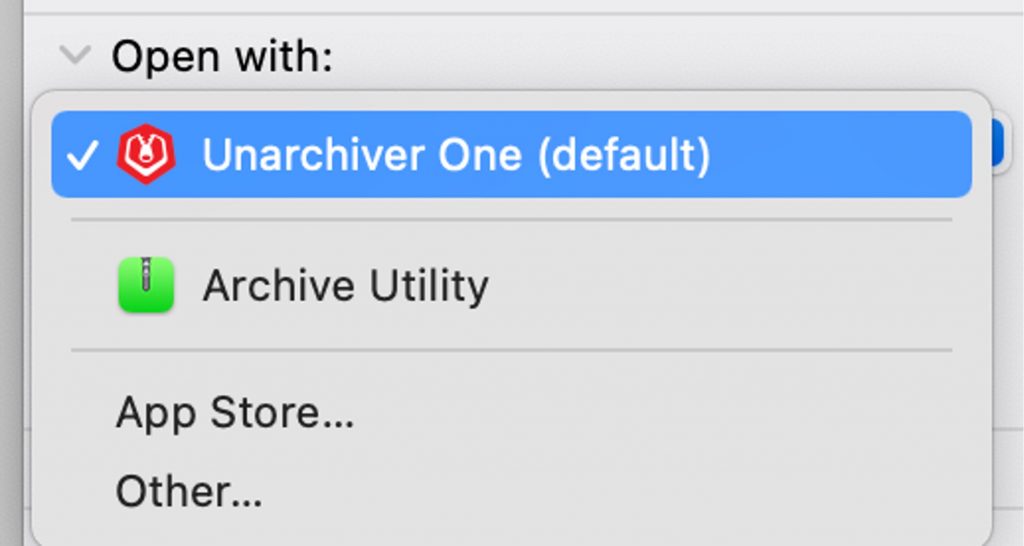
(2) Choose Unarchiver One as your default unarchiving tool.
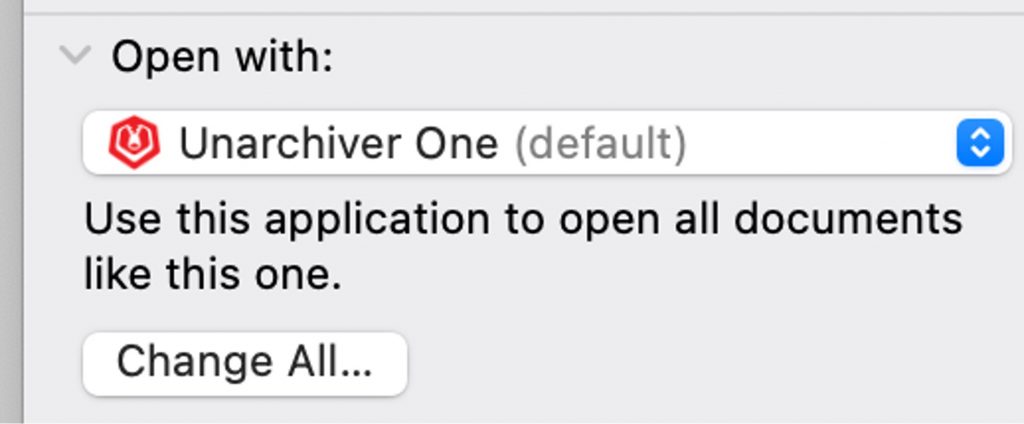
(3) Click ‘Change All’.
2. How to unzip files on Mac
After setting Unarchiver One as your default unarchiving tool, you can open compressed files by simply double-clicking on them. However, there are also other ways to unzip files with Unarchiver One easily:
(1) Right-click on the compressed file.
Unarchiver One will quickly extract files to the current folder by just right-clicking on the compressed file and choosing ‘Open With > Unarchiver One’.

(2) Drag and drop archive files to Unarchiver One’s console.
Effortlessly drag and drop archive files to Unarchiver One’s console to easily browse and securely extract their contents with just one click.
3. How to make a zip file on Mac
There are two main ways to make a zip file with Unarchiver One.
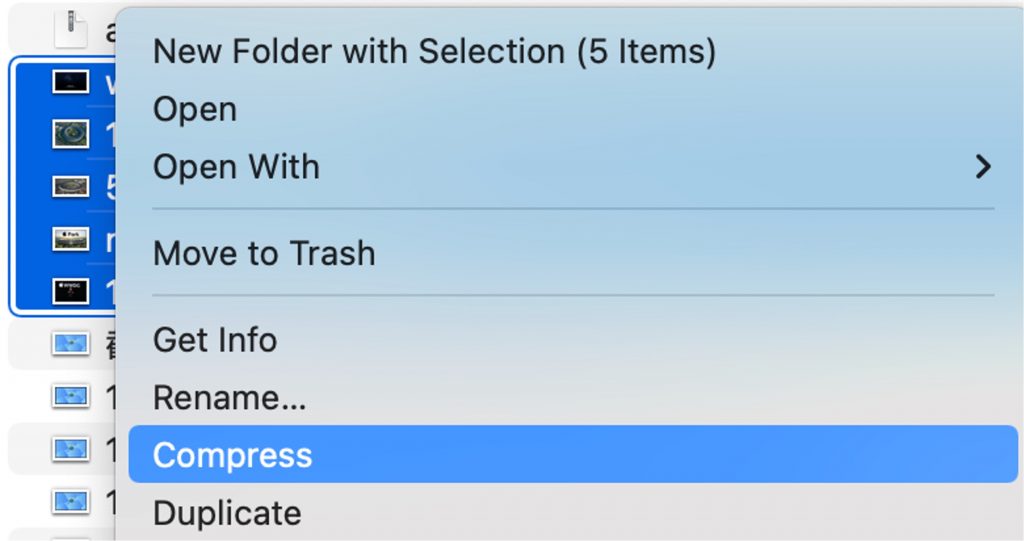
(1) Right-click on the files you want to compress.
- First, follow the steps above and set up Unarchiver One as your default unarchiving tool.
- Then choose all the files you want to compress and right-click on them.
- After clicking on ‘Compress’ you’ll find that the archive file is instantly stored in the current folder!
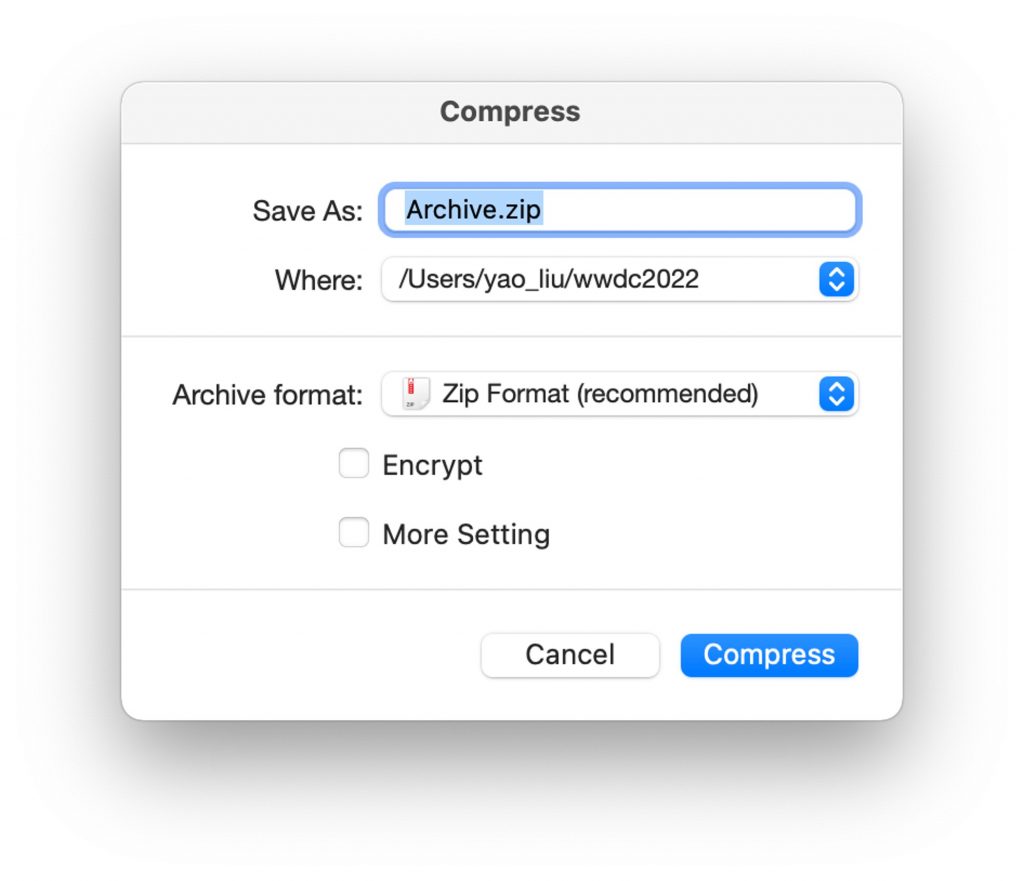
(2) Drag and drop all the files to Unarchiver One’s console.
- Choose all the files you want to compress and drag and drop them into Unarchiver One’s console. Click on ‘Compress’.
- Choose where you want to save the compressed file and the specific archive format. In this step, you can also encrypt the file if required.
Source :
https://news.trendmicro.com/2022/04/14/how-to-make-a-zip-file-on-mac/