One of the Windows 10 Start Menu features is a built-in Bing search when a local search fails to find anything. Whether it be due to privacy reasons, bugs, or just personal dislike, this article will explain how to disable Bing search in the Start Menu.
When you perform a search in the Windows 10 Start Menu, Windows will first look for local search results such as settings, files, or programs and display any that are found.
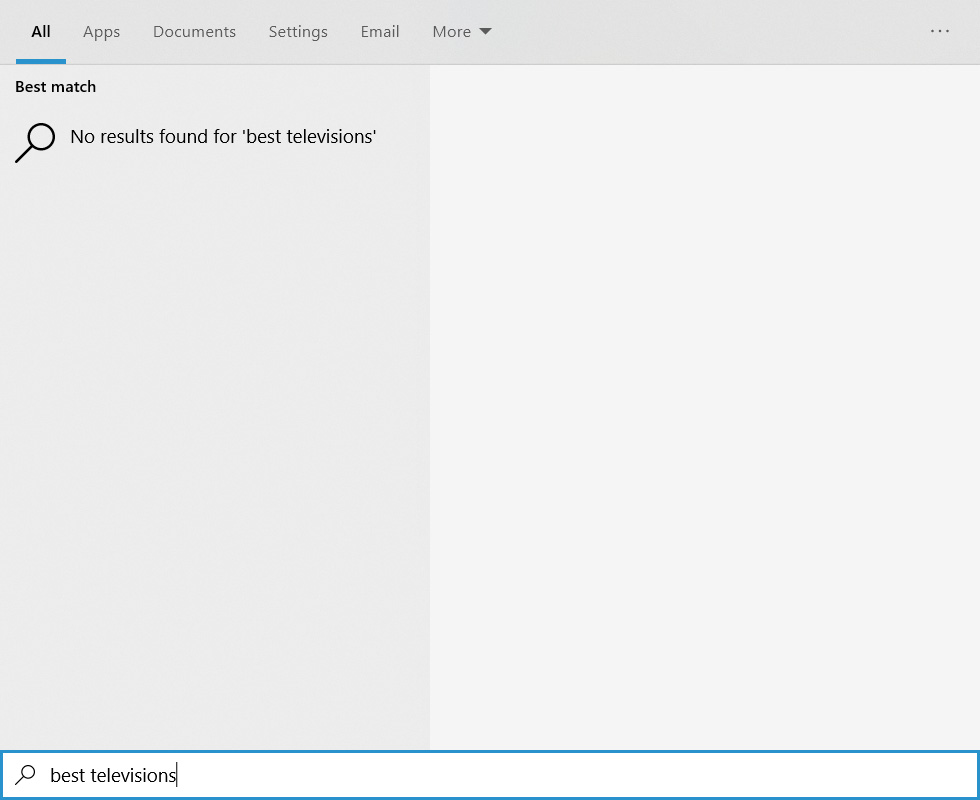
If there are no local results, Windows will then perform a Bing search for the search keyword and list the results in the Start Menu as shown below.

When logged into a Microsoft Account, these searches will be uploaded to Microsoft, who will then list them in your account’s Privacy Dashboard. This is a privacy concern for fear that Microsoft is using this data to track your browsing habits.
There have also been bugs in the Bing search component in the past that have caused the Windows 10 Start menu to appear completely blank. If you do not utilize the Bing search feature, disabling it could prevent those bugs in the future.
Below we have outlined two methods that can be used to disable Bing search in the Windows 10 Start Menu.
How to disable Bing search in the Windows 10 Start Menu
Unfortunately, for those who want to disable Bing search in the Start Menu, Microsoft does not provide an easy method.
Instead, Windows users need to modify the Registry so that it is using the following Registry values.
[HKEY_CURRENT_USER\SOFTWARE\Policies\Microsoft\Windows\Explorer]
“DisableSearchBoxSuggestions”=dword:00000001
For those who feel comfortable modifying the Registry, we have instructions on setting the proper values using the Registry Editor.
For those who are not comfortable with Registry modifications, please see method two that contains an easy to use premade Registry file that makes the settings for you.
METHOD 1: DISABLE BING SEARCH RESULTS VIA THE GROUP POLICY EDITOR
Windows 10 Pro comes with the Group Policy editor, which you can use to disable Bing search in the Start Menu.
To disable Bing Search, follow these steps:
- Search in the Start Menu for ‘gpedit.msc‘ and select it when the result appears.
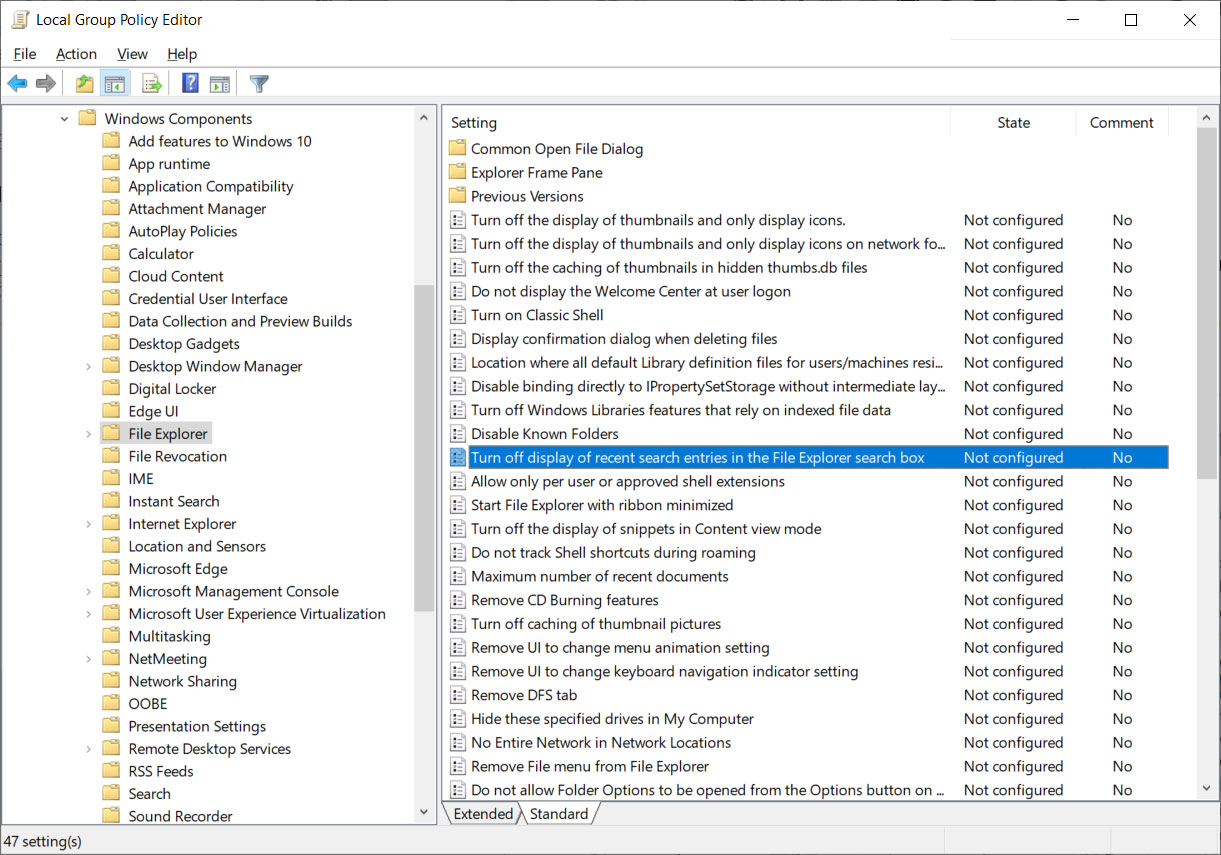
- When the Group Policy Editor opens, navigate to the following path: User Configuration\Administrative Templates\Windows Components\File Explorer
- Under the File Explorer section, you will see a policy called ‘Turn off display of recent search entries in the File Explorer search box’ as shown below. Double-click on the policy to open it.
- To disable Bing search, set this policy to ‘Enabled.’
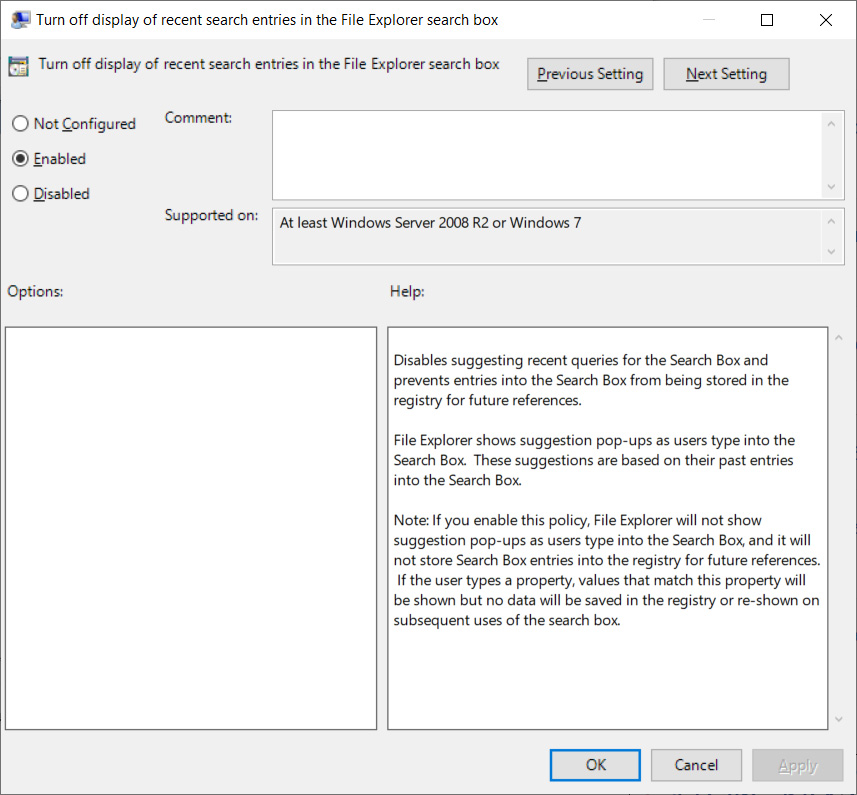
- When done, click on the Apply and then OK button to save the policy.
- You can now close the Group Policy Editor and restart Windows Explorer or restart your computer.
Once restarted, Bing searches will no longer appear in the Start Menu.
METHOD 2: USE THE REGISTRY EDITOR TO DISABLE BING INTEGRATION
If you are using Windows 10 Home and are comfortable using the Windows Registry, you can disable Bing’s integration in Windows Search using the Registry editor.
- First, open the Windows Registry Editor by pressing the Windows key + the R key at the same time. This will open the Run: dialog and then type regedit and press the OK button.
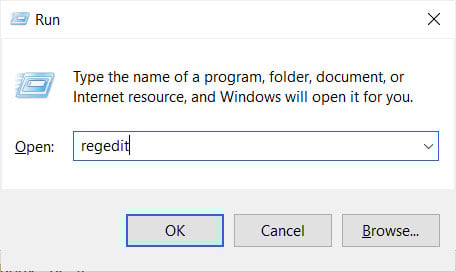 Starting Registry Editor
 - Windows will display a UAC prompt asking if you wish to allow the Registry Editor to make changes to the system. Press the Yes button to continue.
- Navigate to the HKEY_CURRENT_USER\SOFTWARE\Policies\Microsoft\Windows\Explorer key. If the key does not exist, create the necessary folders until you are in the Explorer key.
- Right-click on Explorer and select New and then DWORD (32-bit) Value, as shown below.
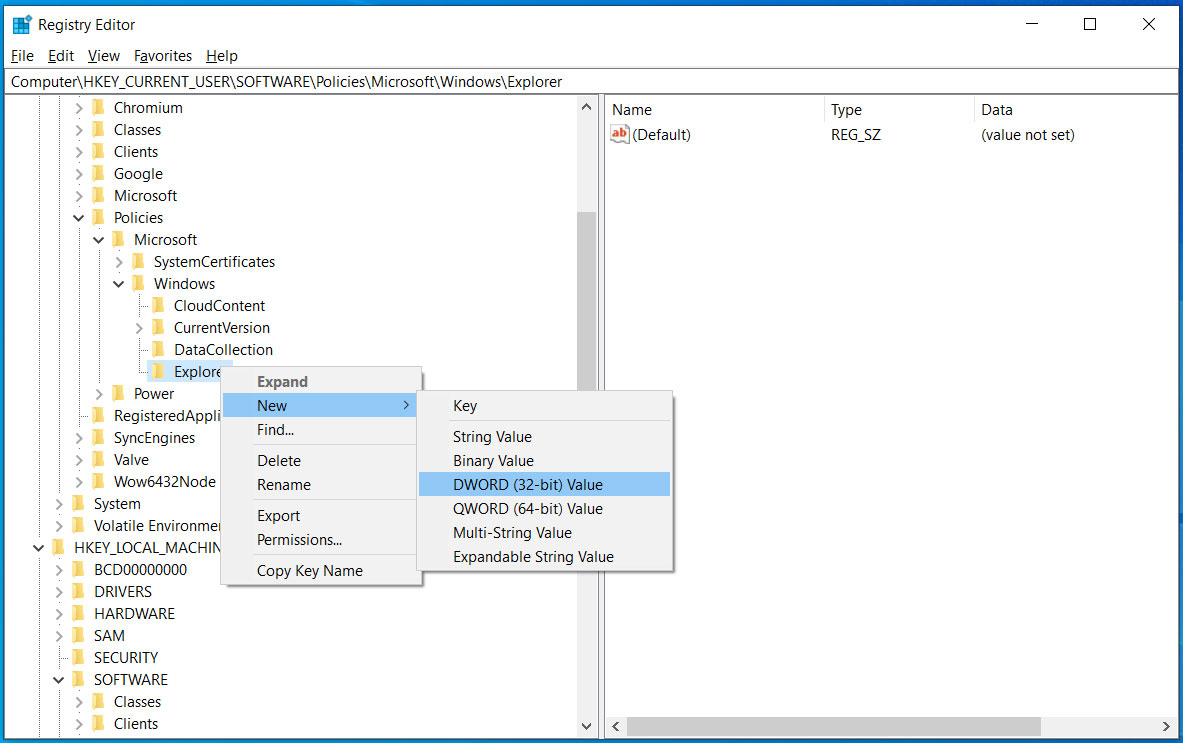 New DWORD value
 - You will be prompted to enter the name of the new value. Type DisableSearchBoxSuggestions and press Enter on the keyboard. A new value will be created that should automatically be set to 0. Now double-click on BingSearchEnabled and set the value to 1 and then press the OK button.
- When done, you should have the BingSearchEnabled value created and set to 1.

- You can now close the Registry Editor and restart Windows Explorer or restart your computer.
Once restarted, Bing search will no longer work in the Windows 10 Start Menu.
Enable Bing integration again
To enable Bing integration again, simply disable the group policy or edit the Registry and delete the DisableSearchBoxSuggestions value under the HKEY_CURRENT_USER\SOFTWARE\Policies\Microsoft\Windows\Explorer Registry key.
Once again, restart the Explorer process or the computer, and Bing integration will work again.
Update 10/5/20: Added updated instructions on how to disable Bing search.
Source :
https://www.bleepingcomputer.com/tutorials/how-to-disable-bing-search-in-the-windows-10-start-menu/