Amplification attacks are one of the most common distributed denial of service (DDoS) attack vectors. These attacks are typically categorized as flooding or volumetric attacks, where the attacker succeeds in generating more traffic than the target can process, resulting in exhausting its resources due to the amount of traffic it receives.
In this blog, we start by surveying the anatomy and landscape of amplification attacks, while providing statistics from Azure on most common attack vectors, volumes, and distribution. We then describe some of the countermeasures taken in Azure to mitigate amplification attacks.
DDoS amplification attacks, what are they?
Reflection attacks involve three parties: an attacker, a reflector, and a target. The attacker spoofs the IP address of the target to send a request to a reflector (e.g., open server, middlebox) that responds to the target, a virtual machine (VM) in this case. For the attack to be amplified the response should be larger than the request, resulting in a reflected amplification attack. The attacker’s motivation is to create the largest reflection out of the smallest requests. Attackers achieve this goal by finding many reflectors and crafting the requests that result in the highest amplification.
Figure 1. Reflected amplification attack
The root cause for reflected amplification attacks is that an attacker can force reflectors to respond to targets by spoofing the source IP address. If spoofing was not possible, this attack vector would be mitigated. Lots of effort has thus been made on disabling IP source address spoofing, and many organizations prevent spoofing nowadays so that attackers cannot leverage their networks for amplification attacks. Unfortunately, a significant number of organizations still allow source spoofing. The Spoofer project shows that a third of the IPv4 autonomous systems allow or partially allow spoofing.
UDP and TCP amplification attacks
Most attackers utilize UDP to launch amplification attacks since reflection of traffic with spoofed IP source address is possible due to the lack of proper handshake.
While UDP makes it easy to launch reflected amplification attacks, TCP has a 3-way handshake that complicates spoofing attacks. As a result, IP source address spoofing is restricted to the start of the handshake. Although the TCP handshake allows for reflection, it does not allow for easy amplification since TCP SYN+ACK response is not larger than TCP SYN. Moreover, since the TCP SYN+ACK response is sent to the target, the attacker never receives it and can’t learn critical information contained in the TCP SYN+ACK needed to complete the 3-way handshake successfully to continue making requests on behalf of the target.
Figure 2. Reflection attack in TCP
In recent years, however, reflection and amplification attacks based on TCP have started emerging.
Independent research found newer TCP reflected amplification vectors that utilize middleboxes, such as nation-state censorship firewalls and other deep packet inspection devices, to launch volumetric floods. Middleboxes devices may be deployed in asymmetric routing environments, where they only see one side of the TCP connection (e.g., packets from clients to servers). To overcome this asymmetry, such middleboxes often implement non-compliant TCP stack. Attackers take advantage of this misbehavior – they do not need to complete the 3-way handshake. They can generate a sequence of requests that elicit amplified responses from middleboxes and can reach infinite amplification in some cases. The industry has started witnessing these kinds of attacks from censorship and enterprise middle boxes, such as firewalls and IDPS devices, and we expect to see this trend growing as attackers look for more ways to create havoc utilizing DDoS as a primary weapon.
Carpet bombing is another example of a reflected amplification attack. It often utilizes UDP reflection, and in recent years TCP reflection as well. With carpet bombing, instead of focusing the attack on a single or few destinations, the attacker attacks many destinations within a specific subnet or classless inter-domain routing (CIDR) block (for example /22). This will make it more difficult to detect the attack and to mitigate it, since such attacks can fly below prevalent baseline-based detection mechanisms.
Figure 3. Carpet bombing attack
One example of TCP carpet bombing is TCP SYN+ACK reflection, where attacker sends spoofed SYN to a wide range of random or pre-selected reflectors. In this attack, amplification is a result of reflectors that retransmit the TCP SYN+ACK when they do not get a response. The amplification of the TCP SYN+ACK response itself may not be large, and it depends on the number of retransmissions sent by the reflector. In Figure 3, the reflected attack traffic towards each of the target virtual machines (VMs) may not be enough to bring them down, however, collectively, the traffic may well overwhelm the targets’ network.
UDP and TCP amplification attacks in Azure
In Azure, we continuously work to mitigate inbound (from internet to Azure) and outbound (from Azure to internet) amplification attacks. In the last 12 months, we mitigated approximately 175,000 UDP reflected amplification attacks. We monitored more than 10 attack vectors, where the most common ones are NTP with 49,700 attacks, DNS with 42,600 attacks, SSDP with 27,100 attacks, and Memcached with 18,200 attacks. These protocols can demonstrate amplification factors of up to x4,670, x98, x76 and x9,000 respectively.
Figure 4. UDP reflected amplification attacks observed from April 1, 2021, to March 31, 2022
We measured the maximum attack throughput in packets per second for a single attack across all attack vectors. The highest throughput was a 58 million packets per second (pps) SSDP flood in August last year, in a short attack campaign that lasted 20 minutes on a single resource in Azure.
Figure 5. Maximum pps recorded for a single attack observed from April 1, 2021, to March 31, 2022
TCP reflected amplification attacks are becoming more prevalent, with new attack vectors discovered. We encounter these attacks on Azure resources utilizing diverse types of reflectors and attack vectors.
One such example is a TCP reflected amplification attack of TCP SYN+ACK on an Azure resource in Asia. Attack reached 30 million pps and lasted 15 minutes. Attack throughput was not high, however there were approximately 900 reflectors involved, each with retransmissions, resulting in a high pps rate that can bring down the host and other network infrastructure elements.
Figure 6. TCP SYN+ACK amplification attack volume on an Azure resource in Asia
We see many TCP SYN+ACK retransmissions associated with the reflector that doesn’t get the ACK response from the spoofed source. Here is an example of such a retransmission:
The retransmitted packet was sent 60 seconds after the first.
Mitigating amplification attacks in Azure
Reflected amplification attacks are here to stay and pose a serious challenge for the internet community. They continue to evolve and exploit new vulnerabilities in protocols and software implementations to bypass conventional countermeasures. Amplification attacks require collaboration across the industry to minimize their effect. It is not enough to mitigate such attacks at a certain location, with a pinpoint mitigation strategy. It requires intertwining of network and DDoS mitigation capabilities.
Azure’s network is one of the largest on the globe. We combine multiple DDoS strategies across our network and DDoS mitigation pipeline to combat reflected amplification DDOS attacks.
On the network side, we continuously optimize and implement various traffic monitoring, traffic engineering and quality of service (QoS) techniques to block reflected amplification attacks right at the routing infrastructure. We implement these mechanisms at the edge and core of our wide area networks (WAN) network, as well as within the data centers. For inbound traffic (from the Internet), it allows us to mitigate attacks right at the edge of our network. Similarly, outbound attacks (those that originate from within our network) will be blocked right at the data center, without exhausting our WAN and leaving our network.
On top of that, our dedicated DDoS mitigation pipeline continuously evolves to offer advanced mitigation techniques against such attacks. This mitigation pipeline offers another layer of protection, on top of our DDoS networking strategies. Together, these two protection layers provide comprehensive coverage against the largest and most sophisticated reflected amplification attacks.
Since reflected amplification attacks are typically volumetric, it is not only enough to implement advanced mitigation strategies, but also to maintain a highly scalable mitigation pipeline to be able to cope with the largest attacks. Our mitigation pipeline can mitigate more than 60Tbps globally, and we continue to evolve it by adding mitigation capacity across all network layers.
Different attack vectors require different treatment
UDP-based reflected amplification attacks are tracked, monitored, detected, and mitigated for all attack vectors. There are various mitigation techniques to combat these attacks, including anomaly detection across attacked IP addresses, L4 protocols, and tracking of spoofed source IPs. Since UDP reflected amplification attacks often create fragmented packets, we monitor IP fragments to mitigate them successfully.
TCP-based reflected amplification attacks take advantage of poor TCP stack implementations, and large set of reflectors and targets, to launch such attacks. We adopt our mitigation strategies to be able to detect and block attacks from attackers and reflectors. We employ a set of mitigations to address TCP SYN, TCP SYN+ACK, TCP ACK, and other TCP-based attacks. Mitigation combines TCP authentication mechanisms that identify spoofed packets, as well as anomaly detection to block attack traffic when data is appended to TCP packets to trigger amplification with reflectors.
Figure 7. Amplification attack detection
Get started with Azure DDoS Protection to protect against amplification attacks
Azure’s DDoS mitigation platform mitigated the largest ever DDoS attacks in history by employing a globally distributed DDoS protection platform that scales beyond 60Tbps. We ensure our platform and customers’ workloads are always protected against DDoS attacks. To enhance our DDoS posture, we continuously collaborate with other industry players to fight reflected amplification attacks.
Azure customers are protected against Layer 3 and Layer 4 DDoS attacks as part of protecting our infrastructure and cloud platform. However, Azure DDoS Protection Standard provides comprehensive protection for customers by auto-tuning the detection policy to the specific traffic patterns of the protected application. This ensures that whenever there are changes in traffic patterns, such as in the case of flash crowd event, the DDoS policy is automatically updated to reflect those changes for optimal protection. When a reflected amplification attack is launched against a protected application, our detection pipeline detects it automatically based on the auto-tuned policy. The mitigation policy, that is automatically set for customers, without their need to manually configure or change it, includes the needed countermeasures to block reflected amplification attacks.
Protection is simple to enable on any new or existing virtual network and does not require any application or resource changes. Our recently released Azure built-in policies allow for better management of network security compliance by providing great ease of onboarding across all your virtual network resources and configuration of logs.
To strengthen the security posture of applications, Azure’s network security services can work in tandem to secure your workloads, where DDoS protection is one of the tools we provide. Organizations that pursue zero trust architecture can benefit from our services to achieve better protection.
Microsoft uncovered high-severity vulnerabilities in a mobile framework owned by mce Systems and used by multiple large mobile service providers in pre-installed Android System apps that potentially exposed users to remote (albeit complex) or local attacks. The vulnerabilities, which affected apps with millions of downloads, have been fixed by all involved parties. Coupled with the extensive system privileges that pre-installed apps have, these vulnerabilities could have been attack vectors for attackers to access system configuration and sensitive information.
As it is with many of pre-installed or default applications that most Android devices come with these days, some of the affected apps cannot be fully uninstalled or disabled without gaining root access to the device. We worked with mce Systems, the developer of the framework, and the affected mobile service providers to solve these issues. We commend the quick and professional resolution from the mce Systems engineering teams, as well as the relevant providers in fixing each of these issues, ensuring that users can continue using such a crucial framework.
Collaboration among security researchers, software vendors, and the security community is important to continuously improve defenses for the larger ecosystem. As the threat and computing landscape continues to evolve, vulnerability discoveries, coordinated response, and other forms of threat intelligence sharing are paramount to protecting customers against present and future threats, regardless of the platform or device they are using.
Uncovering the vulnerabilities
Our research on the framework vulnerabilities began while trying to better understand how a pre-installed System application could affect the overall security of mobile devices. We discovered that the framework, which is used by numerous apps, had a “BROWSABLE” service activity that an attacker could remotely invoke to exploit several vulnerabilities that could allow adversaries to implant a persistent backdoor or take substantial control over the device.
The framework seemed to be designed to offer self-diagnostic mechanisms to identify and resolve issues impacting the Android device, indicating its permissions were inherently broad with access to valuable resources. For example, the framework was authorized to access system resources and perform system-related tasks, like adjusting the device’s audio, camera, power, and storage controls. Moreover, we found that the framework was being used by default system applications to leverage its self-diagnostic capabilities, demonstrating that the affiliated apps also included extensive device privileges that could be exploited via the vulnerable framework.
According to mce Systems, some of these vulnerabilities also affected other apps on both Android and iOS devices. Moreover, the vulnerable framework and affiliated apps were found on devices from large international mobile service providers. mce Systems, which offers “Mobile Device Lifecycle and Automation Technologies,” also permitted providers to customize and brand their respective mobile apps and frameworks. Pre-installed frameworks and mobile apps such as mce Systems’ are beneficial to users and providers in areas like simplifying the device activation process, troubleshooting device issues, and optimizing performance. However, their extensive control over the device to deliver these kinds of services could also make them an attractive target for attackers.
Our analysis further found that the apps were embedded in the devices’ system image, suggesting that they were default applications installed by phone providers. All of the apps are available on the Google Play Store where they go through Google Play Protect’s automatic safety checks, but these checks previously did not scan for these types of issues. As part of our effort to help ensure broad protection against these issues, we shared our research with Google, and Google Play Protect now identifies these types of vulnerabilities.
We initially discovered the vulnerabilities in September 2021 and shared our findings with mce Systems and affected mobile service providers through Coordinated Vulnerability Disclosure (CVD) via Microsoft Security Vulnerability Research (MSVR). We worked closely with mce Systems’ security and engineering teams to mitigate these vulnerabilities, which included mce Systems sending an urgent framework update to the impacted providers and releasing fixes for the issues. At the time of publication, there have been no reported signs of these vulnerabilities being exploited in the wild.
The high-severity vulnerabilities, which have a Common Vulnerability Scoring System (CVSS) score of 7.0-8.9, are now identified as CVE-2021-42598, CVE-2021-42599, CVE-2021-42600, and CVE-2021-42601. We want to thank mce Systems’ engineering teams for collaborating quickly and efficiently in resolving these issues as well as to AT&T for proactively working with Microsoft to ensure customers can safely continue to use the framework.
Several other mobile service providers were found using the vulnerable framework with their respective apps, suggesting that there could be additional providers still undiscovered that may be impacted. The affected providers linked below have made updated app versions available to users before this disclosure, ensuring devices can be protected before these vulnerabilities could be exploited. We encourage these providers’ customers to update to the latest versions of these apps from the Google Play store, which include but are not limited to: com.telus.checkup, com.att.dh, com.fivemobile.myaccount, com.freedom.mlp,uat, and com.ca.bell.contenttransfer.
Additionally, the package com.mce.mceiotraceagent might be installed by several mobile phone repair shops. Mobile users are advised to look for that app name and remove it from their phone, if found.
Analyzing apps that use the mce framework
App manifest and permissions
When analyzing an Android application, the first thing that comes to mind is checking its manifest, maintained under the AndroidManifest.xml file. The manifest describes the application itself and its components, such as the following:
Permissions (for example, camera access, internet access, and others)
Activities and how they respond to Intents sent to them
Content providers
Receivers and the kind of content they expect to receive
Services
Checking the manifest of an app affiliated with mce Systems’ framework shed light on some of its features and capabilities but did not immediately indicate that any vulnerabilities or security issues were present. Therefore, further research into the app’s functionality was needed by understanding its permissions.
Analysis of the app’s permissions on the mobile device revealed authorizations that could lead to powerful access and capabilities for an attacker. Those permissions included control over the following:
Networking: access the internet, modify Wi-Fi state, network state, NFC, and Bluetooth
File access: read and write to the external storage
Peripherals: access the camera, record audio, get fingerprint information, and get the device’s physical location
Private information: read phone numbers, account information, and contacts
Management: install apps and modify device settings
With access to these valuable resources, the app could be abused by an attacker to implant a persistent backdoor on the device.
BROWSABLE activities
The “Activities” section of the app’s manifest detailed that the Intent-filter element included activities with a “BROWSABLE” category. While most Intents do not require a category, category strings detail the components that should handle the Intent. In particular, the BROWSABLE category allows the target Activity to be triggered from a web browser to display data referenced by a link, like an image. BROWSABLE activities appeal to attackers as the latter can exploit them via malicious web pages and other Intent-based attacks.
Figure 1: BROWSABLE Activity with the “mcedigital://” scheme
The Intent-filter element in the manifest dictates how the Activity can be triggered. In the app’s case, the Activity could be triggered by simply clicking a link with the “mcedigital://” scheme. This would start the com.mce.sdk.AppActivity Activity with an Intent with arbitrary data (besides the scheme).
Digging deeper: Reviewing the mce framework’s main functionality
We reviewed the effects of triggering the com.mce.sdk.AppActivity. Also known as appActivity, this Activity refers to the different functionalities provided by the app. AppActivity extends Activity and therefore has an onCreate method, which traditionally handles the creating Intent.
AppActivity
Here’s a brief description of AppActivity:
AppActivity has a member called “webView” and type “JarvisWebView,” a specialized class that extends WebView.
Upon creation, AppActivity has some optional display choices from the Intent (if they exist) and then loads a predefined web page to the WebView. That predefined page can get arbitrary query parameters from the Intent’s data; that is, everything after a “\?” will be added to the web page.
A JavaScript Interface is a conspicuous target to look for security issues, as it uses a JavaScript Bridge to allow invoking specific methods inside an Android app. In the case of JarvisJSInterface, three methods are exported:
init(String): takes a string that will be used as a JavaScript callback method; in our case, it will always be window.AndroidCallback
windowClose(): runs a callback registered by the Android app
request(String): sends a service request from the JavaScript client to the server (Android app)
The request method is by far the most interesting, as it performs the following:
Interprets the given string as a JSON object
Extracts the following pieces from the JSON object:
Context: a random GUID generated by the client, used to link requests and responses
Service: the service we are about to call to
Command: an integer
Data: optional parameters sent to the service call
Invokes the method serviceCall, which finds the registered service, gets the method based on the command number, and eventually invokes that method using Java reflection
Figure 2: Service::callServiceMethod
The serviceCall is a powerful method, as it allows the WebView to invoke “services” freely. But what are these services, exactly?
Services offered by the mce framework
After we examined the services offered by this framework per the app manifest, we then obtained a list of services that practically give the WebView complete control over the device. The most notable services include:
Audio: access and manipulate volume levels, as well as play a tone with a given duration and frequency
Camera: take a silent snapshot
Connectivity: control and obtain valuable information from NFC, Wi-Fi, and Bluetooth
Device: includes various device controlling mechanisms like battery drainage, performing a factory reset, and obtaining information on apps, addresses, sensor data, and much more
Discovery: set the device to discoverable
Location: obtain the location in various modes and set the location state
PackageManager: acquire package info and silently install a new app
Power: obtain charging state
Sensor: acquire sensor data such as barometer data, light data, proximity data, and whether fingerprinting is working
Storage: obtain content such as documents, media, images, and videos
These services inherit from a base class named “Service” and implement two methods:
setServiceName: for service identification purposes
setServiceMethodMap: for setting up the mapping between the command integer and the method name, argument names, and argument types
For example, here is the Camera service setting its methods:
Method 0 is “getCameraList” and expects no arguments.
Method 1 is “captureStillImageNoPreview” and expects one String argument.
Figure 3: The Camera service setting its methods
Vulnerability findings
Based on our analysis of the mce framework, we discovered several vulnerabilities. It should be noted that while mobile service providers can customize their apps respective to mce framework so as not to be identical, the vulnerabilities we discovered can all be exploited in the same manner—by injecting code into the web view. Nonetheless, as their apps and framework customization use different configurations and versions, not all providers are necessarily vulnerable to all the discovered vulnerabilities.
We found a command-injection vulnerability, tracked as CVE-2021-42599, in the Device service mentioned in the previous section. This service offers rich functionality, including the capability to stop activities of a given package. The client fully controls the argument “value,” and simply runs the following command:
am force-stop "value"
Since the argument is not sanitized, an attacker could add backticks or quotation marks to run arbitrary code, like the following:
am force-stop "a"; command-to-run; echo "a"
Figure 4: Command injection proof-of-concept (POC) exploit code implemented in the Device service
According to mce Systems, they have since removed the functionality behind this vulnerability and it is no longer present in more advanced framework versions.
Exploitation by JavaScript injection with PiTM in certain apps
The services offered by the mce framework further indicated that the following vulnerability resided in the logic of the JavaScript client for apps that are configured to enable plaintext communications such as the app that we initially analyzed. Interestingly, the code for the client is a heavily-obfuscated dynamic JavaScript code that is implemented over several files, mainly bundle.js. Due to the blind trust between the JavaScript client and the JarvisJSInterface server, an attacker who could inject JavaScript contents into the WebView would inherit the permissions that the app already has.
We conceived two injection strategies most likely to be leveraged by attackers:
Affect the JavaScript client behavior by supplying specific GET parameters from the BROWSABLE Intent.
Trigger an app with the BROWSABLE Intent to become a person-in-the-middle (PiTM) and view the device’s entire traffic. Inject JavaScript code if the client ever tries to fetch external content and interpret it as a script or HTML.
Once we reverse-engineered the client’s obfuscated code, we discovered that it could not inject JavaScript from the GET parameters. The only capability permitted was to affect some of the client’s self-tests upon initialization, such as a battery-draining test or a Wi-Fi connectivity test. However, the WebView-fetched plaintext pages that we discovered could be injected into with a PiTM attack.
Our proof-of-concept (POC) exploit code was therefore:
Perform a PiTM for the target device and lure the user into clicking a link with the “mcesystems://” schema.
Inject JavaScript into one of the plaintext page responses that does the following:
Hijack the JavaScript interface by calling init with our callback method
Use the JavaScript interface request method to get servicing
Send the data to our server for information gathering using XHR (XMLHttpRequest)
Figure 5: Injecting a similar JavaScript code to the WebView could allow an attacker to call arbitrary services and methods
Local elevation of privilege with deserialization followed by injection (CVE-2021-42601)
Some of the apps we analyzed did not pull plaintext pages. Thus, we looked for a local elevation of privilege vulnerability, allowing a malicious app to gain the system apps’ privileges, tracked as CVE-2021-42601.
In the apps mentioned above, we discovered that the main Activity attempted to handle a deep link (a link that launches an app instead of a browser on click) with Google Firebase. Interestingly, this deep-link handling tried to deserialize a structure called PendingDynamicLinkData (representing a link) from an Intent Extra byte array with the key com.google.firebase.dynamiclinks.DYNAMIC_LINK_DATA. This structure was used later by the mce framework to generate various JSON Objects that might contain data from a categoryId query parameter in the original link, and eventually ended up in the member mFlowSDKInput to be injected into the JarvisWebView instance in an unsafe way:
Figure 6: Unsanitized JavaScript loading allowed arbitrary code injection to the WebView
Since the categoryId query parameter might contain apostrophes, one could inject arbitrary JavaScript code into the WebView. We decided to inject a code that would reach out to a server and load a second-stage code, which was the exact one we used for our PiTM scenario.
Figure 7: Local injection POC exploit
Software design against JavaScript injection vulnerabilities
We worked closely with the mce Systems engineering team and discovered that the reason for unsafe loadUrl invocations with JavaScript injections was that the framework used an asynchronous model of operation. When the JavaScript client performs a request, it expects to be notified later when there are results. Since Android JavaScript Bridge only allows primitive types to be sent (for example, Strings), the mce framework notified the JavaScript client by injecting JavaScript with potentially unsafe arguments (the results themselves).
We offered mce Systems a slightly different software design that prevents unsafe JavaScript injection. The description of the flow of information in our proposal is as follows:
The JavaScript client invokes the request method on the Android JavaScript Bridge, supplying the request itself along with a request ID.
The Java server performs the request and stores the result in a cache. The said cache then maps request IDs to results.
The Java server notifies the client by carefully injecting the JavaScript loadUrl(“javascript:window.onMceResult(<requestID>);”) into the WebView. Note that the only non-constant string is the request ID, which can easily be sanitized. This method “wakes the client up”
The JavaScript client implementation of onMceResult invokes the Android JavaScript Bridge with the method String fetchResult(String requestId). Note that this method returns a string (which contains the result).
This way, the JavaScript client does not need to poll for asynchronous results while data is safely transferred between the client and the server.
Interestingly, Google AndroidX offers a very similar API: webMessageListener. While the said API works quite similarly to our suggestion, it only supports Android versions greater than Lollipop. Thus, the new mce framework now checks the Android version and uses this new Google API if supported or our offered solution for older devices.
The above is just one example of our collaboration to help secure our cross-platform ecosystem. According to mce Systems, all of our reported vulnerabilities were addressed.
Improving security for all through threat intelligence sharing and research-driven protections
Microsoft strives to continuously improve security by collaborating with customers, partners, and industry experts. Responding to the evolving threat landscape requires us to expand our capabilities into other devices and non-Windows platforms in addition to further coordinating research and threat intelligence sharing among the larger security community. This case highlighted the need for expert, cross-industry collaboration to effectively mitigate issues.
Moreover, collaborative research such as this informs our seamless protection capabilities across platforms. For example, intelligence from this analysis helped us ensure that Microsoft Defender Vulnerability Management can identify and remediate devices that have these vulnerabilities, providing security operations teams with comprehensive visibility into their organizational exposure and enabling them to reduce the attack surface. In addition, while we’re not aware of any active exploitation of these mobile vulnerabilities in the wild, Microsoft Defender for Endpoint’s mobile threat defense capabilities significantly improve security on mobile devices by detecting potential exploits, malware, and post-exploitation activity.
We will continue to work with the security community to share intelligence about threats and build better protection for all. Microsoft security researchers continually work to discover new vulnerabilities and threats, turning a variety of wide-reaching issues into tangible results and improved solutions that protect users and organizations across platforms every single day. Similarly inquisitive individuals are encouraged to check opportunities to join the Microsoft research team here: https://careers.microsoft.com/.
Jonathan Bar Or, Sang Shin Jung, Michael Peck, Joe Mansour, and Apurva Kumar Microsoft 365 Defender Research Team
Cybersecurity researchers are calling attention to a zero-day flaw in Microsoft Office that could be abused to achieve arbitrary code execution on affected Windows systems.
The vulnerability came to light after an independent cybersecurity research team known as nao_sec uncovered a Word document (“05-2022-0438.doc“) that was uploaded to VirusTotal from an IP address in Belarus.
“It uses Word’s external link to load the HTML and then uses the ‘ms-msdt’ scheme to execute PowerShell code,” the researchers noted in a series of tweets last week.
According to security researcher Kevin Beaumont, who dubbed the flaw “Follina,” the maldoc leverages Word’s remote template feature to fetch an HTML file from a server, which then makes use of the “ms-msdt://” URI scheme to run the malicious payload.
The shortcoming has been so named because the malicious sample references 0438, which is the area code of Follina, a municipality in the Italian city of Treviso.
MSDT is short for Microsoft Support Diagnostics Tool, a utility that’s used to troubleshoot and collect diagnostic data for analysis by support professionals to resolve a problem.https://www.youtube.com/embed/GybD70_rZDs
“There’s a lot going on here, but the first problem is Microsoft Word is executing the code via msdt (a support tool) even if macros are disabled,” Beaumont explained.
“Protected View does kick in, although if you change the document to RTF form, it runs without even opening the document (via the preview tab in Explorer) let alone Protected View,” the researcher added.
In a standalone analysis, cybersecurity company Huntress Labs detailed the attack flow, noting the HTML file (“RDF842l.html”) that triggers the exploit originated from a now-unreachable domain named “xmlformats[.]com.”
“A Rich Text Format file (.RTF) could trigger the invocation of this exploit with just the Preview Pane within Windows Explorer,” Huntress Labs’ John Hammond said. “Much like CVE-2021-40444, this extends the severity of this threat by not just ‘single-click’ to exploit, but potentially with a ‘zero-click’ trigger.”
Multiple Microsoft Office versions, including Office, Office 2016, and Office 2021, are said to be affected, although other versions are expected to be vulnerable as well.
What’s more, Richard Warren of NCC Group managed to demonstrate an exploit on Office Professional Pro with April 2022 patches running on an up-to-date Windows 11 machine with the preview pane enabled.
“Microsoft are going to need to patch it across all the different product offerings, and security vendors will need robust detection and blocking,” Beaumont said. We have reached out to Microsoft for comment, and we’ll update the story once we hear back.
IT teams rely on Active Directory (AD) to keep networks secure and maintain user accounts — but they often need to adhere to strict budget limitations when it comes to selecting software to help. That’s why we’ve put together this list of the top free Active Directory management tools.
Our picks focus on AD tools that will help you complete routine AD management tasks much faster so your team has time to focus on other priorities. We’ve grouped these free Active Directory tools into three categories:
Active Directory Reporting, Monitoring and Auditing Tools
Microsoft Active Directory Explorer
Microsoft Active Directory Explorer is an advanced administration tool that makes it easy to search for, view and edit extended information about AD objects. It is similar to AD Users and Computers but has at least one key additional benefit — it allows you to view object properties and attributes without opening additional dialog boxes.
AD Explorer also enables you to save snapshots of an AD database for offline viewing and database version comparisons. When you load a saved snapshot, you can work with it as you would use a live database.
Other features include:
Defining favorite locations
Editing permissions
Viewing an object’s scheme
Executing sophisticated searches that you can save and re-execute
Netwrix Auditor for Active Directory (free community edition) gives you visibility into what’s happening inside domains while eliminating the time-consuming tasks of analyzing endless native logs. Netwrix Auditor tracks logons and all changes to Active Directory users, groups, organizational units and Group Policy. It generates a daily activity summary that details all changes and logon activity that occurred during the previous 24 hours, including the before and after values for each modification.
Netwrix Account Lockout Examiner
Netwrix Account Lockout Examiner is well known as one of the best Active Directory tools for quickly resolving one of the most pressing issues with AD: account lockouts. It enables you to identify the root cause of lockouts in a single keystroke, slashing troubleshooting time by up to 90 percent. This lightweight and intuitive tool empowers you to investigate issues like why the same account repeatedly locks out without having to slog through a mountain of cryptic event logs — just enter the username and click a button.
Netwrix Effective Permissions Reporting Tool
Netwrix Effective Permissions Reporting Tool simplifies auditing of access permissions in Active Directory. You can view a user’s account group membership, the permissions the account has to every AD object and how those permissions are granted. It also shows file and folder effective permissions, so you can determine who has access to your data and how their access was gained. You can export this information to an HTML file.
Netwrix Bulk Password Reset
Netwrix Bulk Password Reset enables you to reset local admin and user passwords across multiple workstations at once, remotely, without actually logging into them. This functionality enhances Windows Server security.
Netwrix Inactive User Tracker
Netwrix Inactive User Tracker provides insight into stale Active Directory user accounts so you can disable or delete unneeded accounts before malicious actors can exploit them to gain access to resources and services on your network.
Netwrix Password Expiration Notifier
Netwrix Password Expiration Notifier automatically sends notifications about upcoming AD password expiration to users and their managers. This proactive approach enables you to remain in compliance with password security best practices without sacrificing user productivity or increasing helpdesk workload.
Cjwdev Active Directory Info
Cjwdev Active Directory Info is a free Active Directory reporting and analysis tool that enables you to review the configuration settings of AD objects. You can quickly generate CSV, HTML or TXT reports to gain insight into things like:
Cjwdev Active Directory Permissions Reporter extracts all permissions for every object in your domain. Note that the free edition of Cjwdev AD Permissions Reporter does not support the command line and you cannot filter or export results.
ENow Compass
ENow Compass provides real-time network monitoring to help you identify issues that could evolve into bigger problems. ENow Compass is a powerful toolset, but the company does not offer a free version. Users can start with a 14-day free trial with registration.
MaxPowerSoft Active Directory Reports Lite
MaxPowerSoft Active Directory Reports Lite allows you to load up to 200 objects from Active Directory and generate auditing reports on users, groups, organizational units, computers and GPOs. The paid version of grants access to more reports and many more features.
Active Directory FastReporter
Active Directory FastReporter generates a variety of predefined reports on your AD infrastructure. The free version doesn’t allow you to create custom reports, export reports or use automation features.
LDAPSoft Active Directory Browser
LDAPSoft Active Directory Browser simplifies SSL communication and streamlines the process of browsing your AD hierarchy. You can search for entries, view all available attributes and run SQL-LDAP statements.
Softerra Browser for LDAP
Softerra Browser for LDAP is a lightweight tool that allows you to view, browse, search and export information from LDAP. It is free to use for 30 days — you’ll need to register a paid account to use it past this point.
WiseSoft Password Control
WiseSoft Password Control can reset user passwords in bulk, which saves time and effort when managing service account passwords. It also includes the ability to make other bulk changes, such as enabling and disabling user accounts, group membership functions, descriptions and departments.Handpicked related content:
Albus Bit Active Directory Administrator enables you to manage user and computer accounts across your Active Directory domain from a single interface. You can use the built-in search templates or create your own, and use the results to disable inactive accounts, move accounts to different organizational units or remove users from groups.
CjWdev Active Directory Tidy
CjWdev Active Directory Tidy allows you to easily manage your AD accounts in bulk. For example, you can add multiple accounts to a specific security group, or set random passwords or a particular expiry date for a set of accounts.
The tool’s filtering functionality makes it easy to clean up your AD. For example, you can filter by last login date to find all inactive user and computer accounts to determine whether you should remove them from your domain. The paid version of this tool also enables you to export AD settings to XML.
Spiceworks People View
Spiceworks People View allows you to view and update AD user account properties, such as email, phone number, title and department. You can also add devices to user profiles to monitor installed software programs and update it when needed. You can also reset passwords and enable or disable user accounts. The tool also offers self-administered password and user profile management on a self-service web portal, and real-time status monitoring of all your devices.
Spiceworks offers other useful tools. For example, Network Monitor performs real-time status monitoring of all your devices.
Microsoft AdRestore
Microsoft AdRestore is a single-task tool that enumerates all tombstoned objects in your AD domain and enables you to restore them individually as needed.
Windows PowerShell
Windows PowerShell is undoubtedly the most powerful Active Directory tool. However, it can be challenging to use because it lacks a graphical interface. To accomplish your tasks, you’ll need to use cmdlets and scripts like the following:
Disable a user account: Disable-ADAccount username
Enable a user account: Enable-ADAccount username
Unlock a user account: Unlock-ADAccount username
Delete a user account: Remove-ADUser username
Find all empty groups: Get-adgroup -filter * | where {-Not ($_ | get-adgroupmember)} | Select Name
Add a member to a group: Add-adgroupmember “groupname” –username
Enumerate the members of a group: Get-ADGroupMember “groupname”
See what groups a user account is a member of: Get-aduser username -property Memberof | Select -ExpandProperty memberOf
Disable a computer account: Disable-ADAccount -Identity “computername”
Create an organizational unit: New-ADOrganizationalUnit -Name OUname -Path “dc=domainname,dc=com”
Create a computer account: New-ADComputer -Name username -Path “ou=OUname,dc=DCname,dc=com”
Create a user account: New-ADUser -Name username -Path “ou=OUname,dc=DCname,dc=com”
Adaxes
Adaxes streamlines routine management functions in Active Directory, Microsoft Exchange and Microsoft 365 environments. You can use it to delegate privileges, control authorizations and stay in compliance with data mandates. Softerra offers a 30-day free trial.
CENTREL Solutions XIA Automation
CENTREL Solutions XIA Automation helps you automate IT management tasks, such as account provisioning, user management and password changes. It includes time-saving features like bulk provisioning of accounts from CSV to AD, Exchange, Google or Office 365.
Dameware Remote Everywhere
Dameware Remote Everywhere is a pricey commercial-grade tool at $540 (and up), but it is notable for its powerful functionality — especially for enterprise-level network needs.
“Remote Everywhere” refers to the tool’s cloud-based solutions. Users enjoy safe, remote support with advanced encryption and multifactor authentication, essential endpoint support for any computer or device, and a reporting engine that can handle virtually any reporting task. New users can get a fully functional version of Dameware Remote Everywhere for 14 days.
Active Directory Utility Tools
Microsoft Active Directory Replication Status (ADREPLSTATUS) Tool
Microsoft ADREPLSTATUS Tool is a single-purpose tool that helps you analyze the replication of domain controllers in your network.
Cjwdev Group Manager
Cjwdev Group Manager allows the manager of a group to manage roles and settings for the group, including adding and removing other users and exporting group members to a CSV file. The free edition enables you to manage only a single group, and you cannot or add new members from other domains.
Cjwdev Active Directory Photo Edit
Cjwdev Active Directory Photo Edit enables you to import and upload images to an AD attribute that can be displayed in Outlook 2010, Lync and SharePoint. The free edition can’t process pictures for users and contacts in bulk, but the paid version offers this feature.
Cjwdev Managed Service Accounts GUI
Cjwdev Managed Service Accounts GUI helps you configure managed service accounts using an intuitive GUI that eliminates the need for PowerShell commands.
Specops Password Auditor
Specops Password Auditor scans your Active Directory and identifies password-related vulnerabilities so you can reduce your attack surface and maintain compliance.
Specops Software Gpupdate
Specops Software Gpupdate enables remote administration of computers and organizational units. For example, you can refresh Group Policy or wake up, shut down or restart a PC remotely.
Specops Command
Specops Command is a PowerShell and VBScript interface that helps you automate many Active Directory administrative tasks.
Zohno Z-Hire and Z-Term
Zohno Z-Hire and Z-Term are single-task tools. Z-Hire speeds the user account creation process for new hires, while Z-Term helps with account removal when an employee leaves the organization.
SysOpsTools Active Directory Query
SysOpsTools Active Directory Query is a free executable tool — no installation required — that can be used to quickly search AD for information about a specific user or computer, including schema attributes that are normally not readable.
SysAdmin and SysAdmin Anywhere both offer a free trial.
Codeplex ADModify.NET
Codeplex ADModify.NET is a single-use tool that allows you to modify multiple user attributes at once.
WiseSoft Bulk Password Control
WiseSoft Bulk Password Control enables you to change passwords on multiple accounts at the same time using the tool’s password generator feature. You can also enable, disable and unlock AD accounts in bulk.
Conclusion
With so many options to choose from, it can be challenging to find the right mix of AD management tools for your needs. The most effective way to make that choice is to install different tools and try them out in your AD environment. This will give you insight into how well they will work for your specific needs and preferences.
If you’re looking to offer a more affordable (and easier to build) solution for a client’s business, online portfolio, and much more, you may want to consider a one-page WordPress website.
One-page websites are simple, popular and — when built on Managed WordPress — easy for nearly anyone to maintain.
However, dialing in the one-page design isn’t always a simple task for website designers, especially when you’re used to taking on larger or more complex projects. Luckily you’ve come to this post. Here, we look at tips to help create a solid one-page website design. Here’s what we’ll cover:
Determine whether one page is enough
Create a strategy for content
Build an anchor menu for easy navigation
Understand the audience
Make scrolling easier
Make the website mobile-friendly
Develop strong CTAs
Avoid large text blocks
Optimize for search engines
Include social media accounts
Be creative with the contact block
Why a one-page WordPress website?
One-page website designs have gained increased popularity among business owners and web designers because they’re simple, easy and trendy. But while one-page websites are ideal for different types of business, they are not a one-fits-all solution.
Before settling on a one-page website, ensure it is ideal for your client. You may want to create a one-page website if they don’t have a lot of content or many different elements. A single-page website may be ideal for clients who:
Want to create an online portfolio or personal website
Sell a few products or services
Have one-time events such as conferences and weddings
Need a campaign-specific landing page
On the other hand, a one-page WordPress website may not be ideal, for example, if their content is complex or they sell lots of different products or services with tons of information.
Tips for creating a one-page WordPress website
Less is more in design, and web design is not an exception. After all, the fewer pages a site has, the more it will be appealing to visitors. A good one-page design will communicate a story effectively, promote a brand and drive conversions.
However, that doesn’t mean that creating a one-page WordPress website is a simple task. Without the right gameplan, you may end up with a single page that isn’t attractive and doesn’t serve your marketing purposes.
To that end, here are steps to follow for a perfect one-page website design:
Determine whether one page is enough
Before you take any step, it’s best to determine whether the situation calls for one page or a classic website. Depending on the type of client you’re helping, one kind of website might be better than another — you need to weigh the options to determine which type of website will work.
As stated earlier, a one-page WordPress website should have a simple yet robust design that is user friendly. It often displays only a small amount of text but more images.
Due to its long scrolling design, you have the option to be creative and decide the order in which content appears.
One-page website design offers a good user experience. Since the content appears in a linear fashion, visitors won’t get lost in multiple pages. These sites also render well on mobile and tablets, and are easy to maintain.
A classic website comes with a homepage alongside other pages, often services, a contact page, and FAQ. The main advantage of a classic web design over a one page is that it allows you to display tons of content about products or services.
With the classic design, you get the option to display each piece of content on a dedicated page, allowing more thorough descriptions. But if you decide that a one-page WordPress website is best, move to the next step.
Create a strategy for content
The first step to creating a one-page WordPress website is to plan out content. One page allows you to control the order in which content appears. The idea is to ensure the order is both logical and intuitive.
Be careful with what you place above the fold or what the visitor sees before scrolling down the site. Ideally, the main message should entice visitors.
Like any other website, a one-page WordPress website could include an about section, services and products, more about the offering, an FAQ section, CTAs, a photo gallery and contact information.
How you prioritize this content will determine how effective the one-page design will be. Remove unnecessary information to keep content as simple and organized as possible.
Build an anchor menu for easy navigation
Unlike a classic website (where each item links to a page of its own), a one-page WordPress website menu links to a different section of the same page. As a result, you need to build an anchor menu to link each section.
These are three important steps to help create an anchor menu for a good one-page design:
Create an anchor — An anchor will help users navigate to a particular part of your one-page design. While some templates come with built-in anchors, there’s usually an option to rename, move or delete them.
Link anchors to the menu — Linking the site’s menu to anchors makes it easier for visitors to go to a specific section. The idea is to select the corresponding section to attach an anchor to, which will help in the navigation.
Create a menu order — Linking the menu to anchors isn’t enough. You should ensure the order in the menu corresponds to the order of section. Single-page website designs involve a lot of scrolling. As such, ensure that the menu is always visible by freezing it. Fortunately, this is easily achievable via plugins such as WP Floating Menu.
Understand the audience
When it comes to a one-page WordPress website, you have only one page to display many sections. That’s why it is important to identify gaps in every section and fill those gaps to improve user experience and overall site performance.
Analyzing which sections have gaps and making the necessary changes is paramount. To achieve this, you need to group your visitors based on location, demographics, source, behaviors, devices they use, and other such criteria.
You can collect this data for clients if you install proper analytic tools like Google Analytics on the site. Ensure that you have everything set up to get required data and determine the metric to track.
Tracking user behavior for a classic website with multiple pages is straightforward. But things get rather complicated when it comes to a single-page website.
Luckily, free tools like Google Tag Manager will help track activities on a one-page website. This tool will enable you to track different actions on the site and provide more insights regarding the needs and expectations of a target audience.
Make scrolling easier
A one-page WordPress website involves a lot of scrolling. Don’t make visitors keep scrolling down the site to find what they are looking for — make it as simple as possible.
A scroll-top button (yep, there are plugins for that) and anchor links make navigation easier and fast. You may also want to use parallax scrolling (make the background move a different speed from the foreground content) to keep your users engaged when scrolling until they find what they are looking for.
No matter how creative you want to be with navigation, you shouldn’t ignore usability. After all, visitors are real humans, so ensure they can easily find the content they need.
Make the website mobile-friendly
People spend more time on smartphones or tablets than desktops. You may also have heard about mobile-first indexing, where Google considers the mobile version of the content for indexing and ranking.
As a result, ensure the website is functional and looks as good on mobile as desktop. Adapting to the mobile version shouldn’t cause headaches if you use a readymade CMS like WordPress.
Develop strong CTAs
Strong CTAs for the one-page WordPress website are essential. This command phrase, such as “Buy Now” or “Sign Up,” takes the form of a button or hyperlink to increase sales or conversion.
To get the most from a CTA, it needs to:
Be logical, intuitive and concise
Encourage visitors to take action
Unique from other graphical elements
Placed at strategic places for users’ view
Once you have CTA content, link the button to an anchor to make it easy for visitors to navigate a particular section.
Avoid large text blocks
Having too much text on one page can hurt conversions. After all, users expect as brief a chain of actions as possible (e.g. visit > see what you need > take the required action).
Imagine if, during the second step, there’s tons of text for the user to read.
Include only the information that directs users to a CTA, and presents it in a brief and straightforward manner. If you have a lot of information to share with users, create a separate blog and link it to a unique place on the website.
Optimize for search engines
The need for search engine optimization for any website cannot be overstated. When it comes to a one-page WordPress website, you only have one page to rank for several keywords, and you have fewer things to optimize than a classic website.
However, this doesn’t mean that you cannot optimize the single-page website. Yes, it may be a bit challenging, but it’s possible. That said, here are things to remember when optimizing a one-page website:
Improve page speed
Page speed refers to the time it takes to display a page content fully. In our case, this is the time it takes to display one page of website content.
A significant number of visitors will leave a page that takes more than three seconds to load.
And if your website loads slowly, Google and other search engines will consider it to have a bad user experience. That’s why you need to analyze your site loading speed and optimize it.
Luckily, Google has a free tool to help analyze your website speed. To analyze your website, go to PageSpeed Insights and enter the URL. This tool will help analyze how a site performs on both desktop and mobile devices.
Once you get insights into what is slowing down the website, try to resolve all errors to improve website speed.
Optimize each section for SEO
Treat each section of the one-pager as a separate page and optimize it for SEO. The idea here is to ensure that each section of your one-page website has a heading tag to tell what the section is all about.
Next, optimize each section for the primary and related keywords. You also need to optimize text blocks for those keywords and include alt texts in images.
Ensure content is fresh and relevant
Content is king, but only if it’s fresh and relevant for an audience and search engines. Content is not static. To keep up with the ever-changing Google algorithms, pitch content updates to your client so the website can rank higher on SERPs.
Include social media accounts
Social media can provide a perfect way to improve an online presence. As such, connect your client’s Instagram, Facebook, and LinkedIn profiles with their one-page WordPress website to help improve traffic to the site.
One way to achieve this is by adding an Instagram feed. Doing this will provide an opportunity to share the latest photos of your client’s business with visitors.
Another perfect way to incorporate social media profiles into the website is to place icons for all business social media accounts. Users will see these elements as they scroll the website, providing a perfect way to further interact with a business.
Be creative with the contact block
Last but not least, make sure visitors can easily find contact information on the site. That said, consider placing phone numbers, email addresses, blogs, and social media links in a separate block at the top of the site.
The idea is to ensure that users will not need to scroll to the bottom to see contact information. After all, this can be troublesome, especially if the site has many media components that can load slowly when there’s a poor internet connection.
Closing thoughts on the one-page WordPress website
Creating a one-page WordPress website has many benefits, including better SEO potential, it’s faster and easier to maintain, intuitive to use, and easy to organize. Once you determine that a single website is best for your client, the above tips will help you get a perfect one-pager going.
Wondering how to improve your website’s SEO and increase web traffic fast? There are plenty of actionable steps you can take today. Most don’t even require a web developer or coding knowledge to get started.
Below we’ll review 12 best practises you can easily work into your business plans to help you:
Rank higher in search engines
Grow your audience
Attract more leads
We’ll also give you tips on how GoDaddy can help you on your journey, plus share plenty of free resources you can refer to along the way.
1. Optimize your URLs
Optimizing your URLs is a good way to improve SEO quickly. It’s something that takes little effort but can help boost your rankings when done right. Here are a few best practices to look out for.
Screenshot of Page Title editor inside GoDaddy Website Builder.
Go for shorter URL titles
When it comes to URLs, you want to keep them short and compelling. Shorter URLs are often easier to remember, which makes them more shareable and higher ranking. Make sure your URL is free of fluff words (like “and” or “for”) and easy to understand.
Note: GoDaddy’s Website Builder automatically optimizes your URL title for you by limiting it to 25 characters. Simply type in your URL title into the designated text box for “Page Title” and you’re done. It also fills in any spaces with hyphens following web convention.
Include primary keywords
Adding a primary keyword to your URL is another best practice for optimization and should also be applied to your:
Meta title: This is the blue header in the search engine results page
Meta description: This is the copy that sits beneath the meta title
On-page title: This is the actual title of your work at the top
Aim for placing your keyword closer to the beginning of your URL title for optimal results.
Keep it relevant
URLs should also be relevant to the content you’re displaying on that specific page. Keeping them aligned with the page copy allows Google’s search bots to easily understand and identify the information for search queries.The more relevant your information is to a search query, the higher it ranks on Google.
Think about how relevant it will be for future use. You don’t want it to be overly specific that it becomes less relevant over time.
For example, you can make a URL more applicable for future use if you avoid adding a specific year at the end. Peek the following URL endings to see how they contrast.
Instead of a URL that ends in: .com/best-fathers-day-gifts-2022
Go for something like: .com/best-fathers-day-gifts
If other websites link to your page, the URL without the year enables that page to keep hold of any authority and associated rankings in the future.
Screenshot of URL title settings inside GoDaddy Website Builder.
A note on changing URL titles
Editing your URL title is an option using GoDaddy’s Website Builder, but it’s not recommended you make any changes when dealing with older existing pages.
Changing an existing URL can hurt your SEO and result in decreased traffic, since it’s likely you have backlinks attached to the post you’re trying to change. This means that anytime someone finds the old link through a partnering site or newsletter, they might end up at the dead link instead.
Unless you really need to for rebranding purposes, it’s best you avoid this route to prevent any damage to you SEO.
2. Optimize metadata
Screenshot showing where to write a meta title and meta description inside GoDaddy Website Builder.
The term “metadata” comes up a lot when researching how to improve SEO quickly. It refers to the data on a webpage that provides Google with information about a particular site. In other words, it’s data that describes other data.
By itself, metadata won’t affect SEO rankings. But it can help in the following areas:
Boost engagement
Increase click-through rates
Give you the upper edge over your competitors
It’s a small piece of the SEO puzzle that is often overlooked but can be beneficial when combined with other best practices. Let’s look at two ways to improve your meta data below.
Meta descriptions
Meta descriptions appear in the search results page underneath the meta title. It often gives a quick snippet of what the web page is about and typically includes a call to action (CTA) to encourage more clicks.
Examples of these CTAs could look like:
“Shop now”
“Schedule an appointment”
“Click here to read more”
As noted earlier, you’ll want to include a primary keyword within the description and keep the copy to 155 characters or less. The primary keyword will also appear in bold anytime it matches a searcher’s query.
Meta titles
The meta title (aka title tag) is the text shown in large blue font in the search engine results page. It’s often the first thing searchers will see and can sometimes be confused with the H1 tag.
However, the meta title and H1 tag are two separate things.
The meta title is named with SEO and Google in mind, while an H1 tag is more for the user’s benefit. A lot of times digital marketers will use the same title for both the meta title and H1 tag to cause less confusion for users.
When naming your meta title, you should always:
Screenshot of meta title editor inside GoDaddy Website Builder.Include a primary keyword at the start. An exception should be made for well-known brands or local businesses who should add their business name to the start.
Accurately describe what’s on page. Make sure you showcase what people want to see and use actionable words that’ll generate more clicks.
Ensure each title tag is unique. Look at competitors for ideas but don’t copy. Keep it short and sweet like: Tall Men’s Clothing | Tall Jeans, Pants & Coats | ABC.
Keep it to 65 characters or less. This includes spaces, so avoid going over if you don’t want search engines to automatically truncate it for you. Title tags may be rewritten by Google if it thinks there’s a more suitable one for the searcher’s query. If you need to test the length, you can use free online tools like this meta title counter to help you.
Editing the meta title and meta description is easy using GoDaddy’s Website Builder. Simply use the editor and go to the page you need optimized. Click on Settings (cog symbol) and then select Get Found on Google to edit what you need.
3. Check your speed
An important element of improving SEO is speed. The time it takes for your webpage to load will affect whether your users stay to engage or bounce back in search of something better.
Between July and August 2021, Google rolled out a measure of core web vitals (CWV) to help website owners evaluate their overall page performance.
Here’s a quick breakdown of each one for reference:
Largest contentful paint (LCP): This refers to the largest block of text, video, or visuals that take up the most amount of time to load after a user clicks on your site.
First input delay (FID): This is the amount of time it takes for a browser to respond to a user’s first interaction on your site (typically when they click on a link or tap on a button).
Cumulative layout shift (CLS): This has to do with any layout shifts your user be experiencing as they interact with your page. Too many unexpected shifts could result in a bad user experience if left unchecked.
One best practice is to score below 1.3 seconds when reaching the First Byte. This means that the overall responsiveness and speediness of your website should fall within this time frame after a user clicks onto your site from a search query.
How to optimize your CWV score
Rankings are affected by a CWV score, so it’s best to aim high in good rankings to increase web traffic.
Google’s search advocate, John Mueller, noted in a recent YouTube discussion that if a site had lost or gained traffic steadily over the period of the CWV roll out, then it was likely related to the website’s CWV score.
GoDaddy’s Website Builder scores nearly 68% in good CWV rankings and outperforms most other competitors. It’s a great option to consider if you’re looking for low-hassle performance speed on your site. Plus, it includes other fool-proof elements like SSL certificates and more.
GoDaddy scores higher than other competitors when it comes to Google’s CWV rankings.
For non-GoDaddy sites, your biggest priority is to minimize image sizes before uploading to your site. Try using an image compressor to cut down on load time and apply a lazy loading plugin if you have a WordPress site. This will display all images below the fold only when the user scrolls down.
4. Find the right keywords for your content
Improving SEO means creating content Google can easily comprehend. That’s why optimizing with keywords helps. It allows Google bots to decipher what your page is about so that it can provide relevant results to search queries.
Let’s take a look at some best practices for keyword usage.
How to choose the best keywords
When creating content for your site, try to think of phrases and terms your target audience may be typing into a search query. For example, if you’re a retailer that specializes in kid’s clothing, you could aim for keywords like:
Toddler girl dresses for spring
Zipper onesies for baby boys
Activewear for boys and girls
Keep an eye on your competitors and note how they utilize their keywords for search queries.
It’s important to know the keywords your competitors are ranking for that you are not.
Let these findings guide you when deciding what keywords to create for your own content. Ensure your version is better optimized and more informative to win the upper edge.
Where to include primary keywords
Here are other areas where you should include primary keywords throughout your text:
Each page on your site: Include a primary keyword for every 60 – 150 words in each of your posts. Ensure they sound natural and avoid keyword stuffing to prevent Google from penalizing you.
On-page title: Make sure each page on your website has a primary keyword within the on-page title at the top.
First 100 words of every page: Include a primary keyword in your opening paragraph for each post. The sooner you introduce it, the better.
It’s also best to add a secondary keyword that’s similar in meaning to your primary keyword. This provides Google with extra information (or clues) to what your page is about.
Example of how a page title is automatically marked up as H1 tags for SEO using GoDaddy Website Builder, despite the over-sized font on the page.
Editor’s Note: GoDaddy’s website builder automatically assigns your primary keyword as a required H1 header tag in the backend, so there’s no extra coding necessary for you. This makes things easier any time you want to adjust the font size or style. Simply edit as you go.
Keyword length
When it comes to keyword length, there are two things to remember:
Short keywords with a large volume are harder to rank for and are more competitive
Longer keyword phrases with three to five words are easier to rank for and are less competitive
Let’s imagine you run a clothing shop. Instead of choosing a generalized keyword like “T-shirts,” you can opt for something more specific like “cruelty-free vegan T-shirts.” The competition for the longer phrase is lower and has a better chance at ranking higher on Google.
Duplicate keywords
On a similar note, you want to avoid including the same keywords and phrases on multiple pages of your website. This is known as keyword cannibalization and could lead users to the wrong page when they enter your site from a search query. It’s also not good for bounce-back rates.
The same goes for duplicate content. Try to avoid creating posts that are similar in topic, since this could confuse the search engine bots.
An example would be targeting “divorce lawyer near Los Angeles” on one page and “how to find a divorce lawyer near me” on another. The angles are too similar for Google to recognize the difference.
Helpful tools and resources
To help you optimize strategically, you can use the following tools when deciding which keywords to go for:
Google’s Keyword Planner: This is a tool for finding keywords that many digital marketers tend to utilize – especially in advertising. But you don’t need to be an advertiser to use it. Anyone can sign up for free and use it for insight on keyword search volume.
KWFinder: If you’re looking for a tool with more advanced features, try KWFinder. It offers a free trial and helps you find keywords that are easy to rank for.
Keyword Tool: Ecommerce store owners can find extra ideas using predictive search tools like this one. It gives you free keyword search suggestions for Amazon, eBay and more.
Remember, it’s best to avoid using keywords that have volumes in the highest and lowest categories. Refer to these tools any time you need help.
5. Write for your audience
Developing content that improves SEO quickly should be centred around your audience first and foremost.
You need to know who you are trying to target before you begin writing posts for your website.
This will allow you to create content that is genuinely helpful to potential customers visiting your site. It’s also something Google will reward you for in rankings and will lead users to CTAs that apply to:
Purchases
Email sign-ups
Inquiries and more
When drafting content for your site, you should note that there are two main categories to consider:
Standard pages and blog posts: These typically consist of informational content. A standard page should have a minimum of 300 words, while a blog post should have 700 or more.
Ecommerce product pages: Ecommerce pages focus more on product details. The recommended word count for these pages should range between 120-200 words.
Let’s discuss them even further to help you better understand why both are important for improving SEO.
Pages and blog posts
Pages and blog posts provide informational content to users but differ in the type of content displayed. Pages are more static and don’t often need updating (like About Me or Contact pages), while blog posts provide constant updates to queries that are relevant to your product or service.
Google ranks all web pages according to a mixture of:
Relevancy for the searcher
Value of content on a page
The page’s uniqueness
A website’s overall authority
Authority takes time and is something you earn as your audience grows. It’s not something you can control right away. But optimizing the other categories can help you achieve authority success down the line.
Dwell time
Google rewards websites with higher rankings if searchers stick around for a while (aka dwell time).
To increase dwell time, owners should write for their prospective customer and not for Google.
Write as if you are encouraging a friend to take the next step with your business offer. Use words that inspire and provide informative content that helps users with pain points.
Ecommerce product pages
Ecommerce pages provide users with information about your product or service, but also convinces them to follow-through with a purchase.
Example of product page description with 156 words on an ecommerce site.
Many ecommerce sites miss out on visibility due to lack of content, which makes it hard to rank.
A general recommendation to improve SEO is to start by optimizing product and service pages first. You can do this by:
Using long-tail keywords: This helps increase opportunities in competitive spaces and even converts better with keywords that are low in search volume. It’s better to have a small increase in web traffic and sales, rather than none.
Hitting the 120-200 minimum word count: Do this for all products in your online catalogue and avoid writing beyond this range. Writing too much could be a distraction to the potential sale.
Uploading enticing images: Try to aim for at least three images per product, including one that shows it in use. You might also consider adding product-specific text to images that highlight dimensions and special features.
Avoid copying manufacturer descriptions: Google will consider this duplicate content and you’ll end up taking a hit to your SEO.
Blogging is the most efficient way to increase web traffic online. They serve many purposes but are often used for informational content. Even Airbnb and Paypal use blog posts to attract visitors to their site.
Here are just a few ways blogs can improve SEO rankings for your site:
Drive organic traffic to your site: Incorporating long tail keywords into your posts can help bring new users into your site via Google.
Increase dwell time: Posts that have engaging content will keep users on your site longer.
Boost authority: Informational posts are often picked up by other sites who want to linkback to your site as a source.
Focus on quality over volume
When it comes to blog content, you want to ensure your posts offer users valuable information that’s helpful and relevant.Don’t post articles for the sake of filling up space on your site.
Instead, aim to solve customer problems by answering common questions they might have.
For example, a wedding planner might write a long form article titled “What does a wedding planner do?” to address a common query users search for.
Remember to focus on one primary keyword per blog post and scatter it throughout the text naturally. Combining words like “How”, “What” and “Why” with your keyword will make it sound more helpful for users and Google alike.
Ensure your posts are easy to read
You can make readability more convenient for your users by:
Using short sentences
Keeping paragraphs concise
Optimizing images for quicker page loads
This will allow users to quickly scan the text for information they need. Plus, it makes it easier for Google bots to crawl you site for ranking purposes.
Another best practise is to highlight important information by:
It’s also useful for ecommerce sites to include links to priority products and category pages on relevant blog posts. Just remember to make it sound natural and not too spammy.
Continue to audit older posts
Do revisit your old blog posts on a regular basis and update or extend them when possible. Google hates inactive dusty sites and will reward sites with fresh new content.
Don’t forget that your blog posts must also include a title tag and meta description. Be sure you include your keywords in the meta data and that it is up-to-date with Google’s standards.
Images are the second-most popular way to search online. They help users find what they’re looking for and serve as a visual guide in their buying journey.
But if you’re not optimizing your images before uploading, you might be missing out on valuable SEO rankings.
A couple of good ways you can improve SEO using images is so to:
Include alt text: Alt text (aka image alt or alt attributes) helps search engines understand what the image is about. It also helps with accessibility for users with screen readers and displays when browsers can’t process images correctly.
Compress images: This helps boost your on-page loading speed and can be done using Photoshop or by using a site like TingPNG before uploading.
Optimizing for both areas will make it easier for Google to crawl and decipher your site. But if you need a little more help with alt text, read the section below.
Key notes for writing alt text
Despite the latest advances in technology, search engine crawlers can’t see images like humans do. They must rely on the accompanying alt text to help them out.
One best practice for alt text is to keep it simple. These descriptions are meant be short and should include 125 characters or less (including spaces). There’s no need for gimmicks or extra filler worlds like “this is an image of …” Simply describe what the image is about in the most direct way possible.
Screenshot showing where to add image alt text inside GoDaddy Website Builder.
For example, the alt text for the image above could be, “Close up of someone holding a pair of glasses.”
Image optimization made easy
GoDaddy’s Website Builder makes it easy to edit alt text on images. Simply click on an image insider the editor and write your alt text in the box designated for “Image description.”
You can also use GoDaddy’s Website Builder to automatically compress your images, along with any other large files you may have already uploaded.
8. Is your site mobile friendly?
Making your site mobile-friendly is an important factor for Google rankings. It’s a primary reason why mobile-first indexing was created and adds to the overall convenience for users on-the-go.
Users should be able to experience your website on a mobile or tablet device the same way they do on a desktop.
It needs to be easily accessible without needing to pinch or squeeze to view your content.
Google’s Mobile-Friendly tool is a great way to test your website when optimizing for mobile devices. Or if you don’t want to hassle with checking yourself, GoDaddy’s Website Builder has standard built-in mobile responsiveness.
9. Submit your sitemap
A sitemap helps search engines crawl your website and index it faster. It consists of a file that contains all the URLs on your page, plus metadata that shows each one’s importance and the date they were last updated.
If you’re not using GoDaddy or a content management system (CMS) like WordPress, you’ll need to create one using a tool like XML sitemap generator.
Submitting your sitemap to Google is the last step in this process. You can do this by logging into your Google Search Console (GSC) account and entering it in the “Sitemaps” tab in the side bar.
Backlinko has a great step-by-step guide if you need extra help importing your sitemap link into your account.
10. Experiment with backlinking
Sometimes other websites will link to your site when they want to refer to you as a source of information. This is considered backlinking and it helps boost your authority when Google notices they are coming from relevant and reputable websites.
Another tactic is to partner with other websites in your industry and guest blog on their site. This allows you to share your expertise with similar audiences so that you can backlink and gain new leads.
It also helps to include links to other relevant blogs on your site whenever you find valuable information you can share with your audience.
Local businesses can make use of additional opportunities in search engines with things like Google My Business (GMB). This allows brick and mortar or service businesses to reach local audiences in the surrounding area through rich search results.
In other words, your business can have a dedicated profile with Google that appears any time someone submits a query for relevant businesses in their area. It typically includes things like:
Your website’s URL address
Photos that highlight your business or services
Customer reviews and more
All of this info can be optimized to improve SEO and there are plenty of other distinct things to do to increase website’s traffic locally. You can find more information about local SEO with this handy guide from our blog.
12. Measure your success
Google Analytics (GA) is a free tool for monitoring website traffic from any source. Many digital marketers use it to collect insight on:
Target audiences
Website performance
Ad campaigns
However, it can be a bit intimidating if you’ve never used it before. GA contains a wide variety of reports and data that take time learning how to navigate.
It can also be a challenge to set it up, since it requires a bit of coding knowledge to get started.
To make things easier, GoDaddy’s Website Builder integrates with Google Search Console to track search engine performance for you. It also provides technical SEO suggestions to help improve your website.
Most GoDaddy Website Builder plans show traffic insights you can access within your account.
Most plans for GoDaddy’s Website Builder also include a simplified window inside the platform for essential organic performance. This makes is so there’s no need to log in anywhere else until you’re ready for more advanced steps. It’s a great launching point for beginners interested in learning more about GA.
If you want to have a competitive edge in today’s online marketplace, you need to ensure your business is ranking on search engines. The best way to do that is to improve SEO on your site, so that search bots can crawl it and easily determine what your site is about.The more SEO-friendly your site is, the higher it’ll rank in search queries.
Users with GoDaddy’s Website Builder have the upper hand since it includes built-in benefits like:
Standardized mobile optimization
Automatic XML sitemaps that don’t need to be maintained
SSL certificate with HTTPS for data encryption
Access to Google Search Console
You also get the added benefit of 24/7 support in case you need extra help determining your next move. And you can even opt for additional plans (like GoDaddy’s SEO Services) to help boost your online presence even more.
Remember, improving SEO for your site is all about time and dedication. Now’s the time to jump in and capitalize on opportune moments that get your business noticed online.
With attacks on healthcare rising dramatically, SonicWall’s Capture Cloud Platform helps ensure patient care delivery is more efficient, resilient and secure.
Within the last 30 days, data breaches at nearly 40 healthcare organizations across 20 U.S. states compromised almost 1.8 million individual records, according to the U.S. Department of Health and Human Services (HHS).
Unfortunately, this is just a snapshot of what’s shaping up to be another blistering year: The HHS breach disclosure report indicates that more than 9.5 million records have been affected thus far in 2022 (Figure 1), following last year’s record high of almost 45 million patients impacted.
As the frequency of attacks on the healthcare sector continues to rise worldwide — with recent attacks in Costa Rica, France and Canada, among many others — the global total is sure to be much higher.
How Healthcare Hacks Occur
Hacking incidents involving network servers and email remain the leading attack vectors, making up more than 80% of the total count (Figure 2).
Figure 1
Figure 2
Each patient profile contains rich demographic and health information, consisting of eighteen identifiers as defined under the HIPPA privacy rule. The 18 identifiers include:
Name
Addresses
All dates, including the individual’s birthdate, admission date, discharge date, date of death, etc.
Telephone numbers
Fax number
Email address
Social Security Number (SSN)
Medical record number
Health plan beneficiary number
Account number
Certificate or license number
Vehicle identifiers and serial numbers, including license plate numbers
Device identifiers and serial numbers
Web URL
Internet Protocol (IP) address
Biometric identifiers, such as finger or voice print
Full-face photo
Any other characteristic that could uniquely identify the individual
Threat actors favor electronic health records (EHR) or personal health records (PHR) because they’re useful in a wide array of criminal applications, such as identity theft, insurance fraud, extortion and more. Because there are so many ways this data can be used fraudulently, cybercriminals are able to fetch a higher price for it on the dark web. Meanwhile, these illegal actions cause long-term financial and mental stress for those whose information has been stolen.
Even though we have well-funded, fully equipped anti-hacking agencies across international jurisdictions, cybercriminals can still act with impunity and without fear of getting caught. With hacking tactics, techniques and procedures (TTP) evolving and getting better at evading detection, healthcare facilities can no longer risk having inadequate or unprepared defensive capabilities.
For many of those who have been caught flatfooted, the impacts on affected patients, providers and payers have been catastrophic. Besides the risks that data breaches pose to healthcare delivery organizations (HDOs), they can also dramatically affect facilities’ ability to provide lifesaving care. In a recent Ponemon Institute report, 36 percent of surveyed healthcare organizations said they saw more complications from medical procedures and 22 percent said they experienced increased death rates due to ransomware attacks.
When lives depend on the availability of the healthcare system, healthcare cybersecurity must do more and better to ensure patient safety and anytime, anywhere care.
How SonicWall Can Help
For the past three decades, SonicWall has worked with providers to help build a healthier healthcare system. During this time, our innovations have allowed us to meet new expectations regarding improving security, increasing operation efficiencies and reducing IT costs.
Today, SonicWall works with each organization individually to establish a comprehensive defense strategy that matches their business goals and positions care professionals for success. By leveraging our depth and breadth of experience in healthcare industry operations and processes, SonicWall helps HDOs avoid surprises and spend more time focused on their primary mission: ensuring the health and well-being of the communities they serve.
The journey from “I think I’m secured” to “I’m sure I’m secured” starts with the SonicWall Boundless Cybersecurity approach. This approach binds security, central management, advanced analytics and unified threat management across SonicWall’s entire portfolio of security solutions to form the Capture Cloud Platform. The architectural diagram in Figure 3 shows how SonicWall network, edge, endpoint, cloud, wireless, zero trust access, web, email, mobile and IoT security solutions comes together as one security platform.
Figure 3
With the SonicWall Capture Cloud Platform, HDOs’ cybersecurity can do more and better by composing a custom, layered defense strategy to fit their specific needs or deploying the entire stack to establish a consistent security posture across their critical infrastructure. Combining these security solutions gives HDOs the necessary layered defense, along with a security framework to govern centrally, manage risks and comply with data protection laws.
Participate in a discussion about the impacts of rapid changes on society and businesses, pushing new development of better and more effective cybersecurity.
Think about your life without computers and other digital devices we now take for granted. If you took inventory, how many devices are in your business, at your home and on your person right at this moment? Now consider the experience of earlier generations; their entertainment, travel, communication, and even simple things like reading a newspaper or a book.
Industrial Revolutions change lives and produce excellent opportunities for growth for individuals and society. We have experienced five so far, with the first starting around 1750 and the fifth rolling out only a few years ago. So, we’re very well experienced in recognizing their implications and absorbing their benefits as well. We’re also experts in evolving from the enormous disruptions they bring.
First and Second Revolutions: The Evolution of Industries
The First Industrial Revolution was the harbinger of a massive wave of innovation. Factories sprung up in major cities, and people began producing more products than ever before. But as productivity increased, the number of jobs decreased, and the living standards of specific segments of society fell hard. Eventually, society (and economics) filled in with new jobs that serviced fledgling heavy industries. Companies needed more skilled workers to build the machines that made more machines. As a result, high-paying jobs returned, and society recovered.
But then came the Second Industrial Revolution, also known as the Technological Revolution, because it ushered in a phase of rapid scientific discovery and industrial standardization. From the late 19th century through much of the early 20th, mass production transformed factories into conveyors of productivity. As a result, while we endured a new phase of job losses and societal upheavals, we also saw the rise of highly skilled workers and higher-paying jobs that afforded better homes and greater mobility.
Third and Fourth Revolutions: The Evolution of Modern Society
The Third Industrial Revolution began in the later parts of the 20th century as the need for better automation triggered the advent of electronics, then computers, followed by the invention of the Internet. Technological advancements began fundamental economic transformation and, along with it, greater volatility. In addition, new methods of communication converged with rapid global urbanization and new energy regimes such as renewable sources.
Then came the Fourth Industrial Revolution, which some argue ended just before the pandemic. The blaze of technological advancements from the previous period facilitated the introduction of personal computing, mobile devices and the Internet of Things (IoT) – developments that forced us to redefine the boundaries between the physical, digital, and biological worlds. Advancements in artificial intelligence (AI), robotics, 3D printing, genetic engineering, quantum computing, and other technologies added to social pressures that blurred traditional boundaries to the point of confusion.
The Fifth Industrial Revolution: Societal Fusion
Many global thinkers believe we are in the throes of a Fifth Industrial Revolution (also “5IR”) that inaugurated new metrics for productivity that go beyond measuring the output of humans and machines in the workplace. We are witnessing a fusion of human abilities and machine efficiencies in this context. The physical, digital and biological spheres are now interchangeable and intertwined. So, it’s not just about connecting people to machines but also about connecting devices to other machines, all in the name of human creativity and productivity.
One remarkable aspect of 5IR is that it is happening at an unprecedented rate. For example, accelerated by the COVID pandemic, remote network and wireless communication saw an enormous surge as Work-From-Home became a permanent fixture for the Western workforce; thus, workplace and home were fused. And along with that fusion came education and home. But other fusions are more challenging to discern, such as information and misinformation, news and propaganda, political action and terrorism, and so on, which leads us to the fusion between crime and cybersecurity.
Learn and Explore the Impacts of the 5IR and Cybersecurity
Interestingly, a very high percentage of successful ransomware hits are due to people bypassing or ignoring cybersecurity protocols simply because they don’t believe they could ever become a victim. Unfortunately, the same can be said about organizations that have not yet prioritized updating their security technology. Many owners and managers don’t understand the threats and think that ransomware only happens to bigger companies. Current threat reports prove that the impulse to avoid and dodge better cybersecurity is incorrect, and that’s the part that we’re struggling with the most.
The $10.5T question (est. cost of cybercrime per year by 2025) is how much effort we will expend to correct this trend. Cybercrime is one of the most complex byproducts of our “revolutions.” As a result of the surge in new threats, technology and behavior is rapidly evolving. Taking responsibility and deploying new cybersecurity technology will help us mitigate today’s risks.
Book your seat to learn more during our next MINDHUNTER #9 episode in June.
Active Directory (AD) allows object creations, updates and deletions to be committed to any authoritative domain controller (DC). This is possible because every DC (except read-only DCs) maintains a writable copy of its own domain’s partition. Once a change has been committed, it is replicated automatically to other DCs through a process called multi-master replication. This behavior allows most operations to be processed reliably by multiple domain controllers and provides for high levels of redundancy, availability and accessibility in Active Directory.Handpicked related content:
An exception applies to certain Active Directory operations that are sensitive enough that their execution is restricted to a specific domain controller. Active Directory addresses these situations through a special set of roles. Microsoft has begun referring to these roles as the operations master roles, but they are more commonly referred to by their original name: flexible single-master operator (FSMO) roles.
What are FSMO Roles?
The 5 FSMO Roles
Active Directory has five FSMO roles:
Schema Master
Domain Naming Master
Infrastructure Master
Relative ID (RID) Master
PDC Emulator
In every forest, there is a single Schema Master and a single Domain Naming Master. In each domain, there is one Infrastructure Master, one RID Master and one PDC Emulator. At any given time, there can be only one DC performing the functions of each role. Therefore, a single DC could be running all five FSMO roles; however, in a single-domain environment, there can be no more than five servers that run the roles.
In a multi-domain environment, each domain will have its own Infrastructure Master, RID Master and PDC Emulator. When a new domain is added to an existing forest, only those three domain-level FSMO roles are assigned to the initial domain controller in the newly created domain; the two enterprise-level FSMO roles (Schema Master and Domain Naming Master) already exist in the forest root domain.
Schema Master
Schema Master is an enterprise-level FSMO role; there is only one Schema Master in an Active Directory forest.
The Schema Master role owner is the only domain controller in an Active Directory forest that contains a writable schema partition. As a result, the DC that owns the Schema Master FSMO role must be available to modify its forest’s schema. Examples of actions that update the schema include raising the functional level of the forest and upgrading the operating system of a DC to a higher version than currently exists in the forest.
The Schema Master role has little overhead and its loss can be expected to result in little to no immediate operational impact. Indeed, unless schema changes are necessary, it can remain offline indefinitely without noticeable effect. The Schema Master role should be seized only when the DC that owns the role cannot be brought back online. Bringing the Schema Master role owner back online after the role has been seized from it can introduce serious data inconsistency and integrity issues for the forest.
Domain Naming Master
Domain Naming Master is an enterprise-level role; there is only one Domain Naming Master in an Active Directory forest.
The Domain Naming Master role owner is the only domain controller in an Active Directory forest that is capable of adding new domains and application partitions to the forest. Its availability is also necessary to remove existing domains and application partitions from the forest.
The Domain Naming Master role has little overhead and its loss can be expected to result in little to no operational impact, since the addition and removal of domains and partitions are performed infrequently and are rarely time-critical operations. Consequently, the Domain Naming Master role should need to be seized only when the DC that owns the role cannot be brought back online.
RID Master
Relative Identifier Master (RID Master) is a domain-level role; there is one RID Master in each domain in an Active Directory forest.
The RID Master role owner is responsible for allocating active and standby Relative Identifier (RID) pools to DCs in its domain. RID pools consist of a unique, contiguous range of RIDs, which are used during object creation to generate the new object’s unique Security Identifier (SID). The RID Master is also responsible for moving objects from one domain to another within a forest.
In mature domains, the overhead generated by the RID Master is negligible. Since the primary domain controller (PDC) in a domain typically receives the most attention from administrators, leaving this role assigned to the domain PDC helps ensure its availability. It is also important to ensure that existing DCs and newly promoted DCs, especially those promoted in remote or staging sites, have network connectivity to the RID Master and are reliably able to obtain active and standby RID pools.
The loss of a domain’s RID Master will eventually lead to result in an inability to create new objects in the domain as the RID pools in the remaining DCs are depleted. While it might seem that unavailability of the DC owning the RID Master role would cause significant operational disruption, in mature environments the impact is usually tolerable for a considerable length of time because of a relatively low volume of object creation events. Bringing a RID Master back online after having seized its role can introduce duplicate RIDs into the domain, so this role should be seized only if the DC that owns it cannot be brought back online.
Infrastructure Master
Infrastructure Master is a domain-level role; there is one Infrastructure Master in each domain in an Active Directory forest.
The Infrastructure Master synchronizes objects with the global catalog servers. The Infrastructure Master will compare its data to a global catalog server’s data and receive any data not found in its database from the global catalog server. If all DCs in a domain are also global catalog servers, then all DCs will have up-to-date information (assuming that replication is functional). In such a scenario, the location of the Infrastructure Master role is irrelevant since it doesn’t have any real work to do.
The Infrastructure Master role owner is also responsible for managing phantom objects. Phantom objects are used to track and manage persistent references to deleted objects and link-valued attributes that refer to objects in another domain within the forest (e.g., a local-domain security group with a member user from another domain).
The Infrastructure Master may be placed on any domain controller in a domain unless the Active Directory forest includes DCs that are not global catalog hosts. In that case, the Infrastructure Master must be placed on a domain controller that is not a global catalog host.
The loss of the DC that owns the Infrastructure Master role is likely to be noticeable only to administrators and can be tolerated for an extended period. While its absence will result in the names of cross-domain object links failing to resolve correctly, the ability to utilize cross-domain group memberships will not be affected.Handpicked related content:
The Primary Domain Controller Emulator (PDC Emulator or PDCE) is a domain-level role; there is one PDCE in each domain in an Active Directory forest.
The PDC Emulator controls authentication within a domain, whether Kerberos v5 or NTLM. When a user changes their password, the change is processed by the PDC Emulator.
The PDCE role owner is responsible for several crucial operations:
Backward compatibility. The PDCE mimics the single-master behavior of a Windows NT primary domain controller. To address backward compatibility concerns, the PDCE registers as the target DC for legacy applications that perform writable operations and certain administrative tools that are unaware of the multi-master behavior of Active Directory DCs.
Time synchronization. Each PDCE serves as the master time source within its domain. The PDCE in forest root domain serves as the preferred Network Time Protocol (NTP) server in the forest. The PDCE in every other domain within the forest synchronizes its clock to the forest root PDCE; non-PDCE DCs synchronize their clocks to their domain’s PDCE; and domain-joined hosts synchronize their clocks to their preferred DC. One example of the importance of time synchronization is Kerberos authentication: Kerberos authentication will fail if the difference between a requesting host’s clock and the clock of the authenticating DC exceeds the specified maximum (5 minutes by default); this helps counter certain malicious activities, such as replay attacks.
Password update processing. When computer and user passwords are changed or reset by a non-PDCE domain controller, the committed update is immediately replicated to the domain’s PDCE. If an account attempts to authenticate against a DC that has not yet received a recent password change through scheduled replication, the request is passed to the domain PDCE, which will process the authentication request and instruct the requesting DC to either accept or reject it. This behavior ensures that passwords can reliably be processed even if recent changes have not fully propagated through scheduled replication. The PDCE is also responsible for processing account lockouts, since all failed password authentications are passed to the PDCE.
Group Policy updates. All Group Policy object (GPO) updates are committed to the domain PDCE. This prevents versioning conflicts that could occur if a GPO was modified on two DCs at approximately the same time.
Distributed file system. By default, distributed file system (DFS) root servers will periodically request updated DFS namespace information from the PDCE. While this behavior can lead to resource bottlenecks, enabling the Dfsutil.exe Root Scalability parameter will allow DFS root servers to request updates from the closest DC.
The PDCE should be placed on a highly-accessible, well-connected, high-performance DC. Additionally, the forest root domain PDC Emulator should be configured with a reliable external time source.
While the loss of the DC that owns the PDC Emulator role can be expected to have an immediate and significant impact on operations, the seizure of the PDCE role has fewer implications to the domain than the seizure of other roles. Seizure of the PDCE role is a recommended best practice if the DC that owns that role becomes unavailable due to an unscheduled outage.
Identifying Role Owners
You can use either the command prompt or PowerShell to identify FSMO role owners.
FSMO roles often remain assigned to their original domain controllers, but they can be transferred if necessary. Since FSMO roles are necessary for certain important operations and they are not redundant, it can be desirable or even necessary to move FSMO roles from one DC to another.
One method of transferring a FSMO role is to demote the DC that owns the role, but this is not an optimal strategy. When a DC is demoted, it will attempt to transfer any FSMO roles it owns to suitable DCs in the same site. Domain-level roles can be transferred only to DCs in the same domain, but enterprise-level roles can be transferred to any suitable DC in the forest. While there are rules that govern how the DC being demoted will decide where to transfer its FSMO roles, there is no way to directly control where its FSMO roles will be transferred.
The ideal method of moving an FSMO role is to actively transfer it using either the Management Console, PowerShell or ntdsutil.exe. During a manual transfer, the source DC will synchronize with the target DC before transferring the role.
To transfer an FSMO role, an account must have the following privileges:
To transfer this FSMO
The account must be a member of
Schema Master
Schema Admins and Enterprise Admins
Domain Naming Master
Enterprise Admins
PDCE, RID Master or Infrastructure Master
Domain Admins in the domain where the role is being transferred
How to Transfer FSMO Roles using the Management Console
Transferring the Schema Master Role
The Schema Master role can be transferred using the Active Directory Schema Management snap-in.
If this snap-in is not among the available Management Console snap-ins, it will need to be registered. To do so, open an elevated command prompt and enter the command regsvr32 schmmgmt.dll.
Once the DLL has been registered, run the Management Console as a user who is a member of the Schema Admins group, and add the Active Directory Schema snap-in to the Management Console:
Right-click the Active Directory Schema node and select Change Active Directory Domain Controller. Choose the DC that the Schema Master FSMO role will be transferred to and click OK to bind the Active Directory Schema snap-in to that DC. (A warning may appear explaining that the snap-in will not be able to make changes to the schema because it is not connected to the Schema Master.)
Right-click the Active Directory Schema node again and select Operations Master. Then click the Change button to begin the transfer of the Schema Master role to the specified DC:
Transferring the Domain Naming Master Role
The Domain Naming Master role can be transferred using the Active Directory Domains and Trusts Management Console snap-in.
Run the Management Console as a user who is a member of the Enterprise Admins group, and add the Active Directory Domains and Trusts snap-in to the Management Console:
Right-click the Active Directory Domains and Trusts node and select Change Active Directory Domain Controller. Choose the DC that the Domain Naming Master FSMO role will be transferred to, and click OK to bind the Active Directory Domains and Trusts snap-in to that DC.
Right-click the Active Directory Domains and Trusts node again and select Operations Master. Click the Change button to begin the transfer of the Domain Naming Master role to the selected DC:
Transferring the RID Master, Infrastructure Master or PDC Emulator Role
The RID Master, Infrastructure Master and PDC Emulator roles can all be transferred using the Active Directory Users and Computers Management Console snap-in.
Run the Management Console as a user who is a member of the Domain Admins group in the domain where the FSMO roles are being transferred and add the Active Directory Users and Computers snap-in to the Management Console:
Right-click either the Domain node or the Active Directory Users and Computers node and select Change Active Directory Domain Controller. Choose the domain controller that the FSMO role will be transferred to and click OK button to bind the Active Directory Users and Computers snap-in to that DC.
Right-click the Active Directory Users and Computers node and click Operations Masters. Then select the appropriate tab and click Change to begin the transfer of the FSMO role to the selected DC:
How to Transfer FSMO Roles using PowerShell
You can transfer FSMO roles using the following PowerShell cmdlet:
To transfers an FSMO role using ndtsutil.exe, take the following steps:
Open an elevated command prompt.
Type ntdsutil and press Enter. A new window will open.
At the ntdsutilprompt, type roles and press Enter.
At the fsmo maintenanceprompt, type connections and press Enter.
At the server connectionsprompt, type connect to server <DC> (replacing <DC> with the hostname of the DC that the FSMO role is being transferred to) and press Enter. This will bind ntdsutil to the specified DC.
Type quit and press Enter.
At the fsmo maintenance prompt, enter the appropriate command for each FSMO role being transferred:
transfer schema master
transfer naming master
transfer rid master
transfer infrastructure master
transfer pdc
To exit the fsmo maintenanceprompt, type quit and press Enter.
To exit the ntdsutilprompt, type quit and press Enter.
Seizing FSMO Roles
Transferring FSMO roles requires that both the source DC and the target DC be online and functional. If a DC that owns one or more FSMO roles is lost or will be unavailable for a significant period, its FSMO roles can be seized, rather than transferred.
In most cases, FSMO roles should be seized only if the original FSMO role owner cannot be brought back into the environment. The reintroduction of a FSMO role owner following the seizure of its roles can cause significant damage to the domain or forest. This is especially true of the Schema Master and RID Master roles.
To seize FSMO roles, you can use the Move-ADDirectoryServerOperationMasterRole cmdlet with the ?Force parameter. The cmdlet will attempt an FSMO role transfer; if that attempt fails, it will seize the roles.
How Netwrix Can Help
As we have seen, FSMO roles are important for both business continuity and security. Therefore, it’s vital to audit all changes to your FSMO roles. Netwrix Auditor for Active Directory automates this monitoring and can alert you to any suspicious change so you can take action before it leads to downtime or a data breach.
However, FSMO roles are just one part of your security strategy — you need to understand and control what is happening across your core systems. Netwrix Auditor for Active Directory goes far beyond protecting FSMO roles and facilitates strong management and change control across Active Directory.
By automating Active Directory change tracking and reporting, Netwrix Auditor empowers you to reduce security risks. You can improve your security posture by proactively identifying and remediating toxic conditions like directly assigned permissions, before attackers can exploit them to gain access to your network resources. Moreover, you can monitor changes and other activity in Active Directory changes to spot emerging problems and respond to them promptly — minimizing the impact on business processes, user productivity and security.
This month, the Cisco Umbrella team – in conjunction with Talos – has witnessed the rise of complex cyberattacks. In today’s edition of the Cybersecurity Threat Spotlight, we unpack the tactics, techniques, and procedures used in these attacks.
Want to see how Cisco Umbrella can protect your network? Sign up for a free trial today!
BlackCat Ransomware
Threat Type: Ransomware
Attack Chain:
Description: BlackCat – also known as “ALPHV”- is a ransomware which uses ransomware-as-a-service model and double ransom schema (encrypted files and stolen file disclosure). It first appeared in November 2021 and, since then, targeted companies have been hit across the globe.
BlackCat Spotlight: BlackCat ransomware has quickly gained notoriety for being used in double ransom (encrypted files and stolen file disclosure) attacks against companies. While it targets companies across the globe, more than 30% of the compromises happened to companies based in the U.S.
There is a connection between the BlackCat, BlackMatter and DarkSide ransomware groups, recently confirmed by the BlackCat representative. Attack kill chain follows the blueprint of other human-operated ransomware attacks: initial compromise, followed by an exploration and data exfiltration phase, then attack preparation and finally, the ransomware execution. The key aspect of such attacks is that adversaries take time exploring the environment and preparing it for a successful and broad attack before launching the ransomware. Some of the attacks took up to two weeks from the initial to final stage, so it is key to have capabilities to detect such activities to counter them.
Target Geolocations: U.S., Canada, EU, China, India, Philippines, Australia Target Data: Sensitive Information, Browser Information Target Businesses: Any Exploits: N/A
Mitre ATT&CK for BlackCat
Initial Access: Valid Accounts: Local Accounts
Discovery: Account Discovery System Information Discovery Network Service Discovery File and Directory Discovery Security Software Discovery ADrecon Sofperfect Network Scanner
Which Cisco Products Can Block: Cisco Secure Endpoint Cisco Secure Firewall/Secure IPS Cisco Secure Malware Analytics Cisco Umbrella
ZingoStealer
Threat Type: Information Stealer
Attack Chain:
Description: ZingoStealer is an information stealer released by a threat actor known as “Haskers Gang.” The malware leverages Telegram chat features to facilitate malware executable build delivery and data exfiltration. The malware can exfiltrate sensitive information like credentials, steal cryptocurrency wallet information, and mine cryptocurrency on victims’ systems. ZingoStealer has the ability to download additional malware such as RedLine Stealer and the XMRig cryptocurrency mining malware.
ZingoStealer Spotlight: Cisco Talos recently observed a new information stealer, called “ZingoStealer” that has been released for free by a threat actor known as “Haskers Gang.” This information stealer, first introduced to the wild in March 2022, is currently undergoing active development and multiple releases of new versions have been observed recently. In many cases, ZingoStealer is being distributed under the guise of game cheats, cracks and code generators.
The stealer is an obfuscated .NET executable which downloads files providing core functionality an attacker-controlled server. The malware can exfiltrate sensitive information like credentials, steal cryptocurrency wallet information, and mine cryptocurrency on victims’ systems. The malware is also used as a loader for other malware payloads, such as RedLine Stealer and the XMRig cryptocurrency mining malware.
Target Geolocations: CIS Target Data: User Credentials, Browser Data, Financial and Personal Information, Cryptocurrency Wallets, Data From Browser Extensions Target Businesses: Any Exploits: N/A
Mitre ATT&CK for ZingoStealer
Initial Access: Trojanized Applications
Credential Access: Credentials from Password Stores Steal Web Session Cookie Unsecured Credentials Credentials from Password Stores: Credentials from Web Browsers
Discovery: Account Discovery Software Discovery Process Discovery System Time Discovery System Service Discovery System Location Discovery
Persistence: Registry Run Keys/Startup Folder Scheduled Task/Job: Scheduled Task
Privilege Escalation: N/A
Execution: User Execution Command and Scripting Interpreter: PowerShell
Evasion: Obfuscated Files or Information
Collection: Archive Collected Data: Archive via Utility Data Staged: Local Data Staging
Command and Control: Application Layer Protocol: Web Protocols
Which Cisco Products Can Block: Cisco Secure Endpoint Cisco Secure Email Cisco Secure Firewall/Secure IPS Cisco Secure Malware Analytics Cisco Umbrella Cisco Secure Web Appliance
BumbleBee Loader
Threat Type: Loader
Attack Chain:
Description: BumbleBee is a loader that has anti-virtualization checks and loader capabilities. The goal of the malware is to take a foothold in the compromised system to download and execute additional payloads. BumbleBee was observed to load Cobalt Strike, shellcode, Sliver and Meterpreter malware.
BumbleBee Spotlight: Security researchers noticed the appearance of the new malware being used by Initial Access Brokers, which previously relied on BazaLoader and IcedID malware. Dubbed BumbleBee due to presence of unique User-Agent “bumblebee” in early campaigns, this malware appears to be in active development.
It already employs complex anti-virtualization techniques, as well as uses asynchronous procedure call (APC) injection to launch the shellcode and LOLBins to avoid detections. Delivery chain relies on user interaction to follow the links and open malicious ISO or IMG file. Loader achieves persistence via scheduled task which launches Visual Basic Script to load BumbleBee DLL. Afterwards, the execution malware communicates with the Command-and-Control server and downloads additional payloads such as Cobalt Strike, shellcode, Sliver and Meterpreter. Threat actors using such payloads have been linked to ransomware campaigns.
Target Geolocations: Canada, U.S., Japan Target Data: N/A Target Businesses: Any Exploits: N/A
Mitre ATT&CK for BumbleBee
Initial Access: Malspam
Persistence: Scheduled Task/Job
Execution: Scheduled Task/Job: Scheduled Task Command and Scripting Interpreter: Virtual Basic User Execution: Malicious File
Evasion: System Binary Proxy Execution: Rundll32 Virtualization/Sandbox Evasion: System Checks Process Injection: Asynchronous Procedure Call
Discovery: System Information Discovery System Network Configuration Discovery System Network Connections Discovery


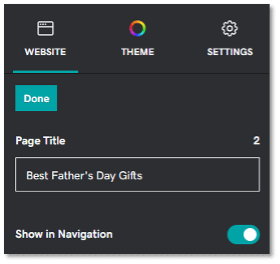


 Screenshot of meta title editor inside GoDaddy Website Builder.Include a primary keyword at the start. An exception should be made for well-known brands or local businesses who should add their business name to the start.
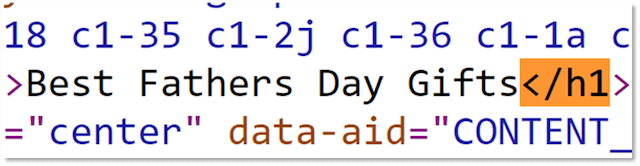


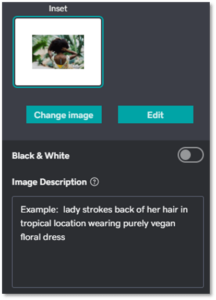

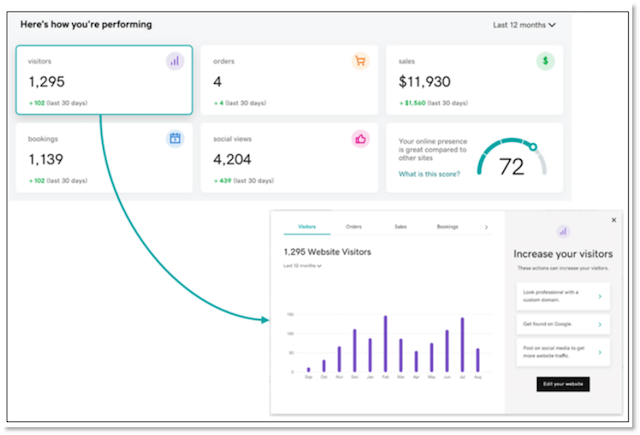


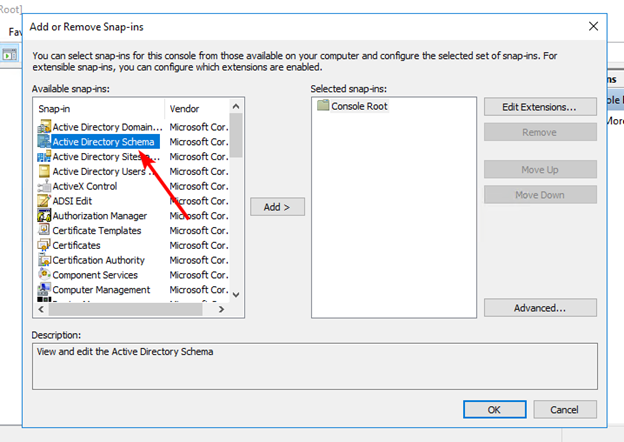
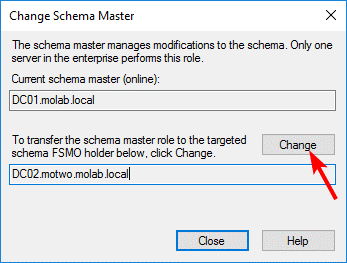
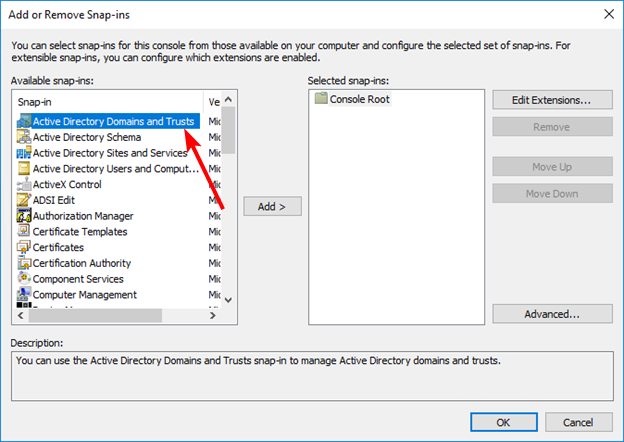

