On April 25, 2023, our Wordfence Threat Intelligence team identified and began the responsible disclosure process for a stored Cross-Site Scripting (XSS) vulnerability in W3 Eden’s Download Manager plugin, which is actively installed on more than 100,000 WordPress websites, making it one of the most popular download management plugins. The vulnerability enables threat actors with contributor-level permissions or higher to inject malicious web scripts into pages using the plugin’s shortcode.
All Wordfence Premium, Wordfence Care, and Wordfence Response customers, as well as those still using the free version of our plugin, are protected against any exploits targeting this vulnerability by the Wordfence firewall’s built-in Cross-Site Scripting protection.
We contacted W3 Eden on April 25, 2023, and promptly received a response. After providing full disclosure details, the developer released a patch on May 1, 2023. We would like to commend the W3 Eden development team for their prompt response and timely patch.
We urge users to update their sites with the latest patched version of Download Manager, version 3.2.71 at the time of this writing, as soon as possible.
The Download Manager plugin for WordPress is vulnerable to Stored Cross-Site Scripting via the ‘wpdm_members’, ‘wpdm_login_form’, ‘wpdm_reg_form’ shortcodes in versions up to, and including, 3.2.70 due to insufficient input sanitization and output escaping on user supplied attributes. This makes it possible for authenticated attackers with contributor-level and above permissions to inject arbitrary web scripts in pages that will execute whenever a user accesses an injected page.
Technical Analysis
Download Manager is a plugin designed to allow WordPress users to manage, track and control file downloads. It provides a shortcode ([wpdm_members]) that lists the authors and the number of files they have added when added to a WordPress page. However, insecure implementation of the plugin’s shortcode functionality allows for the injection of arbitrary web scripts into these pages. Examining the code reveals that the members method in the User class did not adequately sanitize the user-supplied ‘sid’ input, and then loads the members.php view file, where it also did not adequately escape ‘sid’ output. This makes it possible to inject attribute-based Cross-Site Scripting payloads via the ‘sid’ attribute.
There are two other shortcodes, a login form shortcode ([wpdm_login_form]) and a registration form shortcode ([wpdm_reg_form]), that add forms to a WordPress site. However, the insecure implementation of these two shortcode functions, similar to the previous example, also allows arbitrary web scripts to be inserted into these pages. Examining the code reveals that the functions of both forms do not adequately sanitize the user-supplied ‘logo’ input, and in the view files these ‘logo’ outputs are not adequately escaped.
These make it possible for threat actors to carry out stored XSS attacks. Once a script is injected into a page or post, it will execute each time a user accesses the affected page. While this vulnerability does require that a trusted contributor account is compromised, or a user be able to register as a contributor, successful threat actors could steal sensitive information, manipulate site content, inject administrative users, edit files, or redirect users to malicious websites which are all severe consequences.
Disclosure Timeline
April 25, 2023 – Wordfence Threat Intelligence team discovers the stored XSS vulnerability in Download Manager and initiates responsible disclosure. April 27, 2023 – We get in touch with the development team at W3 Eden and send full disclosure details. May 1, 2023 – The fully patched version, 3.2.71, is released. May 3, 2023 – The vendor notified Wordfence that they released the patch. May 3, 2023 – Wordfence confirms the fix addresses the vulnerability.
Conclusion
In this blog post, we have detailed a stored XSS vulnerability within the Download Manager plugin affecting versions 3.2.70 and earlier. This vulnerability allows authenticated threat actors with contributor-level permissions or higher to inject malicious web scripts into pages that execute when a user accesses an affected page. The vulnerability has been fully addressed in version 3.2.71 of the plugin.
We encourage WordPress users to verify that their sites are updated to the latest patched version of Download Manager.
All Wordfence users, including those running Wordfence Premium, Wordfence Care, and Wordfence Response, as well as sites still running the free version of Wordfence, are fully protected against this vulnerability.
If you know someone who uses this plugin on their site, we recommend sharing this advisory with them to ensure their site remains secure, as this vulnerability poses a significant risk.
As cyber threats continue to evolve, security professionals require reliable tools to defend against security vulnerabilities, protect sensitive data, and maintain network security. Open source cyber security tools provide a cost-effective solution for individuals and organizations to combat these threats on-premises and with cloud security and mobile devices. Let’s consider the top 25 open-source cyber security monitoring tools in 2023 that help ensure continuous network and system performance monitoring.
As cyber threats continue to evolve and become more sophisticated, organizations must stay informed and prepared to defend against a wide range of security risks.
Here are the top cybersecurity threats that businesses and individuals should be aware of today:
1. Phishing Attacks: Phishing attacks are a prevalent form of social engineering where cybercriminals use deceptive emails or websites to trick users into revealing sensitive information or installing malware. These attacks often target login credentials, financial information, and other personal data.
2. Ransomware: Ransomware is a type of malicious software that encrypts a victim’s files or locks their systems, demanding a ransom payment to restore access. Ransomware attacks can cause significant financial losses and operational disruptions for organizations.
3. Insider Threats: Insider threats refer to security risks posed by employees, contractors, or other individuals with authorized access to an organization’s systems and data. These threats can result from malicious intent or negligence, leading to data breaches or system compromises.
4. Supply Chain Attacks: Also known as third-party attacks or vendor risk, supply chain attacks target an organization’s suppliers, vendors, or partners to gain access to their systems and data. These attacks often exploit security vulnerabilities in the supply chain to compromise multiple organizations.
5. Distributed Denial of Service (DDoS) Attacks: DDoS attacks involve overwhelming a target’s network or system with a flood of traffic, rendering it inaccessible to legitimate users. DDoS attacks can cause severe downtime and service disruptions.
6. Advanced Persistent Threats (APTs): APTs are sophisticated, coordinated cyberattacks by well-funded threat actors or nation-state groups that target specific organizations for espionage, data theft, or sabotage. APTs often use advanced techniques and tactics to evade detection and maintain a long-term presence within a target’s network.
7. Zero-Day Exploits: Zero-day exploits are attacks that take advantage of previously unknown security vulnerabilities in software or systems. These vulnerabilities, also known as zero-day flaws, have no existing patches or fixes, making them particularly dangerous and challenging to defend against.
8. Internet of Things (IoT) Security: The increasing adoption of IoT devices and connected technologies has expanded the attack surface for cybercriminals. IoT devices are often vulnerable to cyber threats due to weak security measures, creating new risks for organizations and consumers.
9. Data Breaches: Data breaches occur when unauthorized individuals gain access to an organization’s sensitive data, such as customer information, financial records, or intellectual property. Data breaches can result in significant financial and reputational damage for organizations.
10. Cloud Security Threats: As more organizations migrate to cloud-based services, cloud security has become a critical concern. Threats in the cloud can arise from misconfigurations, weak authentication mechanisms, and vulnerabilities in cloud applications or infrastructure.
Benefits of Open-Source CyberSecurity tools
Open source cyber security monitoring tools offer numerous advantages over proprietary solutions, making them an attractive option for businesses, organizations, and individuals looking to enhance their security posture and perform effective security testing.
Here are some key benefits of using open-source tools for cyber security monitoring for monitoring services that pose security threats, even if you have another network monitoring system. Proper cybersecurity monitoring and access management are key to maintaining a secure environment.
Cost-Effectiveness
One of the most significant benefits of open-source cyber security tools is their cost-effectiveness. With no licensing fees or subscription costs, these free tools enable security teams to access powerful network monitoring solutions without breaking the bank.
This particularly benefits small businesses and startups with limited budgets, allowing them to allocate resources to other critical areas.
Customizability and Flexibility
Open-source network monitoring tools offer high customizability and flexibility, allowing security professionals to tailor the tools to their specific needs. This adaptability enables organizations to address unique security threats and vulnerabilities, ensuring a more robust security posture.
Additionally, the ability to integrate these tools with existing security infrastructure adds an extra layer of protection to network security.
Rapid Development and Updates
The open-source community is known for its rapid development and frequent updates. As new security threats and vulnerabilities emerge, open-source cyber security tools are often among the first to receive patches and updates.
This continuous monitoring and proactive response help organizations stay ahead of potential security risks and maintain a strong security posture.
Extensive Support and Collaboration
Open-source cyber security tools benefit from an extensive support network, comprising developers, users, and experts from around the world.
This collaborative environment fosters knowledge sharing, allowing security professionals to learn from one another and develop more effective security strategies.
Additionally, the availability of comprehensive documentation and online forums makes it easier for users to troubleshoot issues and enhance their understanding of network monitoring and security.
Improved Security and Transparency
With their source code openly available for inspection, open-source cyber security tools offer greater transparency than proprietary alternatives. This transparency allows security professionals and researchers to scrutinize the code for potential security vulnerabilities and ensure its integrity.
Moreover, the collaborative nature of the open-source community means that any identified issues are addressed quickly, further enhancing the overall security of these tools.
Platform Independence and Interoperability
Open-source network monitoring software often supports a wide range of operating systems, including Windows, macOS, and Linux, allowing organizations to deploy these tools across diverse environments.
This platform independence and interoperability help organizations ensure comprehensive network monitoring, regardless of the underlying infrastructure.
Top 25 Open Source Cyber Security Monitoring Tools in 2023
Note the following free cyber security monitoring tools in 2023 and the open-source list of solutions you can take advantage of and no free trial needed.
1. Wireshark: Network Protocol Analyzer
Wireshark is a widely-used network protocol analyzer that enables security teams to troubleshoot, analyze, and monitor network traffic in real-time to detect security issues. It is a defacto standard network monitoring tool.
command line interface data packets open source platform data breaches packet capture web apps network packets computer security experts solarwinds security event manager security scanning
By dissecting network protocols, Wireshark provides valuable insights into potential security risks and network vulnerabilities, allowing professionals to identify and resolve issues efficiently with the Wireshark network monitoring solution.
You can monitor a wide range of protocols, including TCP/IP, simple network management protocol, FTP, and many others. If you are looking for a network monitor this is it.
2. Snort: Network Intrusion Detection and Prevention System
Snort is a powerful open-source intrusion detection and prevention system (IDPS) that monitors network traffic and detects potential security threats.
It provides real-time traffic analysis, packet logging, and alerting capabilities, making it an essential tool for security auditing and network monitoring.
3. OSSEC: Host-Based Intrusion Detection System
OSSEC is a comprehensive host-based intrusion detection system (HIDS) that offers log analysis, file integrity checking, rootkit detection, and more.
It supports various operating systems, including Linux, Windows, and macOS, and helps security professionals monitor and analyze network protocols for potential security vulnerabilities.
4. Security Onion: Intrusion Detection and Network Security Monitoring Distribution
Security Onion is a Linux distribution specifically designed for intrusion detection, network security monitoring, and log management.
With a suite of powerful open-source tools, including Snort, Suricata, and Zeek, Security Onion provides a robust solution for security teams to monitor networks and detect security breaches.
5. Nmap: Network Scanning and Discovery Tool
Nmap is a versatile network scanning and discovery tool that helps security professionals identify network devices, open ports, and running services.
It is an essential network monitoring software for vulnerability management, penetration testing, and network inventory management.
6. Kismet: Wireless Network Detector, Sniffer, and Intrusion Detection System
Kismet is a wi fi security tool that detects, sniffs, and analyzes wireless networks. By monitoring wireless network traffic, Kismet identifies potential security risks, network vulnerabilities, and unauthorized users, making it an invaluable tool for wireless network security.
7. Suricata: High-Performance Network Intrusion Detection and Prevention Engine
Suricata is an open-source, high-performance network intrusion detection and prevention engine that provides real-time network traffic analysis, threat detection, and alerting.
Suricata enables security professionals to maintain network integrity and security by employing advanced threat defense and anomaly detection techniques.
8. Zeek (formerly Bro): Network Analysis Framework for Security Monitoring
Zeek, previously known as Bro, is a powerful network analysis framework that offers real-time insight into network traffic.
With its flexible scripting language and extensible plugin architecture, Zeek provides comprehensive visibility into network activity, enabling security teams to detect and prevent security threats.
9. OpenVAS: Vulnerability Scanning and Management Solution
OpenVAS is a comprehensive vulnerability scanning and management solution that helps security professionals identify, assess, and remediate security vulnerabilities.
With its extensive plugin library, OpenVAS ensures continuous monitoring and up-to-date vulnerability information, making it a critical tool for vulnerability management.
10. ClamAV: Open-Source Antivirus Engine
ClamAV is an open-source antivirus engine that detects trojans, viruses, and other malicious software.
It offers a command-line scanner, a graphical user interface (GUI) for Windows operating system, and integration with mail servers, ensuring that your systems are protected from security threats.
11. Fail2Ban: Log-Parsing Application to Protect Against Brute-Force Attacks
Fail2Ban is a log-parsing application that monitors log files for malicious activity, such as repeated failed login attempts. Fail2Ban bans the offending IP address when a potential attack is detected, effectively protecting your network from brute-force attacks and unauthorized access.
12. AlienVault OSSIM: Open-Source Security Information and Event Management Platform
AlienVault OSSIM is an open-source security information and event management (SIEM) platform that provides real-time event correlation, log analysis, and threat intelligence.
By integrating multiple security tools, OSSIM helps security teams maintain a unified user interface and enhance their overall security posture.
13. Cuckoo Sandbox: Automated Malware Analysis System
Cuckoo Sandbox is an open-source automated malware analysis system that enables security professionals to analyze suspicious files and URLs in a safe, isolated environment.
It provides detailed reports on malware behavior, including network traffic analysis, file system changes, and API traces, helping security teams identify and mitigate security risks.
14. Logstash: Log Processing and Management Tool
Logstash is part of the Elastic Stack (ELK Stack) and offers log processing and management capabilities.
It collects, parses, and stores log data from various sources, making it an essential tool for security professionals to monitor and analyze network activity, detect security breaches, and maintain system performance.
15. pfSense: Open-Source Firewall and Router Distribution
pfSense is an open-source firewall and router distribution based on FreeBSD. It offers a powerful and flexible network security, traffic shaping, and VPN connectivity solution.
With its extensive features and customization options, pfSense is ideal for securing web servers and internal networks.
16. ModSecurity: Open-Source Web Application Firewall
ModSecurity is an open-source web application firewall (WAF) providing real-time security monitoring and access control. It detects and prevents web attacks, protects sensitive data, and helps security professionals maintain compliance with industry standards and regulations.
AIDE is a file and directory integrity checker that monitors system files for unauthorized changes. It detects modifications, deletions, and additions, allowing security teams to maintain system integrity and prevent security breaches.
18. Graylog: Open-Source Log Management Platform
Graylog is an open-source log management platform that centralizes and analyzes log data from various sources.
Graylog helps security professionals detect security threats, identify network vulnerabilities, and maintain network security by providing comprehensive visibility into network activity.
19. Wazuh: Security Monitoring and Compliance Solution
Wazuh is a free, open-source security monitoring and compliance solution that integrates host-based and network-based intrusion detection systems, file integrity monitoring and security policy enforcement.
Wazuh’s centralized management and powerful analytics capabilities make it an essential tool for security teams to detect and respond to security threats.
20. T-Pot: Honeypot Platform
T-Pot is a platform combining multiple honeypots into a single, easy-to-deploy solution for cyber security monitoring. By simulating vulnerable systems and services, T-Pot attracts attackers and collects threat data, providing valuable insights into current attack trends and techniques.
Honorable mentions
Samhain: Host-Based Intrusion Detection System
Samhain is a host-based intrusion detection system (HIDS) that provides file integrity checking and log file monitoring. It detects unauthorized modifications, deletions, and additions, helping security professionals maintain system integrity and prevent security breaches.
SELKS: Network Security Management ISO with Suricata
SELKS is a live and installable network security management ISO based on Debian, focusing on a complete and ready-to-use Suricata IDS/IPS ecosystem. It offers a user-friendly interface and powerful analytics tools, making it an ideal choice for security teams to monitor networks and detect potential security threats.
Squid: Open-Source Web Proxy Cache and Forward Proxy
Squid is an open-source web proxy cache and forward proxy that improves web performance and security. By caching frequently-requested web content and filtering web traffic, Squid helps reduce bandwidth usage, enhance user privacy, and protect against web-based security threats.
YARA: Pattern-Matching Tool for Malware Researchers
YARA is a pattern-matching tool designed for malware researchers to identify and classify malware samples. By creating custom rules and signatures, YARA enables security professionals to detect and analyze malicious software, enhancing their understanding of current malware trends and techniques.
Arkime (formerly Moloch): Large-Scale, Open-Source, Indexed Packet Capture and Search System
Arkime is a large-scale, open-source, indexed packet capture and search system that provides comprehensive visibility into network traffic. It enables security professionals to analyze network protocols, detect security vulnerabilities, and identify potential security threats, making it an essential tool for network monitoring and security auditing.
Tips to Improve Your Cybersecurity Posture
Improving your cybersecurity posture is essential for safeguarding your organization from various cyber threats. Here are some practical tips to help enhance your cybersecurity defenses:
Implement Regular Security Audits: Conducting routine security audits can help identify potential weaknesses in your organization’s cybersecurity infrastructure.
This includes checking for outdated software, misconfigured settings, and other vulnerabilities that may expose your systems to attacks.
Keep Software and Systems Updated: Regularly update your software, operating systems, and firmware to protect against known vulnerabilities and exploits.
This includes applying security patches and updates as soon as they become available.
Use Strong Authentication Mechanisms: Implement multi-factor authentication (MFA) for all critical systems and applications.
MFA adds an extra layer of security by requiring users to provide additional verification, such as a one-time code or biometric authentication, in addition to their password.
Encrypt Sensitive Data: Encrypt sensitive data both in transit and at rest to prevent unauthorized access. This includes using secure communication protocols, such as HTTPS and TLS, and implementing encryption solutions for data storage.
Establish a Strong Password Policy: Enforce a robust password policy that requires users to create complex, unique passwords and update them regularly. Additionally, consider using a password manager to help users manage and store their passwords securely.
Educate Employees on Cybersecurity Best Practices: Provide ongoing security awareness training to educate employees about common cyber threats, safe online practices, and how to recognize and report potential security incidents.
Implement Network Segmentation: Divide your network into smaller segments, isolating critical systems and data from less secure areas. This can help prevent the spread of malware and limit the damage in case of a security breach.
Regularly Backup Important Data: Regularly back up essential data and store copies offsite or in the cloud. This ensures that you can quickly recover from data loss or ransomware attacks.
Utilize Endpoint Security Solutions: Deploy comprehensive endpoint security solutions to protect devices connected to your network.
This includes antivirus software, firewalls, intrusion detection and prevention systems, and device management tools.
Monitor and Analyze Network Traffic: Use network monitoring tools to analyze network traffic, detect anomalies, and identify potential security threats. Regular monitoring can help detect and respond to security incidents more effectively.
Develop a Cybersecurity Incident Response Plan: Create a detailed incident response plan outlining the steps to take in a security breach. Regularly review and update the plan, and ensure that all employees are familiar with the procedures.
Collaborate with Security Professionals: Engage with cybersecurity experts or managed service providers to help develop and maintain a strong security posture.
This can provide access to specialized knowledge and resources to stay up-to-date with the latest threats and best practices.
Frequently Asked Questions (FAQs)
1. What are the best open-source cyber security monitoring tools available in 2023?
This blog post covers the top 25 open-source cyber security monitoring tools in 2023, including Wireshark, Snort, OSSEC, Security Onion, Nmap, Kismet, Suricata, Zeek, OpenVAS, ClamAV, and more.
These tools provide comprehensive network monitoring, threat detection, and vulnerability management capabilities to help organizations maintain a robust security posture.
Open-source cyber security monitoring tools offer several advantages: cost-effectiveness, customizability, rapid development and updates, extensive support, improved security, and platform independence.
These benefits make open-source tools attractive for organizations looking to enhance their network security and protect sensitive data.
3. How can I improve my organization’s cybersecurity hygiene?
In addition to utilizing open-source cyber security monitoring tools, organizations can improve their cybersecurity hygiene by implementing security awareness training, regularly updating software and systems, employing strong password policies, using multi-factor authentication, monitoring network traffic, and conducting regular security audits and penetration testing.
4. What is the importance of continuous monitoring in cybersecurity?
Continuous monitoring plays a crucial role in identifying and addressing security threats and vulnerabilities in real-time.
By regularly analyzing network traffic, security professionals can detect potential issues, respond to incidents promptly, and ensure the safety and integrity of their digital assets.
5. How can I protect my web applications from security threats?
Web application security can be improved by using tools such as ModSecurity, an open-source web application firewall (WAF) that provides real-time application security monitoring and access control.
Regularly updating web applications, conducting vulnerability assessments, and implementing secure coding practices can also help mitigate security risks.
6. What role do threat intelligence and threat data play in cybersecurity?
Threat intelligence and threat data help security professionals understand the latest trends, tactics, and techniques cybercriminals use.
Organizations can proactively address potential issues and maintain a strong security posture by staying informed about emerging threats and vulnerabilities.
7. Are open-source cyber security monitoring tools suitable for small businesses and startups?
Yes, open-source cyber security monitoring tools are ideal for small businesses and startups, as they offer cost-effective and powerful network monitoring solutions.
These tools enable organizations with limited budgets to access advanced security features without incurring high licensing fees or subscription costs.
Wrapping up
The ever-evolving landscape of cyber threats demands reliable and effective tools for security professionals to protect networks, systems, and sensitive data.
These Top 20 open-source cyber security monitoring tools in 2023 provide a comprehensive network monitoring, threat detection, and vulnerability management solution.
By incorporating these tools into your security strategy, you can enhance your overall security posture and ensure the safety and integrity of your digital assets.
Are you aware of the WordPress email deliverability best practices?
If you send any emails from a WordPress site, this is a really important topic. Email deliverability is affected by a variety of factors so this may seem tricky at first.
But the good news is, many of these factors are controllable. Following a few best practices can go a long way in helping you maintain high deliverability rates at all times.
We’ll be covering the top tips for improving WordPress email deliverability in this article. Let’s dive in!
How Do I Stop My Emails From Going to Spam in WordPress?
In WordPress, emails are usually delivered using the default PHP mailer. The problem is the PHP mailer function lacks authenticating elements in an email, which frequently leads to your emails being marked spam or blocked altogether.
The best way to stop your emails from ending up in spam is to use a Simple Mail Transfer Protocol (SMTP) plugin like WP Mail SMTP.
SMTP plugins help provide crucial authentication details for domains linked to a WordPress site and are an excellent way to bypass most email deliverability challenges.
In the next section, we’ll dive deeper to discover how SMTP helps and what some of the top email deliverability tactics are.
WP Mail SMTP is the best tool for fixing WordPress email deliverability challenges.
Authentication is the biggest issue with WordPress emails. As we’ve mentioned, the default WordPress PHPMailer just isn’t effective at this.
What this means is that when you send emails from a domain on a WordPress site, mailbox providers have no way of telling if the emails are really coming from your domain. This is a problem because spammers and hackers have developed ways to impersonate legitimate domains.
But with WP Mail SMTP, you can connect your WordPress site to popular SMTP mailer services like Postmark, Sendinblue, SendLayer, and more. These mailer services add proper authentication details to your emails, so that the recipient’s email server can easily verify your legitimacy as the sender.
SMTP mailers also use DNS records like DMARC, SPF, and DKIM to further increase your legitimacy and offer protection from email spoofers.
In addition to being an excellent solution for improving your email deliverability, WP SMTP also offers useful tools such as email tracking and email logs that allow you to monitor your emails right from your WordPress dashboard.
Sender reputation is a crucial metric that mailers use in determining the trustworthiness of a domain. A bad sender reputation will typically mean your emails will get blocked or go to spam.
The good news is that you can track the sender reputation for your domain and take the necessary steps to protect it. Here’s how to check:
Grab your IP address and head over to the Talos Intelligence Reputation Lookup site. On the homepage, pop in your email domain’s IP address. If you’re not sure what this is, you may ask your hosting service.
The tool will then generate a sender reputation report with a few different metrics, including your email reputation.
If your score is too low, you’ll know that you’ll likely have some email deliverability issues due to the poor sender reputation of your domain.
One thing you can do to fix this right away is to use a different domain for sending your emails.
But if your email reputation is good, then you’re unlikely to face any deliverability problems.
3. Ensure Your IP Address Isn’t on a Blocklist
Your IP address can end up on a blocklist for a number of reasons. One of them is simply using shared hosting.
You can check if your IP address is on a blocklist and then reach out to the service that has blocklisted your IP address and ask to have it removed. MxToolbox is an excellent tool for checking if you’ve been blocklisted and by whom.
Once they’re sure that your website doesn’t pose any security threats, your IP address may be removed from the list.
4. Track Email Statistics
Tracking your email statistics is super important because it allows you to measure how well your emails are being received by your users.
If your emails are bouncing or aren’t getting opened at all, these could be pointers to an underlying problem that you’ll want to fix immediately.
Remember, things like low engagement rates, bounced emails, and users unsubscribing from your email lists can lead to a poor sender reputation.
Fortunately, it’s easy to track your email stats using WP Mail SMTP, which you should already be using to provide authentication for your domain. WP Mail SMTP provides tracking data on emails you’ve sent right within the WordPress dashboard.
The data you’ll garner this way will help you modify your email campaigns to improve engagement, which is a key factor influencing domain reputation.
5. Consider Using Subdomains for Different Types of Emails
In general, you’ll either be sending out transactional emails—things like receipts or thank you emails, or marketing emails.
It’s a good practice to create separate subdomains for these purposes. That’s because mailing servers treat subdomains as entirely separate domains, so the reputation of one doesn’t affect that of the other.
Using a subdomain prevents unsubscribes and spam reports from your marketing campaigns from affecting the deliverability of transactional emails sent from your too domain, which often contain crucial information.
Most mailers allow you to create subdomains. However, SendLayer stands out because it automatically creates a subdomain when you sign up, in order to help protect your root domain. So you won’t have to perform any extra steps to get a subdomain with SendLayer.
If you’re a beginner and would like a little more info, here’s a comprehensive guide to get started with email subdomains.
6. Only Send Emails to Users Who’ve Opted In
This point is really important. Sending emails to users who haven’t opted-in to receive those emails is a violation of the law in certain regions.
And more importantly, when it comes to email deliverability, unsolicited emails tend to have a really high unsubscribe rate, which can get your domain blocklisted rapidly. Fortunately, this is straightforward when you use these WordPress Newsletter plugins.
Make sure that your emails are sending successfully when a user is registering on your site. See our guide on how to fix user registration emails for more info.
7. Practice Email Segmentation
We’ve just talked about only sending marketing emails to users who’ve specifically opted in to receive them.
Another thing you can do to keep the highest levels of user engagement is to send users marketing emails only about topics they’ve indicated an interest in. This is email segmentation.
By sending users emails that are more focused on their needs, you’ll likely have much better engagement and much lower unsubscribes.
8. Don’t Use a Shared Server
Shared hosting plans—where you share a server with other users are quite common, but they aren’t always a good idea. One reason for this is the fact that shared hosting plans are frequently used for spam.
When too much spam comes from one source, that IP address usually gets blocked. To prevent this, most hosting services actually block SMTP on your email server.
If you can afford it, using a virtual server is a much better setup for email deliverability and will help to cut out most email deliverability issues straightaway.
The quickest way to ruin your sending reputation is to send out loads of emails that then result in lots of people unsubscribing or reporting your emails as spam.
A better approach is a tactic called IP warming. Essentially, IP warming is where you gradually scale up the number and frequency of emails you send from a particular domain over an initial period.
This could be anywhere from a couple of weeks to a couple of months. IP warming is a particularly good idea for newer domains.
And there you have it! Use these WordPress email deliverability best practices and your emails will never end up in spam again.
10. Get Users to Whitelist Your Domain’s IP Address
In addition to getting your subscribers to opt into your email lists explicitly, one additional step you can take is asking them to whitelist the IP address of your sending domain.
Whitelisting is basically setting up your mailboxes’ spam filters to allow emails from specific domains. This is a straightforward process that can usually be done within a user’s mailbox settings.
11. Don’t Send Emails From a Fake Address
One common email delivery mistake is sending emails from a fake address, different from your real email domain.
You can typically set your emails up to display any from address you want, but if this is different from your real root email domain, you’re very quickly going to find the root domain blocklisted. The best practice is to use your legitimate email domain or any subdomains related to it.
And that is it for our guide to the top email deliverability best practices! Now you can get out there and apply these tips to watch your email deliverability soar!
Next, Check Out The Best WordPress Email Plugins
We’ve just shared our list of the top email deliverability tactics for WordPress sites. Next, you might be interested in learning what some of the top tools for WordPress email are.
Ready to fix your emails? Get started today with the best WordPress SMTP plugin. WP Mail SMTP Elite includes a full White Glove Setup and offers a 14-day money-back guarantee.
If this article helped you out, please follow us on Facebook and Twitter for more WordPress tips and tutorials.
Are you looking for the best Google Workspace plugins for your WordPress website?
Google Workspace (formerly G-Suite) offers various useful tools that most businesses use daily. If you have a WordPress website, you’ll be glad to learn that you can easily integrate most Google Workspace apps with WordPress using some handy plugins.
There aren’t many plugins dedicated to G-Suite, but we’ve tested a few to put together our list of the best Google Workspace WordPress plugins to use. Dive right in!
How Do I Use G-Suite in WordPress?
G-Suite or Google Workspace is way too large and complex to be integrated directly into a WordPress site. Instead, you’ll need to install specific plugins that allow you to use individual G-Suite apps on your WordPress site.
WP Mail SMTP is the best WordPress Simple Mail Transfer Protocol (SMTP) plugin that helps you fix delivery problems in WordPress and allows you to integrate with Google Workspace apps.
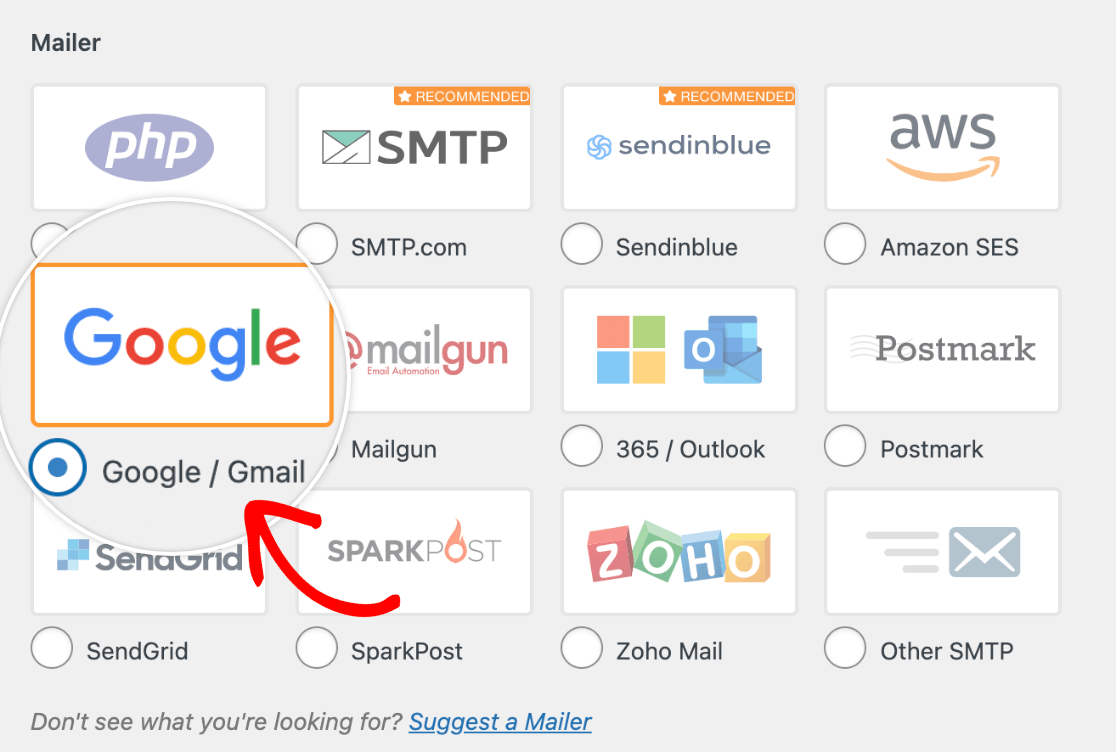
WP Mail SMTP connects with various popular SMTP mailers, including Gmail, for sending your WordPress emails.
Apart from sending your WordPress emails via Gmail as your mailer, you can also integrate Google Sheets with WP Mail SMTP.
Using this integration, you can create useful automation between Google Sheets and WP Mail SMTP using another plugin called Uncanny Automator.
For instance, WP Mail SMTP is a great tool for tracking and monitoring the performance of your WordPress emails. But you can also track email clicks and opens in a spreadsheet by integrating WP Mail SMTP with Google Sheets, allowing you to view your email data outside of your WordPress environment.
Other than these Google Workspace integrations, WP Mail SMTP also offers useful features such as detailed email logs, email reports, email failure notifications, and so on.
For WordPress beginners, or if you just don’t have the time to dedicate to working on your site, you can use WP Mail SMTPs’ white glove setup to get your emails up and running in no time.
WP Mail SMTP Pricing: WP Mail SMTP starts at $49 per year.
WPForms is the best WordPress form builder, and is the easiest way to connect your forms with G-Suite.
To start with, you’ll love the flexibility and ease of use that WPForms offers when it comes to form building. But that’s not all, the plugin provides a number of helpful integrations to improve your workflow efficiency and productivity.
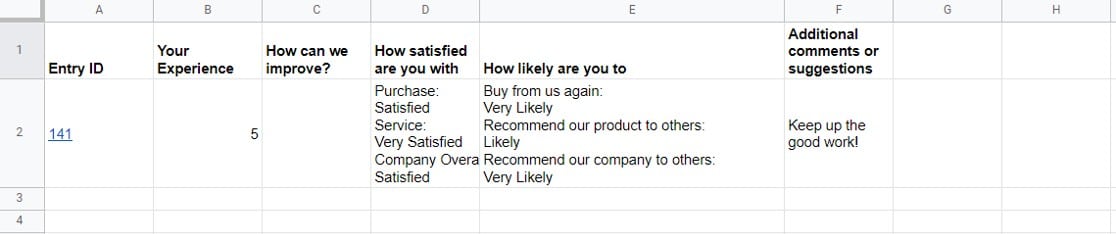
These include a native Google Sheets integration that makes it super easy to send entries from a form to one of your Google Sheets spreadsheets. There’s so much you can do with this integration!
For example, if you’re looking to create surveys to collect feedback from clients, staff, and so on, you’ll easily be able to do this using the WPForms surveys addon. This addon allows you to create a survey form with automated Google Sheets tracking.
And what about nonprofits? Want to track donations for better transparency? With the WPForms prebuilt donation form template, you can easily collect donations using a PayPal Commerce field or one of the other payment fields offered by WPForms.
With over 500 prebuilt WPForms templates for you to choose from, there are so many more ways you can combine WPForms and Google Sheets to create powerful, convenient workflows.
The best part is you won’t even need an extra plugin like Uncanny Automator since WPForms natively supports integration with Google Sheets. To enjoy these awesome features, you’ll need a WPForms Pro or Elite license.
WPForms Pricing: To access the Google Sheets addon, you’ll need a WPForms Pro license or higher, starting at $199.50 annually.
AffiliateWP is the most powerful affiliate program builder and management tool for WordPress sites. If you’re building an affiliate program, you’ll be delighted to learn that you can easily integrate AffiliateWP with G-Suite for easy data management.
You’ll simply need to install Uncanny Automator, and then you can set up an Uncanny Automator recipe to save data in Google Sheets.
We’ve tried this integration out, and we found that it’s incredibly easy to set it all up. What’s more, we were able to set up a connection that allowed us both to trigger events in Google Sheets as well as a connection that allowed actions in Google Sheets to trigger events in AffiliateWP.
So, for example, you’ll be able to keep track of affiliates, new referrals, and so on in a Google Sheets spreadsheet.
You’ll also be able to do the reverse by creating new affiliates and referrals simply by updating a row in the spreadsheet. Pretty neat, right? For more details, check out this guide to integrating AffiliateWP with Google Sheets.
AffiliateWP Pricing: AffiliateWP starts at $149.50 per year.
Like WPForms, Formidable Forms offers a native Google Sheets integration that allows you to easily update your spreadsheets with data from your forms.
Considering how similar this is to the WPForms Google Sheets integration, it’s understandable if you’re unsure which of the two form builders is the right one for you.
If you’re a small business looking for powerful, yet easy to use forms to grow your business, we’d strongly recommend using WPForms. With over 5 million active installations, and 11k+ 5-star reviews on WordPress.org, it’s easy to see why: WPForms offers an unbeatable collection of features at extremely competitive pricing.
Formidable Forms, on the other hand, is much better suited for advanced users, with niche use cases. For example, one of Formidable Forms’ stand out features is its complex in-form calculation field.
Formidable Forms Pricing: To use the Google Sheets integration, you’ll need the Formidable Forms Business license which starts at $199.50 per year.
MemberPress is an excellent choice for building a WordPress membership site that integrates with G-Suite.
For this one, you’ll need to use Zapier to create a connection between MemberPress and Google Drive, which is an arrangement for data storage and management.
One thing we loved when we tried this connection out was the fact that it allows for two-way automations. This means that actions in either MemberPress or Google Drive can trigger events in the other.
This would allow you to automate things like creating a new row to record a new MemberPress sign-up or cancellation.
Aside from this powerful G-Suite integration, you’ll love the flexibility that MemberPress gives you in creating fully-featured online membership sites such as an online course website.
MemberPress Pricing: MemberPress starts at $179.50 for its Basic plan.
Uncanny Automator is by far the best WordPress plugin for creating automations and integrations between plugins, external apps, and even multiple websites.
As you’ll have noticed, we’ve talked quite a bit about Uncanny Automator. This is because it is such a powerful plugin that offers tons of ways to connect WordPress sites to G-Suite apps.
With Uncanny Automator installed on your site, you’ll be able to create rules called recipes, that allow for the automation of the functions of several plugins, apps, or websites.
Some of the major apps you can connect your site to using Uncanny Automator include Google Sheets, Gmail, Google Drive, and more. Now here’s some really good news: you can download Uncanny Automator for free from the WordPress plugin directory, with 1,000 connections to get you started.
Uncanny Automator Pricing: Paid Uncanny Automator licenses start at $149 per year.
Sugar Calendar is the top WordPress event management plugin. Looking to add booking functionality to your site, sell tickets for events, and so on?
This is the plugin to use. Sugar Calendar integrates quite nicely with Google Calendar and other Calendar apps using Sugar Calendar’s Calendar Feeds addon. With this integration setup, your users will be able to create events and sync data for these events with Google Calendar.
This integration is the perfect way for users to schedule events, such as appointments on your site while allowing everyone on your team to easily collaborate to view and manage these bookings on Google Calendar.
When we tried this plugin out, we loved how easy it was to do useful things like create recurring events, specify time zones for specific events, use custom formatting and translation, and so on. Sugar Calendar is also translation ready, which is a huge plus.
Sugar Calendar Pricing: You’ll need the Calendar Feeds addon, which is available for free with the Professional license that starts at $199 per year.
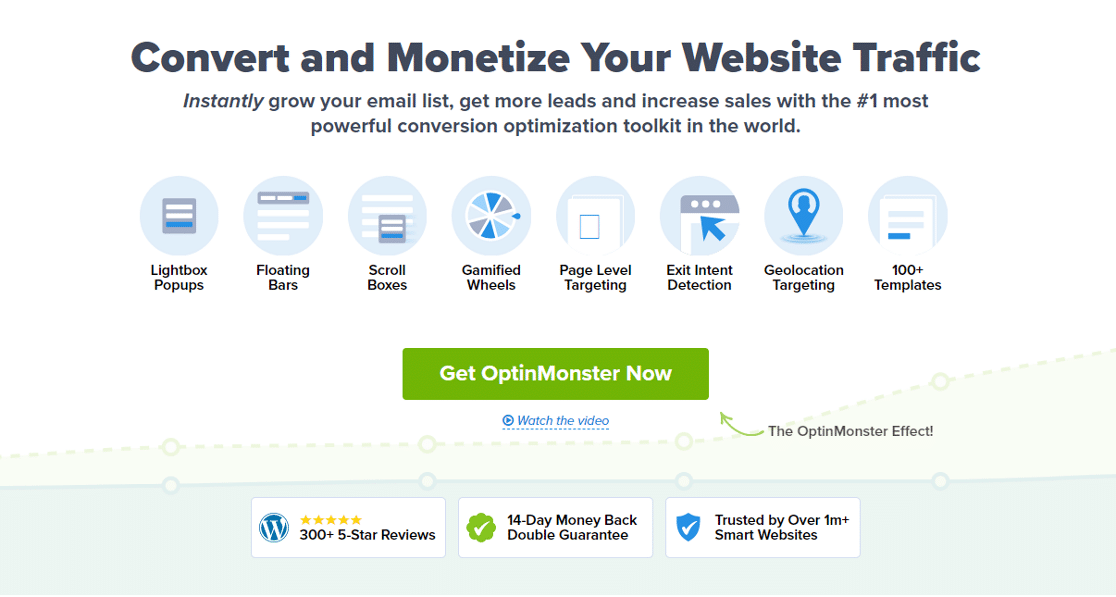
OptinMonster is the number 1 WordPress lead generation plugin and the easiest way to create opt-in forms in WordPress.
What’s more, you can easily connect OptinMonster and Google Sheets using Uncanny Automator. This connection will allow you to automatically send entries to a Google spreadsheet when users submit an opt-in form.
In addition to being able to integrate OptinMonster with Google sheets, you’ll love lots of the features on offer, including things like the easy-to-use drag-and-drop form builder, geo-location targeting, exit-intent technology, and so much more.
OptinMonster Pricing: OptinMonster starts at 9$ per month (billed annually) for its Basic plan.
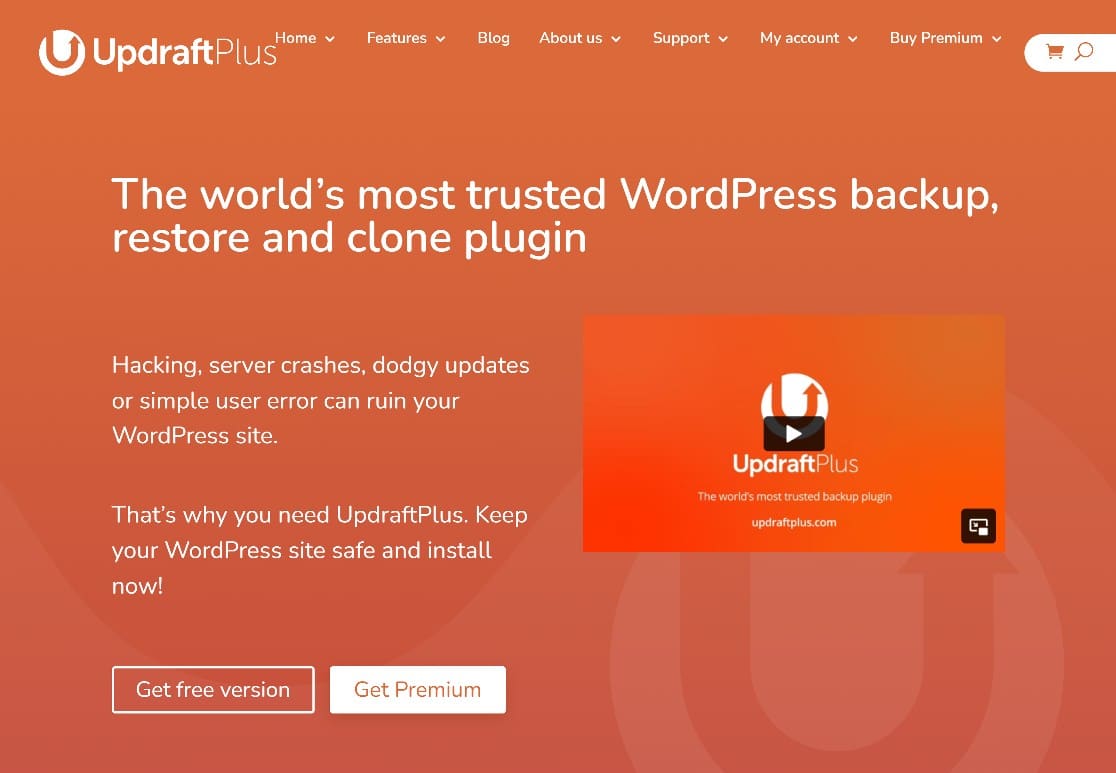
Fortunately, plugins like UpdraftPlus make it easy to automate this process. Once you’ve chosen the backup frequency you prefer, all you have to do is keep up with backup reports, which will be delivered to our email.
And if you’re looking for a way to integrate UpdraftPlus with G-Suite, the answer is yes! UpdraftPlus will allow you to select from a number of destinations for your backup files, which include several useful G-Suite apps like Gmail and Google Drive.
UpdraftPlus Pricing: UpdraftPlus premium starts at $70 per year.
And that’s it for our list of the top 9 WordPress G-Suite plugins! Whatever your needs, one of these plugins is bound to serve you well!
Next, Try These Top Zapier Alternatives
Zapier is one of the top tools for optimizing digital workflows. But it’s not the best tool for every situation. Some other tools, like Uncanny Automator, offer better solutions for WordPress sites, and there are other options to consider too.
Ready to fix your emails? Get started today with the best WordPress SMTP plugin. WP Mail SMTP Elite includes a full White Glove Setup and offers a 14-day money-back guarantee.
If this article helped you out, please follow us on Facebook and Twitter for more WordPress tips and tutorials.
Looking for the top anti-spam plugins for WordPress?
WordPress spam can be tricky to deal with. And while there are lots of plugins that promise to help, not all work so well.
We’ve taken a look at the most popular WordPress anti-spam plugins and created a list of the plugins that we think work best.
Is There a Free Spam Blocker?
There are several free spam blockers. These include multi-platform tools like Google reCAPTCHA and hCaptcha and platform-specific tools like WPForms Lite, which is the best free spam blocker for WordPress forms.
Free spam blockers are a good option to have, but sometimes you’ll need more powerful tools to defend your site from spam. The anti-spam tools we’ll cover below include a nice range of free and paid anti-spam tools for WordPress.
WPForms is the number 1 WordPress form builder and is a favorite for users looking to protect their forms from spam.
WPForms offers an impressive collection of anti-spam features to help you deal with spam once and for all.
The first line of defense is a number of native WPForms anti-spam features. These include the WPForms anti-spam token that adds a hidden cryptographic string to form submissions made by human users. Bots can’t imitate this and when forms are submitted without it, they’ll be marked as spam.
Additionally, WPForms allows you to block known spam sources by filtering form entries by keyword and country.
If your forms have been targeted by specific email addresses or IP addresses from certain countries, this is a creative way to get rid of the problem.
Another native anti-spam solution you’ll love is the WPForms-Akismet integration which allows you to use Akismet on your forms.
Akismet works in two clever ways: first, it compares form entries with its huge database of known spam sources and automatically flags suspicious form entries. Secondly, it scans user on-page behavior to determine if users are likely to be human or bots and flags these for your review as well.
Finally, you can also use one of the 3 CAPTCHA tools available with WPForms.
There is the WPForms Custom Captcha which allows you to set custom math problems for users to solve.
Custom Captcha is an easy anti-spam tool to use, and since you can set your own math problems, you can easily determine the difficulty levels of the CAPTCHA challenge. You’ll need a WPForms Pro license or above to use Custom Captcha.
In addition to this, you can opt for either Google reCAPTCHA or hCaptcha, both of which are powerful and popular anti-spam solutions.
Considering the impressive range of features on offer, WPForms is the clear leader when it comes to anti-spam WordPress plugins for protecting your forms.
WPForms Pricing: WPForms Pro license costs 159.60 annually.
If you have a WordPress website, chances are you already have Akismet installed. Akismet is an anti-spam plugin made by the team behind WordPress.com, so it comes pre-installed with many WordPress installations.
Akismet is quite powerful and is a great way to protect your site from spam. Aside from using it along with WPForms for form protection, you can also use Akismet on its own to protect your comment sections, user registration pages, and so on from spambots.
We particularly love Akismet for its unobtrusive anti-spam protection that allows legitimate visitors to use your site without interruption.
Akismet Pricing: Akismet is free to use for nonprofits, and individual users can pay what they’d like. For commercial use, pricing starts at $8.33 per month, billed annually.
WP Armour is one of the more popular WordPress anti-spam solutions with a distinctive anti-spam approach.
WP Armour works by luring bots into filling out a hidden javascript field that human users cannot see. This is called a spam honeypot.
If you already have WPForms and Akismet, which we’d recommend, you won’t need WP Armour, but it’s good to note that WP Armour is also compatible with WPForms, along with some other major WordPress form builders.
This gives you some additional options if you decide to try an Akismet alternative.
WP Armour pricing: WP Armour is free to get started with.
Titan Anti-Spam & Security is another top-rated WordPress anti-spam plugin. We’d consider this plugin a close like-for-like alternative to Akismet as it works in a similar way.
Titan Anti-Spam & Security works in the background to screen comments by comparing them with its database of spam sources. The exciting thing about this plugin is that it is capable of updating itself frequently, so its ability to block new forms of spam is constantly improving.
While this makes it a really solid option to consider, we recommend that you stick with Akismet as it has a much larger database of known spam patterns, so it offers a wider blanket of spam protection.
On the other hand, it should be noted that Titan anti-spam & Security isn’t just an anti-spam plugin. It also offers some useful WordPress security features like brute force protection and a malware scanner.
If you’re looking for comprehensive WordPress protection, this would be a good plugin to try. Otherwise, just stick to Akismet and WPForms.
Titan Anti Spam & Security Pricing: Titan Anti-Spam & Security is free to get started with.
Zero Spam for WordPress is a well-featured anti-spam plugin for WordPress that covers a few different anti-spam features.
First, like Akismet, this plugin scans comments and other user inputs on your site to compare them with its spam database. But that’s not all. It also allows you to block specific IP addresses, countries, cities, and so on if you’ve been getting spam from those places.
This is a good range of anti-spam features, and as a plus, the plugin works in the background, allowing for a good, seamless user experience.
Zero Spam for WordPress pricing: Zero Spam for WordPress is free to get started with.
Antispam Bee is a popular spam fighter plugin that also works very similarly to Akismet. It helps to beat WordPress spam by scanning user-submitted content and comparing it with its database of proven spam.
One of its handy features is that it allows country-specific or region-specific blocks. The core anti-spam features offered are similar to quite a few plugins on this list, but Antispam Bee has one feature we found exceptional.
With this plugin, you’ll be able to block or create exceptions for user-submitted content in specific languages. Since spam is a global problem, you’re likely to find this really helpful if you’re being targeted by spam in a certain language.
Antispam Bee Pricing: Antispam Bee is free to get started with.
Captcha by BestWebSoft is a WordPress CAPTCHA plugin for protecting your site from spam.
It offers a decent range of protection for comments and forms, registration pages, password reset pages, and so on.
In our testing, we liked the fact that the plugin also offers a broad range of CAPTCHA types including invisible CAPTCHA, Math CAPTCHA, character recognition, and slide CAPTCHA.
And while CAPTCHA tools aren’t always the best when it comes to providing a good user experience, this plugin allows you to hide CAPTCHA from registered users, which is a really useful feature to have.
If you’d like to use CAPTCHA to protect your forms, then we’d recommend sticking with WPForms. But if it’s the other areas of your site you’re more concerned about, then Captcha by BestWebSoft is a good option to consider.
Captcha by BestWebSoft pricing: Captcha by BestWebSoft is free to get started with.
Cleantalk is a spam protection tool that can be used with multiple web development platforms, including WordPress.
On your WordPress site, the plugin works by scanning user inputs on your forms, comments, registration pages, and so on to determine if they are spam. Spam entries are then blocked.
The key feature we found with this plugin was how easy it was to set up and manage spam protection settings. From start to finish, the entire process takes just a few minutes.
One other feature you might find interesting is the word censor feature that allows you to block certain words that you don’t want your users to see. These could be used to block competitor names, swear words, and so on.
Cleantalk pricing: Cleantalk is free to get started with.
WP Cerber Security is a WordPress anti-spam and security plugin that offers comprehensive protection for your site.
Unlike most of the plugins we’ve talked about, with the exception of WPForms, WP Cerber relies on Google reCAPTCHA and invisible CAPTCHA for anti-spam protection.
Google invisible reCAPTCHA works in the background to screen users based on their behavior and presents an actual CAPTCHA challenge only when it deems user behavior to be suspicious.
This can mean some interruptions in user experience, but it also helps to ensure that nothing slips through the cracks.
If you like the idea of using Google invisible CAPTCHA, remember, you can use this with WPForms to protect your forms too.
WP Cerber Security pricing: WP Cerber Security is free to get started with.
And that’s it for our list of the top anti-spam plugins for WordPress!
Our Verdict: Which Is the Best Anti-Spam Plugin for WordPress?
Which anti-spam is best? That depends on your goals.
To protect your forms, WPForms is hands down the best anti-spam plugin. Remember, WPForms helps to protect your site from spam using a range of tools which include the:
WPForms anti-spam token,
Country and keyword blockers
Akismet integration
WPForms Custom Captcha
Google reCAPTCHA
hCaptcha.
For sitewide anti-spam coverage, we’d say combining WPForms and Akismet would be a superb idea.
Next, Apply These Email Deliverability Best Practices
If you have a WordPress website, you’ll likely send lots of marketing or transactional emails. WordPress isn’t best suited for this by default, but with a few simple tips, you can easily set up your WordPress site for effective email delivery. Here’s the full guide in our post on the top WordPress email deliverability practices.
Also, check out our list of anti-spam honeypot alternatives if you’re looking for additional spam filter tools for your site.
Ready to fix your emails? Get started today with the best WordPress SMTP plugin. WP Mail SMTP Elite includes a full White Glove Setup and offers a 14-day money-back guarantee.
If this article helped you out, please follow us on Facebook and Twitter for more WordPress tips and tutorials.
You can view your email logs and sent emails from your WordPress dashboard using the WP Mail SMTP plugin.
Logging WordPress emails is really simple with WP Mail SMTP because it displays the status of your outgoing emails in a log file or dashboard widget.
It’s more advanced than other email logging plugins because it can track the status all the way to the recipient’s mailbox. And it can also show you opens and clicks.
That means you can see a true picture of your email deliverability right in your WordPress dashboard.
WP Mail SMTP also adds a detailed email log page to your WordPress admin area. From the email log page, you can:
View headers: WP Mail SMTP saves all of the technical information associated with the email.
Filter and search: Use the powerful filters to find and track your most important emails.
Print email logs: Every email log can be printed or saved as a PDF.
Log email contents: Save the message as well as the email headers (optional).
Track email opens and clicks: See open and click data for every email you send from WordPress.
Resend failed emails: Resend in bulk or individually, or forward to a different address.
Store attachments: Save the attachment file along with the log.
Export sent emails in CSV, XLSX, or EML format.
View multisite email logs on separate pages easily.
Thanks to these features, logging WordPress emails is not only easy but also very powerful with WP Mail SMTP.
How to Enable WordPress Email Logging
To get full WordPress email logging on your site, you’ll need the WP Mail SMTP Pro license or higher.
Let’s see how you can set up the WP Mail SMTP log on your site.
1. Install WP Mail SMTP
We’re going to use the WP Mail SMTP plugin to log your WordPress emails. WP Mail SMTP is used by 3+ million WordPress users to improve email deliverability and tracking.
To install WP Mail SMTP, download the zip file from your WP Mail SMTP account. You’ll find it in the Downloads tab.
Next, open up your WordPress dashboard. Head to the Plugins page and upload the zip file to install it.
As soon as you activate the plugin, the WP Mail SMTP Setup Wizard will open.
Choose Your Email Service Provider
Now we can set up your chosen SMTP provider using the Wizard.
Click the Let’s Get Started button to begin.
On the next screen, click the mailer you want to use from the list.
WP Mail SMTP supports a ton of popular email services, including many free options.
Logging the Email Delivery Status
Most email logging plugins will tell you if the email Sent or Failed. But they can’t give you any information about what happened after that.
Using WP Mail SMTP for logging WordPress emails provides you with a lot more insight into your delivery status. With WP Mail SMTP, you can unlock 2 additional status reports: Unconfirmed (Waiting) and Confirmed (Delivered).
Here’s what these statuses will tell you:
Sent means that WordPress successfully generated and sent the email.
Failed means that the email wasn’t sent. For example, you’ll see this if there’s a problem with your SMTP server or some other configuration issue.
Unconfirmed means that the email was sent and WP Mail SMTP is waiting for the status.
Confirmed means that the email was sent and delivered to the recipient’s mailbox.
Selected email providers support Unconfirmed and Confirmed. Here’s a chart to show each status and the mailers that support them:
So if you want the best possible email tracking, we recommend that you use WP Mail SMTP with a transactional mailer like SendLayer, Sendinblue, SMTP.com, Mailgun, Postmark, or SparkPost.
When you’ve chosen your mailer, jump to our documentation and continue the setup steps:
In the final step, be sure to turn on Detailed Email Logs and Weekly Email Summary.
Detailed Email Logs will track your email headers and delivery status. Weekly Email Summary will send you a weekly email report.
For the best possible data, we recommend that you log the content of your sent emails as well.
2. Log All Email Content
As well as tracking the header and delivery status of each email sent from WordPress, you can save a copy of the entire content of the messages sent from your site.
This can be helpful when troubleshooting. For example, if you have an email customizer plugin for WooCommerce, you could save a copy of your order emails to make sure they’re formatted correctly.
Let’s turn on complete email logging on your WordPress site. There are 2 ways to do this. You can set this up in the Setup Wizard, or you can achieve the same results in the plugin settings.
Let’s start with the Setup Wizard.
Using the Setup Wizard to Log All Email Content
You’ll go through the Setup Wizard when you first register for WP Mail SMTP. You can always get back to the Setup Wizard, however, by clicking WP Mail SMTP » Settings in the left sidebar menu.
You’ll see the general settings on the screen with the option to launch the setup wizard.
The first thing you’ll do is select your mailer of choice. You’ll configure the mailer settings in step 2.
Step 3 is when you get to enable email features. Your 4 options are Improved Email Deliverability, Email Error Tracking, Detailed Email Logs, and Instant Email Alerts.
Click on Detailed Email Logs to get set up.
Notice that when you check Detailed Email Logs, it automatically adds options for Complete Email Reports and Weekly Email Summary.
On the next screen, you’ll configure your email logs.
You want to check the option to store the content for all sent emails. This must be done if you want to resend any of your emails. Note, however, that this means you will be storing all email content. This might include data, passwords, and personal details.
On this page, you can also opt to save attachments from your emails to your WordPress uploads folder, track when emails are opened, and track when links are clicked in your emails.
After this step, the Setup Wizard will test your connection and let you know if there are any potential issues.
While most of the setup process can be completed through the Setup Wizard, you will still need to go to WP Mail SMTP » Settings » Email Log to adjust settings for webhooks and log retention period.
Once you’ve updated those settings, you’re finished setting up email logging through the Setup Wizard.
Using the Plugin Settings to Log All Email Content
Whether you didn’t use the Setup Wizard when you started or you just want to go back and make changes, you can also use the plugin settings to set up email logging.
First, head to the Settings page in the plugin.
Now click the Email Log tab to open your WordPress email log settings.
Scroll down on this page and check the box next to Log Email Content.
A reminder that this is an advanced option, so there are a couple of things to keep in mind:
Logging the body of emails saves the content in your WordPress database. We recommend that you install a WordPress security plugin with 2-factor authentication so that your site is secure.
Your database will grow. Over time, your WordPress database will get larger as you log the contents of all emails sent from your website.
To avoid any disk space issues, you can restrict the size of your email log. If you decrease the Log Retention Period, older email logs will be deleted automatically.
Now let’s take a closer look at the log file inside your WordPress dashboard.
3. View WordPress Email Logs
Now that you’ve set up WordPress email logs, every email sent using the wp_mail() function will be logged. You don’t need to use a separate WordPress plugin for this, which is great because you can avoid any plugin conflicts that may affect your email deliverability.
If your email provider supports all of the statuses we talked about, it’s also reporting the status of every email: Sent, Failed, and (if supported) Delivered.
When we installed the plugin, the Setup Wizard generated a test email, so that’ll be in your log already. You can generate additional test emails in the Tools menu if you want to.
Now let’s take a look at the email logs. In your WordPress admin menu, open up WP Mail SMTP » Email Log.
Since your installation is new, you might not have many logs to look at yet. We’ll show how it’ll look when it’s been running for a while.
Let’s start by filtering the log by date. In this example, we want to find any emails that failed on April 20.
WP Mail SMTP’s email log has a datepicker at the top so you can easily view the log files for a specific date or series of dates.
In the image below, we’ve used it to look for emails sent from our WordPress website between April 14th and April 21st.
Because we’re using a transactional mailer, we can see a Delivered status with a green circle and checkmark for the first 3 emails, so we know those definitely reached the recipient’s mailbox.
One email is marked with a red dot, so we know that one Failed. If we hover over that line, we can see options to View Log or Delete.
Let’s click on View Log to see more details about the logged email.
From the individual log page, we can:
Print the email log, or save it as a PDF
Export this log as a CSV, EML, or Excel file.
Exporting as EML will export the full email content if you’ve got that option enabled. We’ll show you how that works in the next section of this article.
The email log also tells you which plugin generated the email.
You can click Resend to resend any email and customize the To address.
At the bottom of the log, the Technical Details dropdown will show you the full headers for more detailed troubleshooting.
We can also see the exact error that the email provider returned:
In this case, the recipient was receiving too many emails and has hit their Gmail receiving limit. So we can be sure that it wasn’t a problem with our email provider or settings.
From the individual log file page, we can print log files in Normal or Compact view. Compact view is helpful if you have a large log file and you want to save paper or reduce the size of the PDF.
Back on the main log screen, let’s look at the other ways to manage WordPress email logs.
The search bar lets you narrow down the list of email logs. You can use multiple search criteria to keep filtering the list until you find what you need.
For example, we already filtered by date. Next, we can search in the Subject and Headers to see if we have any other username and password emails that failed during the same week.
The new search is combined with the date search, and you can see both filters in the line above the log screen.
We can click the X icons to remove any part of the search if we want to broaden the results.
These filtering and searching tools make it easy to find any email and find out if it was sent and if it was also delivered (if your mailer supports the Delivered status).
Let’s move on and see how to see if your emails are being opened.
4. Track Email Opens and Clicks
Now that you know for sure that your emails are being delivered, you’ll also want to check if the recipient is actually reading and interacting with the message.
WP Mail SMTP Pro not only assists with logging WordPress emails, but it goes out and beyond to track open and click rates for every HTML email sent from your site.
WordPress email tracking is especially handy if you’re selling online courses or sending newsletters from WordPress.
First, head to the plugin’s Settings page.
And now click Email Log at the top to open your WordPress email log settings.
You’ll want to scroll down and enable these 2 settings:
Open Email Tracking
Click Link Tracking
Now you’ll be able to see open and click tracking data next to each individual email log.
And you can also see an overview from the main email log screen.
If you’re a Pro customer, you can get full open rates and click-through rates in your Email Report.
Keep in mind that open and click tracking relies on a tracking pixel. That means it works with most HTML emails sent from a live WordPress site, but might not work with SMTP on localhost until you publish your site on the internet.
Now we’ve looked at click and open tracking, let’s look at some more data we can log.
5. Log Attachments Sent From WordPress
WP Mail SMTP Pro allows you to save a copy of attachments sent out from your WordPress site.
For example, if you’re sending PDF invoices using a WooCommerce plugin, you can save each invoice for your own reference.
To do this, you’ll want to open up your WP Mail SMTP settings page again. Then click Email Log at the top to open the email log settings as we did before.
Now be sure to turn on all 3 of these options:
Enable Log
Log Email Content
Save Attachments
Now each email sent from your site will be saved in WordPress along with any files originally attached.
You can download the file or resend the email to forward it.
If you want, you can also export the data, which we’ll look at next.
6. Export WordPress Email Logs to CSV, EML, or XLSX
The email log export tool in WP Mail SMTP lets you export email logs and customize the fields that are included in the file.
This is an awesome way to get your email logging data out of WordPress so you can analyze it in other tools and dashboards.
For example, you could track your email deliverability alongside your WooCommerce store activity, or create your own custom reports for agency clients.
To generate an Excel or CSV export file, head to WP Mail SMTP » Tools.
From the tabs across the top, click Export.
At the top, you can choose the file format and select the basic information to include.
Below that, you can pick more information and filter your search.
So in total, an XLSX or CSV WordPress email log export can include any combination of these fields:
Common Information
Additional Information
To address
Status
From address
CC
From name
BCC
Subject
Headers
Body
Mailer
Created date
Error details
Number of attachments
Log ID
Attachments
Opened
Clicked
Additionally, you can also filter the export file by:
Exact date or date range
Email address
Subject or header text
Content
Keep in mind that exporting the Body or searching the Content will only work if you’re logging the contents of the emails sent from your site.
And that’s it! Now you know how to log your WordPress emails so you can track the status and generate your own deliverability reports.
Now you’ve got WP Mail SMTP, you can send different contact form notifications from as many Gmail aliases as you like. You can use the Force From Email setting to use 1 email for everything, or pick a default alias and use the others when you need to.
No matter which Gmail alias you use, WP Mail SMTP will automatically add the right authentication.
Also, if you’re looking to expand your WordPress email capabilities, see our list of the best WordPress email plugins.
Ready to log your emails? Get started today with the best WordPress SMTP plugin. WP Mail SMTP Elite includes full White Glove Setup and offers a 14-day money-back guarantee.
If this article helped you out, please follow us on Facebook and Twitter for more WordPress tips and tutorials.
It’s easy to think high-tech companies have a security advantage over other older, more mature industries. Most are unburdened by 40 years of legacy systems and software. They draw some of the world’s youngest, brightest digital natives to their ranks, all of whom consider cybersecurity issues their entire lives.
Perhaps it is due to their familiarity with technology that causes them to overlook SaaS security configurations. During the last Christmas holiday season, Slack had some private code stolen from its GitHub repository. According to Slack, the stolen code didn’t impact production, and no customer data was taken.
Still, the breach should serve as a warning sign to other tech companies. Stolen tokens allowed threat actors to access the GitHub instance and download the code. If this type of attack can happen to Slack on GitHub, it can happen to any high-tech company. Tech companies must take SaaS security seriously to prevent resources from leaking or being stolen.
Slack’s misfortune with GitHub wasn’t the first time a GitHub breach occurred. Back in April, a stolen OAuth token from Heroku and Travis CI-maintained OAuth applications were stolen, leading to an attacker downloading data from dozens of private code repositories.
MailChimp, a SaaS app used to manage email campaigns, experienced three breaches over 12 months spanning 2022-23. Customer data was stolen by threat actors, who used that data in attacks against cryptocurrency companies.
SevenRooms had over 400 GB of sensitive data stolen from its CRM platform, PayPal notified customers in January that unauthorized parties accessed accounts using stolen login credentials, and Atlassian saw employee data and corporate data exposed in a February breach.
Clearly, tech companies aren’t immune to data breaches. Protecting their proprietary code, customer data, and employee records that are stored within SaaS applications should be a top priority.
A strong SaaS posture is important for any company, but it is particularly important for organizations that store their proprietary code in SaaS applications. This code is especially tempting to threat actors, who would like nothing more than to monetize their efforts and ransom the code back to its creators.
Tech companies also tend to rely on a large number and mix of SaaS applications, from collaboration platforms to sales and marketing tools, legal and finance, data warehouses, cybersecurity solutions, and many more – making it even more challenging to secure the entire stack.
Tech employees heavily depend on SaaS apps to do their day-to-day work; this requires security teams to strictly govern identities and their access. Moreover, these users tend to log into their SaaS apps through different devices to maintain efficiency, which may pose a risk to the organization based on the device’s level of hygiene. On top of this, tech employees tend to connect third-party applications to the core stack without thinking twice, granting these apps high risk scopes.
The high-tech industry is known for periods of hyper-growth, followed by downsizing. Over the past few months, we’ve seen Facebook, Google, Amazon, Microsoft, LinkedIn, Shopify and others announce layoffs.
Deprovisioning employees from SaaS applications is a critical element in data security. While much of the offboarding of employees is automated, SaaS applications that are not connected to the company directory don’t automatically revoke access. Even those applications that are connected may have admin accounts that are outside the company’s SSO. While the primary SSO account may be disconnected, the user’s admin access through the app’s login screen is often accessible.
At the same time, the industry is ripe with mergers and acquisition announcements. As a result of M&As, the acquiring company needs to create a baseline for SaaS security and monitor all SaaS stacks of merged or acquired companies, while enabling business continuity. Whether the hyper growth is organic or through an M&A, organizations need to be able to ensure access is right-sized for their users, at scale and rapidly.
The majority of data breaches impacting tech companies stem from stolen credentials and tokens. The threat actor enters the system through the front door, using valid credentials of the user.
Identity Threat Detection and Response (ITDR) picks up suspicious events that would otherwise go unnoticed. An SSPM (SaaS Security Posture Management) solution with threat detection engines in place will alert when there is an Indicator of Compromise (IOC). These IOCs are based on cross-referencing of activities such as user geolocation, time, frequency, recurring attempts to login, excessive activities and more.
Maintaining a high SaaS security posture is challenging for high tech companies, who may mistakenly believe they are equipped and well trained to prevent SaaS attacks. SaaS Security Posture Management is essential to preventing SaaS breaches, while an SSPM with ITDR capabilities will go a long way toward ensuring that your SaaS data is secure.
A user is browsing your website. They go to your product page. Then to your pricing page. Then back to your product page as they forgot to check if you offer that specific feature. Finally, they navigate forward to your pricing page and finish their order.
As it turns out, it’s a pretty common scenario.
Chrome usage data shows that 1 in 10 (10%) navigations on desktop and 1 in 5 (20%) on mobile are either back or forward.
Truly spectacular numbers.
But…
The more important thing is – how can you guarantee that after navigating back and forward to your pages, they load immediately?
Enter back/forward cache (or bfcache).
In the following lines, you will learn everything about bfcache and how to implement it to improve speed and perceived performance.
Spoiler alert: it’s easier than you think.
What is the back/forward cache?
Bfcache is a feature that allows browsers to create and store a snapshot of an already visited web page in their in-memory. So the next time a visitor navigates back or forward to it, the browser can display it immediately.
The whole behind-the-scene process looks like this…
When a visitor requests to load a specific page, the browser goes through the following process:
Establishes a connection with the server
Downloads and parses the information
Constructs the Document Object Model (DOM) and CSS Object Model (CSSOM)
Renders the content
Makes the page interactive
If the back/forward cache isn’t enabled for the specific page, it means that every time you leave it and then navigate back to it, the browser will have to go through the whole 5-step process.
And that takes time.
On the contrary, with bfcache enabled, the browser “freezes” the page with all of its resources, so the next time you re-visit it, the browser won’t need to waste time rebuilding and will be able to load it instantly.
The following Addy Osmani’s video illustrates best how fast a web page loads with and without bfcache:
As you can see from the video, the loading time is almost non-existent. On top of that, bfcache will reduce your visitors’ data usage as they won’t have to re-download the same resources repeatedly.
And while all of these benefits sound incredible, a certain question might still bother you:
I already have an HTTP cache set up for my website. Do I need bfcache as well?
Here’s the answer…
What is the difference between bfcache and HTTP cache?
Put simply, bfcache is a snapshot of the entire page stored in-memory (including the JavaScript heap), whereas the HTTP cache includes only the previously requested resources.
“…it’s quite rare that all requests required to load a page can be fulfilled from the HTTP cache…”
Not all resources are allowed to be cached in the HTTP Cache. For instance, some sites don’t cache the HTML document itself, but only the resources. As a result, every time a visitor loads a specific page, the browser needs to re-download the document.
Another reason back/forward cache can be faster is the difference between in-memory and disk cache.
It’s true that loading resources from the disk cache (HTTP cache) could be much faster than requesting them over the network. But there’s an extra boost from not even having to read them from disk and fetching the entire page directly from the browser’s in-memory.
What browsers support the back/forward cache?
All of them – Chrome, Safari, Firefox, Opera, and Edge:
The truth is back/forward cache isn’t a new concept. Safari added support for this feature back in 2009. Firefox has supported it since version 1.5.
Edge and Chrome were the latest to join the party, with the former introducing bfcache in 2020, while the latter did it a year later.
Now that you know that all major browsers support it let’s see how you can check if your page is served from the bfcache.
How can I check if my site can be served from the back/forward cache?
The best thing about back/forward cache is that itjust works in the majority of cases because browsers automatically do all the work for you.
In some cases, however, your pages will not be restored by the bfcache.
The easiest way to check if everything works correctly is to run a PageSpeed Insights audit.
Using Google PageSpeed Insights
Since the release of Lighthouse v10, there’s been a new PSI audit called “Page prevented back/forward cache restoration.”
The audit will fail if the page you tested cannot be restored from bfcache for any reason. Clicking on the warning, a drop-down menu will open, and you’ll see a list with reasons and the frame(s) that caused the issue.
Actionable: You can fix these issues to enable caching.
Pending Support: Chrome doesn’t support these features yet, so they prevent caching. However, once supported, Chrome removes these limitations.
Not Actionable: You can’t fix these issues on this page. Something that is outside the page’s control prevents caching.
Using Chrome DevTools
Another option is to use Chrome’s Developer Tools, following these steps:
1. Open Chrome DevTools on the page you want to test:
2. Navigate to Application > Cache > Back/forward cache:
3. Click Test back/forward cache
If bfcache works on your page, you’ll see this message:
If not, you will see a list of issues:
Now that you know how to test it, let’s see how you can optimize your pages for bfcache and fix PSI’s warning.
How to fix the “Page prevented back/forward cache restoration” warning in PageSpeed Insights
Even if you don’t see the warning, meaning your page is eligible for bfcache, it’s good to know that it won’t stay there indefinitely.
That’s why it’s crucial to know how to optimize for back/forward cache.
Here are some best practices you can use to make it as likely as possible that browsers bfcache your pages:
1. Avoid using the unload event
The most surefire way to optimize for bfcache is to avoid using the unload event at all costs.
The unload event fires when the user navigates away from the page (by clicking on a link, submitting a form, closing the browser window, etc.).
On desktop, Chrome and Firefox consider a page ineligible for bfcache if it uses the unload event. Safari, on the other hand, will cache some pages that fire the unload event listener, but to reduce potential breakage, it will not run it when a user is navigating away.
On mobile, Chrome and Safari will cache a page that uses the event, but Firefox won’t.
In general, avoid using the unload event and instead go for the pagehide event. Otherwise, you’re risking slowing down your site, and your code won’t even run most of the time in Chrome and Safari.
Also, there’s an ongoing discussion between browsers to deprecate unload.
2. Be careful with adding beforeunload listeners
It’s ok to use beforeunload events in Chrome and Safari, but keep in mind that Firefox will flag your pages as ineligible for bfcache.
However, there are legitimate use cases for the beforeunload event, unlike the unload event. One example is when you must caution the user about losing unsaved changes if they exit the page. It’s advisable to attach beforeunload event listeners only when there are unsaved changes and to remove them promptly after saving those changes.
3. Use Cache-Control: no-store only with information-sensitive pages
If a page contains sensitive information and caching is inappropriate, then Cache-Control: no-store should be used to prevent it from being eligible for bfcache. On the other hand, if a page doesn’t contain sensitive information and always requires up-to-date content, Cache-Control: no-cache or Cache-Control: max-age=0 can be used. These directives prompt the browser to revalidate the content before serving it and don’t impact a page’s eligibility for bfcache.
4. Update sensitive data after bfcache restore
The bfcache isn’t supposed to work for pages that contain sensitive data. For instance, when a user signs out of a website on a public computer, the next user shouldn’t be able to sign back in just by hitting the back button.
To achieve that, it’s a good practice to update the page after a pageshow event if event.persisted is true.
Whenever possible, use rel=”noopener” instead of window.opener references. The opened window or the opener won’t be eligible for bfcache if your site opens windows and controls them through window.postMessage().
Always close connections and disconnect observers during the pagehide and freeze event
When the page is stored in the bfcache, all JavaScript tasks are paused and resumed as soon as it is taken out of the cache.
If these tasks only access APIs isolated to the current page, there won’t be any problems.
However, if these tasks are connected to APIs that are also accessible from other pages in the same origin, then they may prevent code in other tabs from running properly.
If that’s the case, some browsers will not put a page in bfcache in the following scenarios:
The best thing you can do is to permanently close connections and remove or disconnect observers during pagehide or freeze events if your page uses any of these APIs. By doing this, the browser can cache the page without worrying about other open tabs being affected.
Key Takeaways
For something handled by browsers, we’ve covered a lot of information.
So here are the key takeaways from this article:
Bfcache allows browsers to create and store a snapshot of an already visited web page in their in-memory, making the subsequent back/forward navigation load instantly.
The benefits of your page being served from the bfcache include reduced data usage, better perceived performance, improved Core Web Vitals, and user experience.
The difference between bfcache and HTTP cache is that the former stores a snapshot of the whole page while the latter only the previously used resources. Also, with bfcache, the content is restored from the browser’s in-memory, while with HTTP cache is from a disk cache.
All major browsers support back/forward cache.
You can check if a particular page is eligible for back/forward caching using PageSpeed Insights or Chrome DevTools.
То optimize your pages for bfcache and fix the “Page prevented back/forward cache restoration” warning by doing the following:
Avoid using the unload event
Be careful with adding beforeunload listeners
Use Cache-Control: no-store only with information-sensitive pages
Avoid window.opener references
Always close connections and disconnect observers during the pagehide and freeze event
As always, don’t forget to test. Back/forward cache is a great feature, but remember that not every page should be eligible for it. Your visitors’ experience should always be a first priority.
This tutorial will help you in disabling cloud-based clipboard (WIN+V) history feature in Windows 10. Once you follow the steps given in this guide, you’ll be able to prevent or restrict Windows 10 as well as other users from enabling cloud-clipboard feature from Settings and accessing your copied data from cloud-clipboard fly-out.
Newer versions of Windows 10 come with new cloud-based Clipboard feature which allows users to copy and paste multiple items from the clipboard. Users can copy multiple items to the new clipboard and then they can select and paste desired copied items from cloud-clipboard to anywhere they want such as Notepad, MS Word, etc.
The new cloud-based clipboard can be used by pressing WIN+V keys together. To copy items you need to use the good old Ctrl+C hotkey but to paste the copied text from new cloud-based clipboard, you need to use the new WIN+V keyboard shortcut.
When you press WIN+V keys together to access cloud-clipboard, Windows 10 launches the new cloud-based clipboard fly-out as shown in following screenshot:
To paste an item, you need to click on the item and it’ll be immediately pasted at current cursor position in your program window.
Users can enable/disable cloud-clipboard using Windows 10 Settings app. Open Settings app (WIN+I) and go to System -> Clipboard section. Now you can turn on/off Clipboard History option to allow/disallow Windows 10 from copying items to new cloud-clipboard as shown in following screenshot:
We posted a detailed tutorial reviewing cloud-based clipboard feature at following link:
Although it’s a good feature but many Windows 10 users may not like the new cloud-clipboard feature and they may want to disable or deactivate it due to privacy and security reasons.
In this tutorial, we’ll tell you how to permanently disable cloud-clipboard feature in Windows 10 so that no one can access your copied data by pressing WIN+V hotkey.
Once deactivated or disabled, when anyone will try to open Settings -> System -> Clipboard page in your Windows 10 device, he’ll notice that Clipboard History option is grayed out i.e. disabled and he can’t change it. So users will be unable to activate or enable cloud-clipboard feature without your permission. Also a message “Some of these settings are hidden or managed by your organization” will be displayed at the top of the page as shown in following screenshot:
If anyone will try to press WIN+V hotkey in Notepad or any other program to access cloud-clipboard feature, the new clipboard fly-out will open blank or empty. Windows 10 will no longer store your copied items to cloud-clipboard.
Following methods will help you in disabling cloud-clipboard feature in Windows 10 operating system:
METHOD 1: Using Group Policy Editor
1. Press WIN+R keys together to launch RUN dialog box. Now type gpedit.msc and press Enter. It’ll open Group Policy Editor.
2. Now go to:
Computer Configuration -> Administrative Templates -> System -> OS Policies
3. In right-side pane, look for following options:
Allow Clipboard History
Allow Clipboard synchronization across devices
4. Double-click on both options one by one and set both of them to Disabled.
That’s it. It’ll permanently disable cloud-clipboard feature in Windows 10.
PS: In future, if you decide to restore default settings and restore cloud-clipboard feature, set the above mentioned options to Not Configured again in Group Policy Editor.
METHOD 2: Using Registry Editor
If you are using Home edition of Windows, you’ll not be able to run gpedit.msc command because this edition doesn’t come with Group Policy Editor.
If you can’t use or don’t want to use Group Policy Editor, you can take help of Registry Editor for the same task. Just follow these simple steps:
1. Press WIN+R keys together to launch RUN dialog box. Now type regedit and press Enter. It’ll open Registry Editor.
3. In right-side pane, right-click on empty area and select New -> DWORD (32-bit) Value option. Set the new DWORD name as AllowClipboardHistory and keep its value to 0
Again right-click on empty area and select New -> DWORD (32-bit) Value option. Set the new DWORD name as AllowCrossDeviceClipboard and keep its value to 0
4. Close Registry Editor. You may need to restart your computer to take effects.
That’s it. It’ll completely disable cloud-clipboard feature in Windows 10.
PS: In future, if you decide to restore default settings and restore cloud-clipboard feature, delete the DWORD values created in above mentioned steps from Registry Editor.
About the author: Vishal Gupta (also known as VG) has been awarded with Microsoft MVP (Most Valuable Professional) award. He holds Masters degree in Computer Applications (MCA). He has written several tech articles for popular newspapers and magazines and has also appeared in tech shows on various TV channels.
Keeping up with your email inbox can be a daunting task. It’s easy to get bogged down in long, rambling messages or get overwhelmed by a million unimportant emails and miss the important information buried within. Fortunately, there’s a solution that can help.
With Zapier and OpenAI’s GPT-3, summarizing your email’s essential details has never been easier. With just a few clicks, you can automatically get a summary for each email in Slack or a handy daily digest that includes all the critical info you need from each email all in one go.
In this article, we’ll walk you through the steps of setting up this powerful Zap—our word for Zapier’s automated workflows. Whether you’re a busy professional or simply seeking to optimize your process, this tutorial will help you streamline your email management and stay on top of your inbox.
Looking for GPT-4? GPT-4 may be available with our OpenAI integration in the future. In the meantime, users with a paid subscription to ChatGPT Plus can access GPT-4 via our ChatGPT integration now—allowing you to add ChatGPT-powered conversations into apps like Slack.
How it works
For this project, we’ll be using OpenAI’s GPT-3 to summarize our emails, and then we’ll send the summaries to Slack.
If you’d like to start with a template, click on the Zap template below to go to the Zap editor. You’ll need to create a Zapier account if you don’t already have one. Then, follow the directions below to set up your Zap.
Get an OpenAI-generated email summary in Slack for new Gmail emails
Alternatively, if you prefer to receive the notifications as a daily digest rather than individually, we’ll walk through how you can use Digest by Zapier for this purpose.
If you’d like to go the digest route, you can start with the following Zap template:
Get an AI-generated daily digest of your emails in Slack
Gmail, Digest by Zapier, Formatter by Zapier, OpenAI (GPT-3, DALL·E, Whisper), Slack
Gmail + Digest by Zapier + Formatter by Zapier + 2 moreMore details
Before we begin developing our Zap, you’ll also need an OpenAI account if you don’t already have one. Go to platform.openai.com to sign up for your account. You’ll also need a free Slack account, which you can sign up for at www.slack.com.
Are you ready to build this yourself? Let’s get started!
New to Zapier? It’s a tool that helps anyone connect apps and automate workflows—without any complicated code. Sign up for free.
Step 1: Set up your Gmail trigger step
Head over to Zapier, and click the Create Zap button to create a new Zap.
Search for and select Gmail for the trigger app and New Email in Gmail for the trigger event (if you’re using the Zap template, these will already be selected for you).
Next, connect your Gmail account if you haven’t already connected it to Zapier.
In the Label/Mailbox field, select INBOX. You can optionally leave this blank to trigger for all emails. But since that will also trigger for sent messages and drafts, INBOX is the best choice unless you do heavy email filtering/labeling to remove emails from your inbox.
Click Test Trigger, and you should see a recent email from your inbox, as shown below:
Step 2: Set up a formatter step to truncate your email
Currently, GPT-3 only allows you to send a limited amount of data to summarize, so we’ll need to truncate our email to make sure we don’t exceed this limit. In the future, OpenAI plans to develop new models with higher limits, or possibly no limits, but for now, this is a necessary step.
Click the + symbol beneath your Gmail trigger, then search for and select Formatter by Zapier for the action app and Text for the event.
Select Truncate as your transform action. Click in the Input field, and select Body Plain from the data dropdown from your Gmail trigger—this contains the plain-text body of the email.
In the Max Length field, enter 6000, and then select True for the Append Ellipsis option. Here’s what your complete action step should look like:
This 6000-character truncation means that if the email is shorter than 6000 characters, we’ll keep the entire thing, but if it’s longer, we’ll only keep the first 6000. 6000 characters is quite long, but I do often see emails that go over this limit. Most commonly, this will be longer newsletters or long back-and-forth email threads, as Gmail will include the entire thread in the body that Zapier receives. Because Gmail processes their email threads in reverse chronological order, this truncation will keep the most recent emails in the thread.
Next, click Test Action to ensure everything is working properly. Next, we’ll set up our prompt to send to OpenAI.
Step 3: Set up your OpenAI email summary prompt
If you haven’t set up your Zapier connection to OpenAI, you’ll have to do that now. To start, head back over to platform.openai.com to log into your account. At the top right of the page, click on your profile icon and click View API Keys:
From that page, click on the + Create new secret key button to generate a new API key. You’ll need this key to connect to your OpenAI account within Zapier. Copy this key and store it somewhere safe!
Head back over to Zapier and add a new action step at the bottom of your Zap. Search for the OpenAI app and choose the Send Prompt event:
Click on Choose account, and set up a new account by providing the API key you just generated in OpenAI. If you already have set up your account connection, simply select your existing account.
Head to the Set up action section to set up the prompt we’ll be sending over to OpenAI. In the Prompt field, copy and paste the following:
Summarize the following email into 3 sentences max. Make it concise:
"""
<Output from Formatter by Zapier>
"""
Replace the bracketed content with the Output variable from your Formatter by Zapier step by selecting Output from the Insert Data dropdown.
The triple quotes help GPT-3 to understand where the email starts and stops.
If you want, you can give more specific instructions for the summary depending on your use case. For example, if you’re using this for your work email, you might provide information about your role at your company and the type of information that is or isn’t important to you. You might also consider providing additional context about the services or products your company offers so that GPT-3 can incorporate some of those details into the summary. For now, we’ll keep it simple with the prompt I show above.
You can leave all of the other fields for this step set to their default values.
Click Test Action to send the email over to OpenAI. Review the summary and make sure everything looks okay.
If you want to get a notification in Slack for each email you receive, continue to the next step.
If you want to get a daily digest of all of your emails, skip ahead.
Get notifications for each email step 4: Set up your Slack message
Next, we’ll set up the action step that will send the email summary back to you in a Slack message. This could also be set up to send as an email or SMS if you prefer, but we’ll be using Slack for this example.
Add a fourth action step and search for the Slackapp. Select the Send Channel Message event.
Connect your Slack account if you haven’t already connected it to Zapier.
Next, we’ll set up the action step. Select the Slack channel you want these messages to be sent to. I created a new channel called email-summaries for this purpose.
In the Message Text field, copy and paste the following, replacing the bracketed content with data from your previous Zap steps, which you can select from the Insert Data dropdown:
*New email summary*
From {Gmail From Name}, {Gmail From Email}
Received {Gmail Date}
Summary: {OpenAI Choices Text}
<{Gmail Message URL}|Go To Email>
Your Message Text field should look like the following image when complete:
This will create a message in Slack that includes the sender name and email address, the date and time the email was received, the summary generated by OpenAI, and a link to open the email directly in Gmail for easy responding.
Switch the Include a link to this Zap? field to No and leave the remaining fields as is.
Next, click Test Action to send the summary message to your Slack channel and make sure everything is working properly. If everything looks good, you’re now ready to use your Zap.
Get a daily digest step 4: Set up your digest entries
If the idea of receiving instant notifications for every email you receive sounds too distracting, the daily digest is an ideal solution for you. Instead of setting up a Slack notification for the fourth step, we can use a built-in Zapier tool called Digest by Zapier to store up the email summaries throughout the day and then release them to us all at once at a designated time.
Add a new action step to the bottom of your Zap. Select Digest by Zapier for your action app and Append Entry and Schedule Digest for your action event.
Navigate to the Action section and give your digest a descriptive title like Daily Email Summaries.
For the Entry field, simply copy and paste the copy below. Then replace the bracketed content with the variables from the prior steps by selecting them from the Insert Data dropdown.
From {Gmail From Name}, {Gmail From Email}
Received {Gmail Date}
Summary: {OpenAI Choices Text}
<{Gmail Message URL}|Go To Email>
For the Frequency field, select Daily, and for the Time of Day field, choose when you’d like to receive the digest. Your completed action step should look like this:
Click Test Action to add an entry to your digest and make sure your action step is set up correctly.
Get a daily digest step 5: Set up the Slack action to release your daily digest
Finally, we’ll set up the action step that will release your daily digest and send all of the email summaries to you in a Slack message. This digest message will automatically send at the Time of Day you specified in the prior action step.
Add an action step and search for the Slackapp. Select the Send Channel Message event.
Click on the Actionsection. As before, select the channel you want these messages to be sent to. I created a new channel called email-summaries for this purpose.
In the Message Text field, copy and paste the following, replacing the bracketed content with the data received from your previous digest step by selecting them from the insert Data dropdown:
*You received {Digest Count} emails today*
{Current Digest}
Your Message Text field should look like the following image when complete:
This will create a message in Slack that includes the total number of emails received and the digest with all of the email summaries that were created throughout the day, formatted as we specified in the prior step.
Switch the Include a link to this Zap? field to No and leave the remaining fields as is.
Next, click Test Action to send the summary digest to your Slack Channel and make sure everything is working properly. If everything looks right, you’re now ready to use your Zap!
Putting it all together
Whether you’re a busy professional or simply looking to optimize your email management process, setting up either of these workflows can help streamline your day and keep you on top of your inbox. Give it a try and see the difference it can make!