9 Best Google Workspace Plugins for WordPress

by David Abraham on Dec 22, 2022

Are you looking for the best Google Workspace plugins for your WordPress website?

Google Workspace (formerly G-Suite) offers various useful tools that most businesses use daily. If you have a WordPress website, you’ll be glad to learn that you can easily integrate most Google Workspace apps with WordPress using some handy plugins.

There aren’t many plugins dedicated to G-Suite, but we’ve tested a few to put together our list of the best Google Workspace WordPress plugins to use. Dive right in!

How Do I Use G-Suite in WordPress?

G-Suite or Google Workspace is way too large and complex to be integrated directly into a WordPress site. Instead, you’ll need to install specific plugins that allow you to use individual G-Suite apps on your WordPress site.

Best Google Workspace Plugins for WordPress

In This Article

1. WP Mail SMTP

WP Mail SMTP

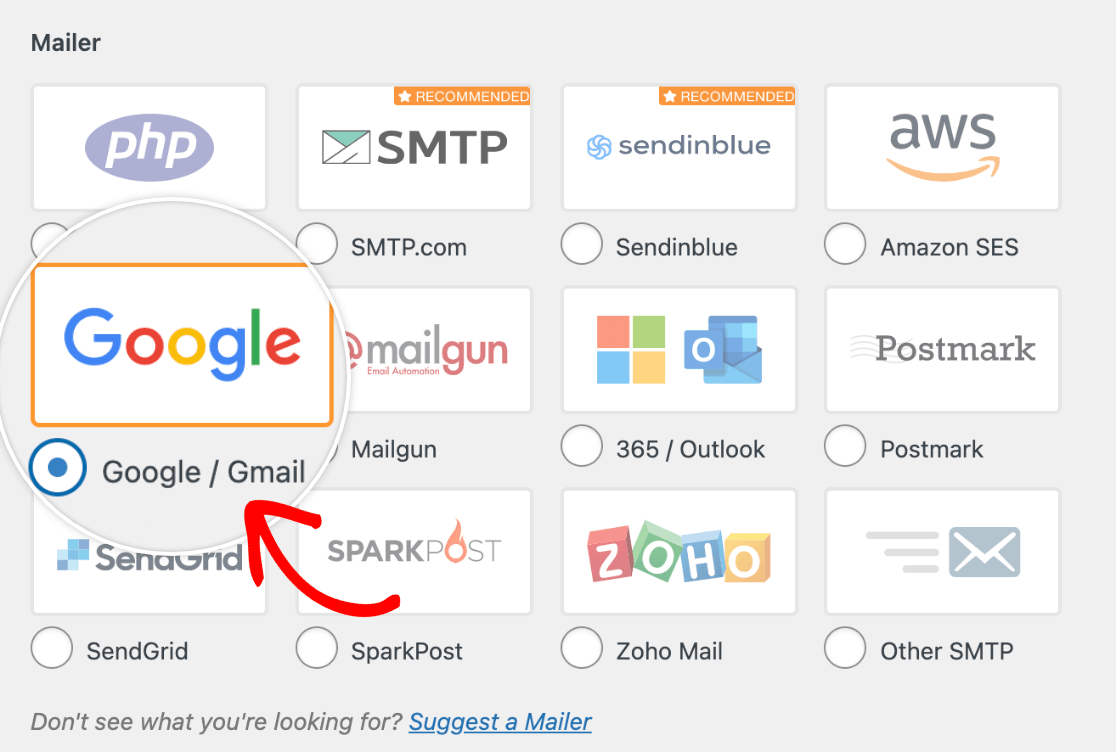
WP Mail SMTP is the best WordPress Simple Mail Transfer Protocol (SMTP) plugin that helps you fix delivery problems in WordPress and allows you to integrate with Google Workspace apps.

WP Mail SMTP connects with various popular SMTP mailers, including Gmail, for sending your WordPress emails.

select gmail mailer

Apart from sending your WordPress emails via Gmail as your mailer, you can also integrate Google Sheets with WP Mail SMTP.

Using this integration, you can create useful automation between Google Sheets and WP Mail SMTP using another plugin called Uncanny Automator.

For instance, WP Mail SMTP is a great tool for tracking and monitoring the performance of your WordPress emails. But you can also track email clicks and opens in a spreadsheet by integrating WP Mail SMTP with Google Sheets, allowing you to view your email data outside of your WordPress environment.

email tracking data in sheet

Other than these Google Workspace integrations, WP Mail SMTP also offers useful features such as detailed email logs, email reports, email failure notifications, and so on.

For WordPress beginners, or if you just don’t have the time to dedicate to working on your site, you can use WP Mail SMTPs’ white glove setup to get your emails up and running in no time.

WP Mail SMTP Pricing: WP Mail SMTP starts at $49 per year.

2. WPForms

WPForms

WPForms is the best WordPress form builder, and is the easiest way to connect your forms with G-Suite.

To start with, you’ll love the flexibility and ease of use that WPForms offers when it comes to form building. But that’s not all, the plugin provides a number of helpful integrations to improve your workflow efficiency and productivity.

These include a native Google Sheets integration that makes it super easy to send entries from a form to one of your Google Sheets spreadsheets. There’s so much you can do with this integration!

For example, if you’re looking to create surveys to collect feedback from clients, staff, and so on, you’ll easily be able to do this using the WPForms surveys addon. This addon allows you to create a survey form with automated Google Sheets tracking.

Survey spreadsheet entries

And what about nonprofits? Want to track donations for better transparency? With the WPForms prebuilt donation form template, you can easily collect donations using a PayPal Commerce field or one of the other payment fields offered by WPForms.

With the Google Sheets integration, you can then automatically track donations in a spreadsheet along with all the relevant user details.

filled spreadsheet

With over 500 prebuilt WPForms templates for you to choose from, there are so many more ways you can combine WPForms and Google Sheets to create powerful, convenient workflows.

The best part is you won’t even need an extra plugin like Uncanny Automator since WPForms natively supports integration with Google Sheets. To enjoy these awesome features, you’ll need a WPForms Pro or Elite license.

WPForms Pricing: To access the Google Sheets addon, you’ll need a WPForms Pro license or higher, starting at $199.50 annually. 

3. AffiliateWP

AffiliateWP home

AffiliateWP is the most powerful affiliate program builder and management tool for WordPress sites. If you’re building an affiliate program, you’ll be delighted to learn that you can easily integrate AffiliateWP with G-Suite for easy data management.

You’ll simply need to install Uncanny Automator, and then you can set up an Uncanny Automator recipe to save data in Google Sheets.

We’ve tried this integration out, and we found that it’s incredibly easy to set it all up. What’s more, we were able to set up a connection that allowed us both to trigger events in Google Sheets as well as a connection that allowed actions in Google Sheets to trigger events in AffiliateWP.

So, for example, you’ll be able to keep track of affiliates, new referrals, and so on in a Google Sheets spreadsheet.

You’ll also be able to do the reverse by creating new affiliates and referrals simply by updating a row in the spreadsheet. Pretty neat, right? For more details, check out this guide to integrating AffiliateWP with Google Sheets.

AffiliateWP Pricing: AffiliateWP starts at $149.50 per year.

4. Formidable Forms

Formidable forms

Formidable Forms is a popular WordPress form builder, and is one of the top alternatives to WPForms.

Like WPForms, Formidable Forms offers a native Google Sheets integration that allows you to easily update your spreadsheets with data from your forms.

Considering how similar this is to the WPForms Google Sheets integration, it’s understandable if you’re unsure which of the two form builders is the right one for you.

If you’re a small business looking for powerful, yet easy to use forms to grow your business, we’d strongly recommend using WPForms. With over 5 million active installations, and 11k+ 5-star reviews on WordPress.org, it’s easy to see why: WPForms offers an unbeatable collection of features at extremely competitive pricing.

Formidable Forms, on the other hand, is much better suited for advanced users, with niche use cases. For example, one of Formidable Forms’ stand out features is its complex in-form calculation field.

Formidable Forms Pricing: To use the Google Sheets integration, you’ll need the Formidable Forms Business license which starts at $199.50 per year. 

5. MemberPress

MemberPress website

MemberPress is an excellent choice for building a WordPress membership site that integrates with G-Suite.

For this one, you’ll need to use Zapier to create a connection between MemberPress and Google Drive, which is an arrangement for data storage and management.

One thing we loved when we tried this connection out was the fact that it allows for two-way automations. This means that actions in either MemberPress or Google Drive can trigger events in the other.

This would allow you to automate things like creating a new row to record a new MemberPress sign-up or cancellation.

Aside from this powerful G-Suite integration, you’ll love the flexibility that MemberPress gives you in creating fully-featured online membership sites such as an online course website.

MemberPress Pricing: MemberPress starts at $179.50 for its Basic plan.

6. Uncanny Automator 

Uncanny Automator homepage

Uncanny Automator is by far the best WordPress plugin for creating automations and integrations between plugins, external apps, and even multiple websites.

As you’ll have noticed, we’ve talked quite a bit about Uncanny Automator. This is because it is such a powerful plugin that offers tons of ways to connect WordPress sites to G-Suite apps.

With Uncanny Automator installed on your site, you’ll be able to create rules called recipes, that allow for the automation of the functions of several plugins, apps, or websites.

Some of the major apps you can connect your site to using Uncanny Automator include Google Sheets, Gmail, Google Drive, and more.  Now here’s some really good news: you can download Uncanny Automator for free from the WordPress plugin directory, with 1,000 connections to get you started.

Uncanny Automator Pricing: Paid Uncanny Automator licenses start at $149 per year.

7. Sugar Calendar

Sugar calendar

Sugar Calendar is the top WordPress event management plugin. Looking to add booking functionality to your site, sell tickets for events, and so on?

This is the plugin to use. Sugar Calendar integrates quite nicely with Google Calendar and other Calendar apps using Sugar Calendar’s Calendar Feeds addon. With this integration setup, your users will be able to create events and sync data for these events with Google Calendar.

This integration is the perfect way for users to schedule events, such as appointments on your site while allowing everyone on your team to easily collaborate to view and manage these bookings on Google Calendar.

When we tried this plugin out, we loved how easy it was to do useful things like create recurring events, specify time zones for specific events, use custom formatting and translation, and so on. Sugar Calendar is also translation ready, which is a huge plus.

Sugar Calendar Pricing: You’ll need the Calendar Feeds addon, which is available for free with the Professional license that starts at $199 per year.

8. OptinMonster

OptinMonster

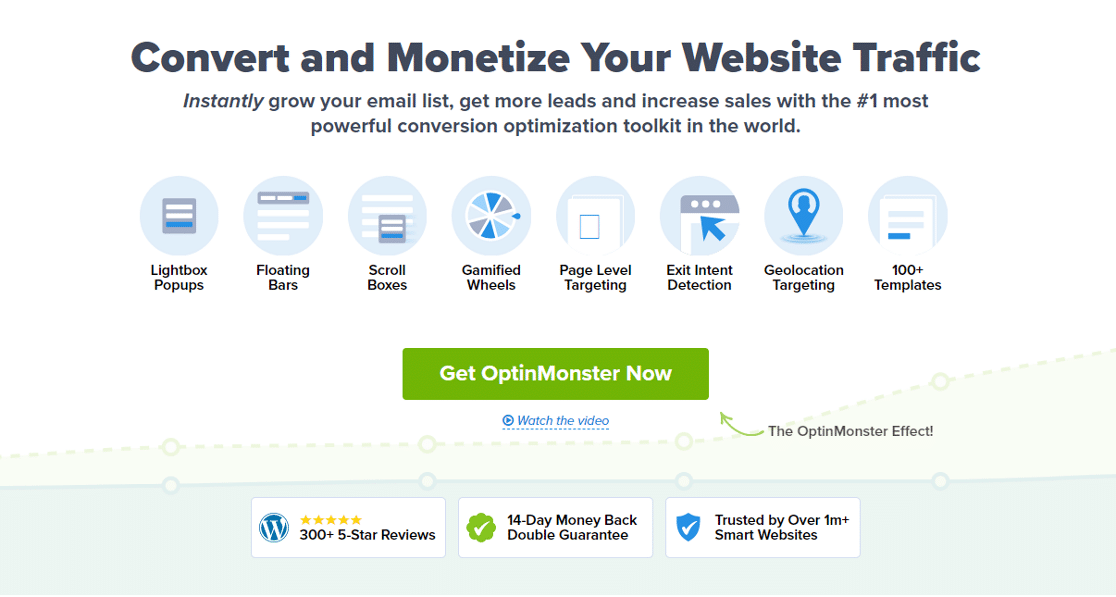
OptinMonster is the number 1 WordPress lead generation plugin and the easiest way to create opt-in forms in WordPress.

What’s more, you can easily connect OptinMonster and Google Sheets using Uncanny Automator. This connection will allow you to automatically send entries to a Google spreadsheet when users submit an opt-in form.

In addition to being able to integrate OptinMonster with Google sheets, you’ll love lots of the features on offer, including things like the easy-to-use drag-and-drop form builder, geo-location targeting, exit-intent technology, and so much more.

OptinMonster Pricing:  OptinMonster starts at 9$ per month (billed annually) for its Basic plan. 

9. UpdraftPlus

updraftplus home

UpdraftPlus is one of the best WordPress plugins for creating backups of your website. Taking regular backups of your site is one of the most important WordPress maintenance practices to do regularly.

Fortunately, plugins like UpdraftPlus make it easy to automate this process. Once you’ve chosen the backup frequency you prefer, all you have to do is keep up with backup reports, which will be delivered to our email.

And if you’re looking for a way to integrate UpdraftPlus with G-Suite, the answer is yes! UpdraftPlus will allow you to select from a number of destinations for your backup files, which include several useful G-Suite apps like Gmail and Google Drive.

UpdraftPlus Pricing: UpdraftPlus premium starts at $70 per year.

And that’s it for our list of the top 9 WordPress G-Suite plugins! Whatever your needs, one of these plugins is bound to serve you well!

Next, Try These Top Zapier Alternatives

Zapier is one of the top tools for optimizing digital workflows. But it’s not the best tool for every situation. Some other tools, like Uncanny Automator, offer better solutions for WordPress sites, and there are other options to consider too.

Here’s our list of the top alternatives to Zapier for productivity.  You may also enjoy reading our guide to tracking email opens in Google Sheets.

Fix Your WordPress Emails Now

Ready to fix your emails? Get started today with the best WordPress SMTP plugin. WP Mail SMTP Elite includes a full White Glove Setup and offers a 14-day money-back guarantee.

If this article helped you out, please follow us on Facebook and Twitter for more WordPress tips and tutorials.

Source :
https://wpmailsmtp.com/google-workspace-plugins-for-wordpress/

9 Best Anti-Spam Plugins for WordPress (2023)

by David Abraham on Jan 5, 2023

Looking for the top anti-spam plugins for WordPress?

WordPress spam can be tricky to deal with. And while there are lots of plugins that promise to help, not all work so well.

We’ve taken a look at the most popular WordPress anti-spam plugins and created a list of the plugins that we think work best.

Is There a Free Spam Blocker?

There are several free spam blockers. These include multi-platform tools like Google reCAPTCHA and hCaptcha and platform-specific tools like WPForms Lite, which is the best free spam blocker for WordPress forms.

Free spam blockers are a good option to have, but sometimes you’ll need more powerful tools to defend your site from spam. The anti-spam tools we’ll cover below include a nice range of free and paid anti-spam tools for WordPress.

Let’s get into it!

Best Anti-Spam Plugins for WordPress

In This Article

1.WPForms

WPForms homepage

WPForms is the number 1 WordPress form builder and is a favorite for users looking to protect their forms from spam.

WPForms offers an impressive collection of anti-spam features to help you deal with spam once and for all.

The first line of defense is a number of native WPForms anti-spam features. These include the WPForms anti-spam token that adds a hidden cryptographic string to form submissions made by human users. Bots can’t imitate this and when forms are submitted without it, they’ll be marked as spam.

Additionally, WPForms allows you to block known spam sources by filtering form entries by keyword and country.

WPForms keyword filtering settings

If your forms have been targeted by specific email addresses or IP addresses from certain countries, this is a creative way to get rid of the problem.

WPForms country filter

Another native anti-spam solution you’ll love is the WPForms-Akismet integration which allows you to use Akismet on your forms.

Toggle this button to enable Akismet anti-spam protection

Akismet works in two clever ways: first, it compares form entries with its huge database of known spam sources and automatically flags suspicious form entries. Secondly, it scans user on-page behavior to determine if users are likely to be human or bots and flags these for your review as well.

Finally, you can also use one of the 3 CAPTCHA tools available with WPForms.

WPForms Captcha Tools

There is the WPForms Custom Captcha which allows you to set custom math problems for users to solve.

WPForms Custom Captcha on the frontend

Custom Captcha is an easy anti-spam tool to use, and since you can set your own math problems, you can easily determine the difficulty levels of the CAPTCHA challenge. You’ll need a WPForms Pro license or above to use Custom Captcha.

In addition to this, you can opt for either Google reCAPTCHA or hCaptcha, both of which are powerful and popular anti-spam solutions.

In fact, WPForms even supports the new Cloudflare Turnstile captcha service, which is a non-intrusive and super user-friendly anti-spam solution

Considering the impressive range of features on offer, WPForms is the clear leader when it comes to anti-spam WordPress plugins for protecting your forms.

WPForms Pricing: WPForms Pro license costs 159.60 annually.

2. Akismet

Akismet Spam Protection

If you have a WordPress website, chances are you already have Akismet installed. Akismet is an anti-spam plugin made by the team behind WordPress.com, so it comes pre-installed with many WordPress installations.

Akismet is quite powerful and is a great way to protect your site from spam. Aside from using it along with WPForms for form protection, you can also use Akismet on its own to protect your comment sections, user registration pages, and so on from spambots.

We particularly love Akismet for its unobtrusive anti-spam protection that allows legitimate visitors to use your site without interruption.

If you’d like to try Akismet, here’s our guide to filtering contact form spam with Akismet to help you get started.

Akismet Pricing: Akismet is free to use for nonprofits, and individual users can pay what they’d like. For commercial use, pricing starts at $8.33 per month, billed annually. 

3. WP Armour

WPArmour home

WP Armour is one of the more popular WordPress anti-spam solutions with a distinctive anti-spam approach.

WP Armour works by luring bots into filling out a hidden javascript field that human users cannot see. This is called a spam honeypot.

If you already have WPForms and Akismet, which we’d recommend, you won’t need WP Armour, but it’s good to note that WP Armour is also compatible with WPForms, along with some other major WordPress form builders.

This gives you some additional options if you decide to try an Akismet alternative.

WP Armour pricing: WP Armour is free to get started with.

4. Titan Anti-Spam & Security

Titan Anti Spam homepage

Titan Anti-Spam & Security is another top-rated WordPress anti-spam plugin. We’d consider this plugin a close like-for-like alternative to Akismet as it works in a similar way.

Titan Anti-Spam & Security works in the background to screen comments by comparing them with its database of spam sources. The exciting thing about this plugin is that it is capable of updating itself frequently, so its ability to block new forms of spam is constantly improving.

While this makes it a really solid option to consider, we recommend that you stick with Akismet as it has a much larger database of known spam patterns, so it offers a wider blanket of spam protection.

On the other hand, it should be noted that Titan anti-spam & Security isn’t just an anti-spam plugin. It also offers some useful WordPress security features like brute force protection and a malware scanner.

If you’re looking for comprehensive WordPress protection, this would be a good plugin to try. Otherwise, just stick to Akismet and WPForms.

Titan Anti Spam & Security Pricing: Titan Anti-Spam & Security is free to get started with.

5. Zero Spam for WordPress

Zero Spam for WordPress homepage

Zero Spam for WordPress is a well-featured anti-spam plugin for WordPress that covers a few different anti-spam features.

First, like Akismet, this plugin scans comments and other user inputs on your site to compare them with its spam database. But that’s not all. It also allows you to block specific IP addresses, countries, cities, and so on if you’ve been getting spam from those places.

This is a good range of anti-spam features, and as a plus, the plugin works in the background, allowing for a good, seamless user experience.

Zero Spam for WordPress pricing: Zero Spam for WordPress is free to get started with.

6. Antispam Bee

Antispam Bee home

Antispam Bee is a popular spam fighter plugin that also works very similarly to Akismet. It helps to beat WordPress spam by scanning user-submitted content and comparing it with its database of proven spam.

One of its handy features is that it allows country-specific or region-specific blocks. The core anti-spam features offered are similar to quite a few plugins on this list, but Antispam Bee has one feature we found exceptional.

With this plugin, you’ll be able to block or create exceptions for user-submitted content in specific languages. Since spam is a global problem, you’re likely to find this really helpful if you’re being targeted by spam in a certain language.

Antispam Bee Pricing: Antispam Bee is free to get started with. 

7. Captcha by BestWebSoft

Captcha by BestWebSoft homepage

Captcha by BestWebSoft is a WordPress CAPTCHA plugin for protecting your site from spam.

It offers a decent range of protection for comments and forms, registration pages, password reset pages, and so on.

In our testing, we liked the fact that the plugin also offers a broad range of CAPTCHA types including invisible CAPTCHA, Math CAPTCHA, character recognition, and slide CAPTCHA.

And while CAPTCHA tools aren’t always the best when it comes to providing a good user experience, this plugin allows you to hide CAPTCHA from registered users, which is a really useful feature to have.

If you’d like to use CAPTCHA to protect your forms, then we’d recommend sticking with WPForms. But if it’s the other areas of your site you’re more concerned about, then Captcha by BestWebSoft is a good option to consider.

Captcha by BestWebSoft pricing: Captcha by BestWebSoft is free to get started with.

8. CleanTalk Anti-Spam

CleanTalk homepage

Cleantalk is a spam protection tool that can be used with multiple web development platforms, including WordPress.

On your WordPress site, the plugin works by scanning user inputs on your forms, comments, registration pages, and so on to determine if they are spam. Spam entries are then blocked.

The key feature we found with this plugin was how easy it was to set up and manage spam protection settings. From start to finish, the entire process takes just a few minutes.

One other feature you might find interesting is the word censor feature that allows you to block certain words that you don’t want your users to see. These could be used to block competitor names, swear words, and so on.

Cleantalk pricing: Cleantalk is free to get started with.

9.  WP Cerber Security

WP Cerber Security homepage

WP Cerber Security is a WordPress anti-spam and security plugin that offers comprehensive protection for your site.

Unlike most of the plugins we’ve talked about, with the exception of WPForms, WP Cerber relies on Google reCAPTCHA and invisible CAPTCHA for anti-spam protection.

Google invisible reCAPTCHA works in the background to screen users based on their behavior and presents an actual CAPTCHA challenge only when it deems user behavior to be suspicious.

This can mean some interruptions in user experience, but it also helps to ensure that nothing slips through the cracks.

If you like the idea of using Google invisible CAPTCHA, remember, you can use this with WPForms to protect your forms too.

WP Cerber Security pricing: WP Cerber Security is free to get started with.

And that’s it for our list of the top anti-spam plugins for WordPress!

Our Verdict: Which Is the Best Anti-Spam Plugin for WordPress?

Which anti-spam is best? That depends on your goals.

To protect your forms, WPForms is hands down the best anti-spam plugin. Remember, WPForms helps to protect your site from spam using a range of tools which include the:

  • WPForms anti-spam token,
  • Country and keyword blockers
  • Akismet integration
  • WPForms Custom Captcha
  • Google reCAPTCHA
  • hCaptcha.

For sitewide anti-spam coverage, we’d say combining WPForms and Akismet would be a superb idea.

Next, Apply These Email Deliverability Best Practices

If you have a WordPress website, you’ll likely send lots of marketing or transactional emails. WordPress isn’t best suited for this by default, but with a few simple tips, you can easily set up your WordPress site for effective email delivery. Here’s the full guide in our post on the top WordPress email deliverability practices.

Also, check out our list of anti-spam honeypot alternatives if you’re looking for additional spam filter tools for your site.

Fix Your WordPress Emails Now

Ready to fix your emails? Get started today with the best WordPress SMTP plugin. WP Mail SMTP Elite includes a full White Glove Setup and offers a 14-day money-back guarantee.

If this article helped you out, please follow us on Facebook and Twitter for more WordPress tips and tutorials.

Source :
https://wpmailsmtp.com/best-anti-spam-plugin-wordpress/

How to Set Up WordPress Email Logging [Status + ALL Content]

by Renee DeCoskey on May 11, 2023

Do you want to log WordPress emails across your site?

Email logs allow you to record, track, troubleshoot, and resend emails sent from WordPress.

In this guide, we’ll show you how to enable email logs using WP Mail SMTP.

In This Article

Log Your WordPress Emails Now

How Do I Check Email Logs in WordPress?

You can view your email logs and sent emails from your WordPress dashboard using the WP Mail SMTP plugin.

Logging WordPress emails is really simple with WP Mail SMTP because it displays the status of your outgoing emails in a log file or dashboard widget.

It’s more advanced than other email logging plugins because it can track the status all the way to the recipient’s mailbox. And it can also show you opens and clicks.

That means you can see a true picture of your email deliverability right in your WordPress dashboard.

WP Mail SMTP Pro dashboard widget

WP Mail SMTP also adds a detailed email log page to your WordPress admin area. From the email log page, you can:

  • View headers: WP Mail SMTP saves all of the technical information associated with the email.
  • Filter and search: Use the powerful filters to find and track your most important emails.
  • Print email logs: Every email log can be printed or saved as a PDF.
  • Log email contents: Save the message as well as the email headers (optional).
  • Track email opens and clicks: See open and click data for every email you send from WordPress.
  • Resend failed emails: Resend in bulk or individually, or forward to a different address.
  • Store attachments: Save the attachment file along with the log.
  • Export sent emails in CSV, XLSX, or EML format.
  • View multisite email logs on separate pages easily.

Thanks to these features, logging WordPress emails is not only easy but also very powerful with WP Mail SMTP.

How to Enable WordPress Email Logging

To get full WordPress email logging on your site, you’ll need the WP Mail SMTP Pro license or higher.

Let’s see how you can set up the WP Mail SMTP log on your site.

1. Install WP Mail SMTP

We’re going to use the WP Mail SMTP plugin to log your WordPress emails. WP Mail SMTP is used by 3+ million WordPress users to improve email deliverability and tracking.

To install WP Mail SMTP, download the zip file from your WP Mail SMTP account. You’ll find it in the Downloads tab.

Download WP Mail SMTP to fix WPForms contact form not sending email

Next, open up your WordPress dashboard. Head to the Plugins page and upload the zip file to install it.

If you’re not sure how to do this, check out how to install a plugin in WordPress.

Install WP Mail SMTP

As soon as you activate the plugin, the WP Mail SMTP Setup Wizard will open.

Choose Your Email Service Provider

Now we can set up your chosen SMTP provider using the Wizard.

Click the Let’s Get Started button to begin.

Start the WP Mail SMTP setup wizard to fix WPforms not sending email

On the next screen, click the mailer you want to use from the list.

WP Mail SMTP Setup Wizard Choose Mailer

WP Mail SMTP supports a ton of popular email services, including many free options.

Logging the Email Delivery Status

Most email logging plugins will tell you if the email Sent or Failed. But they can’t give you any information about what happened after that.

Using WP Mail SMTP for logging WordPress emails provides you with a lot more insight into your delivery status. With WP Mail SMTP, you can unlock 2 additional status reports: Unconfirmed (Waiting) and Confirmed (Delivered).

Here’s what these statuses will tell you:

  • Sent means that WordPress successfully generated and sent the email.
  • Failed means that the email wasn’t sent. For example, you’ll see this if there’s a problem with your SMTP server or some other configuration issue.
  • Unconfirmed means that the email was sent and WP Mail SMTP is waiting for the status.
  • Confirmed means that the email was sent and delivered to the recipient’s mailbox.

Selected email providers support Unconfirmed and Confirmed. Here’s a chart to show each status and the mailers that support them:

Email ServiceFailedSentWaiting / UnconfirmedDelivered / Confirmed
SendLayer
SMTP.com
Sendinblue
Amazon SES
Google Workspace / Gmail
Mailgun
Microsoft 365 / Outlook.com
Postmark
SendGrid
SparkPost
Zoho Mail
Other SMTP

So if you want the best possible email tracking, we recommend that you use WP Mail SMTP with a transactional mailer like SendLayerSendinblueSMTP.com, Mailgun, Postmark, or SparkPost.

When you’ve chosen your mailer, jump to our documentation and continue the setup steps:

Mailers available in all versionsMailers in WP Mail SMTP Pro
SendLayerAmazon SES
SMTP.comMicrosoft 365 / Outlook.com
SendinblueZoho Mail
Google Workspace / Gmail
Mailgun
Postmark
SendGrid
SparkPost
Other SMTP

Come back to this guide when you’re ready.

Need a hand?

Our Elite license includes White Glove Setup.

In the final step, be sure to turn on Detailed Email Logs and Weekly Email Summary.

Enable WordPress email logs and weekly summary

Detailed Email Logs will track your email headers and delivery status. Weekly Email Summary will send you a weekly email report.

For the best possible data, we recommend that you log the content of your sent emails as well.

2. Log All Email Content

As well as tracking the header and delivery status of each email sent from WordPress, you can save a copy of the entire content of the messages sent from your site.

This can be helpful when troubleshooting. For example, if you have an email customizer plugin for WooCommerce, you could save a copy of your order emails to make sure they’re formatted correctly.

Let’s turn on complete email logging on your WordPress site. There are 2 ways to do this. You can set this up in the Setup Wizard, or you can achieve the same results in the plugin settings.

Let’s start with the Setup Wizard.

Using the Setup Wizard to Log All Email Content

You’ll go through the Setup Wizard when you first register for WP Mail SMTP. You can always get back to the Setup Wizard, however, by clicking WP Mail SMTP » Settings in the left sidebar menu.

You’ll see the general settings on the screen with the option to launch the setup wizard.

Launch the setup wizard in WP Mail SMTP

The first thing you’ll do is select your mailer of choice. You’ll configure the mailer settings in step 2.

Step 3 is when you get to enable email features. Your 4 options are Improved Email Deliverability, Email Error Tracking, Detailed Email Logs, and Instant Email Alerts.

Enabling email features in WP Mail SMTP

Click on Detailed Email Logs to get set up.

Enable detailed email logs

Notice that when you check Detailed Email Logs, it automatically adds options for Complete Email Reports and Weekly Email Summary.

On the next screen, you’ll configure your email logs.

Configuring email logs in WP Mail SMTP

You want to check the option to store the content for all sent emails. This must be done if you want to resend any of your emails. Note, however, that this means you will be storing all email content. This might include data, passwords, and personal details.

On this page, you can also opt to save attachments from your emails to your WordPress uploads folder, track when emails are opened, and track when links are clicked in your emails.

After this step, the Setup Wizard will test your connection and let you know if there are any potential issues.

While most of the setup process can be completed through the Setup Wizard, you will still need to go to WP Mail SMTP » Settings » Email Log to adjust settings for webhooks and log retention period.

Access settings for webhooks and the log retention period via email log settings

Once you’ve updated those settings, you’re finished setting up email logging through the Setup Wizard.

Using the Plugin Settings to Log All Email Content

Whether you didn’t use the Setup Wizard when you started or you just want to go back and make changes, you can also use the plugin settings to set up email logging.

First, head to the Settings page in the plugin.

WP Mail SMTP settings menu

Now click the Email Log tab to open your WordPress email log settings.

Email log settings tab

Scroll down on this page and check the box next to Log Email Content.

Log email content in WordPress

A reminder that this is an advanced option, so there are a couple of things to keep in mind:

  • Logging the body of emails saves the content in your WordPress database. We recommend that you install a WordPress security plugin with 2-factor authentication so that your site is secure.
  • Your database will grow. Over time, your WordPress database will get larger as you log the contents of all emails sent from your website.

To avoid any disk space issues, you can restrict the size of your email log. If you decrease the Log Retention Period, older email logs will be deleted automatically.

Log Retention period

Now let’s take a closer look at the log file inside your WordPress dashboard.

3. View WordPress Email Logs

Now that you’ve set up WordPress email logs, every email sent using the wp_mail() function will be logged. You don’t need to use a separate WordPress plugin for this, which is great because you can avoid any plugin conflicts that may affect your email deliverability.

If your email provider supports all of the statuses we talked about, it’s also reporting the status of every email: SentFailed, and (if supported) Delivered.

When we installed the plugin, the Setup Wizard generated a test email, so that’ll be in your log already. You can generate additional test emails in the Tools menu if you want to.

Now let’s take a look at the email logs. In your WordPress admin menu, open up WP Mail SMTP » Email Log.

WordPress email log menu item in WP Mail SMTP

Since your installation is new, you might not have many logs to look at yet. We’ll show how it’ll look when it’s been running for a while.

Let’s start by filtering the log by date. In this example, we want to find any emails that failed on April 20.

WP Mail SMTP’s email log has a datepicker at the top so you can easily view the log files for a specific date or series of dates.

In the image below, we’ve used it to look for emails sent from our WordPress website between April 14th and April 21st.

Email log filtered by date in WordPress

Because we’re using a transactional mailer, we can see a Delivered status with a green circle and checkmark for the first 3 emails, so we know those definitely reached the recipient’s mailbox.

One email is marked with a red dot, so we know that one Failed. If we hover over that line, we can see options to View Log or Delete.

View or delete individual email log

Let’s click on View Log to see more details about the logged email.

From the individual log page, we can:

  • Print the email log, or save it as a PDF
  • Export this log as a CSV, EML, or Excel file.

Exporting as EML will export the full email content if you’ve got that option enabled. We’ll show you how that works in the next section of this article.

The email log also tells you which plugin generated the email.

Viewing the source in an email log

You can click Resend to resend any email and customize the To address.

This can be helpful for resending new user activations and password reset emails.

Resend WordPress emails in WP Mail SMTP

At the bottom of the log, the Technical Details dropdown will show you the full headers for more detailed troubleshooting.

We can also see the exact error that the email provider returned:

Email log error

In this case, the recipient was receiving too many emails and has hit their Gmail receiving limit. So we can be sure that it wasn’t a problem with our email provider or settings.

From the individual log file page, we can print log files in Normal or Compact view. Compact view is helpful if you have a large log file and you want to save paper or reduce the size of the PDF.

Print email log in WordPress

Back on the main log screen, let’s look at the other ways to manage WordPress email logs.

The search bar lets you narrow down the list of email logs. You can use multiple search criteria to keep filtering the list until you find what you need.

For example, we already filtered by date. Next, we can search in the Subject and Headers to see if we have any other username and password emails that failed during the same week.

Search subject and headers in WordPress email log

The new search is combined with the date search, and you can see both filters in the line above the log screen.

Search filters in email log

We can click the X icons to remove any part of the search if we want to broaden the results.

Remove date filter from email log search

These filtering and searching tools make it easy to find any email and find out if it was sent and if it was also delivered (if your mailer supports the Delivered status).

Let’s move on and see how to see if your emails are being opened.

4. Track Email Opens and Clicks

Now that you know for sure that your emails are being delivered, you’ll also want to check if the recipient is actually reading and interacting with the message.

WP Mail SMTP Pro not only assists with logging WordPress emails, but it goes out and beyond to track open and click rates for every HTML email sent from your site.

WordPress email tracking is especially handy if you’re selling online courses or sending newsletters from WordPress.

First, head to the plugin’s Settings page.

WP Mail SMTP settings menu

And now click Email Log at the top to open your WordPress email log settings.

Email log settings tab

You’ll want to scroll down and enable these 2 settings:

  • Open Email Tracking
  • Click Link Tracking
Open and click tracking in WordPress

Now you’ll be able to see open and click tracking data next to each individual email log.

Open and click details in WordPress email log

And you can also see an overview from the main email log screen.

Opens and clicks in WordPress email log

If you’re a Pro customer, you can get full open rates and click-through rates in your Email Report.

Email Report grouped by subject line

Keep in mind that open and click tracking relies on a tracking pixel. That means it works with most HTML emails sent from a live WordPress site, but might not work with SMTP on localhost until you publish your site on the internet.

Now we’ve looked at click and open tracking, let’s look at some more data we can log.

5. Log Attachments Sent From WordPress

WP Mail SMTP Pro allows you to save a copy of attachments sent out from your WordPress site.

For example, if you’re sending PDF invoices using a WooCommerce plugin, you can save each invoice for your own reference.

To do this, you’ll want to open up your WP Mail SMTP settings page again. Then click Email Log at the top to open the email log settings as we did before.

Now be sure to turn on all 3 of these options:

  • Enable Log
  • Log Email Content
  • Save Attachments
Email log attachments settings

Now each email sent from your site will be saved in WordPress along with any files originally attached.

Open WooCommerce invoice attachment

You can download the file or resend the email to forward it.

If you want, you can also export the data, which we’ll look at next.

6. Export WordPress Email Logs to CSV, EML, or XLSX

The email log export tool in WP Mail SMTP lets you export email logs and customize the fields that are included in the file.

This is an awesome way to get your email logging data out of WordPress so you can analyze it in other tools and dashboards.

For example, you could track your email deliverability alongside your WooCommerce store activity, or create your own custom reports for agency clients.

To generate an Excel or CSV export file, head to WP Mail SMTP » Tools.

WP Mail SMTP Tools menu

From the tabs across the top, click Export.

Export email log

At the top, you can choose the file format and select the basic information to include.

WP Mail SMTP export - common information

Below that, you can pick more information and filter your search.

WP Mail SMTP export information - additional filters

So in total, an XLSX or CSV WordPress email log export can include any combination of these fields:

Common InformationAdditional Information
To addressStatus
From addressCC
From nameBCC
SubjectHeaders
BodyMailer
Created dateError details
Number of attachmentsLog ID
AttachmentsOpened
Clicked

Additionally, you can also filter the export file by:

  • Exact date or date range
  • Email address
  • Subject or header text
  • Content

Keep in mind that exporting the Body or searching the Content will only work if you’re logging the contents of the emails sent from your site.

And that’s it! Now you know how to log your WordPress emails so you can track the status and generate your own deliverability reports.

Log Your WordPress Emails Now

Next, Send Email From a Gmail Alias in WordPress

Now you’ve got WP Mail SMTP, you can send different contact form notifications from as many Gmail aliases as you like. You can use the Force From Email setting to use 1 email for everything, or pick a default alias and use the others when you need to.

No matter which Gmail alias you use, WP Mail SMTP will automatically add the right authentication.

Dropdown for alias in WP Mail SMTP Wizard

To learn more about this awesome feature, check out how to use a Gmail alias in WordPress.

Also, if you’re looking to expand your WordPress email capabilities, see our list of the best WordPress email plugins.

Ready to log your emails? Get started today with the best WordPress SMTP plugin. WP Mail SMTP Elite includes full White Glove Setup and offers a 14-day money-back guarantee.

If this article helped you out, please follow us on Facebook and Twitter for more WordPress tips and tutorials.

Source :
https://wpmailsmtp.com/log-emails-wordpress/

Netgear Routers’ Flaws Expose Users to Malware, Remote Attacks, and Surveillance

As many as five security flaws have been disclosed in Netgear RAX30 routers that could be chained to bypass authentication and achieve remote code execution.

“Successful exploits could allow attackers to monitor users’ internet activity, hijack internet connections, and redirect traffic to malicious websites or inject malware into network traffic,” Claroty security researcher Uri Katz said in a report.

Additionally, a network-adjacent threat actor could also weaponize the flaws to access and control networked smart devices like security cameras, thermostats, smart locks; tamper with router settings, and even use a compromised network to launch attacks against other devices or networks.

The list of flaws, which were demonstrated at the Pwn2Own hacking competition held at Toronto in December 2022, is as follows –

  • CVE-2023-27357 (CVSS score: 6.5) – Missing Authentication Information Disclosure Vulnerability
  • CVE-2023-27368 (CVSS score: 8.8) – Stack-based Buffer Overflow Authentication Bypass Vulnerability
  • CVE-2023-27369 (CVSS score: 8.8) – Stack-based Buffer Overflow Authentication Bypass Vulnerability
  • CVE-2023-27370 (CVSS score: 5.7) – Device Configuration Cleartext Storage Information Disclosure Vulnerability
  • CVE-2023-27367 (CVSS score: 8.0) – Command Injection Remote Code Execution Vulnerability
Netgear

A proof-of-concept (PoC) exploit chain illustrated by the industrial cybersecurity firm shows that it’s possible to string the flaws — CVE-2023-27357, CVE-2023-27369, CVE-2023-27368, CVE-2023-27370, and CVE-2023-27367 (in that order) — to extract the device serial number and ultimately obtain root access to it.

UPCOMING WEBINAR

Learn to Stop Ransomware with Real-Time Protection

Join our webinar and learn how to stop ransomware attacks in their tracks with real-time MFA and service account protection.Save My Seat!

“These five CVEs can be chained together to compromise affected RAX30 routers, the most severe of which enable pre-authentication remote code execution on the device,” Katz noted.

Users of Netgear RAX30 routers are advised to update to firmware version 1.0.10.94 released by the networking company on April 7, 2023, to address the flaws and mitigate potential risks.

Source :
https://thehackernews.com/2023/05/netgear-routers-flaws-expose-users-to.html

Why High Tech Companies Struggle with SaaS Security

It’s easy to think high-tech companies have a security advantage over other older, more mature industries. Most are unburdened by 40 years of legacy systems and software. They draw some of the world’s youngest, brightest digital natives to their ranks, all of whom consider cybersecurity issues their entire lives.

Perhaps it is due to their familiarity with technology that causes them to overlook SaaS security configurations. During the last Christmas holiday season, Slack had some private code stolen from its GitHub repository. According to Slack, the stolen code didn’t impact production, and no customer data was taken.

Still, the breach should serve as a warning sign to other tech companies. Stolen tokens allowed threat actors to access the GitHub instance and download the code. If this type of attack can happen to Slack on GitHub, it can happen to any high-tech company. Tech companies must take SaaS security seriously to prevent resources from leaking or being stolen.

App Breaches: A Recurring Story#

Slack’s misfortune with GitHub wasn’t the first time a GitHub breach occurred. Back in April, a stolen OAuth token from Heroku and Travis CI-maintained OAuth applications were stolen, leading to an attacker downloading data from dozens of private code repositories.

MailChimp, a SaaS app used to manage email campaigns, experienced three breaches over 12 months spanning 2022-23. Customer data was stolen by threat actors, who used that data in attacks against cryptocurrency companies.

SevenRooms had over 400 GB of sensitive data stolen from its CRM platform, PayPal notified customers in January that unauthorized parties accessed accounts using stolen login credentials, and Atlassian saw employee data and corporate data exposed in a February breach.

Clearly, tech companies aren’t immune to data breaches. Protecting their proprietary code, customer data, and employee records that are stored within SaaS applications should be a top priority.

Reliance on SaaS Applications#

A strong SaaS posture is important for any company, but it is particularly important for organizations that store their proprietary code in SaaS applications. This code is especially tempting to threat actors, who would like nothing more than to monetize their efforts and ransom the code back to its creators.

Tech companies also tend to rely on a large number and mix of SaaS applications, from collaboration platforms to sales and marketing tools, legal and finance, data warehouses, cybersecurity solutions, and many more – making it even more challenging to secure the entire stack.

Tech employees heavily depend on SaaS apps to do their day-to-day work; this requires security teams to strictly govern identities and their access. Moreover, these users tend to log into their SaaS apps through different devices to maintain efficiency, which may pose a risk to the organization based on the device’s level of hygiene. On top of this, tech employees tend to connect third-party applications to the core stack without thinking twice, granting these apps high risk scopes.

Learn how Adaptive Shield can help you secure your entire SaaS stack.

Controlling SaaS Access After Layoffs#

The high-tech industry is known for periods of hyper-growth, followed by downsizing. Over the past few months, we’ve seen Facebook, Google, Amazon, Microsoft, LinkedIn, Shopify and others announce layoffs.

Deprovisioning employees from SaaS applications is a critical element in data security. While much of the offboarding of employees is automated, SaaS applications that are not connected to the company directory don’t automatically revoke access. Even those applications that are connected may have admin accounts that are outside the company’s SSO. While the primary SSO account may be disconnected, the user’s admin access through the app’s login screen is often accessible.

Organic Hyper Growth and M&As#

At the same time, the industry is ripe with mergers and acquisition announcements. As a result of M&As, the acquiring company needs to create a baseline for SaaS security and monitor all SaaS stacks of merged or acquired companies, while enabling business continuity. Whether the hyper growth is organic or through an M&A, organizations need to be able to ensure access is right-sized for their users, at scale and rapidly.

Identity Threat Detection & Response#

The majority of data breaches impacting tech companies stem from stolen credentials and tokens. The threat actor enters the system through the front door, using valid credentials of the user.

Identity Threat Detection and Response (ITDR) picks up suspicious events that would otherwise go unnoticed. An SSPM (SaaS Security Posture Management) solution with threat detection engines in place will alert when there is an Indicator of Compromise (IOC). These IOCs are based on cross-referencing of activities such as user geolocation, time, frequency, recurring attempts to login, excessive activities and more.

Securing High Tech’s SaaS#

Maintaining a high SaaS security posture is challenging for high tech companies, who may mistakenly believe they are equipped and well trained to prevent SaaS attacks. SaaS Security Posture Management is essential to preventing SaaS breaches, while an SSPM with ITDR capabilities will go a long way toward ensuring that your SaaS data is secure.

Learn how Adaptive Shield can help you secure your entire SaaS stack.

Source :
https://thehackernews.com/2023/05/why-high-tech-companies-struggle-with.html

Best WordPress Database Cleanup Methods and Plugins to Boost Site Speed (2023 Guide)

Last updated on Apr 6th, 2023 | 14 min

As your website grows and you create more content, your WordPress database can become cluttered with unnecessary data, which can slow down your site and create security risks.

In this guide, we will discuss the best WordPress database cleanup methods and plugins to boost site speed and performance.


Why WordPress database cleanup is necessary

Your WordPress database stores all your website data, including posts, pages, comments, media files, and user information. As your website grows, your database can become bloated with unnecessary data, which can:

  • Lead to slower page load times;
  • Use up more server resources;
  • Slow down backups and maintenance tasks;
  • Impact caching effectiveness;
  • Slow down search functionality.

Maintaining a clean WordPress database is an effective step not only toward better website speed and performance but also:

  • Improved website security
  • Improved website backup and recovery
  • Reduced disk space usage
  • Less strain on your servers


8 manual cleanup techniques for a faster WordPress database (via phpMyAdmin)

Before performing any database cleanup, it’s essential to perform a backup. This ensures you have a copy of your website’s data in case anything goes wrong during the cleanup process.

To create a backup, you can use a plugin or access cPanel and use the built-in backup tool. It’s important to save the backup in a secure location (like a Cloud space) so you can restore your website easily.

Generally, the manual approach requires access to your WordPress dashboard and phpMyAdmin – a web-based application for managing MySQL databases.

To access the phpMyAdmin interface, log in from your web hosting control panel or through a plugin like WP phpMyAdminPlease note all SQL commands shared below use the standard “wp_” prefix. Change it to match the ones used by your database.

SQL tab

Note: Manual WordPress database cleanup requires some technical knowledge. If you don’t feel confident running the command line, we recommend you go with any of the tried-and-tested plugins. Jump to the list.


1. Optimize database tables

In general, you can optimize all database tables, but some may require more attention than others. Here are some tips on how to identify the tables that need optimization:

  • Look for tables that are frequently updated: Tables, such as the posts, comments, and user meta tables, are good candidates for optimization.
  • Check for tables with large sizes: Tables, such as the wp_options and wp_postmeta tables, may benefit from optimization to improve website performance.
  • Identify tables with overhead: Overhead is the amount of space in a table that is used but not required. Tables with a high amount of overhead may need optimization.

To optimize tables, select them from the list on the left in phpMyAdmin, and check the box next to them.

From the “With selected” drop-down menu, select “Optimize table.” Click on the “Go” button to start the optimization process.

Post overhead


2. Delete unused data

Unused data can accumulate over time, leading to a cluttered database. This includes unused themes and plugins, media files, posts and pages, and tags.

Unused Themes and Plugins
To delete inactive WordPress themes and plugins, run the following SQL commands in phpMyAdmin:

For unused themes:

DELETE FROM wp_options WHERE option_name LIKE ‘template_%’ OR option_name LIKE ‘stylesheet_%’;

For unused plugins:

DELETE FROM wp_options WHERE option_name = ‘active_plugins’;

Alternatively, log in to your WordPress dashboard and select the “Appearance” or “Plugins” options for inactive themes and plugins, respectively.

WordPress dashboard

From there, you can select and delete them (in the example below, we’re deleting an inactive WordPress theme).

Delete WordPress theme

To delete inactive WordPress plugins completely, we suggest you follow our latest step-by-step guide.


Unused Media Files
To delete unused media files:

  1. Log into phpMyAdmin and select your WordPress database from the list of databases.
  2. Click on the “wp_posts” table to open it.
  3. Look for rows with a “post_type” value of “attachment.” These are media files.

    Attachment post type
     
  4. To find unused media files, look for rows where the “post_parent” column is set to a value of “0”. This means the media file is not attached to any post or page on your site.
  5. Delete the row associated with the file.

To remove unused media files in one hit, use the following command in the SQL tab:

DELETE FROM wp_posts WHERE post_type = ‘attachment’ AND post_parent = 0;


Unused Posts and Pages

To delete unused posts and pages via phpMyAdmin, you can use the following SQL commands:

  1. For unused posts:DELETE FROM wp_posts WHERE post_type = ‘post’ AND post_status = ‘draft’;
  2. For unused pages:

         DELETE FROM wp_posts WHERE post_type = ‘page’ AND post_status = ‘draft’;

Alternatively, you can delete unused posts and pages inside the WordPress dashboard in a few simple steps:

  1. Log in to your WordPress dashboard.
  2. Go to the “Posts” or “Pages” section, depending on which content type you want to remove.
  3. Look for any posts or pages that you no longer need and want to delete and click on the checkbox next to them
  4. Select “Move to Trash” from the “Bulk Actions” drop-down menu and click on the “Apply” button
  5. To permanently delete the posts or pages, go to the “Trash” section and perform a bulk action “Delete Permanently,” and confirm with “Apply.”
Bulk delete post


Unused Tags
To remove unused tags in phpMyAdmin, you can use a combination of SQL queries.

Run the following query to identify all tags that are not associated with any posts or content:

SELECT * FROM wp_terms AS t 
LEFT JOIN wp_term_taxonomy AS tt ON t.term_id = tt.term_id 
WHERE tt.taxonomy = ‘post_tag’ 
AND tt.count = 0;

This query will list all the tags that are not associated with any posts or content. Make sure that the list contains only the tags you want to delete.

To delete these tags run the following query:

DELETE FROM wp_terms WHERE term_id IN (
  SELECT term_id FROM wp_term_taxonomy WHERE count = 0
);

This query will delete all the tags that have a count of zero, i.e., those that are not associated with any posts or content.


Removing unused tags is also done through your WordPress dashboard.

  1. Go to the “Posts” section and click “Tags” from the menu on the left-hand side.
  2. Look for any tags that you no longer need and click on the checkbox next to the tag that you want to delete.
  3. Select “Delete” from the “Bulk Actions” drop-down menu.
  4. Click the “Apply” button to delete the selected tag.
Bulk delete tags

If the tag you want to delete is still associated with any posts, you will need to remove it from those posts first. To do this: 

  1. Click on the tag you want to remove. 
  2. Check the list of posts that use the tag.
  3. Click on each post that uses the tag and remove the tag by clicking on the “X.” 
     
Remove tag from post

Once the tag is removed from all the associated posts, go back to the “Tags” section and repeat the steps from above.


3. Remove spam comments

In phpMyAdmin, run the following query to identify all comments that have been marked as spam:

SELECT * FROM wp_comments WHERE comment_approved = ‘spam’;

Once you have confirmed the list, you can delete these comments by running the following query:

DELETE FROM wp_comments WHERE comment_approved = ‘spam’;

To remove spam comments via the WordPress dashboard, follow these steps:

  1. Go to the “Comments” section and select “Spam” from the “All Comments” drop-down menu.
  2. Look for any spam comments you want to delete and click on the checkbox next to them.
  3. Select “Delete Permanently” from the “Bulk Actions” drop-down menu.
  4. Click on the “Apply” button to confirm the removal.
Delete spam comment


4. Remove unapproved comments

Similarly to the spam comments, run the following query to identify all comments that have not been approved:

SELECT * FROM wp_comments WHERE comment_approved = 0;

Then, you can delete these comments by running the following query:

DELETE FROM wp_comments WHERE comment_approved = 0;

Alternatively, navigate to your WordPress dashboard. In the “Comments” section, select “Pending” or “Unapproved” from the “All Comments” drop-down menu.

  1. Look for any unapproved comments you want to delete and click on the checkbox.
  2. Select “Move to Trash” from the “Bulk Actions” drop-down menu.
  3. Click the “Apply” button to move the selected unapproved comments to the trash.
Delete unapproved comment

To permanently delete the unapproved comments, go to the “Trash” section and perform the bulk action “Delete Permanently” for all the unapproved comments you want gone.

Click on the “Apply” button to finish the process.


5. Remove post revisions

To delete post revisions, enter the following command in the SQL query box and click Go to execute:

DELETE FROM wp_posts WHERE post_type = “revision”;

For a more granular control, the safest alternative is to use a plugin from our recommendations list.


6. Remove old shortcodes

Identifying old shortcodes in WordPress can be challenging, especially if you have a large number of pages or posts on your site. However, there is a way to identify which shortcodes are old and no longer used on your site:

  • Check the theme and plugin documentation: If you are using a theme or a plugin that came with shortcodes, check their documentation to see if any of the shortcodes have been deprecated.

Note: We recommend using a plugin if you have a large number of posts. Going through each post to identify and delete a shortcode can prove more time-consuming than expected.

Once you identify which shortcodes are no longer needed, go to your WordPress dashboard. 

  1. Go to the “Pages” or “Posts” section and select the page or post where the old shortcode is used.
  2. Switch to the “Text” or “HTML” editor mode for the page or post and search for the old shortcode.
  3. Once you have located the old shortcode, delete it and save the changes.
  4. Repeat this process for each page or post where the old shortcode is used.
Delete shortcode from post


7. Remove pingbacks and trackbacks

Pingbacks and trackbacks are two methods that WordPress uses to notify you when another website links to your content. Both methods are designed to help you manage your incoming links and engage with other bloggers and website owners.

However, they can also be a source of spam and unwanted notifications, which is why it’s important to manage them properly or disable them altogether.

In phpMyAdmin, run the following query to identify all comments that have the comment type of “pingback” or “trackback”:

SELECT * FROM wp_comments WHERE comment_type = ‘pingback’ OR comment_type = ‘trackback’;

Delete these comments by running the following query:

DELETE FROM wp_comments WHERE comment_type = ‘pingback’ OR comment_type = ‘trackback’;

You could also use the built-in comment management system in your WordPress dashboard:

  1. Click on “Comments” in the left-hand menu.
  2. You will see a list of comments, including pingbacks and trackbacks. Check the boxes next to the comments you want to delete.
  3. Click the “Bulk Actions” drop-down menu and select “Move to Trash.”
  4. Click on the “Apply” button.


8. Remove transients

Transients are temporary pieces of data used to cache data and speed up your website’s performance. However, if not taken care of on a regular basis, they can start harming your speed instead. Here’s how to remove transients in a WordPress database cleanup:

1. via phpMyAdmin
Log into your phpMyAdmin. Then, select your WordPress database and click on the SQL tab. In the SQL window, enter the following command to delete all transients:

DELETE FROM wp_options WHERE option_name LIKE ‘_transient_%’;

2. via WP-CLI
If you’re comfortable using the command line, log in to your server and open a terminal window. Then, navigate to your WordPress directory and run the following command to delete all transients:

wp transient delete –all

Note: It’s important to note that when you remove transients, they will be recreated the next time they are needed. Therefore, it’s a good idea to regularly clean up your database to maintain a fast and efficient website.


5 best plugins for WordPress database cleanup

Advantages of using plugins for database cleanup

Manually cleaning up your database can be a time-consuming and tedious task, especially if you’re not familiar with SQL queries.

Fortunately, there are many plugins available that can automate the process for you. They can help you:

  • quickly identify and remove unnecessary data;
  • reduce the risk of errors;
  • ensure your database is clean and optimized.


Is it safe to use plugins for database cleanup?

Using a plugin for database cleanup is generally safe as long as you choose a reputable plugin and follow best practices. Flip through our list of the best WordPress plugins for database optimization.


1. WP-Optimize

WP-Optimize is a popular plugin that can remove unnecessary data, such as old post revisions, spam comments, and unused tags. It can also optimize your database tables and remove expired transients. One of the standout features of WP-Optimize is the ability to schedule automatic cleanups, so you don’t have to remember to do it manually. The plugin is easy to use and has a user-friendly interface.

WP Optimize

Pros:

  • Scheduled automatic optimization and cleanup
  • Easy to use interface
  • Comprehensive cleanup options

Cons:

  • Some features are only available in the pro version
  • May not be suitable for large databases


2. WP Sweep

WP Sweep can remove unused, orphaned, and duplicated data, as well as optimize your database tables. The plugin is lightweight and easy to use, with a simple interface. WP Sweep also includes a preview function, so you can see what data will be deleted before you confirm the cleanup.

WP Sweep

Pros:

  • Lightweight and easy to use
  • Preview function to see what data will be deleted
  • Ability to clean up specific types of data

Cons:

  • May not be suitable for large databases
  • Some features are only available in the pro version


3. Advanced Database Cleaner

Advanced Database Cleaner comes in both free and paid versions, with the paid version offering more features and functionality. The plugin is designed to help you clean up and optimize your database by removing unnecessary data, such as post revisions, spam comments, and unused tables.

Advanced database cleanup

One of the standout features of Advanced Database Cleaner is its ability to schedule automatic cleanups. The plugin also allows you to create custom queries to clean up specific parts of your database.

Pros:

  • Free version available
  • Schedule automatic cleanups
  • Create custom queries for targeted cleaning

Cons:

  • Some features only available in the pro version
  • Can be more complex to use than some other plugins


4. WP DBManager

WP DBManager offers a range of features, including database backup and optimization options, as well as the ability to repair and restore your database. 

WP DBManager

One of the standout features of WP DBManager is its easy-to-use interface, which makes it simple to perform database maintenance tasks. The plugin also includes a range of optimization options to help you speed up your site, such as removing spam comments 
and cleaning up post revisions.

Pros:

  • Backup and optimization options
  • Easy-to-use interface
  • Optimization options to speed up your site

Cons:

  • Some users have reported issues with the backup functionality
  • Not as customizable as some other plugins
     

5. WP Reset

WP Reset is a powerful WordPress plugin that helps users quickly and easily reset their website to its default settings. Not only can users take a snapshot of their website to quickly restore their website to a specific previous state, but also rely on efficient database cleanup and emergency recovery script.

WP Reset

Pros:

  • Easy to use and user-friendly interface perfect for non-technical users
  • Time-saving website resetting
  • No important data loss during the reset process guaranteed

Cons:

  • Some advanced features are only available in the paid version

Best practices for choosing a plugin for WordPress database cleanup

When choosing a plugin for database cleanup, there are a few things to keep in mind.

First, look for a plugin that is regularly updated and has a large user base. This can help ensure that the plugin is compatible with the latest version of WordPress and is free from bugs and security vulnerabilities.

Second, look for a plugin that has a good reputation and positive reviews.

Finally, choose a plugin that meets your specific needs. Some plugins are designed to clean up specific types of data, while others offer more comprehensive cleaning and optimization options.


Tips for maintaining a clean and fast database

Regularly Scheduled Cleanups

One of the best ways to ensure your WordPress database remains clean is to schedule regular cleanups. Depending on the size of your website and how frequently you update content, you may need to schedule cleanups more frequently.

For websites with a lot of traffic and frequent content updates, it’s recommended to schedule cleanups on a weekly or bi-weekly basis. For smaller websites, a monthly or bi-monthly cleanup may suffice.


Monitor Database Size

It’s important to keep an eye on your database size to determine how frequently you need to schedule cleanups. You can use plugins like WP-Optimize, WP-Sweep, or Advanced Database Cleaner to monitor your database size and set up automatic cleanups. Alternatively, you can monitor your database size using cPanel.


Frequently Asked Questions

Why is my WP database so big?

Your WordPress database may be big because of accumulated data over time. This includes post revisions, spam comments, and unused data like media files, themes, and plugins. Additionally, some plugins may create their own tables in the database, which can also contribute to its size.


Does WordPress store everything in the database?

No, not everything is stored in the database. WordPress stores content like posts, pages, and comments in the database, but media files like images and videos are stored on your server’s file system. Plugins and themes may also store data outside of the database.


What happens if I accidentally delete important data from my database?

If you accidentally delete important data from your database, it may result in errors or a broken website. This is why it’s vital to always back up your database before performing any cleanup. You can then use the backup to restore any accidentally deleted data.


What happens if I delete my WordPress database?

Deleting your WordPress database will result in a broken website. Without the database, WordPress won’t be able to access any content, comments, or settings, and your website won’t function properly.


Take it away

А clean WordPress database is essential for optimal website speed, performance, and security.

There are several cleanup techniques that you can use to keep your database clean, including backing up your database, manually optimizing your database via phpMyAdmin by going over database tables and removing unused data like themes, plugins, media files, posts, and tags.

There are also several plugins available that can help you with WordPress database cleanup, including WP-Optimize, WP-Sweep, and Advanced Database Cleaner. When choosing a plugin, it’s important to consider its features, ease of use, and reliability.

By scheduling regular cleanups and monitoring your database size, you can ensure that your website remains fast, secure, and optimized for optimal user experience. Prioritize a database cleanup today and reap the benefits tomorrow.

Source :
https://nitropack.io/blog/post/wordpress-database-cleanup-guide

Back/Forward Cache: What It Is and How to Use It to Serve Content Immediately

Last updated on Feb 20th, 2023 | 7 min

Imagine this…

A user is browsing your website. They go to your product page. Then to your pricing page. Then back to your product page as they forgot to check if you offer that specific feature. Finally, they navigate forward to your pricing page and finish their order. 

As it turns out, it’s a pretty common scenario. 

Chrome usage data shows that 1 in 10 (10%) navigations on desktop and 1 in 5 (20%) on mobile are either back or forward.

Truly spectacular numbers. 

But…

The more important thing is – how can you guarantee that after navigating back and forward to your pages, they load immediately? 

Enter back/forward cache (or bfcache).

In the following lines, you will learn everything about bfcache and how to implement it to improve speed and perceived performance.

Spoiler alert: it’s easier than you think. 


What is the back/forward cache?

Bfcache is a feature that allows browsers to create and store a snapshot of an already visited web page in their in-memory. So the next time a visitor navigates back or forward to it, the browser can display it immediately.

The whole behind-the-scene process looks like this…

When a visitor requests to load a specific page, the browser goes through the following process:

  1. Establishes a connection with the server
  2. Downloads and parses the information
  3. Constructs the Document Object Model (DOM) and CSS Object Model (CSSOM)
  4. Renders the content
  5. Makes the page interactive
Browser loading a web page


If the back/forward cache isn’t enabled for the specific page, it means that every time you leave it and then navigate back to it, the browser will have to go through the whole 5-step process. 

And that takes time. 

On the contrary, with bfcache enabled, the browser “freezes” the page with all of its resources, so the next time you re-visit it, the browser won’t need to waste time rebuilding and will be able to load it instantly. 

The following Addy Osmani’s video illustrates best how fast a web page loads with and without bfcache:

data:text/html;https://www.youtube.com/embed/_me7_7C6Drs?autoplay=1;base64,PGJvZHkgc3R5bGU9J3dpZHRoOjEwMCU7aGVpZ2h0OjEwMCU7bWFyZ2luOjA7cGFkZGluZzowO2JhY2tncm91bmQ6dXJsKGh0dHBzOi8vaW1nLnlvdXR1YmUuY29tL3ZpL19tZTdfN0M2RHJzLzAuanBnKSBjZW50ZXIvMTAwJSBuby1yZXBlYXQnPjxzdHlsZT5ib2R5ey0tYnRuQmFja2dyb3VuZDpyZ2JhKDAsMCwwLC42NSk7fWJvZHk6aG92ZXJ7LS1idG5CYWNrZ3JvdW5kOnJnYmEoMCwwLDApO2N1cnNvcjpwb2ludGVyO30jcGxheUJ0bntkaXNwbGF5OmZsZXg7YWxpZ24taXRlbXM6Y2VudGVyO2p1c3RpZnktY29udGVudDpjZW50ZXI7Y2xlYXI6Ym90aDt3aWR0aDoxMDBweDtoZWlnaHQ6NzBweDtsaW5lLWhlaWdodDo3MHB4O2ZvbnQtc2l6ZTo0NXB4O2JhY2tncm91bmQ6dmFyKC0tYnRuQmFja2dyb3VuZCk7dGV4dC1hbGlnbjpjZW50ZXI7Y29sb3I6I2ZmZjtib3JkZXItcmFkaXVzOjE4cHg7dmVydGljYWwtYWxpZ246bWlkZGxlO3Bvc2l0aW9uOmFic29sdXRlO3RvcDo1MCU7bGVmdDo1MCU7bWFyZ2luLWxlZnQ6LTUwcHg7bWFyZ2luLXRvcDotMzVweH0jcGxheUFycm93e3dpZHRoOjA7aGVpZ2h0OjA7Ym9yZGVyLXRvcDoxNXB4IHNvbGlkIHRyYW5zcGFyZW50O2JvcmRlci1ib3R0b206MTVweCBzb2xpZCB0cmFuc3BhcmVudDtib3JkZXItbGVmdDoyNXB4IHNvbGlkICNmZmY7fTwvc3R5bGU+PGRpdiBpZD0ncGxheUJ0bic+PGRpdiBpZD0ncGxheUFycm93Jz48L2Rpdj48L2Rpdj48c2NyaXB0PmRvY3VtZW50LmJvZHkuYWRkRXZlbnRMaXN0ZW5lcignY2xpY2snLCBmdW5jdGlvbigpe3dpbmRvdy5wYXJlbnQucG9zdE1lc3NhZ2Uoe2FjdGlvbjogJ3BsYXlCdG5DbGlja2VkJ30sICcqJyk7fSk7PC9zY3JpcHQ+PC9ib2R5Pg==


As you can see from the video, the loading time is almost non-existent. On top of that, bfcache will reduce your visitors’ data usage as they won’t have to re-download the same resources repeatedly. 

And while all of these benefits sound incredible, a certain question might still bother you:

I already have an HTTP cache set up for my website. Do I need bfcache as well? 

Here’s the answer…
 

What is the difference between bfcache and HTTP cache?

Put simply, bfcache is a snapshot of the entire page stored in-memory (including the JavaScript heap), whereas the HTTP cache includes only the previously requested resources. 

And as Google claims:

“…it’s quite rare that all requests required to load a page can be fulfilled from the HTTP cache…”


Not all resources are allowed to be cached in the HTTP Cache. For instance, some sites don’t cache the HTML document itself, but only the resources. As a result, every time a visitor loads a specific page, the browser needs to re-download the document. 

Another reason back/forward cache can be faster is the difference between in-memory and disk cache. 

It’s true that loading resources from the disk cache (HTTP cache) could be much faster than requesting them over the network. But there’s an extra boost from not even having to read them from disk and fetching the entire page directly from the browser’s in-memory. 
 

What browsers support the back/forward cache?

All of them – Chrome, Safari, Firefox, Opera, and Edge:

Bfcache browser support

The truth is back/forward cache isn’t a new concept. Safari added support for this feature back in 2009. Firefox has supported it since version 1.5.

Edge and Chrome were the latest to join the party, with the former introducing bfcache in 2020, while the latter did it a year later. 

Now that you know that all major browsers support it let’s see how you can check if your page is served from the bfcache. 


How can I check if my site can be served from the back/forward cache?

The best thing about back/forward cache is that it just works in the majority of cases because browsers automatically do all the work for you.

In some cases, however, your pages will not be restored by the bfcache. 

The easiest way to check if everything works correctly is to run a PageSpeed Insights audit. 


Using Google PageSpeed Insights

Since the release of Lighthouse v10, there’s been a new PSI audit called “Page prevented back/forward cache restoration.” 

The audit will fail if the page you tested cannot be restored from bfcache for any reason. Clicking on the warning, a drop-down menu will open, and you’ll see a list with reasons and the frame(s) that caused the issue.

Failure reasons are separated into three categories:

  • Actionable: You can fix these issues to enable caching.
  • Pending Support: Chrome doesn’t support these features yet, so they prevent caching. However, once supported, Chrome removes these limitations.
  • Not Actionable: You can’t fix these issues on this page. Something that is outside the page’s control prevents caching.
Page prevented back/forward cache restoration warning

Using Chrome DevTools

Another option is to use Chrome’s Developer Tools, following these steps:

1. Open Chrome DevTools on the page you want to test:

How to open Chrome DevTools

2. Navigate to Application > Cache > Back/forward cache:

How to open bfcache settings in Chrome DevTools

3. Click Test back/forward cache

Test back/forward cache in Chrome Devtools

If bfcache works on your page, you’ll see this message:

Page eligible for bfcache

If not, you will see a list of issues:

Page ineligible for bfcache


Now that you know how to test it, let’s see how you can optimize your pages for bfcache and fix PSI’s warning. 
 

How to fix the “Page prevented back/forward cache restoration” warning in PageSpeed Insights

Even if you don’t see the warning, meaning your page is eligible for bfcache, it’s good to know that it won’t stay there indefinitely.

That’s why it’s crucial to know how to optimize for back/forward cache.

Here are some best practices you can use to make it as likely as possible that browsers bfcache your pages:

1. Avoid using the unload event 

The most surefire way to optimize for bfcache is to avoid using the unload event at all costs. 

The unload event fires when the user navigates away from the page (by clicking on a link, submitting a form, closing the browser window, etc.).

On desktop, Chrome and Firefox consider a page ineligible for bfcache if it uses the unload event. Safari, on the other hand, will cache some pages that fire the unload event listener, but to reduce potential breakage, it will not run it when a user is navigating away.

On mobile, Chrome and Safari will cache a page that uses the event, but Firefox won’t. 

In general, avoid using the unload event and instead go for the pagehide event. Otherwise, you’re risking slowing down your site, and your code won’t even run most of the time in Chrome and Safari. 

Also, there’s an ongoing discussion between browsers to deprecate unload
 

2. Be careful with adding beforeunload listeners

It’s ok to use beforeunload events in Chrome and Safari, but keep in mind that Firefox will flag your pages as ineligible for bfcache. 

However, there are legitimate use cases for the beforeunload event, unlike the unload event. One example is when you must caution the user about losing unsaved changes if they exit the page. It’s advisable to attach beforeunload event listeners only when there are unsaved changes and to remove them promptly after saving those changes.
 

3. Use Cache-Control: no-store only with information-sensitive pages

If a page contains sensitive information and caching is inappropriate, then Cache-Control: no-store should be used to prevent it from being eligible for bfcache. On the other hand, if a page doesn’t contain sensitive information and always requires up-to-date content, Cache-Control: no-cache or Cache-Control: max-age=0 can be used. These directives prompt the browser to revalidate the content before serving it and don’t impact a page’s eligibility for bfcache.
 

4. Update sensitive data after bfcache restore

The bfcache isn’t supposed to work for pages that contain sensitive data. For instance, when a user signs out of a website on a public computer, the next user shouldn’t be able to sign back in just by hitting the back button. 

To achieve that, it’s a good practice to update the page after a pageshow event if event.persisted is true.

Here’s a code from web.dev you can use:

Web dev code


5. Avoid window.opener references

Whenever possible, use rel=”noopener” instead of window.opener references. The opened window or the opener won’t be eligible for bfcache if your site opens windows and controls them through window.postMessage().

Always close connections and disconnect observers during the pagehide and freeze event

When the page is stored in the bfcache, all JavaScript tasks are paused and resumed as soon as it is taken out of the cache.

If these tasks only access APIs isolated to the current page, there won’t be any problems. 

However, if these tasks are connected to APIs that are also accessible from other pages in the same origin, then they may prevent code in other tabs from running properly.

If that’s the case, some browsers will not put a page in bfcache in the following scenarios:

The best thing you can do is to permanently close connections and remove or disconnect observers during pagehide or freeze events if your page uses any of these APIs. By doing this, the browser can cache the page without worrying about other open tabs being affected.
 

Key Takeaways

For something handled by browsers, we’ve covered a lot of information. 

So here are the key takeaways from this article:

  • Bfcache allows browsers to create and store a snapshot of an already visited web page in their in-memory, making the subsequent back/forward navigation load instantly. 
  • The benefits of your page being served from the bfcache include reduced data usage, better perceived performance, improved Core Web Vitals, and user experience.
  • The difference between bfcache and HTTP cache is that the former stores a snapshot of the whole page while the latter only the previously used resources. Also, with bfcache, the content is restored from the browser’s in-memory, while with HTTP cache is from a disk cache. 
  • All major browsers support back/forward cache. 
  • You can check if a particular page is eligible for back/forward caching using PageSpeed Insights or Chrome DevTools.
  • То optimize your pages for bfcache and fix the “Page prevented back/forward cache restoration” warning by doing the following:
  • Avoid using the unload event
  • Be careful with adding beforeunload listeners
  • Use Cache-Control: no-store only with information-sensitive pages
  • Avoid window.opener references
  • Always close connections and disconnect observers during the pagehide and freeze event

As always, don’t forget to test. Back/forward cache is a great feature, but remember that not every page should be eligible for it. Your visitors’ experience should always be a first priority. 

Source :
https://nitropack.io/blog/post/back-forward-cache

Tip – How to Disable Cloud-Based Clipboard (WIN+V) History in Windows 10

This tutorial will help you in disabling cloud-based clipboard (WIN+V) history feature in Windows 10. Once you follow the steps given in this guide, you’ll be able to prevent or restrict Windows 10 as well as other users from enabling cloud-clipboard feature from Settings and accessing your copied data from cloud-clipboard fly-out.

Newer versions of Windows 10 come with new cloud-based Clipboard feature which allows users to copy and paste multiple items from the clipboard. Users can copy multiple items to the new clipboard and then they can select and paste desired copied items from cloud-clipboard to anywhere they want such as Notepad, MS Word, etc.

The new cloud-based clipboard can be used by pressing WIN+V keys together. To copy items you need to use the good old Ctrl+C hotkey but to paste the copied text from new cloud-based clipboard, you need to use the new WIN+V keyboard shortcut.

When you press WIN+V keys together to access cloud-clipboard, Windows 10 launches the new cloud-based clipboard fly-out as shown in following screenshot:

Clear_Cloud_Based_Clipboard_History_Windows_10.png

To paste an item, you need to click on the item and it’ll be immediately pasted at current cursor position in your program window.

Users can enable/disable cloud-clipboard using Windows 10 Settings app. Open Settings app (WIN+I) and go to System -> Clipboard section. Now you can turn on/off Clipboard History option to allow/disallow Windows 10 from copying items to new cloud-clipboard as shown in following screenshot:

Customize_Cloud_Based_Clipboard_Settings_Windows_10.png

We posted a detailed tutorial reviewing cloud-based clipboard feature at following link:

[Tip] How to Configure and Use Cloud-Based Clipboard (WIN+V) Feature in Windows 10

Although it’s a good feature but many Windows 10 users may not like the new cloud-clipboard feature and they may want to disable or deactivate it due to privacy and security reasons.

In this tutorial, we’ll tell you how to permanently disable cloud-clipboard feature in Windows 10 so that no one can access your copied data by pressing WIN+V hotkey.

Once deactivated or disabled, when anyone will try to open Settings -> System -> Clipboard page in your Windows 10 device, he’ll notice that Clipboard History option is grayed out i.e. disabled and he can’t change it. So users will be unable to activate or enable cloud-clipboard feature without your permission. Also a message “Some of these settings are hidden or managed by your organization” will be displayed at the top of the page as shown in following screenshot:

Cloud_Clipboard_History_Disabled_Grayed_Out_Windows_10_Settings.png

If anyone will try to press WIN+V hotkey in Notepad or any other program to access cloud-clipboard feature, the new clipboard fly-out will open blank or empty. Windows 10 will no longer store your copied items to cloud-clipboard.

Following methods will help you in disabling cloud-clipboard feature in Windows 10 operating system:

METHOD 1: Using Group Policy Editor

1. Press WIN+R keys together to launch RUN dialog box. Now type gpedit.msc and press Enter. It’ll open Group Policy Editor.

2. Now go to:

Computer Configuration -> Administrative Templates -> System -> OS Policies

3. In right-side pane, look for following options:

Allow Clipboard History

Allow Clipboard synchronization across devices

4. Double-click on both options one by one and set both of them to Disabled.

Disable_Cloud_Clipboard_History_Windows_10_Group_Policy.png

That’s it. It’ll permanently disable cloud-clipboard feature in Windows 10.

PS: In future, if you decide to restore default settings and restore cloud-clipboard feature, set the above mentioned options to Not Configured again in Group Policy Editor.

METHOD 2: Using Registry Editor

If you are using Home edition of Windows, you’ll not be able to run gpedit.msc command because this edition doesn’t come with Group Policy Editor.

If you can’t use or don’t want to use Group Policy Editor, you can take help of Registry Editor for the same task. Just follow these simple steps:

1. Press WIN+R keys together to launch RUN dialog box. Now type regedit and press Enter. It’ll open Registry Editor.

2. Now go to following key:

HKEY_LOCAL_MACHINE\SOFTWARE\Policies\Microsoft\Windows\System

3. In right-side pane, right-click on empty area and select New -> DWORD (32-bit) Value option. Set the new DWORD name as AllowClipboardHistory and keep its value to 0

Again right-click on empty area and select New -> DWORD (32-bit) Value option. Set the new DWORD name as AllowCrossDeviceClipboard and keep its value to 0

Disable_Cloud_Clipboard_History_Windows_10_Registry_Editor.png

4. Close Registry Editor. You may need to restart your computer to take effects.

That’s it. It’ll completely disable cloud-clipboard feature in Windows 10.

PS: In future, if you decide to restore default settings and restore cloud-clipboard feature, delete the DWORD values created in above mentioned steps from Registry Editor.

Also Check:

[Fix] Some Settings are Managed by Your Organization in Windows 10

You are here: Home » Windows 10 » [Tip] How to Disable Cloud-Based Clipboard (WIN+V) History in Windows 10

Published in: Windows 10

About the author: Vishal Gupta (also known as VG) has been awarded with Microsoft MVP (Most Valuable Professional) award. He holds Masters degree in Computer Applications (MCA). He has written several tech articles for popular newspapers and magazines and has also appeared in tech shows on various TV channels.

Source :
https://www.askvg.com/tip-how-to-disable-cloud-based-clipboard-winv-history-in-windows-10/

How to automatically generate email summaries with Zapier and OpenAI

By Michael Toth · May 1, 2023

Keeping up with your email inbox can be a daunting task. It’s easy to get bogged down in long, rambling messages or get overwhelmed by a million unimportant emails and miss the important information buried within. Fortunately, there’s a solution that can help. 

Do more with OpenAI

Discover more ways to add AI to your workflows.

Explore now

With Zapier and OpenAI’s GPT-3, summarizing your email’s essential details has never been easier. With just a few clicks, you can automatically get a summary for each email in Slack or a handy daily digest that includes all the critical info you need from each email all in one go.

In this article, we’ll walk you through the steps of setting up this powerful Zap—our word for Zapier’s automated workflows. Whether you’re a busy professional or simply seeking to optimize your process, this tutorial will help you streamline your email management and stay on top of your inbox.

Looking for GPT-4? GPT-4 may be available with our OpenAI integration in the future. In the meantime, users with a paid subscription to ChatGPT Plus can access GPT-4 via our ChatGPT integration now—allowing you to add ChatGPT-powered conversations into apps like Slack.

How it works

For this project, we’ll be using OpenAI’s GPT-3 to summarize our emails, and then we’ll send the summaries to Slack. 

A 4-step Zap in the Zap editor.

If you’d like to start with a template, click on the Zap template below to go to the Zap editor. You’ll need to create a Zapier account if you don’t already have one. Then, follow the directions below to set up your Zap.

Get an OpenAI-generated email summary in Slack for new Gmail emails

Try it

  • Gmail logo
  • +2
  • Slack logo

Gmail, Formatter by Zapier, OpenAI (GPT-3, DALL·E, Whisper), Slack

Gmail + Formatter by Zapier + OpenAI (GPT-3, DALL·E, Whisper) + 1 moreMore details

Alternatively, if you prefer to receive the notifications as a daily digest rather than individually, we’ll walk through how you can use Digest by Zapier for this purpose. 

A 5-step Zap in the Zap editor.

If you’d like to go the digest route, you can start with the following Zap template:

Get an AI-generated daily digest of your emails in Slack

Try it

  • Gmail logo
  • +3
  • Slack logo

Gmail, Digest by Zapier, Formatter by Zapier, OpenAI (GPT-3, DALL·E, Whisper), Slack

Gmail + Digest by Zapier + Formatter by Zapier + 2 moreMore details

Before we begin developing our Zap, you’ll also need an OpenAI account if you don’t already have one. Go to platform.openai.com to sign up for your account. You’ll also need a free Slack account, which you can sign up for at www.slack.com

Are you ready to build this yourself? Let’s get started!

New to Zapier? It’s a tool that helps anyone connect apps and automate workflows—without any complicated code. Sign up for free.

Step 1: Set up your Gmail trigger step

Head over to Zapier, and click the Create Zap button to create a new Zap. 

Search for and select Gmail for the trigger app and New Email in Gmail for the trigger event (if you’re using the Zap template, these will already be selected for you). 

A Zap with Gmail selected for the trigger app and New Email for the trigger event.

Next, connect your Gmail account if you haven’t already connected it to Zapier.

In the Label/Mailbox field, select INBOX. You can optionally leave this blank to trigger for all emails. But since that will also trigger for sent messages and drafts, INBOX is the best choice unless you do heavy email filtering/labeling to remove emails from your inbox.

In the Label/Mailbox field, INBOX is shown selected.

Click Test Trigger, and you should see a recent email from your inbox, as shown below:

A successful test result that shows an email found in a Gmail inbox.

Step 2: Set up a formatter step to truncate your email

Currently, GPT-3 only allows you to send a limited amount of data to summarize, so we’ll need to truncate our email to make sure we don’t exceed this limit. In the future, OpenAI plans to develop new models with higher limits, or possibly no limits, but for now, this is a necessary step.

Click the + symbol beneath your Gmail trigger, then search for and select Formatter by Zapier for the action app and Text for the event. 

An action step of a Zap with Formatter by Zapier selected for the action app and Text for the action event.

Select Truncate as your transform action. Click in the Input field, and select Body Plain from the data dropdown from your Gmail trigger—this contains the plain-text body of the email. 

In the Max Length field, enter 6000, and then select True for the Append Ellipsis option. Here’s what your complete action step should look like:

A formatter step in the Zap editor with assorted fields filled out.

This 6000-character truncation means that if the email is shorter than 6000 characters, we’ll keep the entire thing, but if it’s longer, we’ll only keep the first 6000. 6000 characters is quite long, but I do often see emails that go over this limit. Most commonly, this will be longer newsletters or long back-and-forth email threads, as Gmail will include the entire thread in the body that Zapier receives. Because Gmail processes their email threads in reverse chronological order, this truncation will keep the most recent emails in the thread. 

Next, click Test Action to ensure everything is working properly. Next, we’ll set up our prompt to send to OpenAI.

Step 3: Set up your OpenAI email summary prompt

If you haven’t set up your Zapier connection to OpenAI, you’ll have to do that now. To start, head back over to platform.openai.com to log into your account. At the top right of the page, click on your profile icon and click View API Keys:

The Settings menu in OpenAI with the View API Keys tab selected.

From that page, click on the + Create new secret key button to generate a new API key. You’ll need this key to connect to your OpenAI account within Zapier. Copy this key and store it somewhere safe! 

A list of API keys in OpenAI.

Head back over to Zapier and add a new action step at the bottom of your Zap. Search for the OpenAI app and choose the Send Prompt event:

An action step in the Zap editor with OpenAI selected for the action app and Send Prompt for the action event.

Click on Choose account, and set up a new account by providing the API key you just generated in OpenAI. If you already have set up your account connection, simply select your existing account.

Head to the Set up action section to set up the prompt we’ll be sending over to OpenAI. In the Prompt field, copy and paste the following: 

Summarize the following email into 3 sentences max. Make it concise: 

"""

<Output from Formatter by Zapier>

"""

Replace the bracketed content with the Output variable from your Formatter by Zapier step by selecting Output from the Insert Data dropdown.

An OpenAI action step in the Zap editor with a prompt added to the Prompt field.

The triple quotes help GPT-3 to understand where the email starts and stops. 

If you want, you can give more specific instructions for the summary depending on your use case. For example, if you’re using this for your work email, you might provide information about your role at your company and the type of information that is or isn’t important to you. You might also consider providing additional context about the services or products your company offers so that GPT-3 can incorporate some of those details into the summary. For now, we’ll keep it simple with the prompt I show above.

You can leave all of the other fields for this step set to their default values. 

Click Test Action to send the email over to OpenAI. Review the summary and make sure everything looks okay. 

If you want to get a notification in Slack for each email you receive, continue to the next step.

If you want to get a daily digest of all of your emailsskip ahead.

Get notifications for each email step 4: Set up your Slack message

Next, we’ll set up the action step that will send the email summary back to you in a Slack message. This could also be set up to send as an email or SMS if you prefer, but we’ll be using Slack for this example.

Add a fourth action step and search for the Slackapp. Select the Send Channel Message event. 

A Slack action step in the Zap editor with Send Channel Message selected for the action event.

Connect your Slack account if you haven’t already connected it to Zapier.

Next, we’ll set up the action step. Select the Slack channel you want these messages to be sent to. I created a new channel called email-summaries for this purpose. 

In the Message Text field, copy and paste the following, replacing the bracketed content with data from your previous Zap steps, which you can select from the Insert Data dropdown:

*New email summary*

From {Gmail From Name}, {Gmail From Email}

Received {Gmail Date}

Summary: {OpenAI Choices Text}

<{Gmail Message URL}|Go To Email>

Your Message Text field should look like the following image when complete:

The Message Text field of a Slack step in the Zap editor.

This will create a message in Slack that includes the sender name and email address, the date and time the email was received, the summary generated by OpenAI, and a link to open the email directly in Gmail for easy responding.

Switch the Include a link to this Zap? field to No and leave the remaining fields as is. 

Next, click Test Action to send the summary message to your Slack channel and make sure everything is working properly. If everything looks good, you’re now ready to use your Zap.

Get a daily digest step 4: Set up your digest entries

If the idea of receiving instant notifications for every email you receive sounds too distracting, the daily digest is an ideal solution for you. Instead of setting up a Slack notification for the fourth step, we can use a built-in Zapier tool called Digest by Zapier to store up the email summaries throughout the day and then release them to us all at once at a designated time. 

Add a new action step to the bottom of your Zap. Select Digest by Zapier for your action app and Append Entry and Schedule Digest for your action event. 

A Digest by Zapier step in the Zap editor with Append Entry and Schedule Digest selected for the action event.

Navigate to the Action section and give your digest a descriptive title like Daily Email Summaries

For the Entry field, simply copy and paste the copy below. Then replace the bracketed content with the variables from the prior steps by selecting them from the Insert Data dropdown.

From {Gmail From Name}, {Gmail From Email}

Received {Gmail Date}

Summary: {OpenAI Choices Text}

<{Gmail Message URL}|Go To Email>

For the Frequency field, select Daily, and for the Time of Day field, choose when you’d like to receive the digest. Your completed action step should look like this:

A digest step in the Zap editor with a list of emails summarized in the Body field.

Click Test Action to add an entry to your digest and make sure your action step is set up correctly.

Get a daily digest step 5: Set up the Slack action to release your daily digest

Finally, we’ll set up the action step that will release your daily digest and send all of the email summaries to you in a Slack message. This digest message will automatically send at the Time of Day you specified in the prior action step. 

Add an action step and search for the Slackapp. Select the Send Channel Message event. 

A Slack step in the Zap editor with Send Channel Message selected for the action event.

Click on the Actionsection. As before, select the channel you want these messages to be sent to. I created a new channel called email-summaries for this purpose. 

In the Message Text field, copy and paste the following, replacing the bracketed content with the data received from your previous digest step by selecting them from the insert Data dropdown:

*You received {Digest Count} emails today*

{Current Digest}

Your Message Text field should look like the following image when complete:

A Slack message text field with a daily digest of 4 emails.

This will create a message in Slack that includes the total number of emails received and the digest with all of the email summaries that were created throughout the day, formatted as we specified in the prior step. 

Switch the Include a link to this Zap? field to No and leave the remaining fields as is. 

Next, click Test Action to send the summary digest to your Slack Channel and make sure everything is working properly. If everything looks right, you’re now ready to use your Zap! 

Putting it all together

Whether you’re a busy professional or simply looking to optimize your email management process, setting up either of these workflows can help streamline your day and keep you on top of your inbox. Give it a try and see the difference it can make!

Related reading:


Source :
https://zapier.com/blog/generate-email-summaries-with-ai/

Google Introduces Passwordless Secure Sign-In with Passkeys for Google Accounts

May 03, 2023 Ravie Lakshmanan

Almost five months after Google added support for passkeys to its Chrome browser, the tech giant has begun rolling out the passwordless solution across Google Accounts on all platforms.

Passkeys, backed by the FIDO Alliance, are a more secure way to sign in to apps and websites without having to use a traditional password. This, in turn, can be achieved by simply unlocking their computer or mobile device with their biometrics (e.g., fingerprint or facial recognition) or a local PIN.

“And, unlike passwords, passkeys are resistant to online attacks like phishing, making them more secure than things like SMS one-time codes,” Google noted.

Passkeys, once created, are locally stored on the device, and are not shared with any other party. This also obviates the need for setting up two-factor authentication, as it proves that “you have access to your device and are able to unlock it.”

Users also have the choice of creating passkeys for every device they use to login to Google Account. That said, a passkey created on one device will be synced to all the users’ other devices running the same operating system platform (i.e., Android, iOS/macOS, or Windows) and if they are signed in to the same account. Viewed in that light, passkeys are not truly interoperable.

It’s worth pointing out that both Google Password Manager and iCloud Keychain use end-to-end encryption to keep the passkeys private, thereby preventing users from getting locked out should they lose access to their devices or making it easier to upgrade from one device to another.

Passwordless Secure Sign-In with Passkeys

Additionally, users can sign in on a new device or temporarily use a different device by selecting the option to “use a passkey from another device,” which then uses the phone’s screen lock and proximity to approve a one-time sign-in.

“The device then verifies that your phone is in proximity using a small anonymous Bluetooth message and sets up an end-to-end encrypted connection to the phone through the internet,” the company explained.

“The phone uses this connection to deliver your one-time passkey signature, which requires your approval and the biometric or screen lock step on the phone. Neither the passkey itself nor the screen lock information is sent to the new device.”

While this may be the “beginning of the end of the password,” the company said it intends to continue to support existing login methods like passwords and two-factor authentication for the foreseeable future.

Google is also recommending that users do not create passkeys on devices that are shared with others, a move that could effectively undermine all its security protections.

Found this article interesting? Follow us on Twitter  and LinkedIn to read more exclusive content we post.

Source :
https://thehackernews.com/2023/05/google-introduces-passwordless-secure.html