Google has released the March 2022 security updates for Android 10, 11, and 12, addressing three critical severity flaws, one of which affects all devices running the latest version of the mobile OS.
Tracked as CVE-2021-39708, the flaw lies in the Android System component, and it’s an escalation of privilege problem requiring no user interaction or additional execution privileges.
“The most severe of these issues is a critical security vulnerability in the System component that could lead to remote escalation of privilege with no additional execution privileges needed. User interaction is not needed for exploitation.” – mentions Google’s bulletin.
The other two critical flaws are CVE-2021-1942 and CVE-2021-35110, both affecting closed-source components on Qualcomm-based devices.
For a full list of which Qualcomm chipsets are affected by these two vulnerabilities, check out the chipmaker’s security bulletin.
No further technical details have been published for any of the fixed vulnerabilities, as doing so would put users running an older patch level at risk.
Other fixes that land with the March 2022 update are:
1 medium severity escalation of privilege flaw in Android runtime (version 12)
5 high severity escalation of privileges flaws in Android Framework (versions 10, 11, 12)
2 high severity denial of service flaws in Android Framework (version 12)
1 high severity information disclosure in Media Framework (versions 10, 11, 12)
8 high severity escalation of privilege flaws in System (versions 10, 11, 12)
1 high severity information disclosure flaw in System (versions 10, 11, 12)
4 high severity escalation of privilege flaws in Kernel
1 high severity information disclosure in Kernel
3 high severity flaws in MediaTek components
10 high severity flaws in Qualcomm components
As is the case every month, Google has released two patch levels for March 2022, one denoted as “2022-03-01” and one as “2022-03-05”.
The second patch level includes everything in the first set plus fixes for third-party closed source and Kernel components that may not apply to all devices.
As such, your device vendor may choose to push the first level to save on roll-out time, and it won’t necessarily mean that you are left vulnerable to exploitation.
With the only exception being Google’s Pixel line which receives these security updates immediately, all other vendors will need some time to bundle the patches for each of their models, as different hardware configurations require dedicated testing and fine-tuning.
If you are running anything older than Android 10, consider upgrading to a new and actively supported device or flashing your existing with a third-party Android ROM that’s based on a recent AOSP version.
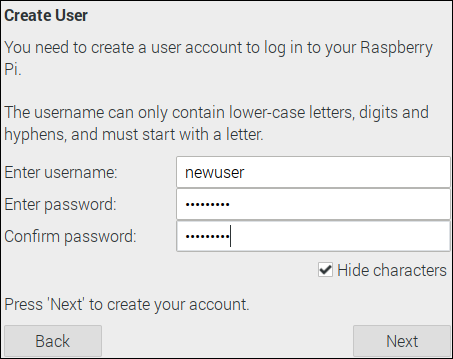
An update to Raspberry Pi OS Bullseye has removed the default ‘pi’ user to make it harder for attackers to find and compromise Internet-exposed Raspberry Pi devices using default credentials.
Starting with this latest release, when installing the OS, you will first be prompted to create an account by choosing a username and password (before this change, the OS installer would only ask for a custom password).
You can no longer skip this step since the setup wizard will be launched when first booting the device (previously, you could hit Cancel to use the default pi/raspberry credentials).
While you can still choose to use a ‘pi’ username and ‘raspberry’ as your password, you will be warned that it’s not a wise choice.
“We are not getting rid of the ‘pi’ user on existing installs. We are not stopping anyone from entering ‘pi’ and ‘raspberry’ as the username and password on a new install,” said Simon Long, Senior Principal EngineerSenior at Raspberry Pi.
“All we are doing is making it easy for people who care about security to not have a default ‘pi’ user – which is something people have been requesting for some time now.”
Raspberry Pi OS account creation wizard (Raspberry Pi )
When booting the image for the first time, Raspberry Pi OS Lite image users will also be asked to create a new account via command line text prompts.
If you want to run Raspberry Pi headless, you can create the user before booting into the OS by setting a username and a password via the Settings dialog before writing the image or adding a userconf file to the boot partition containing a username:encrypted-password pair.
Existing installations are not affected by this change. However, users can still switch to non-default credentials by updating their existing image and running the sudo rename-user command.
“This isn’t that much of a weakness – just knowing a valid user name doesn’t really help much if someone wants to hack into your system; they would also need to know your password, and you’d need to have enabled some form of remote access in the first place,” Long explained.
“But nonetheless, it could potentially make a brute-force attack slightly easier, and in response to this, some countries are now introducing legislation to forbid any Internet-connected device from having default login credentials.”
For instance, the UK wants to enforce new regulations asking that IoT devices no longer come with default usernames and passwords but, instead ask customers to choose custom credentials, “not resettable to any universal factory default value.”
The Italian luxury fashion house Ermenegildo Zegna has confirmed an August 2021 ransomware attack that resulted in an extensive IT systems outage.
The disclosure came in today’s filing of an SEC Form 424B3 that updates their investment prospectus to alert investors of business disruption and data breach risks resulting from sophisticated cyberattacks.
To highlight the potential investment risks, the report provides an example of a ransomware attack that hit the firm in August 2021, impacting most of its IT systems and causing a large-scale interruption.
Zegna underlines that they did not engage with the ransomware actors in negotiating a ransom payment, so they had to restore from backups in the weeks that followed the incident.
“In August 2021, we were subject to a ransomware attack that impacted the majority of our IT systems. As we refused to engage in discussions relating to the payment of the ransom, the responsible parties published certain accounting materials extracted from our IT systems,” reads Zegna’s SEC filing.
“We publicly announced the IT systems breach and gradually restored our IT systems from secure backup servers during the weeks following the breach.”
As the filing updates the prospectus to address risks to investors, it also warns:
“A malfunction that results in a wider or sustained disruption to our business could have a material adverse effect on our business, results of operations, and financial condition. In addition to supporting our operations, we use our systems to collect and store confidential and sensitive data, including information about our business, our customers and our employees.
Any unauthorized access to our information systems may compromise the privacy of such data and expose us to claims as well as reputational damage. Ultimately, any significant violation of the integrity of our data security could have a material adverse effect on our business, results of operations, and financial condition.”
RansomEXX claimed the attack
Last year, the RansomEXX operation claimed responsibility for the attack, where data was published as a way to further extort the victim into paying a ransom.
The leaked data was stolen from Zegna’s systems and was published by the ransomware gang on the day of the firm’s announcement of their attack.
Zegna’s entry on the RansomEXX leak portal(Bleeping Computer)
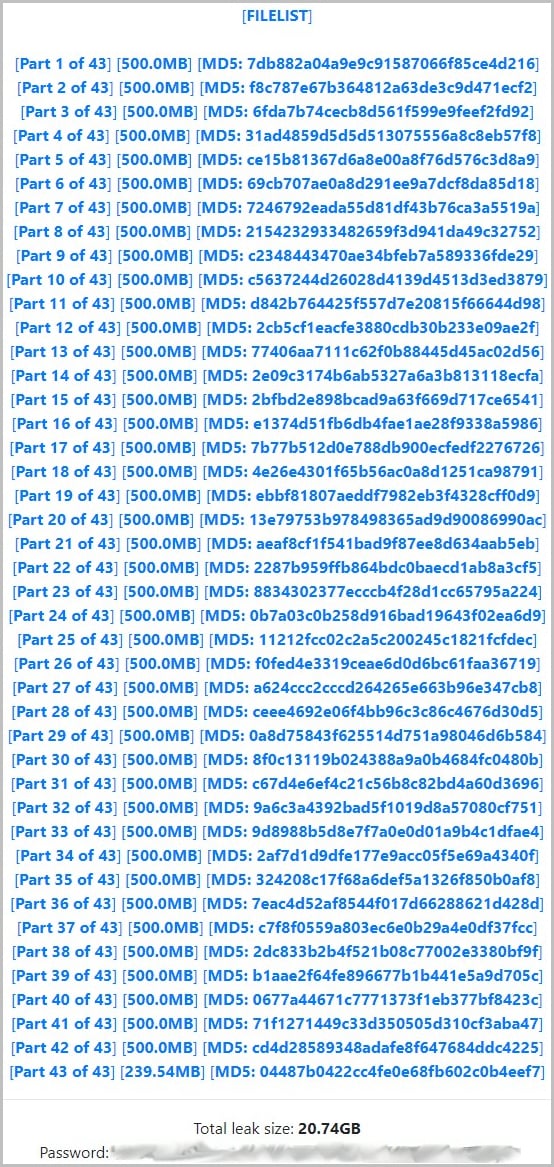
As part of the attack, the threat actors claim to have copied 20.74 GB of data where they offered it in password-protected ZIP files. At this time, Zegna’s listing on the leak portal has allegedly received 483,000 visits.
List of leaked files(BC)
Unfortunately, Zegna’s filing confirms the authenticity of the leaked data, but they did not comment on the impact on clients and partners.
This is the same ransomware group that has hit corporate giants such as Konica Minolta in August 2020, GIGABYTE in August 2021, and more recently, Hellmann Worldwide.
The Cybersecurity and Infrastructure Security Agency (CISA) has ordered federal civilian agencies and urged all US organizations on Monday to patch an actively exploited bug impacting WatchGuard Firebox and XTM firewall appliances.
Sandworm, a Russian-sponsored hacking group, believed to be part of the GRU Russian military intelligence agency, also exploited this high severity privilege escalation flaw (CVE-2022-23176) to build a new botnet dubbed Cyclops Blink out of compromised WatchGuard Small Office/Home Office (SOHO) network devices.
“WatchGuard Firebox and XTM appliances allow a remote attacker with unprivileged credentials to access the system with a privileged management session via exposed management access,” the company explains in a security advisory rating the bug with a critical threat level.
The flaw can only be exploited if they are configured to allow unrestricted management access from the Internet. By default, all WatchGuard appliances are configured for restricted management access.
Federal Civilian Executive Branch Agencies (FCEB) agencies must secure their systems against these security flaws according to November’s binding operational directive (BOD 22-01).
CISA has given them three weeks, until May 2nd, to patch the CVE-2022-23176 flaw added today to its catalog of Known Exploited Vulnerabilities.
Even though this directive only applies to federal agencies, CISA also strongly urged all US organizations to prioritize fixing this actively abused security bug to avoid having their WatchGuard appliances compromised.
It establishes persistence on the device through firmware updates, and it provides its operators with remote access to compromised networks.
It uses the infected devices’ legitimate firmware update channels to maintain access to the compromised devices by injecting malicious code and deploying repacked firmware images.
This malware is also modular, making it simple to upgrade and target new devices and security vulnerabilities, tapping into new pools of exploitable hardware.
WatchGuard issued its own advisory after US and UK cybersecurity and law enforcement agencies linked the malware to the GRU hackers, saying that Cyclops Blink may have hit roughly 1% of all active WatchGuard firewall appliances.
The UK NCSC, FBI, CISA, and NSA joint advisory says organizations should assume all accounts on infected devices as being compromised. Admins should also immediately remove Internet access to the management interface.
Botnet disrupted, malware removed from C2 servers
On Wednesday, US government officials announced the disruption of the Cyclops Blink botnet before being weaponized and used in attacks.
The FBI also removed the malware from Watchguard devices identified as being used as command and control servers, notifying owners of compromised devices in the United States and abroad before cleaning the Cyclops Blink infection.
“I should caution that as we move forward, any Firebox devices that acted as bots, may still remain vulnerable in the future until mitigated by their owners,” FBI Director Chris Wray warned.
“So those owners should still go ahead and adopt Watchguard’s detection and remediation steps as soon as possible.”
WatchGuard has shared instructions on restoring infected Firebox appliances to a clean state and updating them to the latest Fireware OS version to prevent future infections.
This has been a busy month for cyber attackers, and the Cisco Umbrella team – in conjunction with Cisco Talos – has observed several new threats for users to be aware of.
In this month’s edition of the Cybersecurity Threat Spotlight, we discuss a wiper making its way through Ukraine, a dropper targeting India and China, and a newly discovered Trojan targeting EU banks.
Want to see Cisco Umbrella in action? Sign up for a free trial today!
HermeticWiper
Threat Type: Wiper
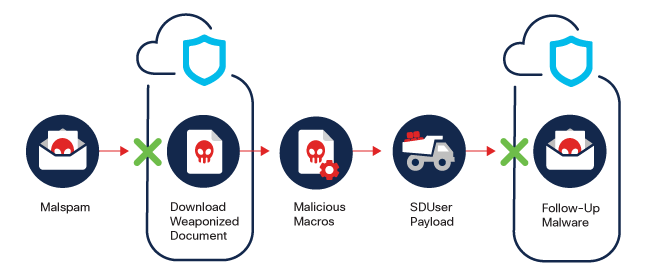
Attack Chain:
Description: HermeticWiper is a data destructing malware observed in attacks targeting Ukraine. This wiper comes as a small executable with a valid digital signature issued to “Hermetica Digital Ltd.” The malware leverages embedded resources to interact with storage devices present on infected systems. The applicable embedded driver is extracted, loaded into the wiper’s process memory space, decompressed, and written to the disk before the wipe process. The wiper disables the generation of crash dumps and corrupts the first 512 bytes to destroy the MBR of physical drives. For partitions, it disables the Volume Shadow Copy Service and uses different destructive mechanisms on the partitions depending on whether they’re FAT type or NTFS type. The wiper also attempts to corrupt housekeeping files. During the final stage, HermeticWiper waits for all sleeping threads to complete and initiates a reboot to ensure the success of the wiping activity.
HermeticWiper Spotlight: Cisco Talos has become aware of a series of wiper attacks going on inside Ukraine. One of the wipers used in these attacks has been dubbed “HermeticWiper.” Deployment of this destructive malware began on February 23, 2022. The malware has two components designed for destruction: one targeting the Master Boot Record (MBR) and another targeting partitions.
Description: SDUser is a VBA-based dropper that is used by Advanced Persistent Threat (APT) groups. The functionality of the payload includes command and control protocol, anti-sandboxing techniques, and a reverse shell mechanism.
SDUser Spotlight: In June 2021, Cisco Talos researchers discovered a malicious Excel spreadsheet that attempted to drop a previously unknown RAT. A month later, they discovered another closely related spreadsheet. These samples were internally referred to as “SDUser” sampled due to the specific PDB string left in the binary payload.
More recent analysis shows similar code being used by two different APT groups: Transparent Tribe, which targets organizations in India, and Donut, which targets organizations in Pakistan and China. These two different threat actors may use code from the same source in their attacks, which means that their attacks would display similarities despite being conducted by different groups. Code reuse, adopting techniques from successful attacks, and deliberate integration of evidence designed to fool analysts can disguise the true perpetrator and lead to these attacks being attributed to different groups.
Target Geolocations: Pakistan, China Target Data: User Credentials, Browser Data, Sensitive Information Target Businesses: Any Exploits: N/A
Description: Xenomorph is an Android Banking Trojan. It is capable of stealing credentials via overlay attack, and it uses SMS and notification interception to log and use potential 2FA tokens. Stolen data is sent to the C2 for further exploitation.
Xenomorph Spotlight: Xenomorph was initially discovered in February 2022. It is distributed through the official Google Play Store. It targets users of 56 different European banks and cryptocurrency wallets. Capabilities include – but are not limited to – stealing credentials, SMS and notification interception, excessive logging, and data exfiltration. The core engine is designed as a modular system and still appears to be in the development stage. Malware heavily relies on the overlay attack mechanism to steal personally identifiable information (PII) and other sensitive data. Collected data is exfiltrated to an attacker-controlled server using the open-source project RetroFit2.
Target Geolocations: EU Target Data: User Credentials, Browser Data, Sensitive Information Target Businesses: Any Exploits: N/A
Mitre ATT&CK for Xenomorph
Initial Access: Deliver Malicious App via Authorized App Store
Most people don’t realize it, but when you uninstall apps on Mac, they almost always leave behind what is commonly referred to as “leftovers”. These leftovers are files that were required by the app or program to function when it was installed, but now it’s been removed, they are merely taking up valuable storage space on your Mac. Over time, as you use your Mac and install and uninstall various apps, these leftovers can really begin to pile up — eventually significantly slowing down your Mac.
Fortunately, there are several ways that you can remove these leftovers during the uninstallation process, and in this article, we will show you three of them. They vary slightly in complexity, but if you’re looking for the absolute easiest way possible, you’ll want to skip to number 2!
1. Uninstall programs using Finder
This method is one that most people are completely comfortable using, but with a slight twist.
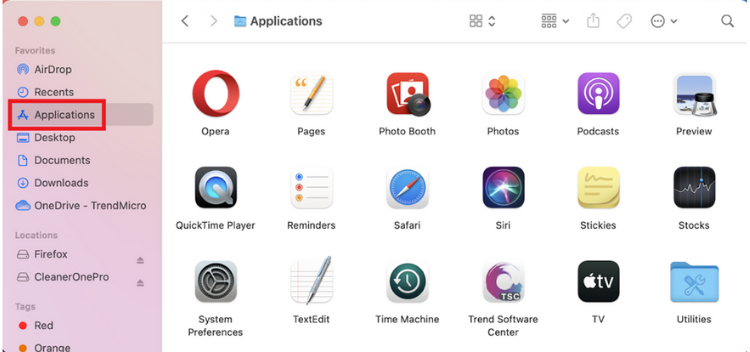
1. Open Finder and select Applications.
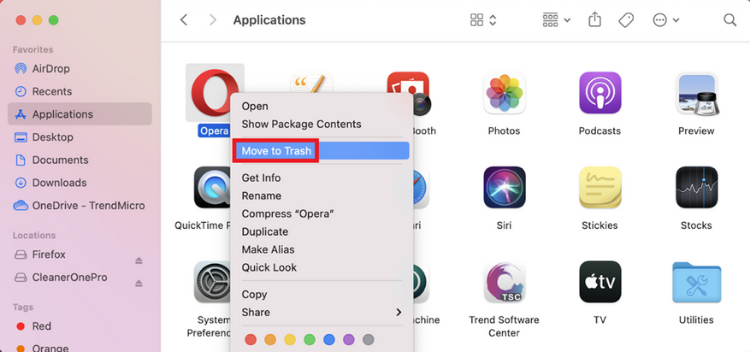
2. Locate the app you want to delete and right-click on it. Select Move to Trash.
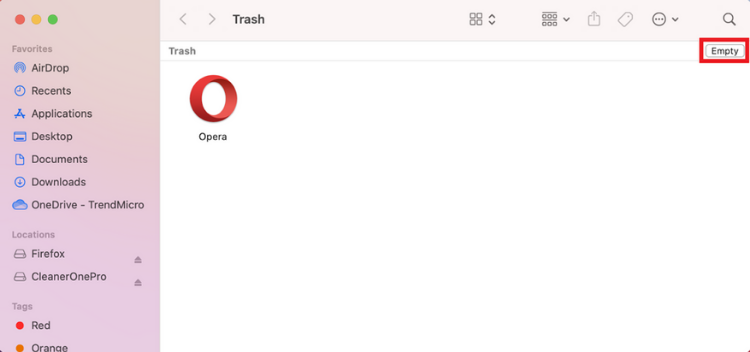
3. Open Trash by clicking on its icon on the Dock. Select Empty.
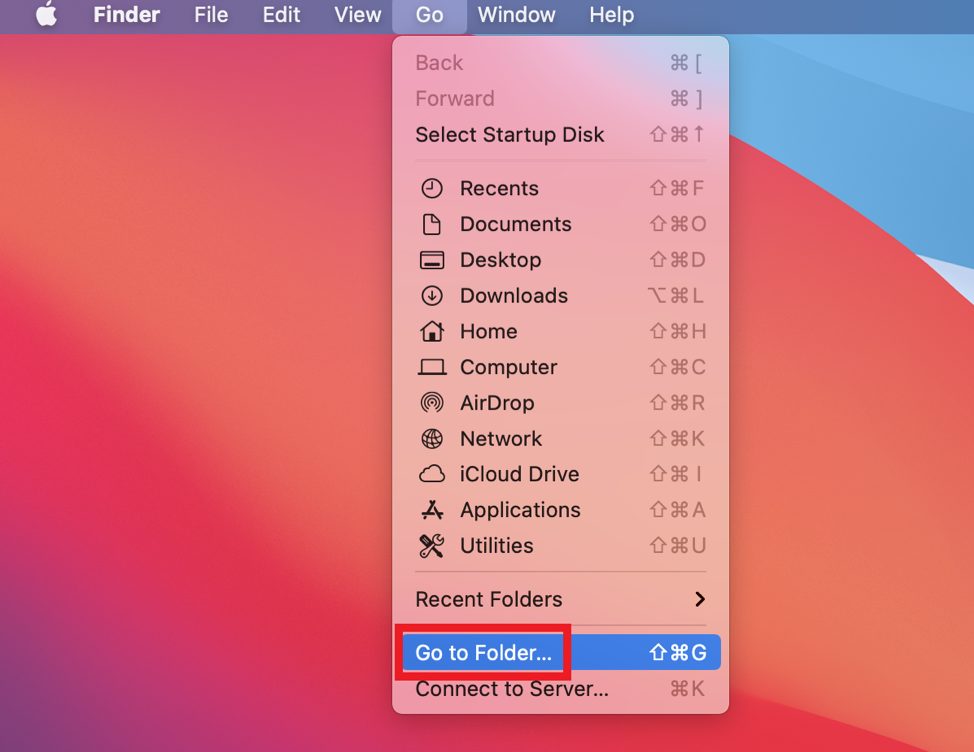
4. Now here’s how to delete the leftovers. In Finder, select Go > Go to Folder.
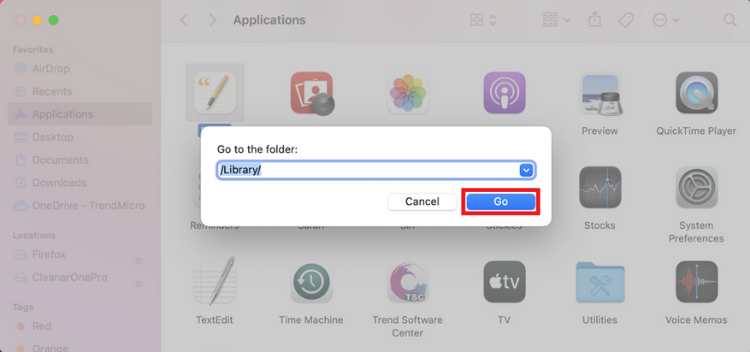
5. Type “/Library/” in the search box and select Go.
6. Type the removed app’s name into the search box. Right-click on any of its associated files and select Move to Trash. After you’ve removed all the leftover files, empty the Trash folder once again.
2. Automatically remove apps using Cleaner One Pro (the easy way!)
One of the great features of Cleaner One Pro is its ability to completely remove apps, including any leftovers, with the click of a button. It really couldn’t be any easier!
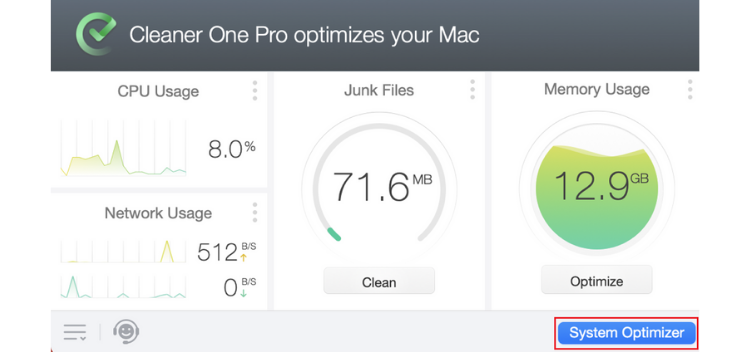
1. Open Cleaner One Pro and select System Optimizer.
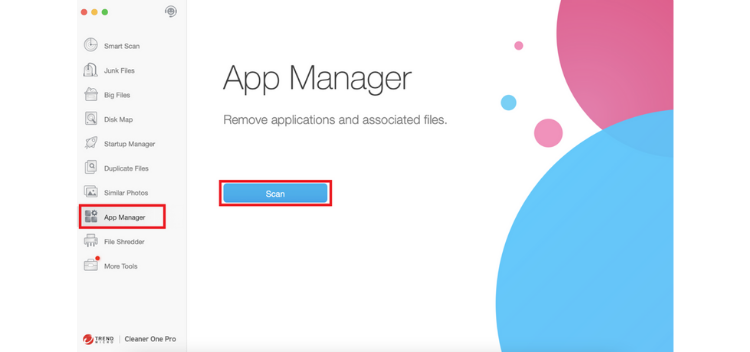
2. Select App Manager > Scan.
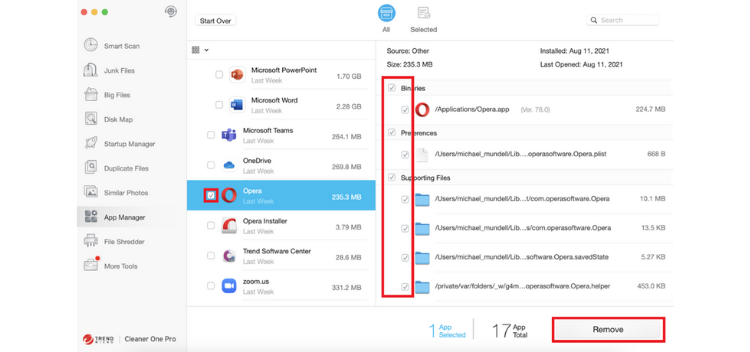
3. Hit the checkbox to the left of the app you wish to completely remove. Verify that all the checkboxes next to the app’s associated files are selected and click on Remove.
Compared to the other options that are available for completely removing apps (like the two mentioned in this article), there is no more straightforward method than using Cleaner One Pro . To read more about Cleaner One Pro and all its other excellent features, click here.
3. Delete apps using Terminal
For most people, this method will be overly technical and come with too much risk, but it does work.
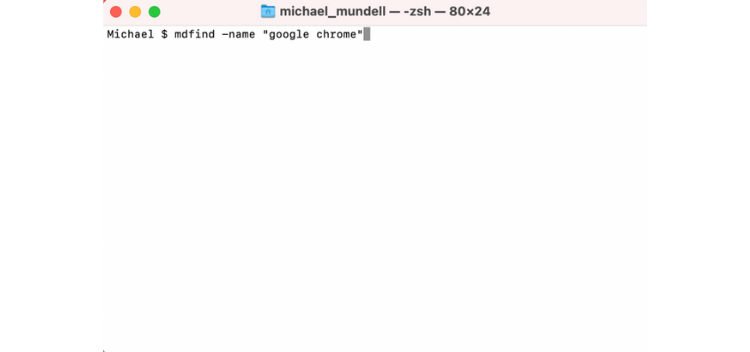
1. Open Terminal and type mdfind -name “application name” and press Enter. For example, if you wanted to remove Google Chrome, you would type mdfind -name “google chrome”.
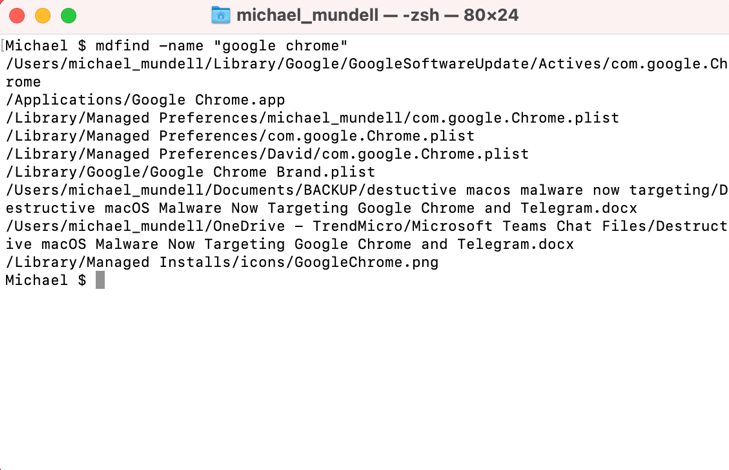
2. This will return all files associated with the name of the app, but it doesn’t mean you should delete them all. If you are using this method of uninstallation, you should have a pretty good idea of what you’re looking for, but in general, you should be searching for .app files, .plist files, settings and preferences, caches, and other accessory files.
3. Once you have located the files you wish to remove, you can do so using the rm command by typing “sudo rm -rif ~” + the directory and file name. For example, “sudo rm -rif ~/Library/Managed Installs/icons/GoogleChrome.png”. Please note, the rn command is irreversible, so please exercise caution.
Consistency is key
Whichever method you opt to use, you’ll be doing your Mac a big favor in the long run. By removing all the associated files every time you remove an app, your Mac isn’t going to eventually get bogged down by them. Trust us, after your Mac is still running super quick in years to come, you’ll be glad you took our advice!
Tried to upgrade your PC to Windows 11, but run into the dreaded ‘This PC can’t run Windows 11’ error message? Don’t give up, it could be because your system doesn’t have two security settings turned on: Secure Boot and TPM 2.0.
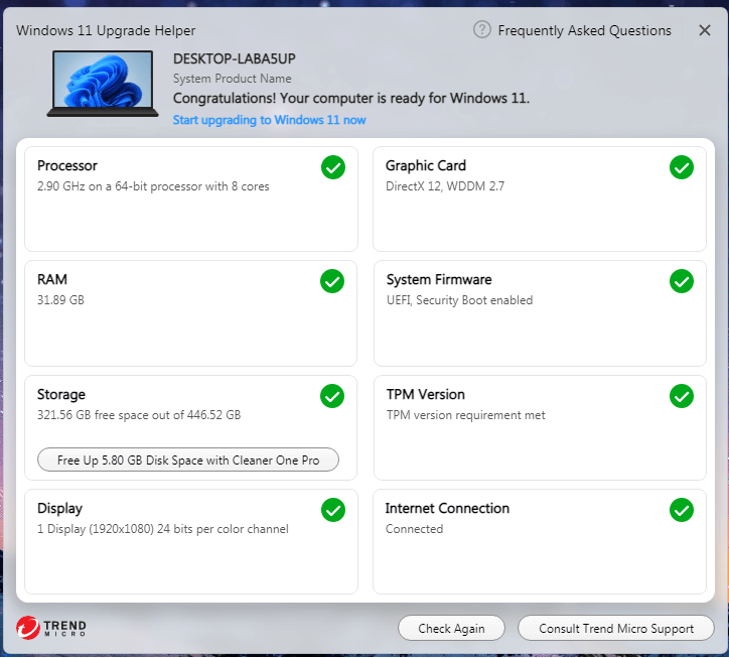
Trend Micro Windows 11 Upgrade Helper checks eight aspects of your computer, and perhaps most crucially, which TPM version it is running. Windows 11 requires TPM 2.0, so if your PC is not currently running or is not capable of running TPM 2.0, Windows 11 Upgrade Helper will let you know.Get Windows 11 Upgrade Helper
What are TPM and Secure Boot?
Trusted Platform Module (TPM) is a technology designed to provide hardware-based, security-related functions. A TPM chip is a secure crypto-processor that is designed to carry out cryptographic operations. The chip includes multiple physical security mechanisms to make it tamper-resistant. Malicious software isn’t able to tamper with the security functions of the TPM, either.
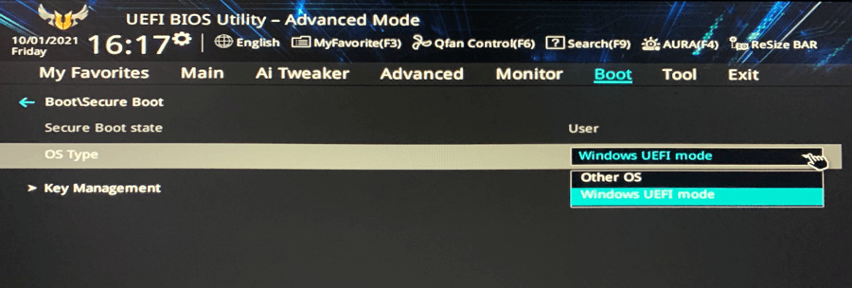
Secure Boot is a feature from the latest Unified Extensible Firmware Interface (UEFI). It offers another layer of protection against potential malware infections. It can detect when boot loaders or key operating system files are being tampered with by malware and actively block them before they can infect the system. Both TPM and Secure Boot offer unique ways of strengthening the protection of Windows 11.
Is my device capable of TPM 2.0 and Secure Boot?
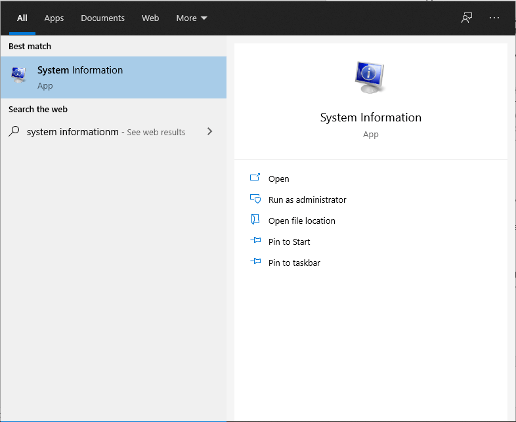
To check if your device has Secure Boot, you can follow these steps: 1. In the Windows search box, type “System Information” and open the System Information app.
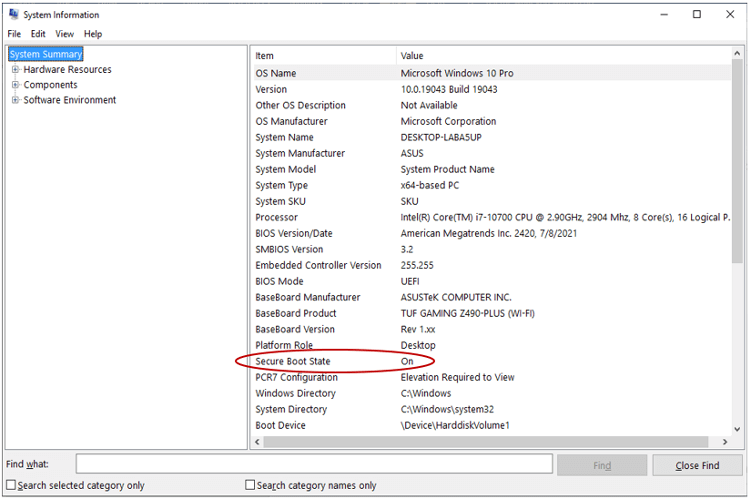
2. Select System Summary, and in the panel on the right side, look for “Secure Boot State”.
3. The value indicates the status of Secure Boot. “On” means it is turned on, “Off” means it is disabled, and “Unsupported” means your hardware does not support Secure Boot.
To check if your device has TPM, follow the steps below:
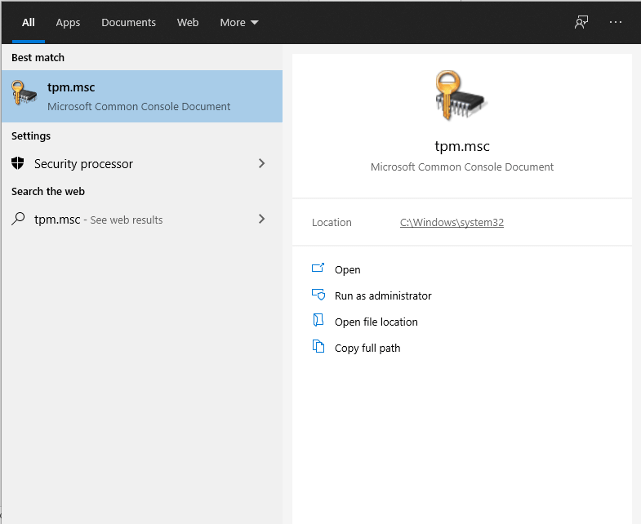
1. In the Windows search box, type “tpm.msc” and click Open.
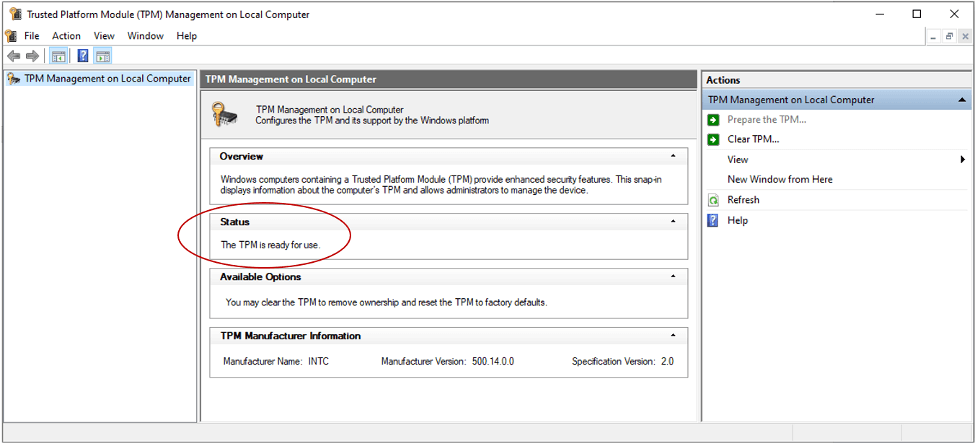
2. Under Status, if you see “The TPM is ready for use”, you know that the TPM is present and available. If you see the message “Compatible TPM cannot be found”, it means that either your computer cannot find the TPM or that it has been disabled in the BIOS or UEFI.
You can also check if your device is using TPM 2.0 through Device Manager. Here’s how to do so:
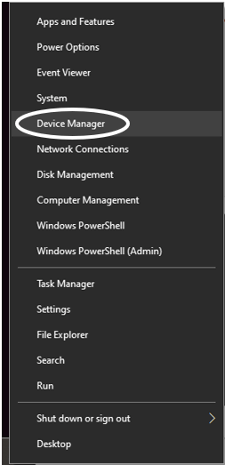
1. Right-click on the Windows Start menu icon located in the lower left of your screen, then select Device Manager.
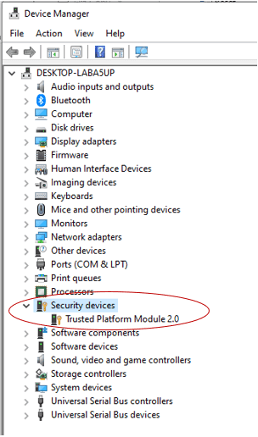
2. Select Security Devices from the list and it will show you what TPM chip you have. If it says Trusted Platform Module 2.0, you are good to go.
How to enable TPM and Secure Boot
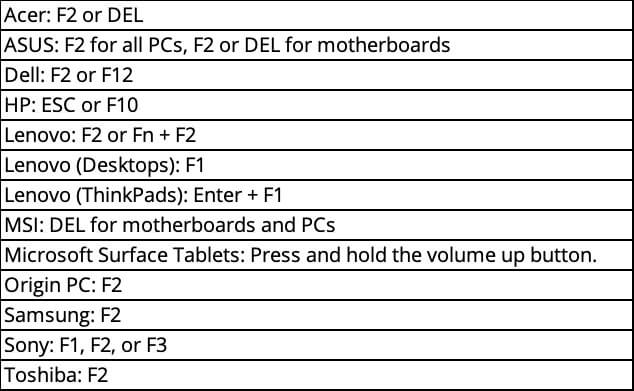
To enable TPM and Secure Boot, you need to restart your computer to access the BIOS settings. After restarting, at the boot screen, press your computer’s BIOS access key. The most common BIOS access keys are DEL and F2. Here’s a reference for popular PC and motherboard brands and their BIOS access keys:
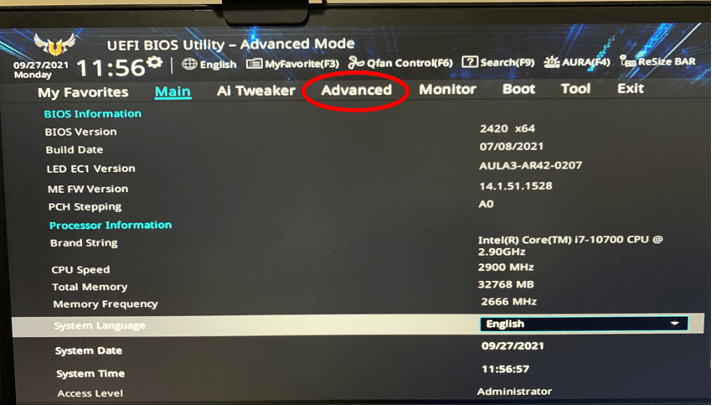
In the example below, we show you how to enable TPM on an ASUS TUF Gaming Z490-PLUS [WI-FI] motherboard, but the instructions will almost certainly differ depending on which brand of PC or motherboard you have.
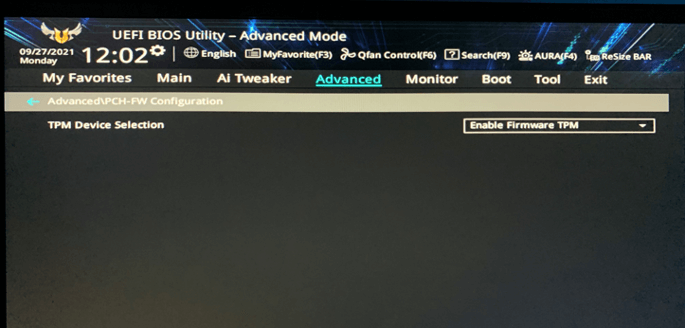
1. At the UEFI BIOS Utility screen, press F7 to access Advanced Mode.
2. Click the “Advanced” tab and select “PCH-FW Configuration”.
3. Go to the “Exit” tab to save the changes and restart the computer. TPM and Secure Boot will be enabled after the restart.
What can I do if I don’t have a TPM chip?
Your device may have a TPM chip, but you need to update your BIOS to have access to it. Please contact your PC or motherboard manufacturer to learn more about how to enable TPM on your device.
You could also buy a TPM module online, but you must know which TPM module is compatible with your motherboard. You also need to install the module onto the motherboard, which might not be an easy task — especially if you don’t have any experience in working with motherboards. If you would like to go down this route, we advise that you contact a technician or take it to a local PC repair shop.
Alternatively, you could upgrade to a new computer.
What’s the most convenient way to check if I can upgrade to Windows 11?
There are tools created that can help you assess if your computer is ready for Windows 11. One of those tools is Trend Micro Windows 11 Upgrade Helper .
Trend Micro Windows 11 Upgrade Helper can check if your computer meets all the requirements for Windows 11. You can talk to Premium Support Service if you need assistance in making your computer Windows 11 ready, too.Get Windows 11 Upgrade Helper
Your browsing history is a vital piece of information that can define your personality, your drives, and your likes and dislikes. That’s why third parties love to collect this information for targeted advertising and, sometimes, malicious activities.
To prevent others from collecting your browsing history, make it a habit to delete it now and then. Here’s some simple steps on how to delete browsing history on your Safari browser.
For Mac
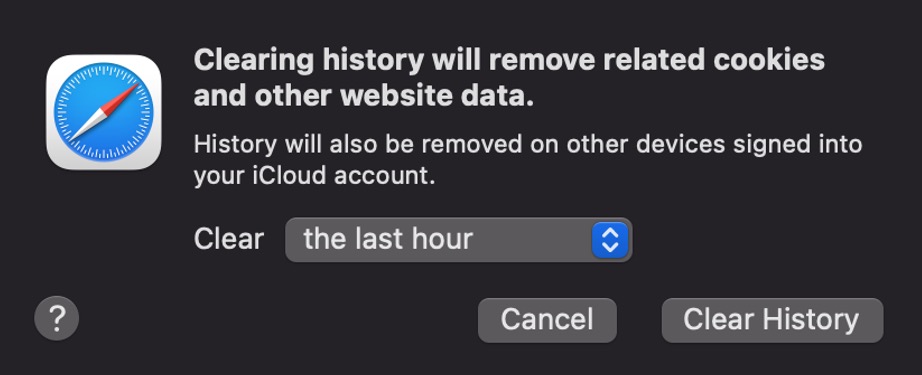
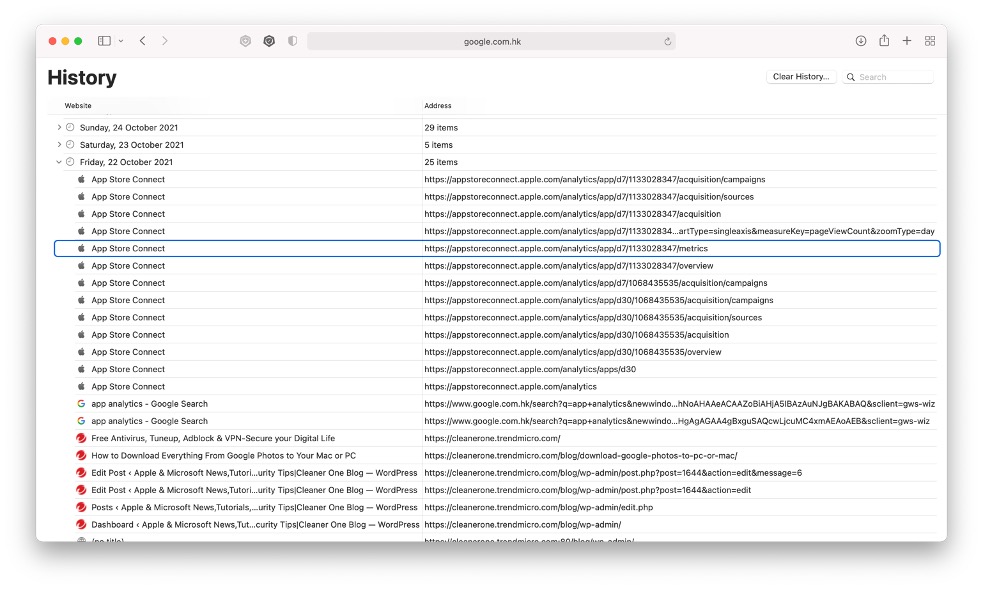
1. Open your Safari App and click History on the top menu options. 2. Click Clear History. A pop-up menu will appear and you can choose how far back you want to clear your browsing history.
You can also clear specific safari browsing history:
In Safari, press Command-Yor select History > Show All History.
From the long list, click once on a history item to select it.
Right-click to bring up a menu, then choose Delete.
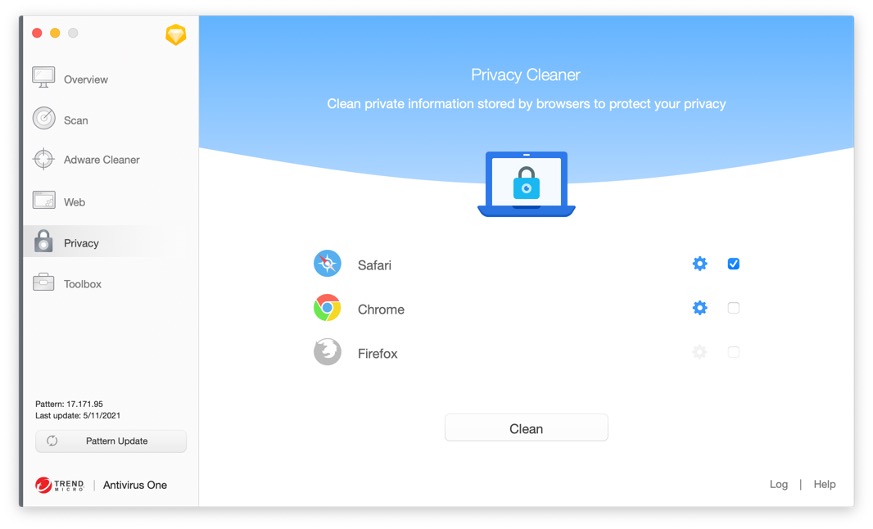
Manually clearing search and browsing history from your safari can be tedious. However, there is also an automatic solution you can try: Antivirus One , from Trend Micro.
The privacy cleaner feature in Antivirus One can help you clean sensitive browsing information to protect your privacy. Here, you can select Safari and then click the “Clean” button to remove all browsing info in a few seconds.
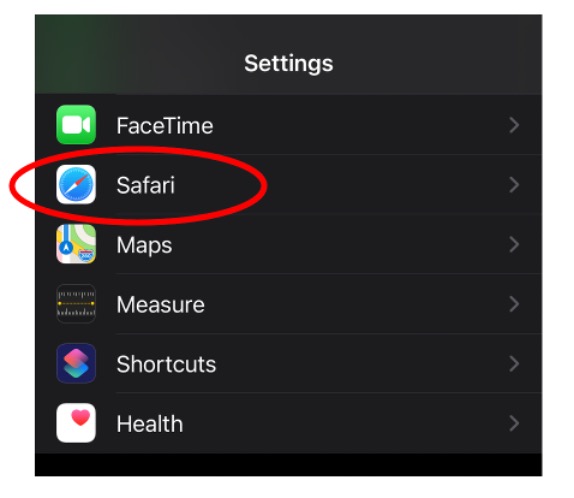
For iPhone
1. Go to Settings and click Safari.
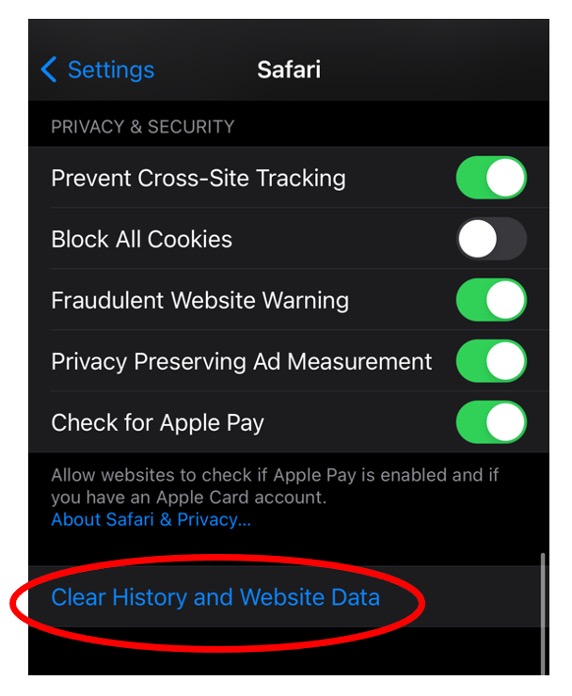
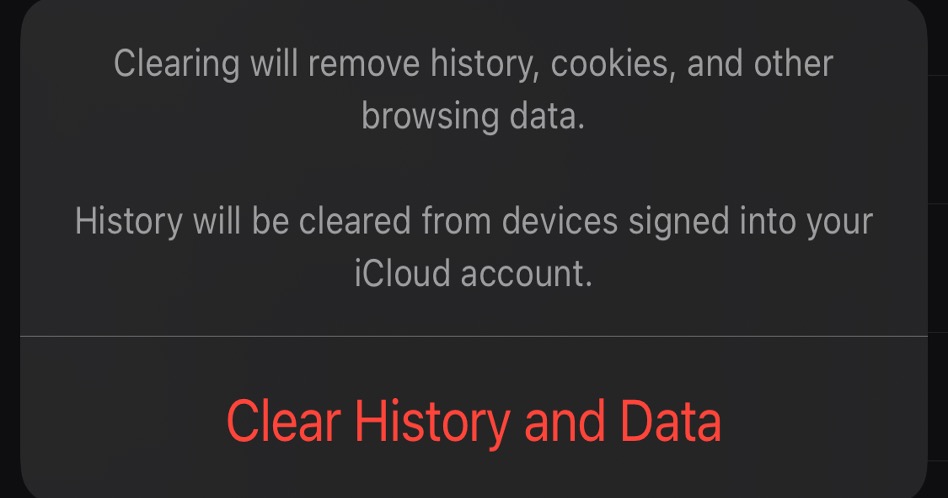
2. Tap “Clear History and Website Data”.
This will remove history, cookies, and browsing data from Safari.
If this article has been of use and/or interest to you, please do SHARE with friends and family — and remember to give Antivirus One a go.Get Antivirus One
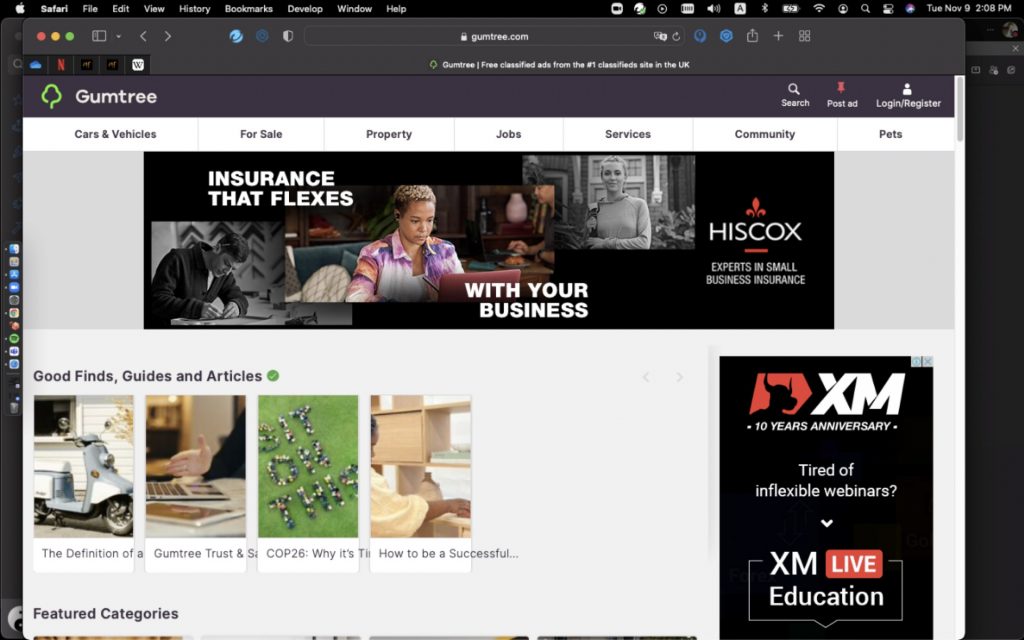
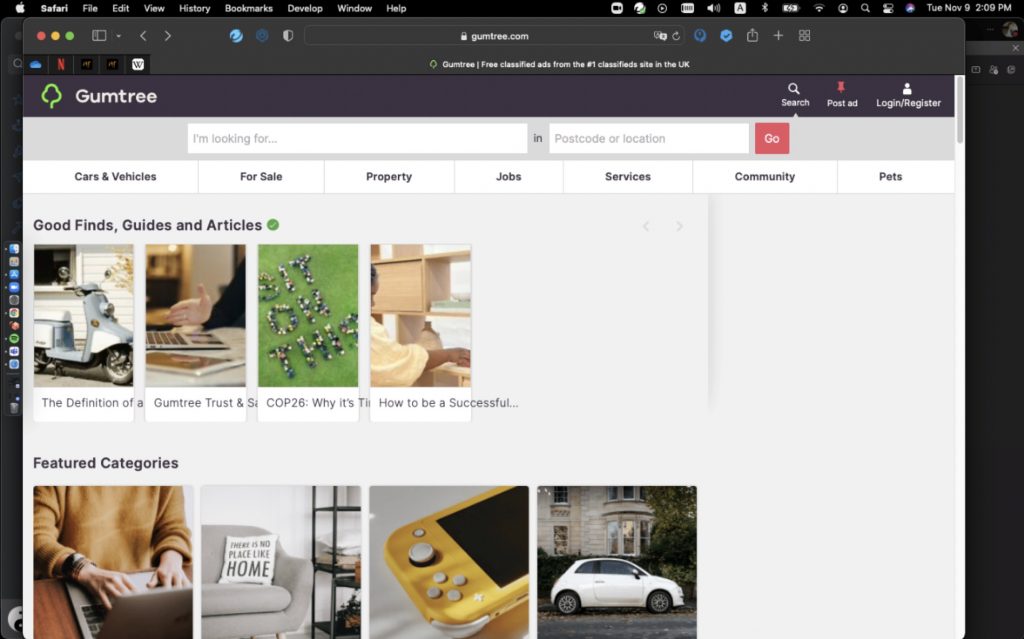
Users have been complaining that the search engine, Bing, loads as the default instead of Google. Annoying, but don’t fret! We’ve put together a simple guide on how to get rid of Bing and restore your preferred search engine.
On Google Chrome
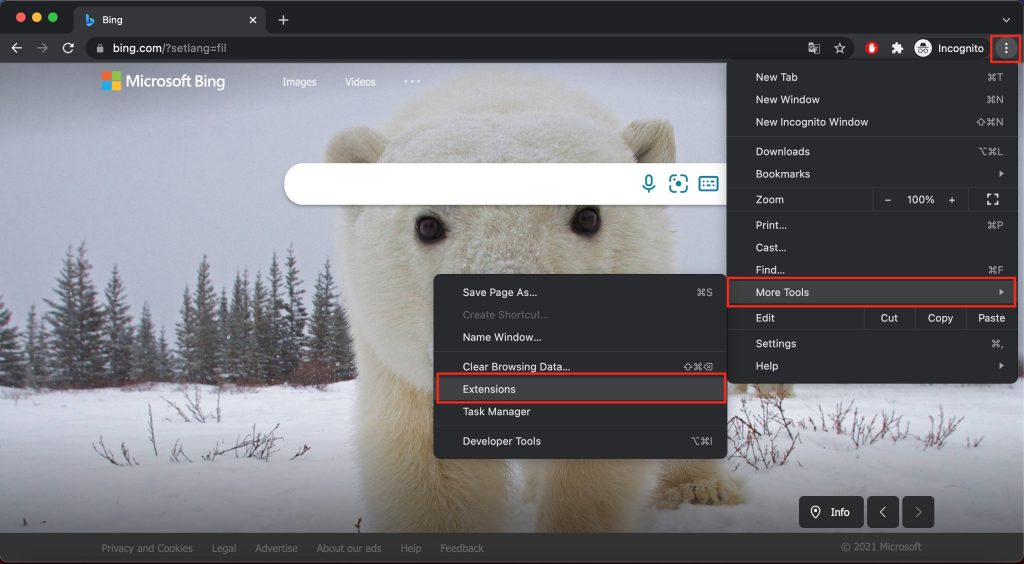
1. Open Google Chrome and click the 3-dots menu. 2. Select More Tools, then choose Extensions.
3. Remove any Bing Extensions you see. 4. Go back to the Menu, then select Settings.
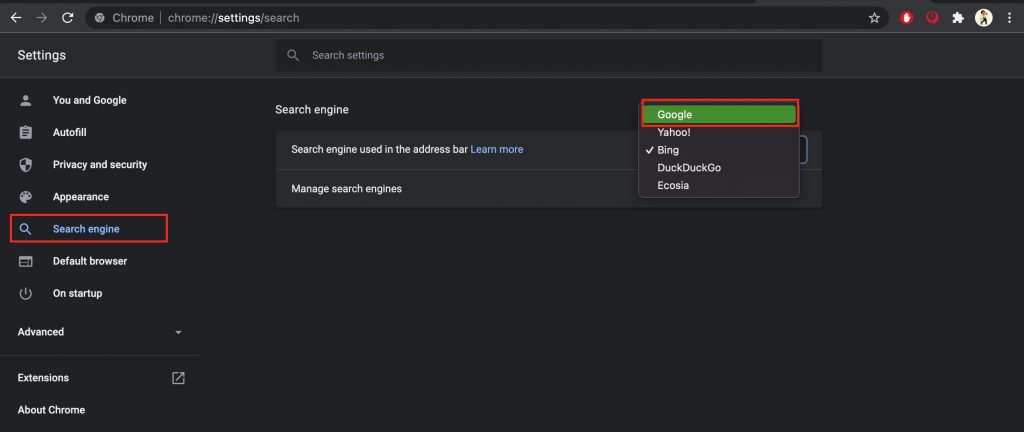
5. Look for Search Engine and click it.
6. On the right side, choose your preferred Search Engine (Google, Yahoo, DuckDuckGo or Ecosia). 7. Restart Google Chrome. If it still uses Bing as your search engine, we suggest resetting or reinstalling Chrome.
On Mozilla Firefox
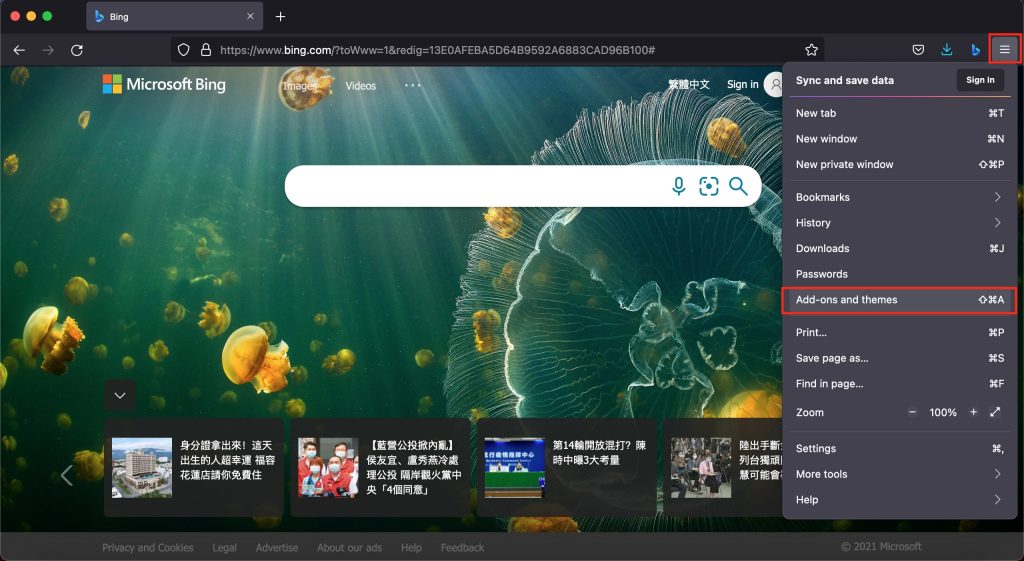
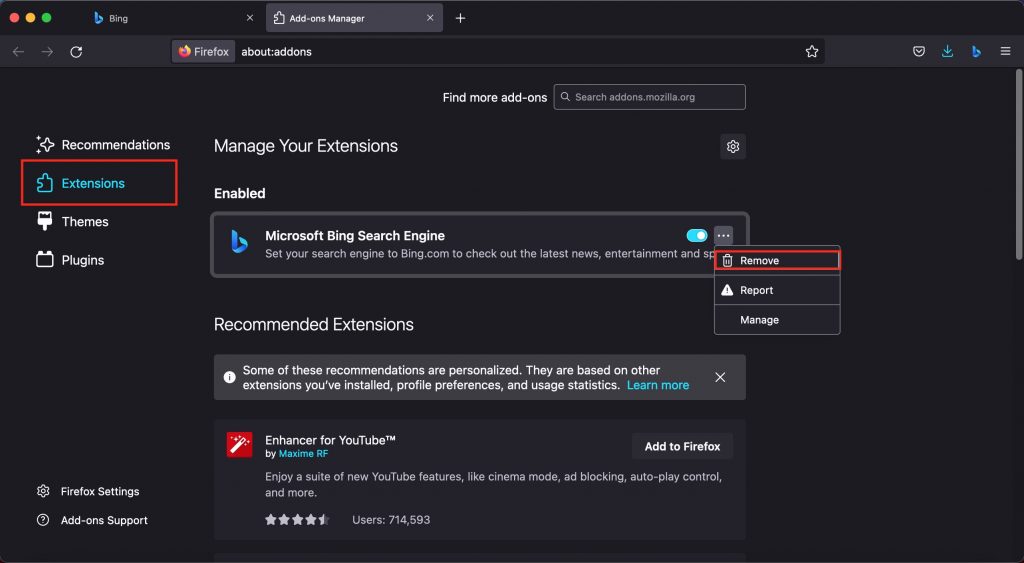
1. Open Mozilla Firefox and click the hamburger menu (3 horizontal lines). 2. Select Add-ons and themes.
3. Choose Extensions on the left side, then remove any Bing extensions you see.
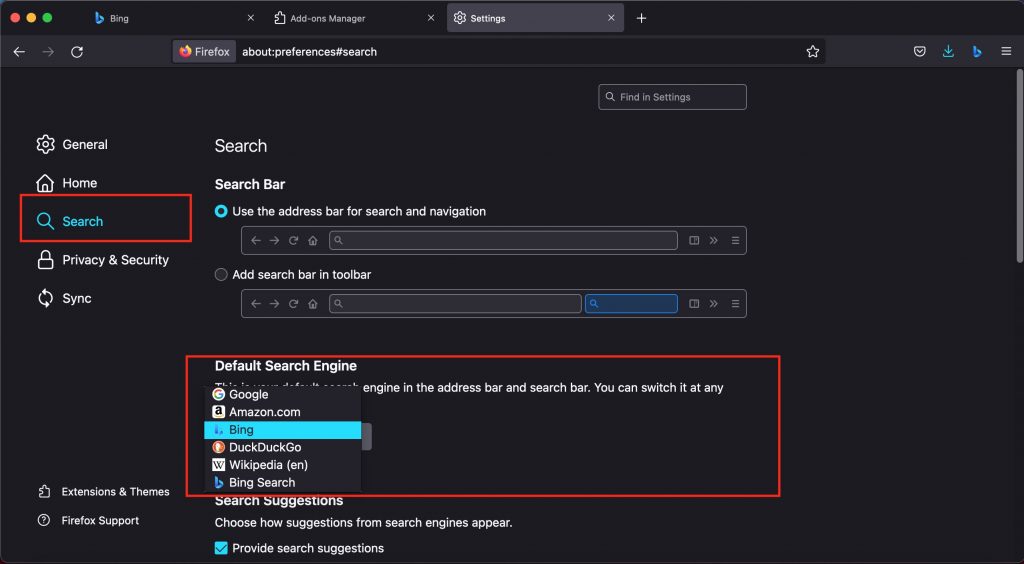
4. Go back to the Menu, then select Settings. 5. On the left side, click Search and look for the Default Search Engine section on the right side.
6. Choose your preferred Search Engine (Google, Amazon.com, DuckDuckGo or Wikipedia). 7. RestartFirefox. If it still uses Bing as your search engine, we suggest resetting or reinstalling Firefox.
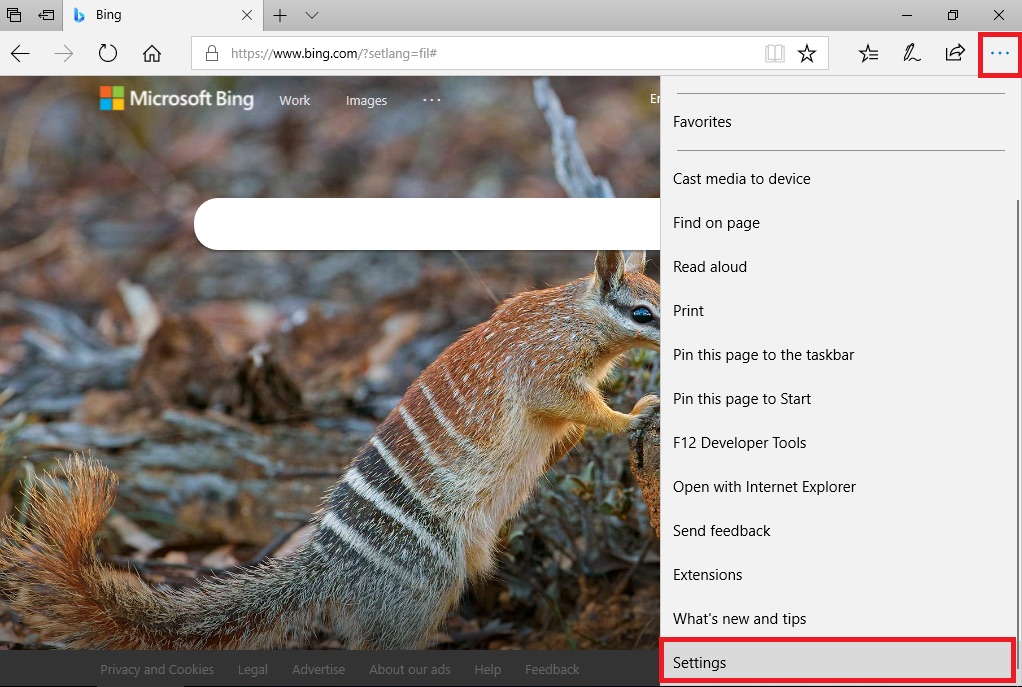
On Microsoft Edge
1. Open Microsoft Edge. 2. Click the 3-dots menu on the upper right corner, then select Settings.
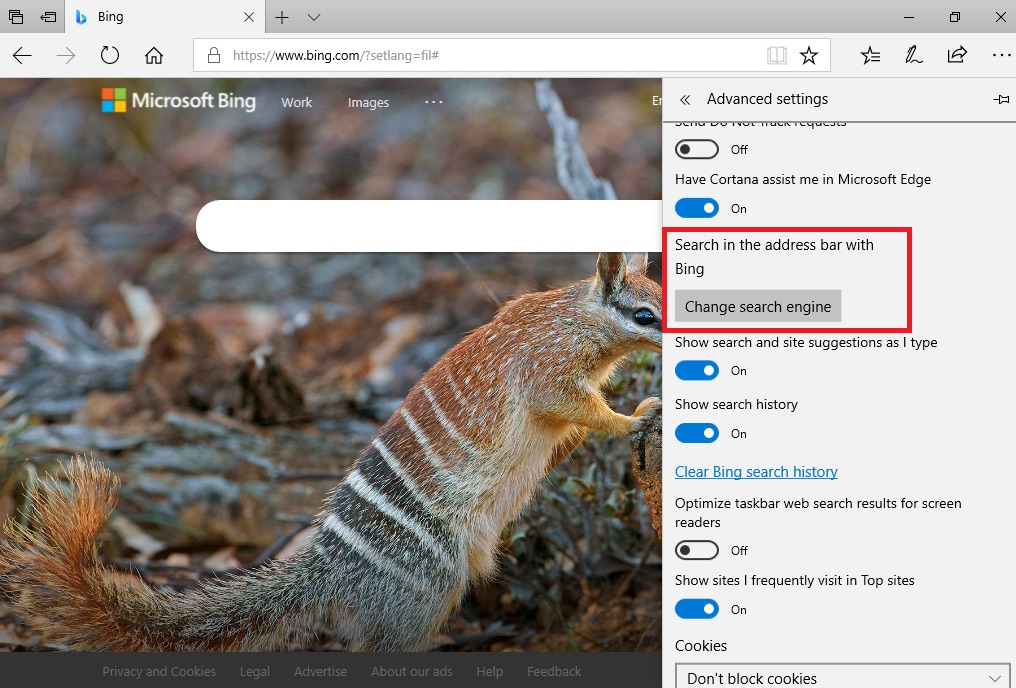
3. Select View Advance Settings and click the Changesearchengine button.
4. Choose your preferred Search Engine then click the Set as default button.
We hope this short guide has helped you get things back to normal! If you’ve found it a useful article, please do SHARE with friends and family.
In the modern world, searching for information is simple. There’s no need to go from one library to another, flipping through numerous pages, or checking the table of contents before you get to what you’re looking for. Simply typing words on the internet will give you limitless results — all you need to do is narrow them down.
What is a Search Engine?
If you need to find something, like a website or page that contains your needed information, you’ll need to go and visit a search engine page to query keywords.
A search engine is a program or application that checks, hunts, and searches the web for sites based on keywords. It uses these keywords and returns pages that are connected to what you have typed.
Search engines use web crawlers or web spiders to catalog the World Wide Web. These crawling bots are used for indexing contents. They will scan, check, assess and inspect site pages and their information across the web.
Notable Search Engines and Their Brief Histories
Archie — During the 1990s, the very first search engine arrived, named Archie. Its purpose was to search FTP sites to create indexes of files that are downloadable.
Veronica and Jughead — Created around 1992/93, they both searched file names and titles in Gopher index systems.
Infoseek — In 1994, Webmasters would submit and provide a page in real-time with this program.
Yahoo Search — Also created in 1994, it created a collection of favorable web pages with description of each website.
Looksmart, Excite and AltaVista — These search engines were created in 1995 and tried to compete with Yahoo.
Backrub — Created around 1996, Google’s initial project, Backrub, was a search engine that utilized backlinks for searches. It ranked pages depending on citations from other sites.
Ask Jeeves — Started in 1996, this search engine used human editors that tried to match search queries.
Google — Officially launched in 1998.
MSN Search — Relied on three different search engines: Looksmart, Overture and Inktomi.
Snap — A somewhat complex search engine, released in 2005, that shows search volumes, revenues and advertisers.
Bing — Rebranded name for MSN/Live Search.
Schema.Org — In 2011, Microsoft, Google and Yahoo collaborated to create Schema.org to create structured internet data.
Top 10 Most Used Search Engines
The following list contains the top ten from across the world:
1. Google:“Just google it” is a ubiquitous expression nowadays. Google is the most popular across all search engines — even more than all others combined. According to statistics, around 78% of desktops and laptops uses Google.
2. Yahoo: In the past, Yahoo had competed with Google. But as the years went on, Yahoo users had declined significantly. Now it is mostly used as a backup search engine in case the dominant one is down.
3. Bing: Microsoft Bing (or just Bing) is owned by Microsoft. Its origin came from MSN Search and Windows Live Search. This search engine is proud of its ‘decision’ engine which provides suggestions on the sides.
4. AOL Search: Known before as American Online Search. This search engine is used mostly by older people accustomed to AOL.
5. Duck Duck Go: Some say that Duck Duck Go is for and by Hipsters. But the main reason users choose this search engine is that it does not track search history and avoids spammy websites.
6. Baidu: This search engine is the 3rd largest out there. Baidu dominates the Chinese market and is the first choice in China. This engine has a sophisticated online censorship system since there’s many restrictions in its operating region.
7. Yandex: If Baidu has China as its market, then Yandex has the Russian market.
8. Ask: Its origin is the older “Ask Jeeves”. Since it could not compete with Google, it’s now powered by Google — if you can’t beat ‘em, join ‘em!
9. Naver: South Korea is another huge tech and communications market with its own search engine, Naver.
10.Seznam: The search engine popular in the Czech Republic and C. Europe.
And some honorable mentions:
Ecosia — Donates surplus income to organizations that plant trees.
Dogpile — Shows results from the top 3 search engines (Google, Bing and Baidu).
Gigablast — An open-source search engine.
Qwant — A popular, EU-based search engine.
Tips For Using Search Engines
Search engines are brilliant tools to immediately get the information we want. However, since search engines generally do not have much security capability, you should invest in a security product to provide and efficient browsing.
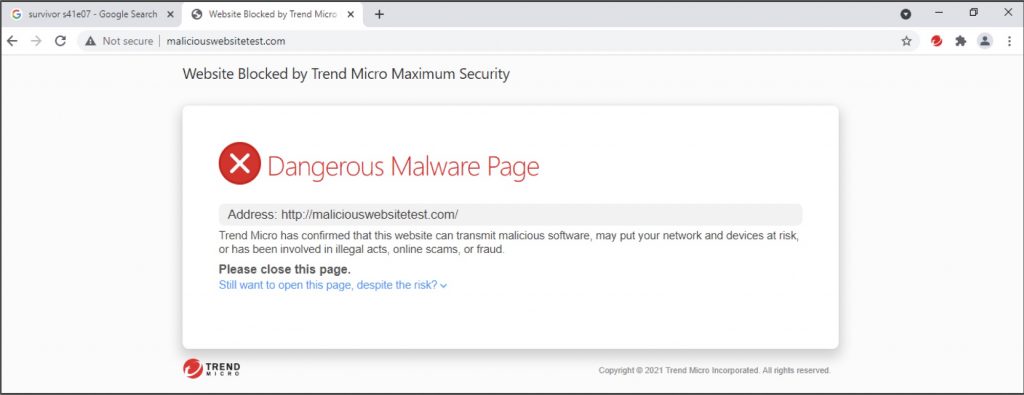
1. Install the Maximum Security tool bar to prevent you from visiting malicious websites.
You can install the Trend Micro Maximum Security toolbar service, which warns you of security risks relevant to the websites you visit.
When you search online, it monitors and rates websites in search engines such as Google, Bing, Baidu, and Yahoo. The Trend Micro Toolbar provides Page Ratings that show if the page is safe, suspicious, dangerous, trusted or untested.
A Mac User? No problem. Trend Micro Antivirus for Mac has the same toolbar feature to protect your online activity.
2. Install AdBlock One to stop annoying ads.
In addition, be sure to also use AdBlock One for Safari. This app stops annoying online ads from bothering you and helps load web pages faster — a significant boost in securing and improving your digital life.
.jpg)