Jasmin Kahriman bitlocker, encryption, security
Jasmin Kahriman is an IT Pro with 15 years of experience. He is deep into data center monitoring, product and customer advocacy, training, and blogging. Check out his blog TechWithJasmin.com, and feel free to connect with Jasmin via LinkedIn.
BitLocker is a security feature that allows you to encrypt your system or data disk and prevent unauthorized access in case of theft. In my view, this is a must-do on your personal or business notebook or workstation.
Improve Active Directory Password Security with Group Policy & Block 3 Billion Compromised Passwords
Download Specops Password PolicyAd
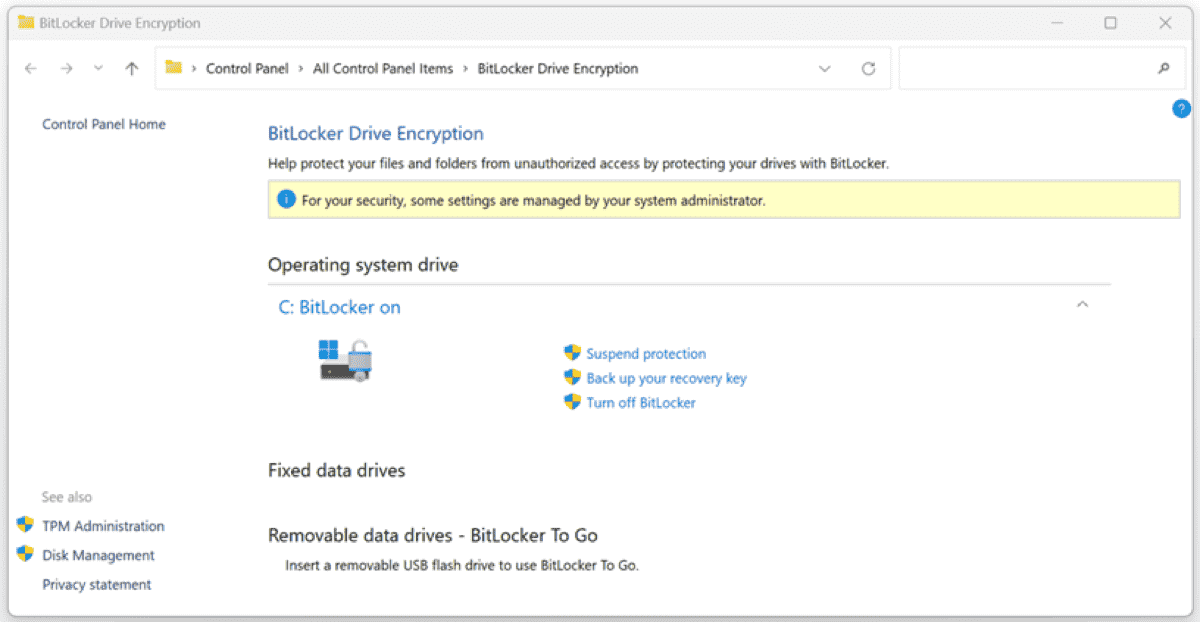
BitLocker drive encryption
BitLocker is available only for Windows 11 Professional or Enterprise Edition.
How to check whether a TPM chip is present
If you want to check whether your machine has a TPM, you can do so by navigating to your machine’s BIOS or UEFI and checking the settings. Another way is to press the Windows key + R and type tpm.msc to open the TPM management console.
Active Directory Management, Automated Provisioning, Delegation, Self-Password Reset
If TPM is not available on your Windows 11 machine, you will see a window like this:
TPM is not available
Note that your Windows 11 system may display the message “Compatible TPM cannot be found.” In this case, it is important to verify whether TPM is available but simply not turned on. To do so, check your system’s BIOS or UEFI settings.
If TPM is available on your Windows 11 machine, you will see a window like this:
TPM is available
Enable BitLocker step-by-step
To make BitLocker work without using TPM on your Windows 11 machine, you need to adjust group policies on your machine. Here is how:
- Press the Windows key + R to open the Run dialog box.
- Type gpedit.msc to open the Local Group Policy Editor and then press Enter.
- Expand Computer Configuration > Administrative Templates > Windows Components > BitLocker Drive Encryption > Operating System Drives.Operating system drives
- Right-click Require additional authentication at startup and then click Edit to modify the policy.Require additional authentication at startup
- Select Enabled and then select Allow BitLocker without a compatible TPM (requires a password or a startup key on a USB flash drive).Allow BitLocker without a compatible TPM
Using BitLocker with a USB drive
In this mode, either a password or a USB drive is required for startup. When using a startup key, the key information used to encrypt the drive is stored on the USB drive, creating a USB key. When the USB key has been inserted, access to the drive is authenticated, and the drive is accessible. If the USB key is lost or unavailable, or if you have forgotten the password, then you will need to use one of the BitLocker recovery options to access the drive.
On a computer with a compatible TPM, four types of authentication methods can be used at startup to provide added protection for encrypted data. When the computer starts, it can use only the TPM for authentication, or it can also require the insertion of a USB flash drive containing a startup key, the entry of a 6- to 20-digit personal identification number (PIN), or both.
- Click Apply and then OK.
- Close the Local Group Policy Editor.
- Open the command prompt (CMD).
- Type gpupdate /force and press Enter to force group policy change.
- Close the CMD.
Configuring BitLocker
You successfully enabled BitLocker on a Windows 11 without a TPM chip.
Now, in the next step, you will need to configure BitLocker. You do this by right-clicking your disk or partition and then clicking Manage BitLocker.
Manage BitLocker
Conclusion
BitLocker is a security feature that allows you to encrypt your disk. To enable it in on Windows 11, you need Windows 11 Professional or Enterprise Edition. By default, Windows 11 requires an integrated TPM chip in your machine. However, with the help of some tweaks in the Local Group Policy Editor, you can enable BitLocker without TPM.
Source :
https://4sysops.com/archives/enable-bitlocker-on-windows-11-without-a-tpm-chip/
 Print
Print