Recent Windows 11 builds come with the Account Lockout Policy policy enabled by default which will automatically lock user accounts (including Administrator accounts) after 10 failed sign-in attempts for 10 minutes.
The account brute forcing process commonly requires guessing the passwords using automated tools. This tactic is now blocked by default on the latest Windows 11 builds (Insider Preview 22528.1000 and newer) after failing to enter the correct password 10 times in a row.
“Win11 builds now have a DEFAULT account lockout policy to mitigate RDP and other brute force password vectors,” David Weston, Microsoft’s VP for Enterprise and OS Security, tweeted Thursday.
“This technique is very commonly used in Human Operated Ransomware and other attacks – this control will make brute forcing much harder which is awesome!”
As Weston also said, brute forcing credentials is a popular tactic among threat actors to breach Windows systems via Remote Desktop Protocol (RDP) when they don’t know the account passwords.
The Account Lockout Policy is also available on Windows 10 systems. However, unfortunately, it’s not enabled by default, allowing attackers to brute force their way into Windows systems with exposed Remote Desktop Protocol (RDP) services.
Admins can configure this policy on Windows 10 in the Group Policy Management Console from Computer Configuration\Policies\Windows Settings\Security Settings\Account Policies\Account Lockout Policy.
This is a crucial security improvement since many RDP servers, especially those used to help teleworkers access corporate assets, are directly exposed to the Internet, exposing the organizations’ network to attacks when poorly configured.
To put things in perspective, attacks targeting RDP services have seen a sharp increase since at least mid-late 2016, starting with the rise in popularity of dark web marketplaces that sell RDP access to compromised networks, per an FBI IC3 report from 2018.
On Windows 11, you can set up a proxy server quite easily. A proxy server is a service that works as a man-in-the-middle between the computer and the internet. When using this feature, the requests you make to websites and other services will be handled by the proxy instead.
Usually, you’d see a proxy configuration in organizations and schools, but anyone can set up a proxy server because of its benefits. Using a proxy helps save data usage and reduce bandwidth use because web requests are cached in the server and then served again when the user requests the same content.
It can increase your privacy by hiding the IP address of the client making an internet request. It can improve security by blocking malicious traffic and logging users’ activities. It can also block sites, by using rules, a company can stop users from accessing social networks and other websites, and much more.
In this guide, you will learn three ways to set up a proxy server on your Windows 11 device without the need for third-party tools. (Just to be clear, in this guide, we’re setting proxy settings to connect to a server, not to set up the actual proxy server.)
The following instructions will apply to Ethernet and Wi-Fi network connections, but these settings won’t work during a VPN session.
To enable automatic configuration for proxy server on Windows 11, use these steps:
Open Settings on Windows 11.
Click on Network & Internet.
Click the Proxy tab.
Turn on the Automatically detect settings toggle switch to set up a proxy server on Windows 11.
Once you complete the steps, Windows 11 will automatically detect the settings using the Web Proxy Auto-Discovery Protocol (WPAD). Organizations and schools typically use this option to automatically configure or change the proxy settings to computers connected to their networks.
If you do not want the computer to detect settings automatically, or you are trying to set up a proxy server manually, you need to turn off the Automatically detect settings toggle switch.
Configure proxy through script on Windows 11
It is also possible to configure a proxy server automatically using the setup script option on Windows 11.
To configure a proxy server using a script, use these steps:
Open Settings.
Click on Network & Internet.
Click the Proxy tab.
Under the “Automatic proxy setup” section, click the “Set up” button for the “Use setup script” setting.
Turn on the Use setup script toggle switch.
Confirm the address of the script (or .pac file).
Click the Save button.
After you complete the steps, Windows 11 will load the proxy configuration from the specified file.
Configure automatic proxy with manual configuration on Windows 11
To set up proxy server settings manually on Windows 11, use these steps:
Open Settings.
Click on Network & Internet.
Click the Proxy tab.
Under the “Manual proxy setup” section, click the “Set up” button for the “Use a proxy server” setting.
Turn on the “Use a proxy server” toggle switch.
In the “Proxy IP address” setting, confirm the address that connects to the proxy server.
In the “Port” setting, confirm the port number required for the proxy to work.
Check the “Don’t use the proxy server for local (intranet) addresses” option.
(Optional) Confirm the addresses that will bypass the proxy in the available section.Quick note: You need to specify these addresses using a semicolon (;) to separate each entry. You can use an asterisk as a wildcard if you have multiple addresses from the same domain. For example, *.website.com will match all the addresses in the asterisk part, including forums.website.com, docs.website.com, etc.
Click the Save button.
Once you complete the steps, the proxy will be configured and the network traffic will automatically pass through the proxy server. However, it is also possible to specify a list of addresses that will not use the proxy.
On Windows 11, a cumulative update (or quality update) is a service patch that Microsoft rolls out proactively to fix bugs, enhance security, and improve system performance. Although updates download automatically through Windows Update, sometimes it may still be necessary to install a specific patch manually.
For instance, after a new installation of Windows 11 or if the computer hasn’t been connected to the internet for some time. If Windows Update isn’t working, it might be necessary to install an update manually to fix the problem. A specific driver needs an update, or you want to upgrade to a newer version of Windows.
Regardless of the reason, Windows 11 has at least four ways to update the system using the Windows Update settings, manual download, Command Prompt, and PowerShell.
Microsoft offers three main types of updates (quality, optional, and feature updates). “Quality updates” are available every month with security and non-security fixes, improvements, and features (occasionally). “Optional updates” are not critical but necessary, and they include drivers and product updates. Finally, “feature updates” are meant to upgrade the device to a newer version (for example, Windows 11 22H2).
In this guide, you will learn six ways to install updates on Windows 11.
To install Windows 11 updates manually with Windows Update, use these steps:
Open Settings on Windows 11.
Click on Windows Update.
Click the Check for updates button.
(Optional) Click the Download and install option to apply a preview of an upcoming update of Windows 11.Quick note: Optional updates usually include non-security changes that Microsoft plans to release in the next Patch Tuesday rollout.
Click the Restart now button.
Once you complete the steps, if an update is available, it will download and install automatically on Windows 11.
Install updates on Windows 11 with Microsoft Update Catalog
To download and install an update manually on Windows 11, use these steps:
Search for the knowledge base number of the update – for example, KB5015814.Quick tip: If you do not know the latest update reference number, you can check the update history tracker.
Click the Download button for the update to install on Windows 11.Quick note: The page usually lists two versions, including ARM64 and x64. Unless you have an ARM-based device, you need to download the x64 version of the cumulative update.
Click the link to download the .msu package to your computer.
Click the Close button.
Double-click the .msu file to launch the installer.
Click the Yes button to install the update on Windows 11.
Click the Restart now button.
After you complete the steps, the cumulative update will apply to Windows 11.
Install updates on Windows 11 with Command Prompt
Windows 11 doesn’t have a Command Prompt tool to check and download updates. However, you can use commands to install update packages manually.
To install Windows 11 updates with Command Prompt, use these steps:
Search for the knowledge base number of the update – for example, KB5015814.
Click the Download button for the cumulative update you want to install.
Click the link to download the .msu package.
Click the Close button.
Open Start.
Search for Command Prompt, right-click the top result, and select the Run as administrator option.
Type the following command to install a new update on Windows 11 and press Enter:wusa c:\PATH\TO\UPDATE.msu /quiet /norestartIn the command, update the path with the location and name of the .msu update package. This example installs the KB5015814 update:wusa c:\Users\USERACCOUNT\Downloads\windows10.0-kb5015814-x64.msu /quiet /norestart
Type the following command to confirm the update was installed correctly and press Enter:wmic qfe list brief /format:table
Type the following command to restart the device and press Enter:shutdown /r /t 00
After you complete the steps, the quality update will install quietly, and the computer will restart to finish applying the changes on Windows 11.
Install updates on Windows 11 with PowerShell
Alternatively, you can also install a PowerShell module to download and install updates on Windows 11.
To install Windows 11 updates with PowerShell, use these steps:
Open Start.
Search for PowerShell, right-click the top result, and select the Run as administrator option.
Type the following command to install the PowerShell module to update Windows 11 and press Enter:Install-Module PSWindowsUpdate
Type Y to accept and press Enter.
Type A to accept and install the module and press Enter.
Type the following command to allow scripts to run on PowerShell and press Enter:Set-ExecutionPolicy RemoteSigned
Type the following command to import the installed module and press Enter:Import-Module PSWindowsUpdate
Type the following command to check for Windows 11 updates with PowerShell and press Enter:Get-WindowsUpdate
Type the following command to select, download, and install a specific update and press Enter:Install-WindowsUpdate -KBArticleID KBNUMBERIn the command, make sure to replace KBNUMBER with the update number you want to install. This example downloads and applies the KB5015814 update for Microsoft Defender:Install-WindowsUpdate -KBArticleID KB5015814
Type A to confirm the installation and press Enter.
(Optional) Type the following command to download and install all available updates and press Enter:Install-WindowsUpdateQuick note: When using this command, you will be applying system updates as well as optional updates that may include driver updates.
Type A to confirm the installation and press Enter.
Type Y to confirm the restart and press Enter (if applicable).
(Optional) Type the following command to view a list of previously installed updates and press Enter:Get-WUHistory
Once you complete the steps, the Windows 11 updates will download and install on your device.
Install optional updates on Windows 11
On Windows 11, optional updates are not critical, but they may be necessary for other functionalities. Typically, these updates are available for Microsoft and other products, feature updates, and third-party drivers (such as printers, cameras, network adapters, graphics cards, and Bluetooth peripherals).
To install optional updates on Windows 11, use these steps:
Open Settings.
Click on Windows Update.
Click the Advanced options tab.
Under the “Additional options” section, click the Optional updates setting.
Click the category to see the optional updates – for example, Driver updates.
Check the optional updates to install on Windows 11.
Click the Download and install button.
After you complete the steps, Windows Update will install the packages on your computer.
Install feature updates on Windows 11
Feature updates refer to new versions of Windows 11 that bring new changes and features. These updates are optional, and you must install them manually unless the current release of Windows 11 is reaching the end of service, in which case the feature update will install automatically.
To install a feature update on Windows 11, use these steps:
Open Settings.
Click on Windows Update.
Click on Check for updates button (if applicable).
Click the Download and Install now button.
Click the Restart now button.
In addition to Windows Update, you can also install feature updates using the Installation Assistant or the official ISO file to perform an in-place upgrade.
ChromeOS Flex is a lightweight operating system from Google, which you can install on Windows, Mac, and Linux computers with older hardware, such as an old laptop or desktop computer. The operating system is based on Linux which uses web apps and the Chrome browser as the main interface.
The operating system also gives you security protection from threats such as malware and ransomware, and users will get a fast and modern work environment with background updates reducing downtime while boosting productivity.
Although Google offers many Chromebooks from different manufacturers that come preloaded with ChromeOS, the company now provides the ChromeOS Flex variant to give old computers a second life, especially for devices not compatible with Windows 11.
This guide will teach you the steps to install ChromeOS Flex on an old Windows-based computer.
Although Google only supports specific devices, you can still install the operating system on virtually any hardware as long as it meets the minimum requirements:
Processor: Intel or AMD x86-64-bit.
Memory: 4GB.
Storage: 16GB.
The requirements to run ChromeOS Flex are minimal, but Google says that processors and graphics made before 2010 may result in a poor user experience.
Aside from system requirements, you will also need a USB flash drive of at least 8GB to create the installation media.
Create ChromeOS Flex USB flash media
To create a ChromeOS Flex installation media, connect a USB flash drive of 8GB, and use these steps:
Click the Extension button and select the Chromebook Recovery Utility extension.
Click the Get started button.
Select the Google ChromeOS Flex option.
Select the ChromeOS Flex option.
Click the Continue button.
Select the USB flash media from the list.
Click the Continue button.
Click the Create now button.
Click the Done button.
Once you complete the steps, you can proceed with the clean installation of ChromeOS Flex.
Install ChromeOS Flex
To install ChromeOS Flex on a Windows device, use these steps:
Start the laptop with the ChromeOS Flex USB.Quick note: If the computer can’t boot from USB, you may need to update the BIOS/UEFI settings. This process usually requires pressing one of the function keys (F1, F2, F3, F10, or F12), the ESC, or the Delete key. For more accurate instructions, visit your PC manufacturer’s support website.
Click the Get Started button.
Select the “Try it first” option.Quick note: In this guide, we’ll use the “Try it first” option, but if you plan to dedicate the device to the operating system, select the “Install CloudReady 2.0” option.
Click the Next button.
Select the wireless network.
Confirm the Wi-Fi password.
Click the Connect button.
Click the Accept and continue button.
Select the You option to create an account.
Click the Next button.
Confirm your Gmail account.
Click the Next button.
Confirm the account password.
Click the Next button.
Complete the account verification.
Click the Next button.
Click the Accept and continue button.
After you complete the steps, the operating system will install on the computer.
Windows Update is an essential component of Windows 10, as it provides the ability to download and install the latest updates with bug fixes, security patches, and drivers. Also, it is the mechanism to download new feature updates and preview builds. However, there will be times when your device may not download or install updates because of a specific error message, Windows Update not connecting to the Microsoft servers and other problems.
Typically, users may encounter this type of problem when the Windows Update agent-related services stop working, Windows 10 has an issue with the update cache, or some components get corrupted. You can reset Windows Update on Windows 10 to fix most problems in these situations.
In this guide, you will learn the steps to reset the Windows Update components using the “Windows Update Troubleshooter” utility. Also, you will learn the instructions to use Command Prompt to fix Windows Update manually to get security patches, drivers, and features downloading again on your computer. However, before using the Command Prompt option, make sure to use the instructions to install the most recent update manually, Service Stack Update (SSU), and repair system files first.
In the left pane, browse the latest update for your version of Windows 10 and note the update’s KB number.Quick tip: You can check your current version on Settings > System > About, and under the “Windows Specifications” section, confirm the version information.
Search for the knowledge base (KB) number of the update.Download Windows Update manually
Download the update for the version of Windows 10 that you have (32-bit (x86) or 64-bit (x64)).
Double-click the file to install the update.
Restart the computer.
Once you complete the steps, the device should have the latest update installed. The update should have also fixed the problem with Windows Update. You can check by clicking the Check for updates button on the Windows Update settings page.
How to fix Windows Update installing latest Servicing Stack Update (SSU)
To make sure the computer has the most recent Servicing Stack Update to fix Windows Update problems, use these steps:
Open Settings.
Click on System.
Click on About.
Under the “System type” section, check whether you have the 32-bit or 64-bit version of Windows 10.Windows 10 architecture settings
Download the most recent Servicing Stack Update for the version you have (32-bit (x86) or 64-bit (x64)).
Double-click the file to install the update.
Restart your computer.
After you restart the computer, you should now be able to download and install the update using the Settings app.
How to fix Windows Update repairing corrupted system files
To repair system files using the Deployment Image Servicing and Management (DISM) and System File Checker (SFC) tools to fix Windows Update problems, use these steps:
Open Start.
Search for Command Prompt, right-click the top result, and select the Run as administrator option.
Type the following DISM command to repair corrupted system files and press Enter:dism.exe /Online /Cleanup-image /Restorehealth
Type the following SFC command to repair system files and press Enter:sfc /scannowWindows Update dism and sfc repair
After you complete the steps, the Windows Update components should start working again, and you can check for updates again to verify.
How to reset Windows Update using Command Prompt
To reset Windows Update manually using Command Prompt on Windows 10, use these steps:
Open Start.
Search for Command Prompt, right-click the top result, and select the Run as administrator option.
Type the following commands to stop the Background Intelligent Transfer Service (BITS), Windows Update service, and Cryptographic service, and press Enter on each line:net stop bits net stop wuauserv net stop appidsvc net stop cryptsvcStop Windows Update servicesQuick tip: You may need to run the command more than once until you see the message that the service has stopped successfully.
Type the following command to delete all the qmgr*.dat files created by BITS from your PC. and press Enter:Del “%ALLUSERSPROFILE%\Application Data\Microsoft\Network\Downloader\*.*”Reset Windows Update commands
Type Y to confirm the deletion.
Type the following commands to clear the Windows Update cache to allow Windows 10 to re-download the updates, instead of using the files already downloaded on the system that might be damaged and press Enter on each line:rmdir %systemroot%\SoftwareDistribution /S /Q rmdir %systemroot%\system32\catroot2 /S /QQuick tip: We use the remove directory rmdir command with the /S option to delete the specified directory and all subdirectories within the main folder, and the /Q option deletes directories quietly without confirmation. If you get the message “The process cannot access the file because it is being used by another process,” then repeat step No. 1 and try again, as one of the services might have restarted unexpectedly.
Type the following commands to reset the BITS and Windows Update services to their default security descriptor, and press Enter on each line:sc.exe sdset bits D:(A;;CCLCSWRPWPDTLOCRRC;;;SY)(A;;CCDCLCSWRPWPDTLOCRSDRCWDWO;;;BA)(A;;CCLCSWLOCRRC;;;AU)(A;;CCLCSWRPWPDTLOCRRC;;;PU) sc.exe sdset wuauserv D:(A;;CCLCSWRPWPDTLOCRRC;;;SY)(A;;CCDCLCSWRPWPDTLOCRSDRCWDWO;;;BA)(A;;CCLCSWLOCRRC;;;AU)(A;;CCLCSWRPWPDTLOCRRC;;;PU)
Type the following command to move to the System32 folder and press Enter:cd /d %windir%\system32
Type the following commands to register all the corresponding BITS and Windows Update DLL files on the Registry and press Enter on each line:regsvr32.exe /s atl.dll regsvr32.exe /s urlmon.dll regsvr32.exe /s mshtml.dll regsvr32.exe /s shdocvw.dll regsvr32.exe /s browseui.dll regsvr32.exe /s jscript.dll regsvr32.exe /s vbscript.dll regsvr32.exe /s scrrun.dll regsvr32.exe /s msxml.dll regsvr32.exe /s msxml3.dll regsvr32.exe /s msxml6.dll regsvr32.exe /s actxprxy.dll regsvr32.exe /s softpub.dll regsvr32.exe /s wintrust.dll regsvr32.exe /s dssenh.dll regsvr32.exe /s rsaenh.dll regsvr32.exe /s gpkcsp.dll regsvr32.exe /s sccbase.dll regsvr32.exe /s slbcsp.dll regsvr32.exe /s cryptdlg.dll regsvr32.exe /s oleaut32.dll regsvr32.exe /s ole32.dll regsvr32.exe /s shell32.dll regsvr32.exe /s initpki.dll regsvr32.exe /s wuapi.dll regsvr32.exe /s wuaueng.dll regsvr32.exe /s wuaueng1.dll regsvr32.exe /s wucltui.dll regsvr32.exe /s wups.dll regsvr32.exe /s wups2.dll regsvr32.exe /s wuweb.dll regsvr32.exe /s qmgr.dll regsvr32.exe /s qmgrprxy.dll regsvr32.exe /s wucltux.dll regsvr32.exe /s muweb.dll regsvr32.exe /s wuwebv.dllQuick note: The regsvr32 helps to register “.DLL” files as command components in the Registry, and we use the /S option to specify the tool to run the command silently without prompting additional messages.
Type the following commands to reset the network configurations that might be part of the problem (but do not restart your computer just yet), and press Enter on each line:netsh winsock reset netsh winsock reset proxyReset network adapter on Windows 10
Type the following commands to restart the BITS, Windows Update, and Cryptographic services, and press Enter on each line:net start bits net start wuauserv net start appidsvc net start cryptsvc
Restart the computer.
Once you complete the steps, Windows Update should have reset, and it should be working again on your Windows 10 device.
You can also use the above instructions to fix the update problems when Surface Pro 8, Pro 7, Laptop 4, Studio, or any other Surface cannot seem to download a new firmware update.
The UEFI firmware used in several laptops made by Lenovo is vulnerable to three buffer overflow vulnerabilities that could enable attackers to hijack the startup routine of Windows installations.
Lenovo has issued a security advisory disclosing three medium severity vulnerabilities tracked as CVE-2022-1890, CVE-2022-1891, and CVE-2022-1892.
The first is an issue in the ReadyBootDxe driver used in some Lenovo notebook products, while the last two are buffer overflow bugs in the SystemLoadDefaultDxe driver.
This second driver is used in the Yoga, IdeaPad, Flex, ThinkBook, V14, V15, V130, Slim, S145, S540, and S940 Lenovo lines, affecting over 70 individual models.
According to ESET, whose analysts discovered the three bugs and reported them to Lenovo, an attacker could leverage them to hijack the OS execution flow and disable security features.
“These vulnerabilities were caused by insufficient validation of DataSize parameter passed to the UEFI Runtime Services function GetVariable,” explains ESET Research in a tweet.
“An attacker could create a specially crafted NVRAM variable, causing buffer overflow of the Data buffer in the second GetVariable call.”
Variable to trigger exploitation of CVE-2022-1892(ESET Research)
To help the cybersecurity community identify and fix similar issues, ESET submitted code improvements to Binarly’s UEFI firmware analyzer ‘efiXplorer,’ which is freely available on GitHub.
Hijacking the OS
UEFI firmware attacks are extremely dangerous because they enable threat actors to run malware early in an operating system’s boot process, even before Windows built-in security protections are activated.
This early level of access allows the malware to bypass or disable OS-level security protections, evade detection, and persist even after a disk is formatted.
While low-skilled remote actors can’t easily exploit these flaws, more capable hackers with access (malware or hands-on) to a targeted machine could leverage the vulnerabilities for silent yet ultra-powerful compromises.
To address the security risk, users of the affected devices are recommended to download the latest available driver version for their products which can be found on Lenovo’s official software download portal.
If you have trouble determining what model you’re using, Lenovo offers an automatic online detector that you can use instead.
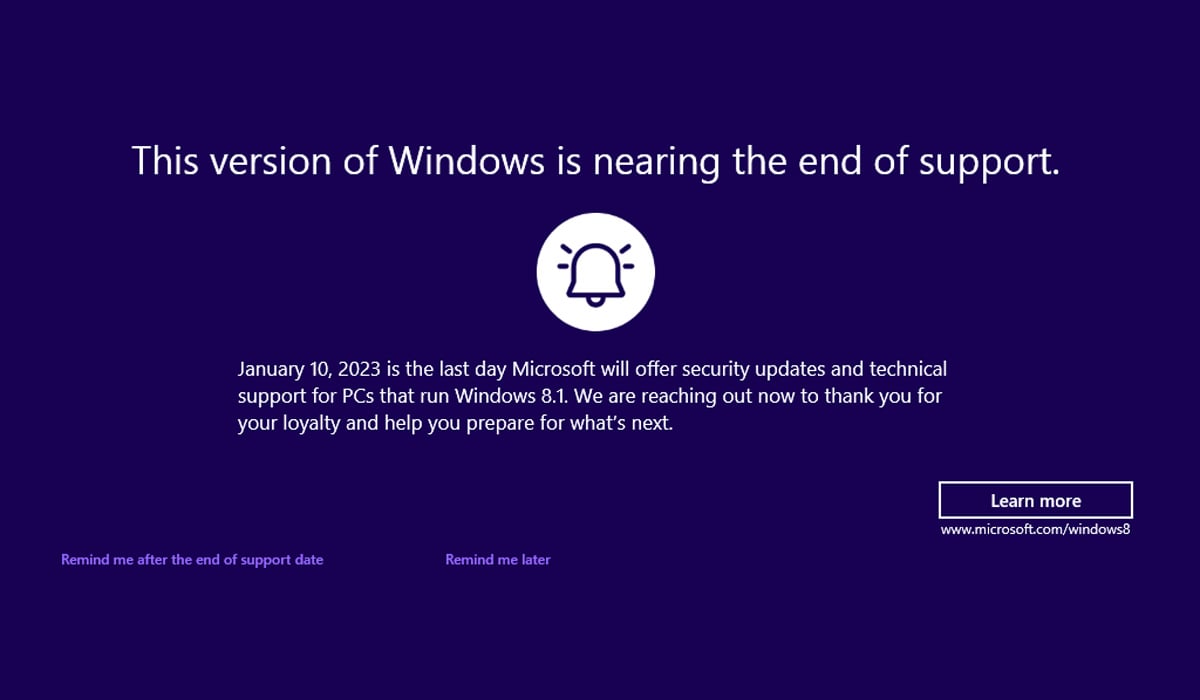
Windows 8.1 is now displaying full-screen alerts when logging into the operating system, warning that the OS is reaching the end of support in January 2023 and will no longer receive security updates.
The notification was introduced yesterday as part of the Windows 8.1 KB5015874 cumulative update, which includes a new EOSnotify.exe program to display a warning that the operating system will soon be unsupported.
“January 10, 2023 is the last day Microsoft will offer security updates and technical support for PCs that run Windows 8.1. We are reaching out now to thank you for your loyalty and help you prepare for what’s next,” reads the Windows 8.1 notification below.
When displaying the notification, users can click on the ‘Remind me later’ option, which will cause the notification to be shown again in 35 days. Users can also click on the ‘Remind me after the end of support date’ option to only show the notification after Windows 8.1 reaches the end of support.
Clicking on the ‘Learn More’ link will bring people to a Microsoft.com web page explaining that Windows 8.1 will soon reach the end of support.
Microsoft states that the notification will not appear on managed Pro and Enterprise devices, as well as Windows Embedded 8.1 Industry Enterprise and Windows Embedded 8.1 Industry Pro devices.
About EOSnotify.exe
Like the Windows 7 full-screen notifications warning users to upgrade to Windows 10, the new Windows 8.1 notifications use Microsoft’s EOSnotify program.
EOSNotify.exe is located under the C:\Windows\System32 folder and is launched via two scheduled tasks named EOSNotify and EOSNotify2.
The EOSNotify task is launched any time a user logs into Windows, and the EOSNotify2 is run once a day.
When the EOSNotify.exe program runs, it will check the LastRunTimestamp value under the HKEY_CURRENT_USER\Software\Microsoft\Windows\CurrentVersion\EOSNotify key, and if it has already run that day, it will not show the alert.
When a user clicks on the ‘Remind Me Later‘ link in the notification, EOSNotify.exe will create the ‘RemindMeLater‘ value and set it to 1 to indicate that Windows should not show the alert again for another 35 days.
If a user clicks on the ‘Remind me after the end of support date’ link, EOSNotify will create the ‘RemindMeAfterEndOfSupport‘ value and set it to 1, causing the notification only to be shown again after Windows 8.1 reaches end of support on January 10th, 2023.
Finally, it is possible to prevent the notification from displaying at all by configuring the ‘DiscontinueEOS‘ value, as shown below.
Microsoft uncovered a vulnerability in macOS that could allow specially crafted codes to escape the App Sandbox and run unrestricted on the system. We shared these findings with Apple through Coordinated Vulnerability Disclosure (CVD) via Microsoft Security Vulnerability Research (MSVR) in October 2021. A fix for this vulnerability, now identified as CVE-2022-26706, was included in the security updates released by Apple on May 16, 2022. Microsoft shares the vulnerability disclosure credit with another researcher, Arsenii Kostromin (0x3c3e), who discovered a similar technique independently.
We encourage macOS users to install these security updates as soon as possible. We also want to thank the Apple product security team for their responsiveness in fixing this issue.
The App Sandbox is Apple’s access control technology that application developers must adopt to distribute their apps through the Mac App Store. Essentially, an app’s processes are enforced with customizable rules, such as the ability to read or write specific files. The App Sandbox also restricts the processes’ access to system resources and user data to minimize the impact or damage if the app becomes compromised. However, we found that specially crafted codes could bypass these rules. An attacker could take advantage of this sandbox escape vulnerability to gain elevated privileges on the affected device or execute malicious commands like installing additional payloads.
We found the vulnerability while researching potential ways to run and detect malicious macros in Microsoft Office on macOS. For backward compatibility, Microsoft Word can read or write files with an “~$” prefix. Our findings revealed that it was possible to escape the sandbox by leveraging macOS’s Launch Services to run an open –stdin command on a specially crafted Python file with the said prefix.
Our research shows that even the built-in, baseline security features in macOS could still be bypassed, potentially compromising system and user data. Therefore, collaboration between vulnerability researchers, software vendors, and the larger security community remains crucial to helping secure the overall user experience. This includes responsibly disclosing vulnerabilities to vendors.
In addition, insights from this case study not only enhance our protection technologies, such as Microsoft Defender for Endpoint, but they also help strengthen the security strategies of software vendors and the computing landscape at large. This blog post thus provides details of our research and overviews of similar sandbox escape vulnerabilities reported by other security researchers that helped enrich our analysis.
How macOS App Sandbox works
In a nutshell, macOS apps can specify sandbox rules for the operating system to enforce on themselves. The App Sandbox restricts system calls to an allowed subset, and the said system calls can be allowed or disallowed based on files, objects, and arguments. Simply put, the sandbox rules are a defense-in-depth mechanism that dictates the kind of operations an application can or can’t do, regardless of the type of user running it. Examples of such operations include:
the kind of files an application can or can’t read or write;
whether the application can access specific resources such as the camera or the microphone, and;
whether the application is allowed to perform inbound or outbound network connections.
Figure 1. Illustration of a sandboxed app, from the App Sandbox documentation (photo credit: Apple)
Therefore, the App Sandbox is a useful tool for all macOS developers in providing baseline security for their applications, especially for those that have large attack surfaces and run user-provided code. One example of these applications is Microsoft Office.
Sandboxing Microsoft Office in macOS
Attackers have targeted Microsoft Office in their attempts to gain a foothold on devices and networks. One of their techniques is abusing Office macros, which they use in social engineering attacks to trick users into downloading malware and other payloads.
On Windows systems, Microsoft Defender Application Guard for Office helps secure Microsoft Office against such macro abuse by isolating the host environment using Hyper-V. With this feature enabled, an attacker must first be equipped with a Hyper-V guest-to-host vulnerability to affect the host system—a very high bar compared to simply running a macro. Without a similar isolation technology and default setting on macOS, Office must rely on the operating system’s existing mitigation strategies. Currently, the most promising technology is the macOS App Sandbox.
Viewing the Microsoft sandbox rules is quite straightforward with the codesign utility. Figure 2 below shows the truncated sandbox rules for Microsoft Word:
Figure 2. Viewing the Microsoft Word sandbox rules with the codesign utility
One of the rules dictates the kind of files the application is allowed to read or write. As seen in the screenshot of the syntax below, Word is allowed to read or write files with filenames that start with the “~$” prefix. The reason for this rule is rooted in the way Office works internally and remains intact for backward compatibility.
Figure 3. File read and write sandbox rule for Microsoft Word
Despite the security restrictions imposed by the App Sandbox’s rules on applications, it’s possible for attackers to bypass the said rules and let malicious codes “escape” the sandbox and execute arbitrary commands on an affected device. These codes could be hidden in a specially crafted Word macro, which, as mentioned earlier, is one of the attackers’ preferred entry points.
For example, in 2018, MDSec reported a vulnerability in Microsoft Office on macOS that could allow an attacker to bypass the App Sandbox. As explained in their blog post, MDSec’s proof-of-concept (POC) exploit took advantage of the fact that Word could drop files with arbitrary contents to arbitrary directories (even after passing traditional permission checks), as long as these files’ filenames began with a “~$” prefix. This bypass was relatively straightforward: have a specially crafted macro drop a .plist file in the user’s LaunchAgents directory.
The LaunchAgents directory is a well-known persistence mechanism in macOS. PLIST files that adhere to a specific structure describe (that is, contain the metadata of) macOS launch agents initiated by the launchd process when a user signs in. Since these launch agents will be the children of launchd, they won’t inherit the sandbox rules enforced onto Word, and therefore will be out of the Office sandbox.
Shortly after the above vulnerability was reported, Microsoft deployed a fix that denied file writes to the LaunchAgents directory and other folders with similar implications. The said disclosure also prompted us to look into different possible sandbox escapes in Microsoft Word and other applications.
Exploring Launch Services as means of escaping the sandbox
In 2020, several blog posts described a generic sandbox escape vulnerability in macOS’s /usr/bin/open utility, a command commonly used to launch files, folders, and applications just as if a user double-clicked them. While open is a handy command, it doesn’t create child processes on its own. Instead, it performs an inter-process communication (IPC) with the macOS Launch Services, whose logic is implemented in the context of the launchd process. Launch Services then performs the heavy lifting by resolving the handler and launching the right app. Since launchd creates the process, it’s not restricted by the caller’s sandbox, similar to how MDSec’s POC exploit worked in 2018.
However, using open for sandbox escape purposes isn’t trivial because the destination app must be registered within Launch Services. This means that, for example, one couldn’t run files like osascript outside the sandbox using open. Our internal offensive security team therefore decided to reassess the open utility for sandbox escape purposes and use it in a larger end-to-end attack simulation.
Our obvious first attempt in creating a POC exploit was to create a macro that launches a shell script with the Terminal app. Surprisingly, the POC didn’t work because files dropped from within the sandboxed Word app were automatically given the extended attribute com.apple.quarantine (the same one used by Safari to keep track of internet-downloaded files, as well as by Gatekeeper to block malicious files from executing), and Terminal simply refused to run files with that attribute. We also tried using Python scripts, but the Python app had similar issues running files having the said attribute.
Our second attempt was to use application extensibility features. For example, Terminal would run the default macOS shell (zsh), which would then run arbitrary commands from files like ~/.zshenv before running its own command line. This meant that dropping a .zshenv file in the user’s home directory and launching the Terminal app would cause the sandbox escape. However, due to Word’s sandbox rules, dropping a .zshenv file wasn’t straightforward, as the rules only allowed an application to write to files that begin with the “~$” prefix.
However, there is an interesting way of writing such a file indirectly. macOS was shipped with an application called Archive Utility responsible of extracting archive files (such as ZIP files). Such archives were extracted without any user interaction, and the files inside an archive were extracted in the same directory as the archive itself. Therefore, our second POC worked as follows:
Prepare the payload by creating a .zshenv file with arbitrary commands and placing it in a ZIPfile. Encode the ZIPfile contents in a Word macro and drop those contents into a file “~$exploit.zip” in the user’s home directory.
Launch Archive Utility with the open command on the “~$exploit.zip” file. Archive Utility ran outside the sandbox (since it’s the child process of /usr/bin/open) and was therefore permitted to create files with arbitrary names. By default, Archive Utility extracted the files next to the archive itself—in our case, the user’s home directory. Therefore, this step successfully created a .zshenv file with arbitrary contents in the user’s home directory.
Launch the Terminal app with the open command. Since Terminal hosted zsh and zsh ran commands from the .zshenv file, the said file could escape the Word sandbox successfully.
Figure 4. Preparing a Word macro with our sandbox escape for an internal Red Team operation
Perception Point’s CVE-2021-30864
In October 2021, Perception Point published a blog post that discussed a similar finding (and more elegant, in our opinion). In the said post, Perception Point released details about their sandbox escape (now identified as CVE-2021-30864), which used the following facts:
Every sandboxed process had its own container directory that’s used as a “scratch space.” The sandboxed process could write arbitrary files, including arbitrary filenames, to that directory unrestricted.
The open command had an interesting –env option that could set or override arbitrary environment variables for the launched app.
Therefore, Perception Point’s POC exploit was cleverly simple:
Drop a .zshenv file in the container directory. This was allowed because sandbox rules weren’t enforced on that directory.
Launch Terminal with the open command but use the –env option to override the HOME environment variable to point to the container directory. This made zsh consider the user’s home directory to be the container directory, and run commands from the planted .zshenv file.
Apple has since patched the vulnerability Perception Point reported in the latest version of macOS, Monterey. While we could still create the “~$exploit.zip” file in the user’s home directory, using open to launch the Archive Utility on the ZIP file now resulted in it being extracted to the Downloads folder. While this is an interesting behavior, we could no longer use it for sandbox escape purposes.
Final exploit attempt: Revisiting the ‘open’ command
After discovering that Apple has fixed both variants that abuse .zshenv, , we decided to examine all the command line options of the open command. Soon after, we came across the following:
Figure 5. The –stdin option in the open utility as presented by its manual entry
As mentioned earlier, we couldn’t run Python with a dropped .py file since Python refuses to run files with the “com.apple.quarantine” extended attribute. We also considered abusing the PYTHONSTARTUP environment variable, but Apple’s fix to CVE-2021-30864 apparently prevented that option, too. However, –stdin bypassed the “com.apple.quarantine” extended attribute restriction, as there was no way for Python to know that the contents from its standard input originated from a quarantined file.
Our POC exploit thus became simply as follows:
Drop a “~$exploit.py” file with arbitrary Python commands.
Run open –stdin=’~$exploit.py’ -a Python, which runs the Python app with our dropped file serving as its standard input. Python happily runs our code, and since it’s a child process of launchd, it isn’t bound to Word’s sandbox rules.
Figure 6. Sample minimal POC exploit code
We also came up with a version that’s short enough to be a Twitter post:
Figure 7. “Tweetable” POC exploit
Detecting App Sandbox escapes with Microsoft Defender for Endpoint
Since our initial discovery of leveraging Launch Services in macOS for generic sandbox escapes, we have been using our POC exploits in Red Team operations to emulate end-to-end attacks against Microsoft Defender for Endpoint, improve its capabilities, and challenge our detections. Shortly after our Red Team used our first POC exploit, our Blue Team members used it to train artificial intelligence (AI) models to detect our exploit not only in Microsoft Office but also on any app used for a similar Launch Services-based sandbox escape.
After we learned of Perception Point’s technique and created our own new exploit technique (the Python POC), our Red Team saw another opportunity to fully test our own detection durability. Indeed, the same set of detection rules that handled our first sandbox escape vulnerability still turned out to be durable—even before the vulnerability related to our second POC exploit was patched.
Figure 8. Microsoft Defender for Endpoint detecting Office sandbox escape
For Defender for Endpoint customers, such detection durability feeds into the product’s threat and vulnerability management capabilities, which allows them to quickly discover, prioritize, and remediate misconfigurations and vulnerabilities—including those affecting non-Windows devices—through a unified security console.
Although there is a greater awareness of cybersecurity threats than ever before, it is becoming increasingly difficult for IT departments to get their security budgets approved. Security budgets seem to shrink each year and IT pros are constantly being asked to do more with less. Even so, the situation may not be hopeless. There are some things that IT pros can do to improve the chances of getting their security budgets approved.
Presenting the Problem in a Compelling Way
If you want to get your proposed security budget approved, you will need to present security problems in a compelling way. While those who are in charge of the organization’s finances are likely aware of the need for good security, they have probably also seen enough examples of “a security solution in search of a problem” to make them skeptical of security spending requests. If you want to persuade those who control the money, then you will need to convince them of three things:
You are trying to protect against a real issue that presents a credible threat to the organization’s wellbeing.
Your proposed solution will be effective and that it isn’t just a “new toy for the IT department to play with”
Your budget request is both realistic and justified.
Use Data to Your Advantage
One of the best ways to convince those who are in charge that there is a credible cyber threat against the organization is to provide them with quantifiable metrics. Don’t resort to gathering statistics from the Internet. Your organization’s financial staff is probably smart enough to know that most of those statistics are manufactured by security companies who are trying to sell a product or service. Instead, gather your own metrics from inside your organization by using tools that are freely available for download.
Specops for example, offers a free Password Auditor that can generate reports demonstrating the effectiveness of your organization’s password policy and existing password security vulnerabilities. This free tool can also help you to identify other vulnerabilities, such as accounts that are using passwords that are known to have been leaked or passwords that do not adhere to compliance standards or industry best practices.
Example of Specops Password Auditor results in an Active Directory environment
Of course, this is just one of the many free security tools that are available for download. In any case, it is important to use metrics from within your own organization to demonstrate the fact that the security problem that you are trying to solve is real.
Highlight What a Solution Would Do
Once you demonstrate the problem to those who are in charge of the organization’s finances, do not make the mistake of leaving them guessing as to how you are planning on solving the problem. Be prepared to clearly explain what tools you are planning on using, and how those tools will solve the problem that you have demonstrated.
It’s a good idea to use visuals to demonstrate the practicality of your proposed solution. Be sure to explain how the problem is solved in non-technical language and enhance your argument with examples that are specific to your organization.
Estimated Time of Implementation and Seeing Results
We have probably all heard horror stories of IT projects that have gone off the rails. Organizations sometimes spend millions of dollars and invest years of planning into IT projects that never ultimately materialize. That being the case, it is important to set everyone’s mind at ease by showing them exactly how long it will take to get your proposed solution up and running and then how much additional time will be needed in order to achieve the desired result.
When you are making these projections, be careful to be realistic and not to make promises based on an overly ambitious implementation schedule. You should also be prepared to explain how you arrived at your projection. Keep in mind upcoming projects, company-wide goals, and fiscal year ideals when factoring in timing.
Demonstrate the Estimated Savings
Although security is of course a concern for most organizations, those who are in charge of an organization’s finances typically want to see some sort of return on investment. As such, it is important to consider how your proposed solution might save the company money. A few ideas might include:
Saving the IT department time, thereby reducing the number of overtime hours worked
Avoiding a regulatory penalty that could cost the organization a lot of money
Bringing down insurance premiums because data is being better protected
Of course, these are just ideas. Every situation is different, and you will need to consider how your security project can produce a return on investment given your own unique circumstances. It is important to include a cost-saving element for clarity sake, even if it is citing the average cost of a data breach in your industry.
Show You’ve Done Your Homework with a Pricing Comparison
As you pitch your proposed solution, stakeholders are almost certain to ask whether there might be a less expensive product that would accomplish your objectives. As such, it’s important to spend some time researching the solutions offered by competing vendors. Here are a few things that you should be prepared to demonstrate:
The total cost for implementing each potential solution (this may include licensing, labor, support, and hardware costs)
Why you are proposing a particular solution even if it is not the least expensive
If your solution is the least expensive, then be prepared to explain what you might be giving up by using the cheapest vendor.
What each vendor offers relative to the others
A Few Quick Tips
As you make your budgetary pitch, keep in mind that those to whom you are presenting likely have a limited understanding of IT concepts. Avoid using unnecessary technical jargon and be prepared to clearly explain key concepts, but without sounding condescending in the process.
It’s also smart to anticipate any questions that may be asked of you and have answers to those questions ready to go. This is especially true if there is a particular question that makes you a little bit uncomfortable.
Present your information clearly, confidently, and in a concise manner (I.e., make it quick!) so you can make your case without wasting time.
A group of academics from the New Jersey Institute of Technology (NJIT) has warned of a novel technique that could be used to defeat anonymity protections and identify a unique website visitor.
“An attacker who has complete or partial control over a website can learn whether a specific target (i.e., a unique individual) is browsing the website,” the researchers said. “The attacker knows this target only through a public identifier, such as an email address or a Twitter handle.”
The cache-based targeted de-anonymization attack is a cross-site leak that involves the adversary leveraging a service such as Google Drive, Dropbox, or YouTube to privately share a resource (e.g., image, video, or a YouTube playlist) with the target, followed by embedding the shared resource into the attack website.
This can be achieved by, say, privately sharing the resource with the target using the victim’s email address or the appropriate username associated with the service and then inserting the leaky resource using an <iframe> HTML tag.
In the next step, the attacker tricks the victim into visiting the malicious website and clicking on the aforementioned content, causing the shared resource to be loaded as a pop-under window (as opposed to a pop-up) or a browser tab — a method that’s been used by advertisers to sneakily load ads.
This exploit page, as it’s rendered by the target’s browser, is used to determine if the visitor can access the shared resource, successful access indicating that the visitor is indeed the intended target.
The attack, in a nutshell, aims to unmask the users of a website under the attacker’s control by connecting the list of accounts tied to those individuals with their social media accounts or email addresses through a piece of shared content.
In a hypothetical scenario, a bad actor could share a video hosted on Google Drive with a target’s email address, and follow it up by inserting this video in the lure website. Thus when visitors land on the portal, a successful loading of the video could be used as a yardstick to infer if their victim is one among them.
The attacks, which are practical to exploit across desktop and mobile systems with multiple CPU microarchitectures and different web browsers, are made possible by means of a cache-based side channel that’s used to glean if the shared resource has been loaded and therefore distinguish between targeted and non-targeted users.
Put differently, the idea is to observe the subtle timing differences that arise when the shared resource is being accessed by the two sets of users, which, in turn, occurs due to differences in the time it takes to return an appropriate response from the web server depending on the user’s authorization status.
The attacks also take into account a second set of differences on the client-side that happens when the web browser renders the relevant content or error page based on the response received.
“There are two main causes for differences in the observed side channel leakages between targeted and non-targeted users – a server-side timing difference and a client-side rendering difference,” the researchers said.
While most popular platforms such as those from Google, Facebook, Instagram, LinkedIn, Twitter, and TikTok were found susceptible, one notable service that’s immune to the attack is Apple iCloud.
It’s worth pointing out the de-anonymization method banks on the prerequisite that the targeted user is already logged in to the service. As mitigations, the researchers have released a browser extension called Leakuidator+ that’s available for Chrome, Firefox, and Tor browsers.
To counter the timing and rendering side channels, website owners are recommended to design web servers to return their responses in constant time, irrespective of whether the user is provisioned to access the shared resource, and make their error pages as similar as possible to the content pages to minimize the attacker-observable differences.
“As an example, if an authorized user was going to be shown a video, the error page for the non-targeted user should also be made to show a video,” the researchers said, adding websites should also be made to require user interaction before rendering content.
“Knowing the precise identity of the person who is currently visiting a website can be the starting point for a range of nefarious targeted activities that can be executed by the operator of that website.”
The findings arrive weeks after researchers from the University of Hamburg, Germany, demonstrated that mobile devices leak identifying information such as passwords and past holiday locations via Wi-Fi probe requests.
In a related development, MIT researchers last month revealed the root cause behind a website fingerprinting attack as not due to signals generated by cache contention (aka a cache-based side channel) but rather due to system interrupts, while showing that interrupt-based side channels can be used to mount a powerful website fingerprinting attack.


 Quick note: The page usually lists two versions, including ARM64 and x64. Unless you have an ARM-based device, you need to download the x64 version of the cumulative update.


 Quick note: In this guide, we’ll use the “Try it first” option, but if you plan to dedicate the device to the operating system, select the “Install CloudReady 2.0” option.


 Windows Update Troubleshooter
 Download Windows Update manually
 Windows 10 architecture settings
 Windows Update dism and sfc repair
 Stop Windows Update servicesQuick tip: You may need to run the command more than once until you see the message that the service has stopped successfully.
 Reset Windows Update commands
 Reset network adapter on Windows 10
.png)


