In this article, I will show you how to enable Hibernate mode in Windows 11 using different methods. We will explore different methods to turn on hibernate mode which includes Intune, Registry, Group Policy, Command Prompt and Control Panel.
In Windows, the Hibernate mode allows you to completely shut down your computer while conserving your work, allowing you to immediately resume where you left off the next time you turn on your computer.
Hibernate mode is similar to Sleep mode in Windows. The primary difference is that in Hibernate mode, the documents, and apps that are currently open are saved to a file on your hard disk rather than in RAM as in Sleep mode. Hibernate mode consumes less power than Sleep mode which is a big advantage. However, it can use gigabytes of disk space.
When you use Hibernate mode, your work is saved in a hidden file named hiberfil.sys. This hiberfil.sys file is responsible for managing computer hibernation, helping your computer restart from the hibernate power state. Although hiberfil.sys is a hidden and protected system file, it is safe to delete it if you do not wish to employ Windows’ power-saving capabilities.
According to Microsoft, use hibernation when you know that you won’t use your laptop or tablet for an extended period and won’t have an opportunity to charge the battery during that time. Windows 11 doesn’t come with hibernate mode enabled by default. You have to manually enable it from Windows settings.
Related: Prohibit Access to Control Panel and PC Settings using Intune
Why is the Hibernate option missing on Windows 11 PC?
When you install Windows 11 or upgrade from Windows 10 to Windows 11, you’ll notice that the Hibernate option is missing from the Power options menu. This is by design and Microsoft allows users to use the Sleep option instead of Hibernate. Although, the hibernate option is not enabled on your Windows 11 PC, you can turn it on or off when required.

Related: Configure Interactive Logon Message Using Intune
Ways to Turn on Hibernate Mode in Windows 11
There are multiple ways that you can use to turn on the hibernate mode in Windows 11. Some of these methods include:
- Turn on the hibernate mode using Control Panel.
- Activate the hibernate mode using Command Prompt.
- Use Windows Registry to enable the hibernate mode in Windows 11.
- Enable Hibernate option using Intune on Windows 11 endpoints.
- Deploy GPO to enable or disable the Hibernate option.
I will cover all the methods in this post that will help you turn on the hibernate mode in Windows 11.
Method 1: Turn on Hibernate Mode in Windows 11 from Control Panel
The method is easiest and recommended way to enable the hibernate option in Windows 11 is using control panel. Select Search on the taskbar, type ‘control panel‘, and select it from the results. When the control panel launches, select System and Security.

In the Power Options section, select Change what the power buttons do.

By default, the option to enable Hibernate is greyed out because the changes that you make here applies to all your power plans. Select Change settings that are currently unavailable.

In the Shutdown settings section, select Hibernate. This allows the Hibernate Mode to show up on the Power Menu. Click on Save changes to complete the process.

To verify if the hibernate option is enabled, click on Start and select the Power button. The option for hibernate mode should be available.

To disable the hibernate option, click start and launch the control panel. Click System and Security and in the Power Options section, select Change what the power buttons do. Select Change settings that are currently unavailable. In the Shutdown settings section, uncheck the Hibernate option and click Save changes. This will immediately disable the hibernate option from Windows 11 power options.

Also Read: Prohibit Access to Control Panel and PC Settings using Intune
Method 2: Use Command Prompt to Turn on Hibernate mode in Windows 11
Command Prompt in Windows lets you run manage Windows Power plans on a Windows PC. You can also use Windows Terminal instead of command prompt to perform the same tasks. Enabling the Hibernate mode using command prompt is effortless.
- In the Windows Start Menu, type Command Prompt in the text box and hit enter.
- From the search results, run Command Prompt as administrator.
- Run the command “powercfg.exe /hibernate on” to enable the Hibernate mode on Windows 11.

To disable the hibernate mode using command prompt, run the command “powercfg.exe /hibernate off” and this will turn off the Hibernate mode on Windows 11.
Note: You cannot enable Hibernation on a VM when the firmware doesn’t support it. You will encounter the following error. Hibernation failed with the following error: The request is not supported. The following items are preventing hibernation on this system. The system firmware does not support hibernation.

Related: Find MAC Address on Windows 11 PC using 6 Best Methods
Method 3: Enable Hibernate Mode using Registry
You can also use Windows Registry to enable the hibernate mode on Windows devices if the previous methods don’t have the desired results. Press the Windows+R key to bring up the Run dialog box. Type in Regedit and press OK to open the Windows Registry Editor.
In the Registry editor, navigate to HKEY_LOCAL_MACHINE\SYSTEM\CurrentControlSet\Control\Power. Here you should find the HibernateEnabled registry setting and the value of the setting lets you enable or disable the hibernate mode in Windows 11.
- HibernateEnabled = 1 – The value 1 indicates the Hibernate option is enabled.
- HibernateEnabled = 0 – The value 0 indicates the Hibernate option is disabled.

On the right panel, double-click on HibernateEnabled. This will bring up the Edit DWORD Value box. Change the value to 1 to enable hibernate mode and click OK.

After making the above modifications to the registry, restart the computer. Once restarted, you will find that hibernate mode is enabled on your system when you access the Start Menu.
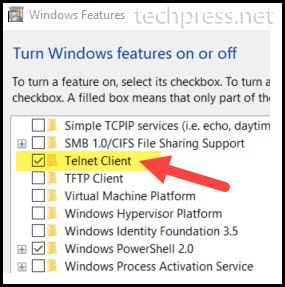
Related Article: How to Enable Telnet on Windows 11 | Disable Telnet
Method 4: Enable Hibernate Mode using Intune via Settings Catalog
The Intune Settings Catalog policy makes it easier for MEM Admins to add, configure, customize and manage device and user policy settings. With Intune, you can deploy a policy setting to Show hibernate in the power options menu. You can also configure power options using Intune.
Also Read: Disable Windows 11 Lock Screen | Intune | GPO | Registry
We will now create a Device Configuration Profile to enable hibernate on Windows devices using Intune.
- First, sign in to the Microsoft Endpoint Manager admin center.
- Go to Devices > Windows > Configuration Profiles.
- Create a new Intune Configuration profile and define the settings to turn on hibernate mode.
On Windows Configuration Profiles window, select Create Profile. On the Create a Profile window, select Platform as Windows 10 and later. Select profile type as Settings Catalog. Click Create. On the Basics tab, specify the name of the profile to Enable Hibernate Mode on Windows Devices, and you may add a profile description. Click Next.

On the Configuration Settings section, under Settings Catalog, click Add Settings.

On the Settings picker window, type “Hibernate” in the search box and click on Search. From the search results, select Power. Enable the option “Allow Hibernate“. This policy setting decides if hibernate on the machine is allowed or not. Supported values: 0 – Disable hibernate. 1 (default) – Allow hibernate.

Next, on the same page, select Administrative Templates\Windows Components\File Explorer. Now enable the setting “Show hibernate in the power options menu“.
- Show hibernate in the power options menu: Shows or hides hibernate from the power options menu. If you enable this policy setting, the hibernate option will be shown in the Power Options menu (as long as it is supported by the machine’s hardware). If you disable this policy setting, the hibernate option will never be shown in the Power Options menu. If you do not configure this policy setting, users will be able to choose whether they want hibernate mode to show through the Power Options Control Panel.

On the Configuration Settings tab, ensure the following two settings are enabled:
- Show hibernate in the power options menu
- Allow hibernate
Click Next to continue.

In Intune, Scope tags determine which objects admins can see. On the Scope tags section, you specify scope tags. Click Next. On the Assignments tab, specify the groups to which you want to target this policy. Click Next.
On the Review+Create tab, review all the settings defined to enable hibernate on Windows 11 and select Create. After you create a device configuration policy in Intune, a notification appears “Policy created successfully“.
You must wait for the Intune Policy to apply to the targeted groups and once the devices check-in with the Intune service they will receive your profile settings. You can also force sync Intune policies on your computers. Once the policy applies to the devices, you can verify if the hibernate option shows by clicking the start menu and selecting the power button. This completes the steps to enable hibernate mode in Windows 11 using Intune.

Method 5: Enable or Disable Hibernate Mode using Group Policy
Group Policy is a fast and effective way to configure Hibernate on multiple PCs. When you want to turn on hibernate mode for multiple Windows 11 PCs, GPO is the best choice for administrators.
With GPO, you enable the hibernate mode and even disable it when it’s not required. Here are the steps to enable hibernate option in Group Policy:
- On your domain controller, launch the Group Policy Management console.
- Create a new Group Policy Object and name it “Enable Hibernate Mode“
- Right-click on “Enable Hibernate Mode” and select Edit. This will bring up Group Policy Management Editor.
- Navigate to Computer Configuration > Administrator Templates > Windows Components > File Explorer.
- On the right pane, double-click the setting “Show hibernate in the power options menu” and set it to Enabled.

Ensure the GPO is linked to a OU or you may link it to entire domain to apply the settings for all computers. Wait for the GPO to refresh on the remote computers. Alternatively, you can force a GP Update through Command Prompt by running the command GPUpdate /force. The hibernate option show now show up on Power options menu.
To disable the hibernate mode in Windows 11, double-click the setting “Show hibernate in the power options menu” and set it to Disabled.
Source :
https://www.prajwaldesai.com/enable-disable-hibernate-mode-in-windows-11/


