A lesser-known ransomware strain called AstraLocker has recently released its second major version, and according to threat analysts, its operators engage in rapid attacks that drop its payload directly from email attachments.
This approach is quite unusual as all the intermediate steps that typically characterize email attacks are there to help evade detection and minimize the chances of raising red flags on email security products.
According to ReversingLabs, which has been following AstraLocker operations, the adversaries don’t seem to care about reconnaissance, evaluation of valuable files, and lateral network movement.
Instead, they are performing “smash-n-grab” attacks to his immediately hit with maximum force aiming for a quick payout.
From document to encryption
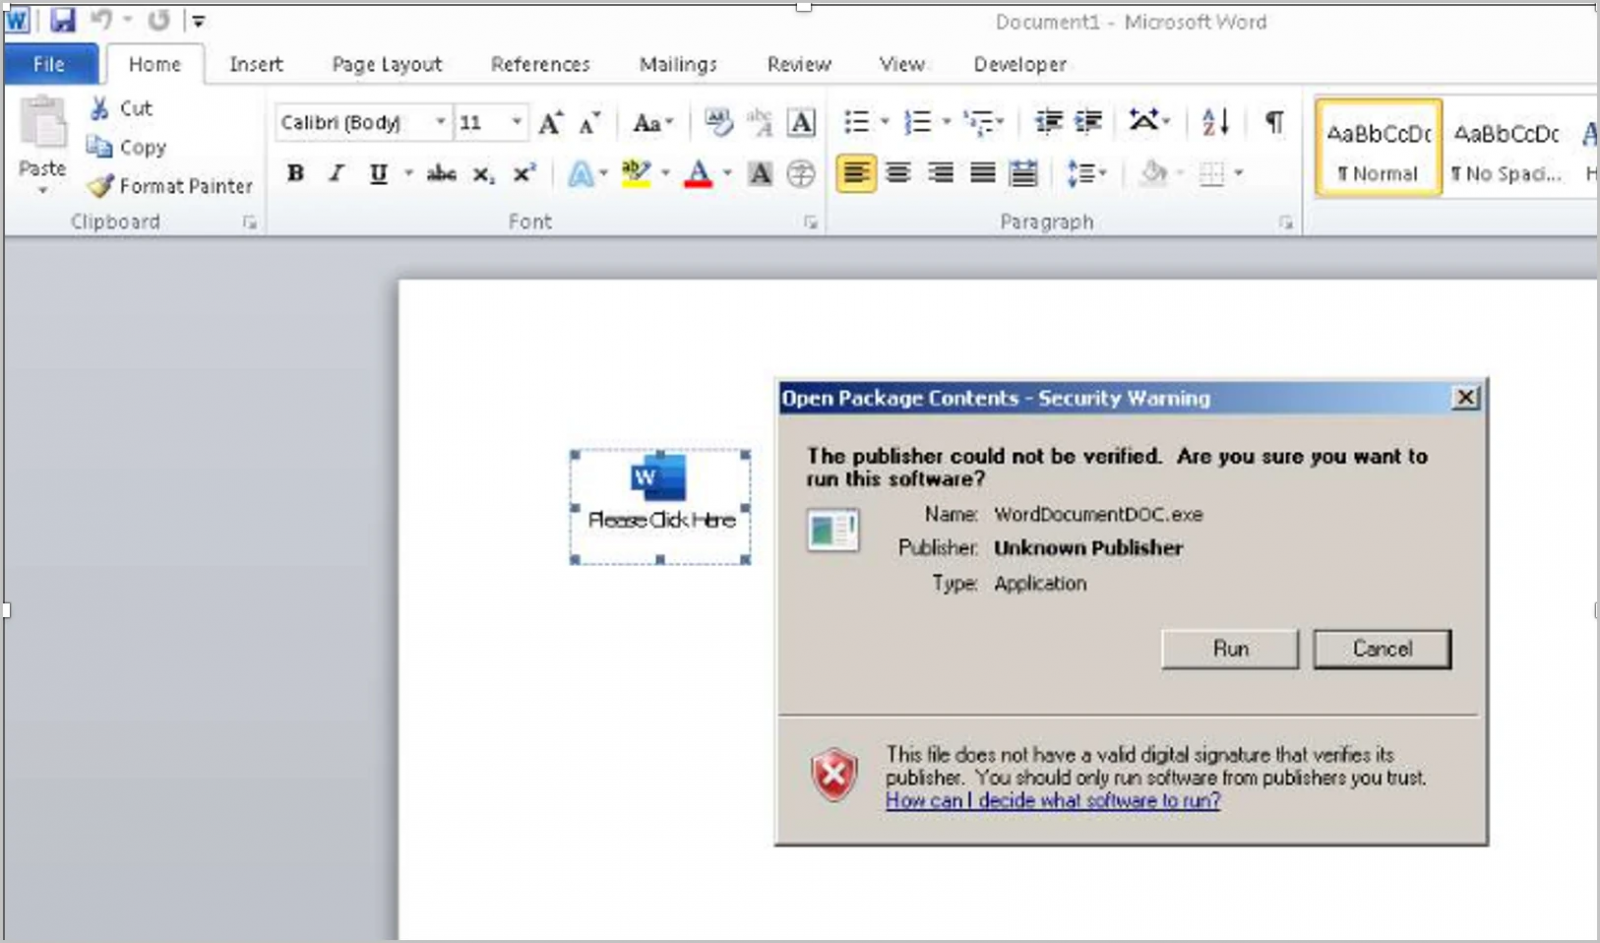
The lure used by the operators of AstraLocker 2.0 is a Microsoft Word document that hides an OLE object with the ransomware payload. The embedded executable uses the filename “WordDocumentDOC.exe”.
To execute the payload, the user needs to click “Run” on the warning dialog that appears upon opening the document, further reducing the chances of success for the threat actors.
Unknown publisher warning(ReversingLabs)
This bulk approach is in line with Astra’s overall “smash-n-grab” tactic, choosing OLE objects instead of VBA macros that are more common in malware distribution.
Another peculiar choice is the use of SafeEngine Shielder v2.4.0.0 to pack the executable, which is such an old and outdated packer that reverse engineering is almost impossible.
After an anti-analysis check to ensure that the ransomware isn’t running in a virtual machine and that no debuggers are loaded in other active processes, the malware prepares the system for encryption using the Curve25519 algorithm.
The preparation includes killing processes that could jeopardize the encryption, deleting volume shadow copies that could make restoration easier for the victim, and stopping a list of backup and AV services. The Recycle Bin is simply emptied instead of encrypting its contents.
AstraLocker 2.0 ransom note(ReversingLabs)
AstraLocker background
According to the code analysis of ReversingLabs, AstraLocker is based on the leaked source code of Babuk, a buggy yet still dangerous ransomware strain that exited the space in September 2021.
Additionally, one of the Monero wallet addresses listed in the ransom note is linked to the operators of Chaos ransomware.
This could mean that the same operators are behind both malware or that the same hackers are affiliates on both ransomware projects, which is not uncommon.
Judging from the tactics that underpin the latest campaign, this doesn’t seem to be the work of a sophisticated actor but rather one who is determined to deliver as many destructive attacks as possible.
Attackers used a newly discovered malware to backdoor Microsoft Exchange servers belonging to government and military organizations from Europe, the Middle East, Asia, and Africa.
The malware, dubbed SessionManager by security researchers at Kaspersky, who first spotted it in early 2022, is a malicious native-code module for Microsoft’s Internet Information Services (IIS) web server software.
It has been used in the wild without being detected since at least March 2021, right after the start of last year’s massive wave of ProxyLogon attacks.
“The SessionManager backdoor enables threat actors to keep persistent, update-resistant and rather stealth access to the IT infrastructure of a targeted organization,” Kaspersky revealed on Thursday.
“Once dropped into the victim’s system, cybercriminals behind the backdoor can gain access to company emails, update further malicious access by installing other types of malware or clandestinely manage compromised servers, which can be leveraged as malicious infrastructure.”
SessionManager’s capabilities include, among other features:
dropping and managing arbitrary files on compromised servers
remote command execution on backdoored devices
connecting to endpoints within the victim’s local network and manipulating the network traffic
In late April 2022, while still investigating the attacks, Kaspersky found that most of the malware samples identified earlier were still deployed on 34 servers of 24 organizations (still running as late as June 2022).
Additionally, months after the initial discovery, they were still not flagged as malicious by “a popular online file scanning service.”
After deployment, the malicious IIS module allows its operators to harvest credentials from system memory, collect information from the victims’ network and infected devices, and deliver additional payloads (such as a PowerSploit-based Mimikatz reflective loader, Mimikatz SSP, ProcDump, and a legitimate Avast memory dump tool).
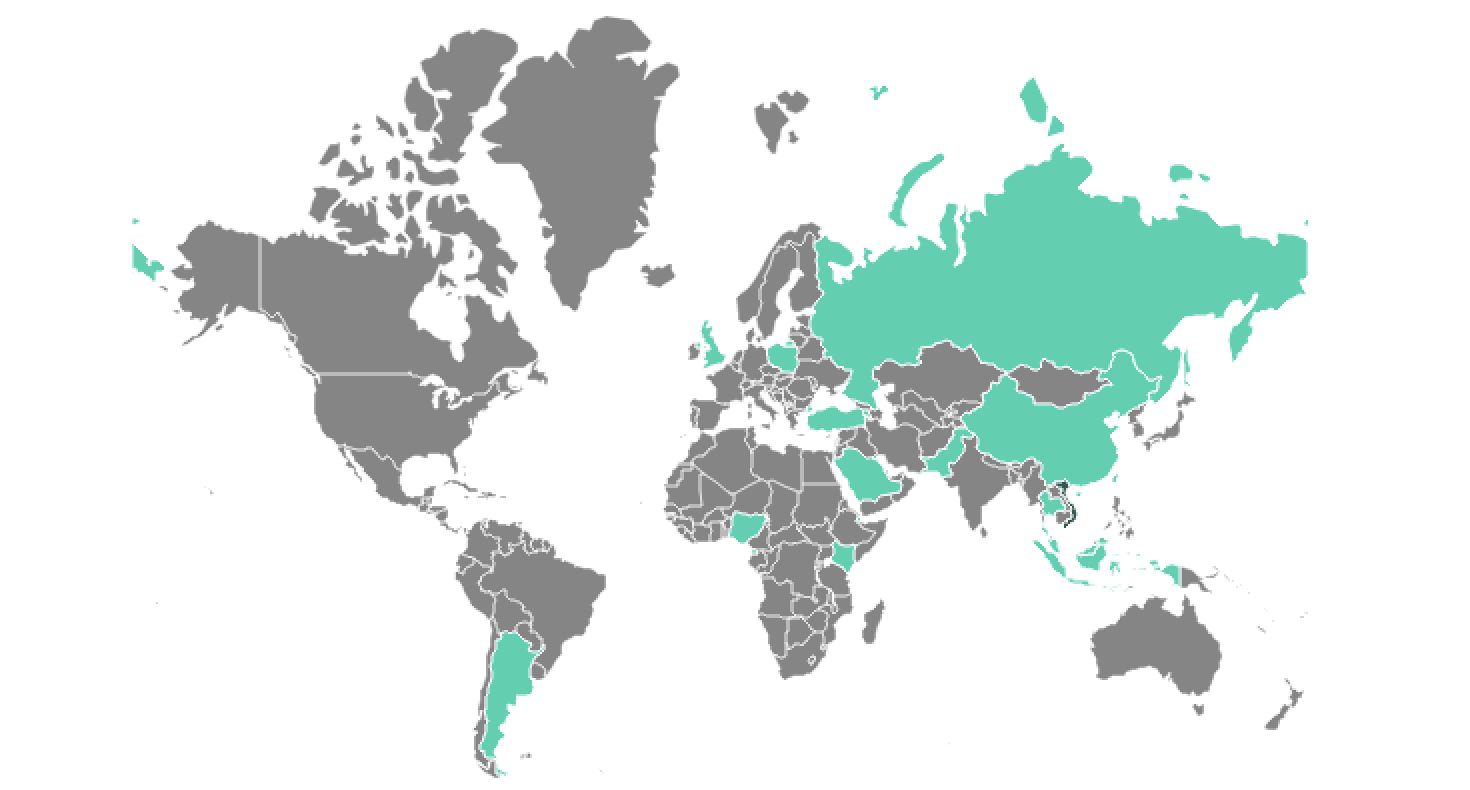
SessionManager targets (Kaspersky)
“The exploitation of exchange server vulnerabilities has been a favorite of cybercriminals looking to get into targeted infrastructure since Q1 2021. The recently discovered SessionManager was poorly detected for a year and is still deployed in the wild,” added Pierre Delcher, a Senior Security Researcher at Kaspersky’s GReAT.
“In the case of Exchange servers, we cannot stress it enough: the past year’s vulnerabilities have made them perfect targets, whatever the malicious intent, so they should be carefully audited and monitored for hidden implants, if they were not already.”
Kaspersky uncovered the SessionManager malware while continuing to hunt for IIS backdoors similar to Owowa, another malicious IIS module deployed by attackers on Microsoft Exchange Outlook Web Access servers since late 2020 to steal Exchange credentials.
Gelsemium APT group links
Based on similar victimology and the use of the OwlProxy malware variant, Kaspersky’s security experts believe the SessionManager IIS backdoor was leveraged in these attacks by the Gelsemium threat actor as part of a worldwide espionage operation.
This hacking group has been active since at least 2014, when some of its malicious tools were spotted by G DATA’s SecurityLabs while investigating the “Operation TooHash” cyber-espionage campaign. In 2016, new Gelsemium indicators of compromise surfaced in a Verint Systems presentation during the HITCON conference.
Two years later, in 2018, VenusTech unveiled malware samples linked to the Operation TooHash and an unknown APT group, later tagged by Slovak internet security firm ESET as early Gelsemium malware versions.
ESET also revealed last year that its researchers linked Gelsemium to Operation NightScout, a supply-chain attack targeting the update system of the NoxPlayer Android emulator for Windows and macOS (with over 150 million users) to infect gamers’ systems between September 2020 and January 2021.
Otherwise, the Gelsemium APT group is mainly known for targeting governments, electronics manufacturers, and universities from East Asia and the Middle East and mostly flying under the radar.
Do you want to send email to WordPress users from your admin dashboard?
It’s actually quite simple to use WordPress for sending emails to your registered users. This can be useful if you have a membership site and want to send email announcements or other updates to your site members.
In this article, we’ll show walk you through the steps for sending emails to WordPress users without needing any code.
When Should You Send Email to WordPress Users?
WordPress automatically sends transactional emails to your customers like order receipts and password reset links. But you can also send mass emails to your entire list of users from WordPress. While this isn’t a recommended practice, it’s a good option to have in case you don’t have a proper email list maintained in an email marketing service.
If your website allows users to register, learning how to email users right from your WordPress dashboard is always an important skill. You may want to send emails about new product updates, changes to your website, or other important announcements.
How to Send Email to All WordPress Registered Users
To send emails to your WordPress users, just follow the steps below. First, we’ll set up WP Mail SMTP to take care of your WordPress email delivery from the backend. Then, we’ll set up another plugin that lets you select your WordPress email recipients, compose an email, and send it.
First, you’ll need WP Mail SMTP on your site to deliver your emails reliably to intended recipients.
By default, WordPress uses PHP Mail for emails which is commonly responsible for poor email delivery and spam blocks by mailing servers.
A much more dependable method for sending emails takes advantage of SMTP. In SMTP, your emails are properly authenticated, so their legitimacy is easy to verify. As a result, your WordPress emails are able to avoid spam filters and reach recipients without fail.
To install WP Mail SMTP on your site, first select a plan that’s appropriate for your needs.
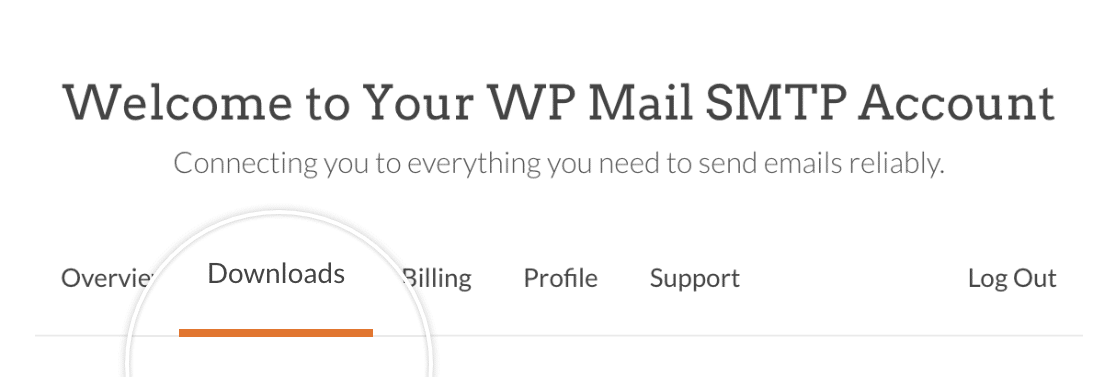
You’ll be able to log into your WP Mail SMTP account area once you’ve purchased a plan and created your account. From your account area, click on the Downloads tab.
Now, press the Download Mail SMTP button to start the ZIP file download.
While the download is in progress, it’s a good idea to use this moment to copy your WP Mail SMTP license key. You’ll need this later on.
When the file has finished downloading, open your WordPress dashboard. Then, go to Plugins » Add New.
Here, you can upload the plugin file that you just downloaded. Click on the Choose File button and locate your WP Mail SMTP zip file in your download folder.
After selecting the file, click on Install Now. It will only take a few seconds for WordPress to install this plugin.
Press the blue Activate Plugin to activate WP Mail SMTP on your site.
Great job! Now we just have to configure a mailer with WP Mail SMTP to finish the setup.
2. Integrate WP Mail SMTP With a Mailer
WP Mail SMTP needs an API connection with a mailer service in order to deliver your WordPress emails properly.
The WP Mail SMTP setup wizard allows you to set up a connection between your WordPress site and a mailer service very easily.
After you activate the plugin, the setup wizard should launch automatically. But if for any reason it didn’t start, you can launch it manually.
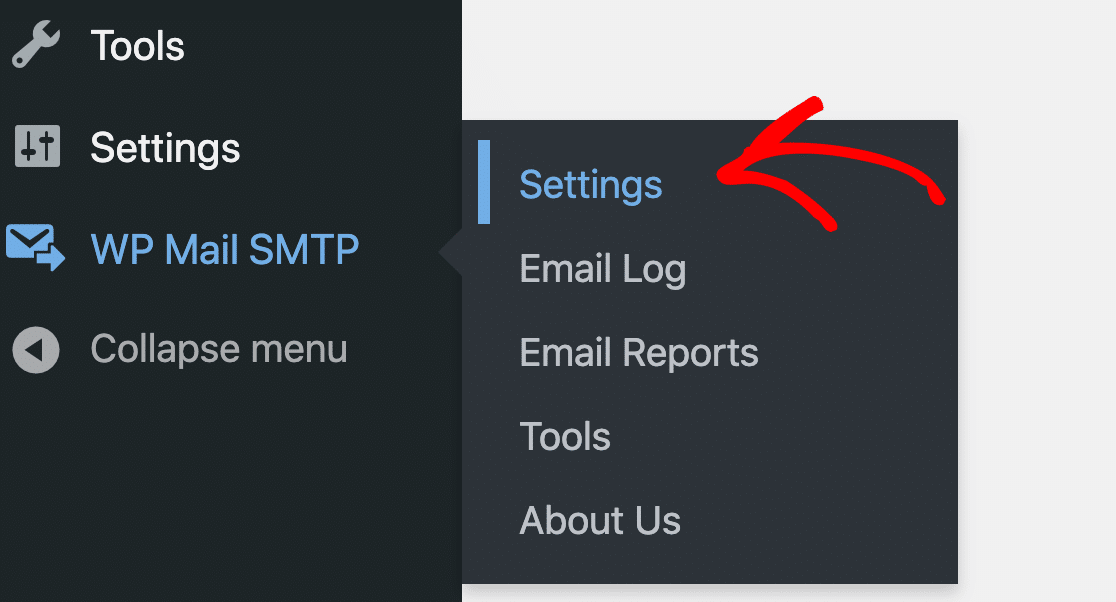
From your WordPress dashboard, go to WP Mail SMTP» Settings. Underneath the Mail section, find and click the Launch Setup Wizard button.
The wizard will ask you to select an SMTP mailer service from a wide range of options.
If you need a reliable and reasonably priced mailer, we recommend SendLayer. However, you’re free to choose from other available options.
When you’ve selected a mailer, click Save and Continue. You’ll need to fill out a few fields to configure the mailer connection.
If you need help setting up a particular mailer, click one of the links below for detailed instructions.
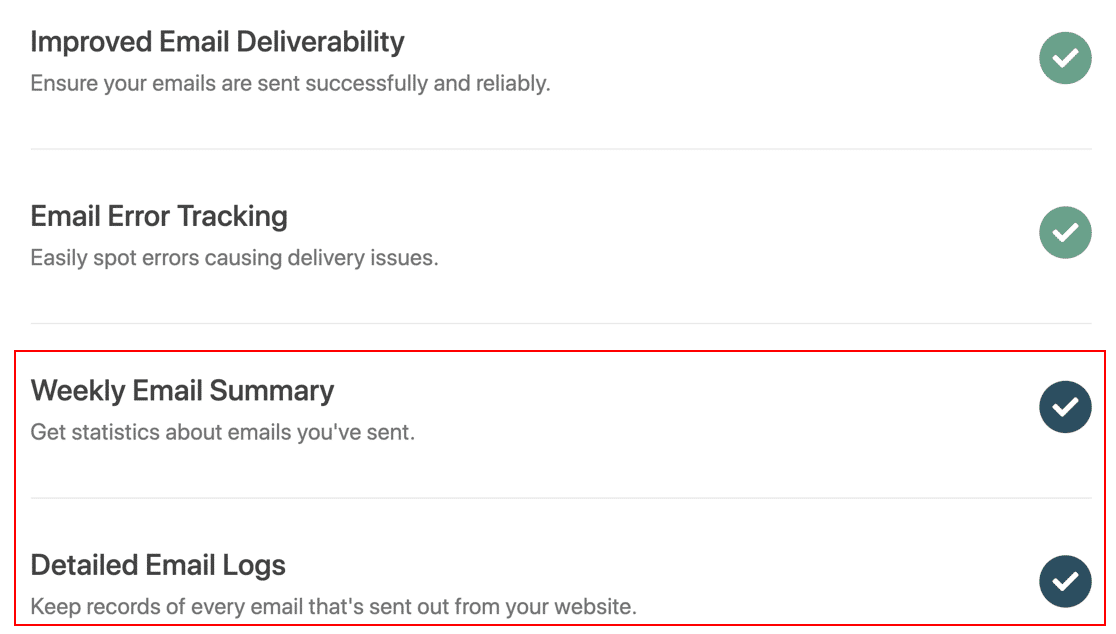
In the final step of the setup, WP Mail SMTP will ask you to check the features that you want to enable. If you have the paid version, you can enable extra features like email logs (which we highly recommend for the purposes of this topic).
If you check the Pro features, the setup wizard will then require you to add your license key (which we copied in an earlier step). Insert your license key and then press Verify License Key.
The wizard will now send a test email to make sure your configuration is properly set up. If all is good, move to the next step.
3. Get the Send Users Email Plugin
Now that you have WP Mail SMTP configured, you can rest assured that your emails originating from any plugin on your site will always deliver successfully.
But by default, there’s no way in WordPress to write an email and send it to your WordPress users at will.
To be able to send emails to any recipient of your choice in WordPress, you’ll need to install a plugin called Send Users Email.
When the plugin is installed and activated on your site, you can start sending emails to your WordPress users easily.
4. Send Email to Registered Users
Open your WordPress admin area and then click Email to Users » Email Roles.
You should now see a page with options to send emails to people selected by their assigned WordPress roles. If you want to send the email to all of your WordPress subscribers, checkmark the box against Subscriber.
You can also select other types of users as your recipients such as administrators and authors. The email subject field lets you write a subject line for your email. There’s also a rich text field for composing the body of your email message.
After selecting recipients and writing the email, press the Send Message button,
Your email will now start sending to all WordPress users that you selected by role above.
But what if you only want to email individual users rather than mass emailing your entire list?
The Send Users Email includes a feature that lets you individually select each registered WordPress user you wish to send your email to.
To access this feature, go to Email to Users » Email Users. Here, you’ll see a list of all registered WordPress users on your site. You can simply select the users that you want to send emails to from this list.
As before, you can use the email subject field and email message fields to customize your subject line and email content.
Press the blue Send Message button to send your email to individually selected WordPress users.
Congratulations! You now have the necessary tools to send emails to WordPress users entire individually or to your entire subscriber list.
5. Track Your WordPress Emails (Optional)
Generally, WordPress isn’t the best way to send emails and run email marketing campaigns. This is because of the inherent limitations of the platform when it comes to email functionalities.
WordPress is primarily a content management system, so its email capabilities are only basic. For the best results and much easier management, you should consider using a dedicated email marketing service (Sendinblue, Constant Contact, and MailerLite to name a few).
However, if you are going to send some of your emails from WordPress, then it’s wise to log and track your emails.
One of the many benefits of WP Mail SMTP Pro is that it includes email tracking features. With this feature, WP Mail SMTP can track how many times your emails were opened and clicked by your subscribers.
To enable this feature, navigate to WP Mail SMTP » Settings.
On the top of the Settings page, click on the Email Log tab.
Here, make sure that the Email Log option is enabled.
Now scroll down to view additional email tracking settings. You can enable open and click tracking to collect open and click rate data for every WordPress email you send to users.
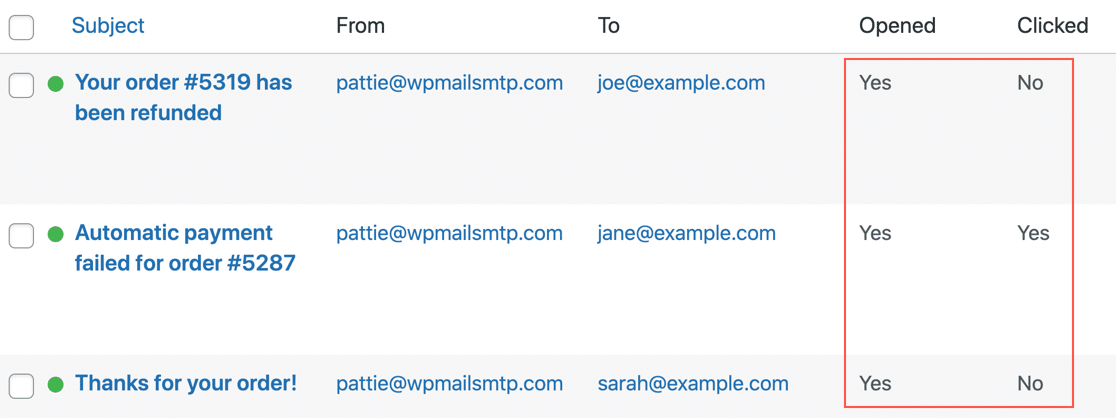
With email tracking enabled, you will be able to see engagement metrics for each email right within your WordPress dashboard.
This information is extremely helpful as it allows you to experiment with different subject lines to produce higher engagement levels.
And that’s all! You now know how to send email to WordPress users (by role and individually) and also track the performance of your emails from your admin area!
Ready to fix your emails? Get started today with the best WordPress SMTP plugin. WP Mail SMTP Elite includes full White Glove Setup and offers a 14-day money-back guarantee.
.png)