03/28/2023
Description
SonicOS API provides an alternative to the SonicOS Command Line Interface (CLI) for configuring selected functions. SonicOS API is disabled by default in SonicOS.
To use the SonicOS API, you must enable it, either through the SonicOS Management Interface or from the CLI.
SonicOS API is supported on all platforms on GEN7 and running SonicOS 6.5.4 and higher for GEN6.
Resolution
Resolution for SonicOS 7.X
This release includes significant user interface changes and many new features that are different from the SonicOS 6.5 and earlier firmware. The below resolution is for customers using SonicOS 7.X firmware.
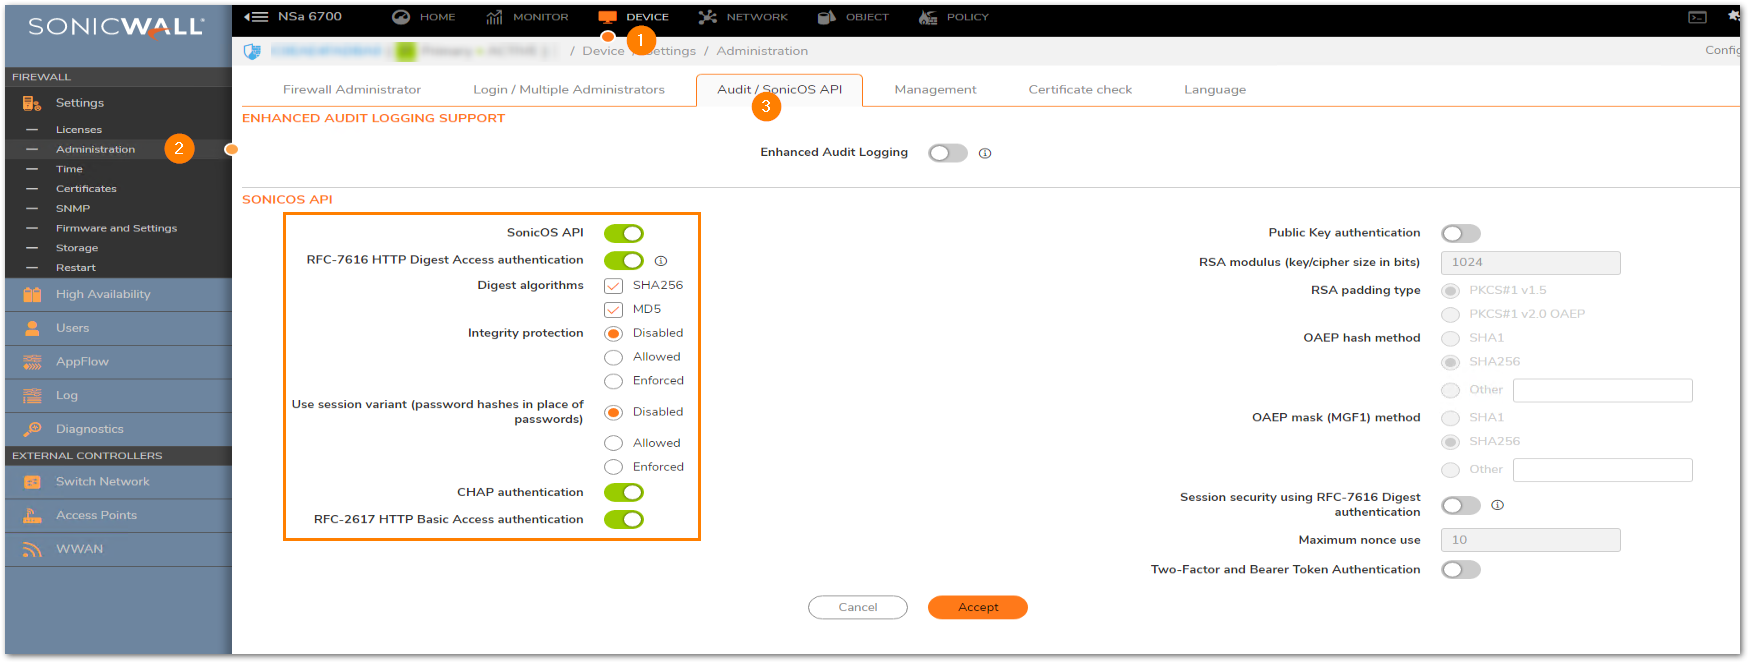
- ENABLING THE API MODULE ON THE FIREWALL UI.Login to the SonicWall management UI. Navigate to Device | Settings | Administration | Audit/SonicOS API section. Enable the option ‘Enable SonicOS API’ and ‘Enable RFC-2617 HTTP Basic Access authentication’ options.
- LIST OF APPLICABLE APIS:Navigate to MANAGE | API and click on the link https://SonicOS-api.sonicwall.com. Swagger will prepopulate your SonicWalls’s IP, MGMT Port, and Firmware so it can give you a list of applicable APIs.

- LOGIN TO THE FIREWALL USING POSTMANThe following 3 steps need to be performed for every API request in Gen7 devices.
 NOTE: https://IP-address:port/– Replace this with your SonicWall’s Public or private IP address with the right management port number (If the management port is 443, you can directly use https:// followed by the IP address without the port number too).
a) The HTTP method should be POST and we need to use the URL: https://192.168.168.168/api/sonicos/auth
Under the authorization tab, select Basic Auth and mention the correct admin credentials.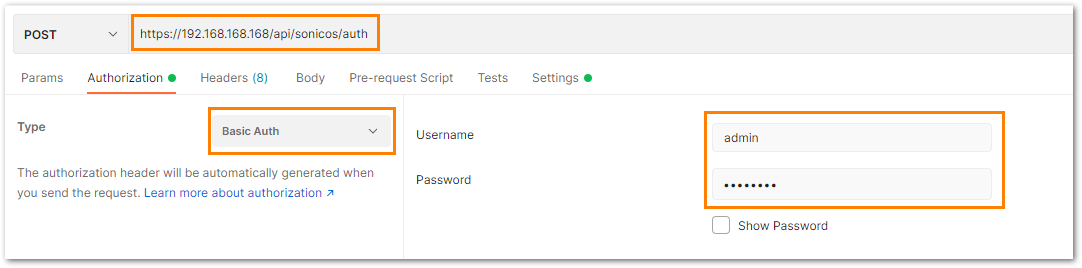
b) Under the settings tab, turn OFF the Enable SSL certificate verification if the firewall uses a self-signed certificate for management.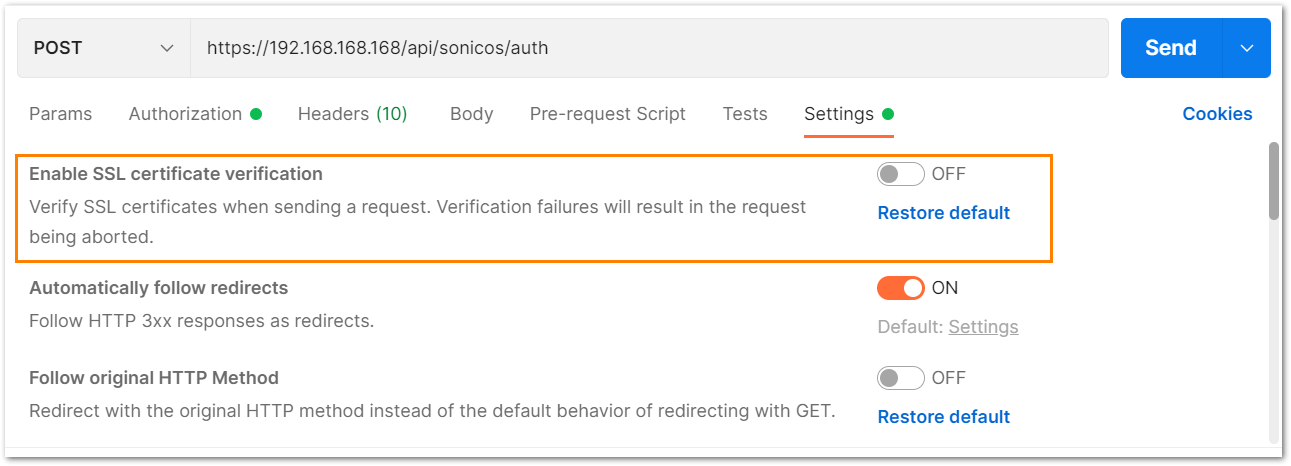
c) Under the headers tab, include application/Json as the value for keys Accept and Content-type.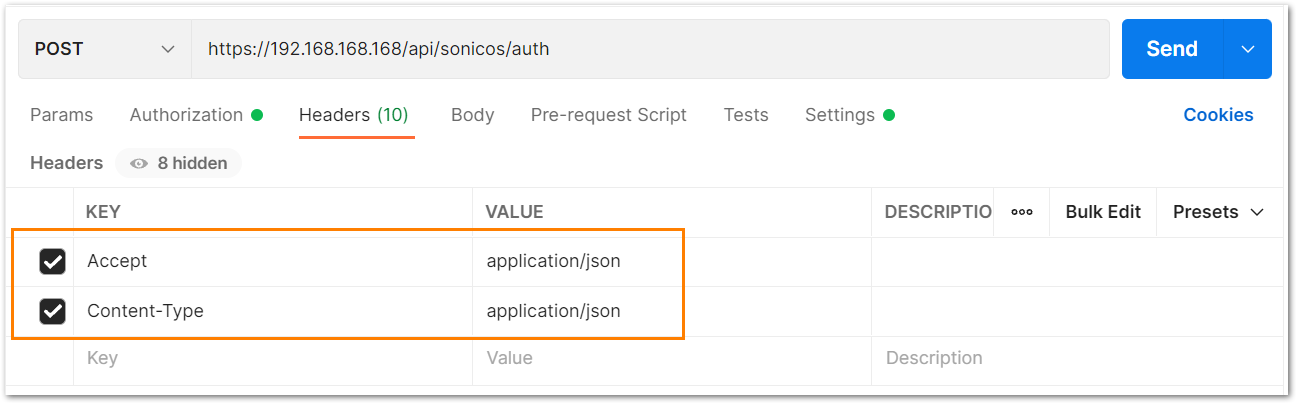
d) The Gen 7 devices are token-driven. Use the {“override” : true} under the body to override any older tokens. This is used only during login.
After this, click on the Send button and then you can see the response in the section below. The response should contain a message: “success”.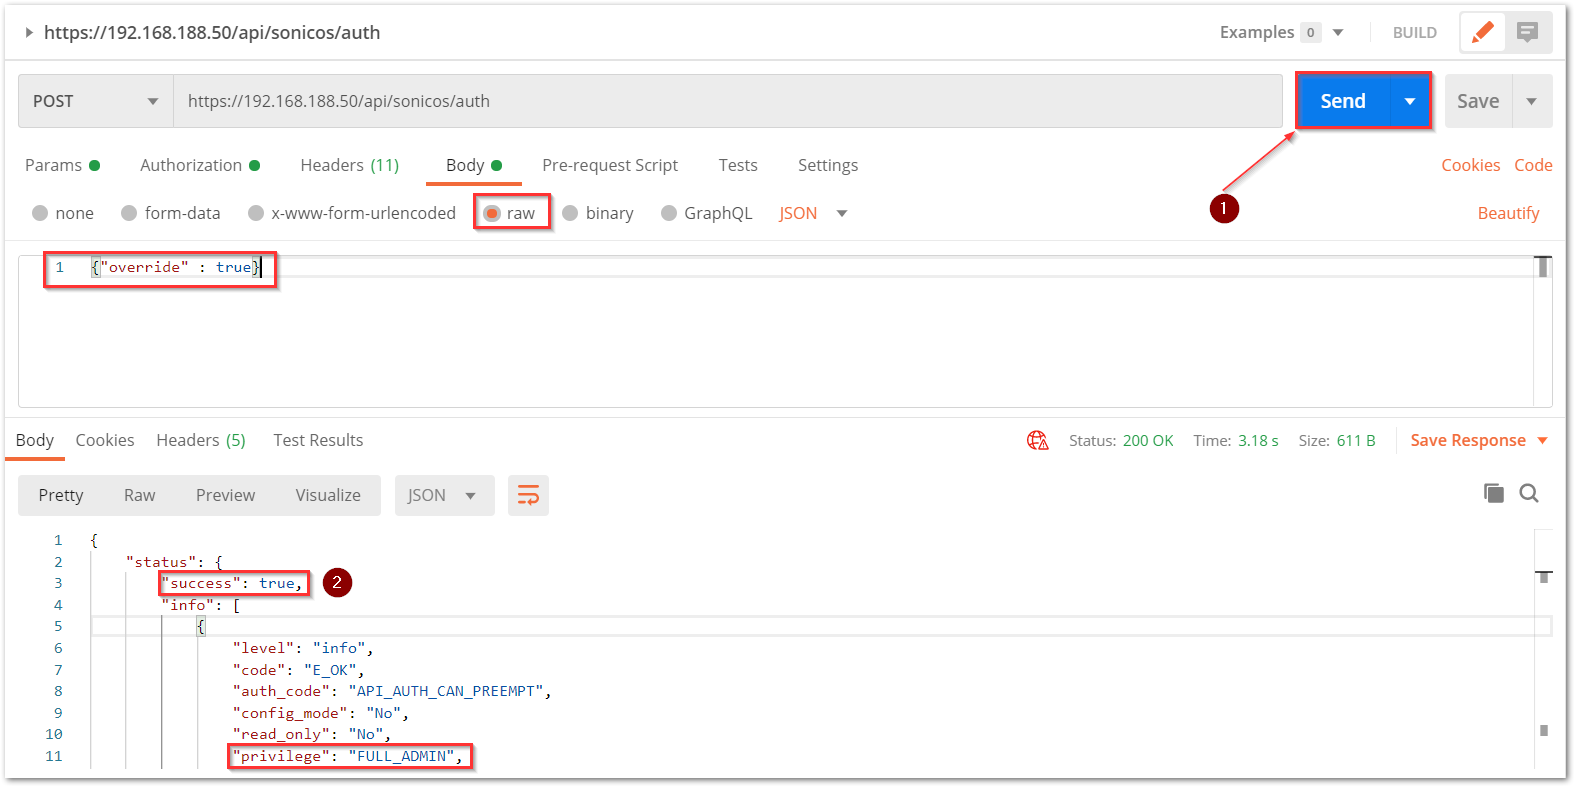
e) After this, click on the Send button and then you can see the response in the section below. The response should contain a message: “success”.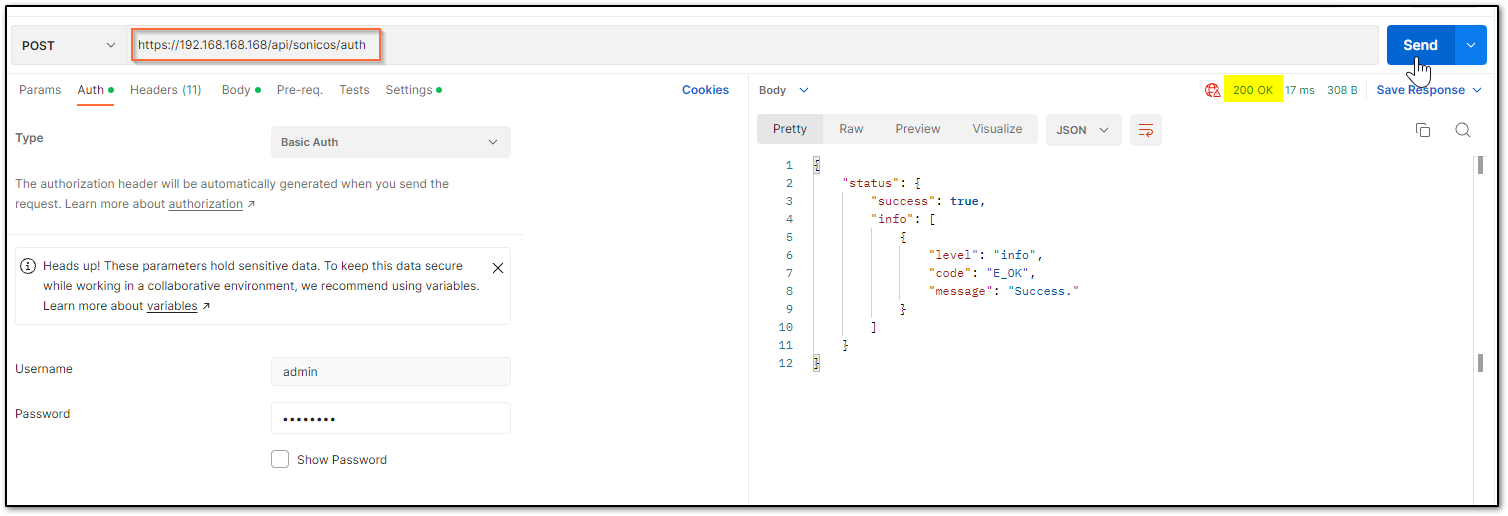
cURL code:curl --location --request POST 'https://192.168.168.168/api/sonicos/auth' \--header 'Accept: application/Json' \--header 'Content-Type: application/Json' \--header 'Authorization: Basic YWRtaW46cGFzc3dvcmQ=
--data-raw '{"override" : true}'
Command Output should contain a string: “success”: true - Restart command
Restart can be pushed in 2 ways: now or later. There is nothing in the body of the API call as you will notice in the screenshot below.
- Restart now
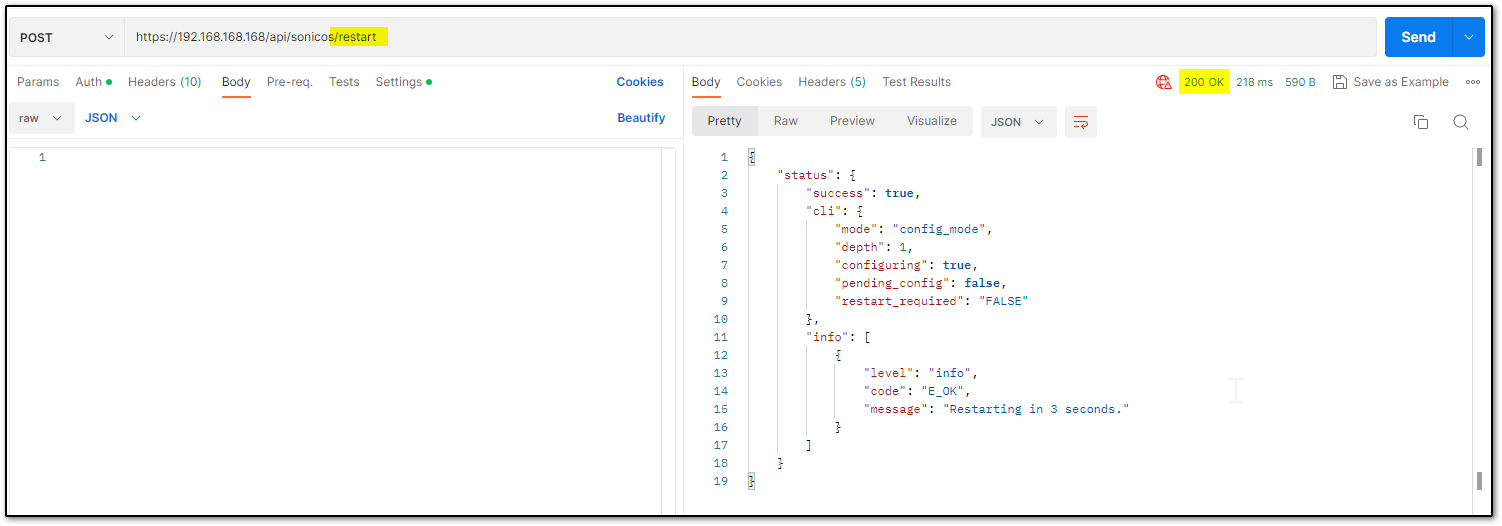
cURL code:curl -L -X POST 'https://192.168.168.168/api/sonicos/restart' \-H 'Content-Type: application/Json' \-H 'Accept: application/Json' \-H 'Authorization: Basic YWRtaW46cGFzc3dvcmQ=' \-d '' - Restart in ___ minutes/hours/days/
If the plan is to restart after some time, you can schedule that. Please ensure you log out after the command since there is a waiting period.
You can make other configurational changes, but it should be noted that you ‘commit’ the changes as a restart can clear off the pending configuration if not saved.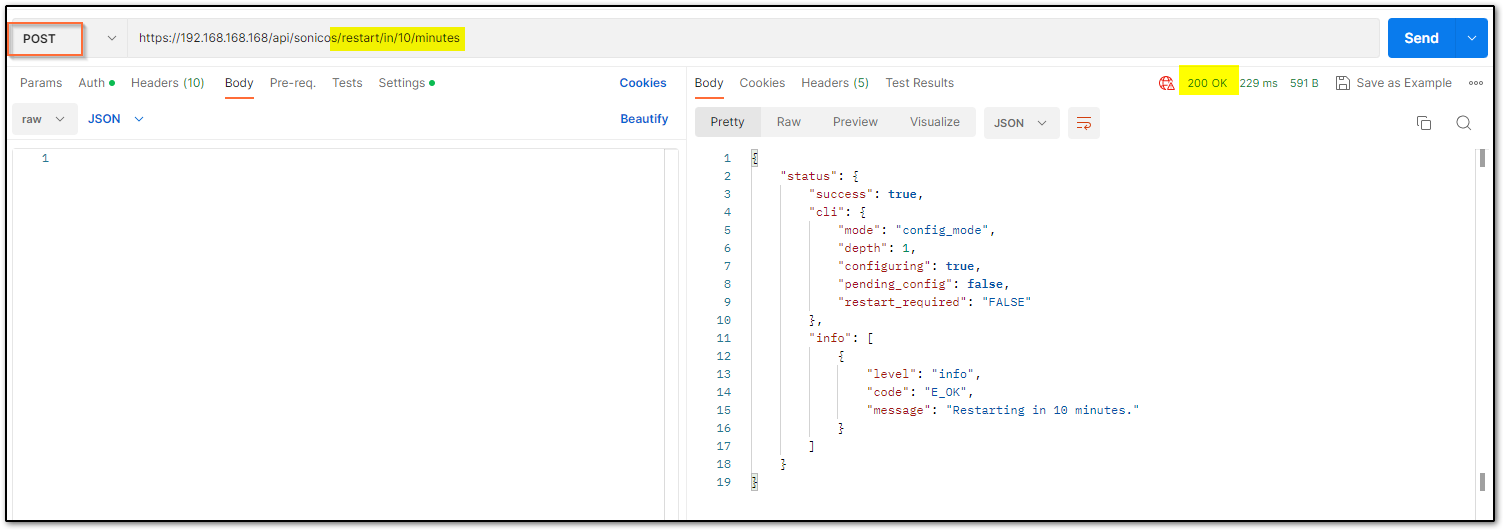
You may change the URL to suit your requirement. The number that you use should be an unsigned integer (UINT32) with values ranging from 0 to 4,294,967,295. For example, it can be made
../restart/in/2/days
../restart/in/24/hours
cURL code:curl -L -X POST 'https://192.168.168.168/api/sonicos/restart/in/10/minutes' \-H 'Content-Type: application/Json' \-H 'Accept: application/Json' \-H 'Authorization: Basic YWRtaW46cGFzc3dvcmQ=' \-d ''
- Restart now
- Log out the SonicWall with API
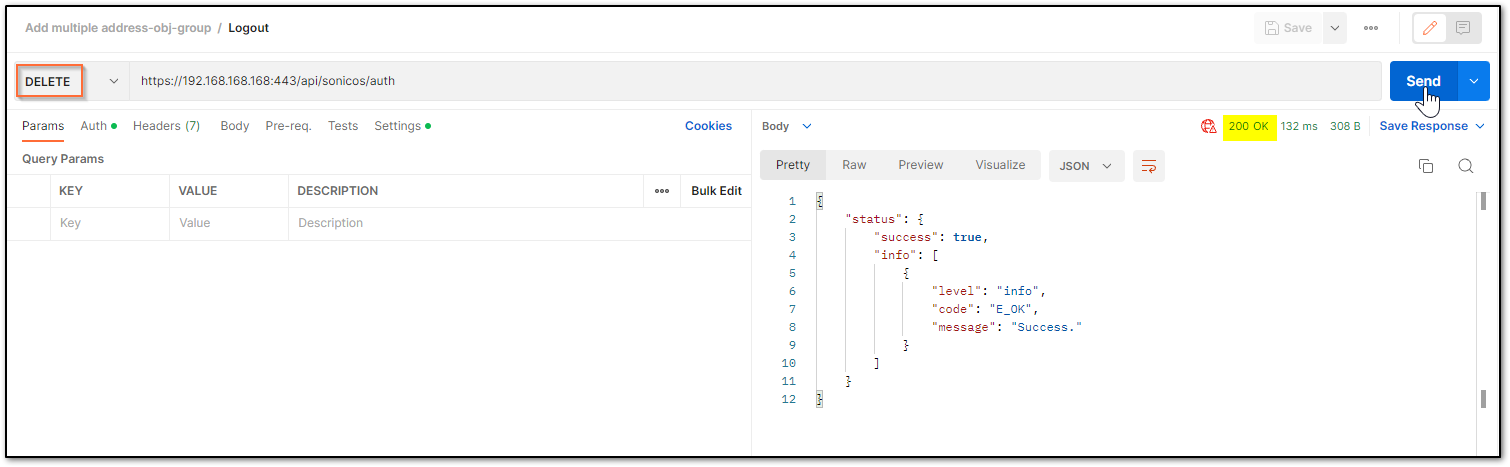
cURL command:curl -L -X DELETE 'https://192.168.168.168:443/api/sonicos/auth' \-H 'Authorization: Basic YWRtaW46cGFzc3dvcmQ='
Resolution for SonicOS 6.5
This release includes significant user interface changes and many new features that are different from the SonicOS 6.2 and earlier firmware. The below resolution is for customers using SonicOS 6.5 firmware.
- Enabling the API Module on the firewall UI
Login to the SonicWall management UI. Navigate to MANAGE | Appliance | Base Settings and scroll down to SonicOS API section. Enable the option ‘Enable SonicOS API’ and ‘Enable RFC-2617 HTTP Basic Access authentication’ options.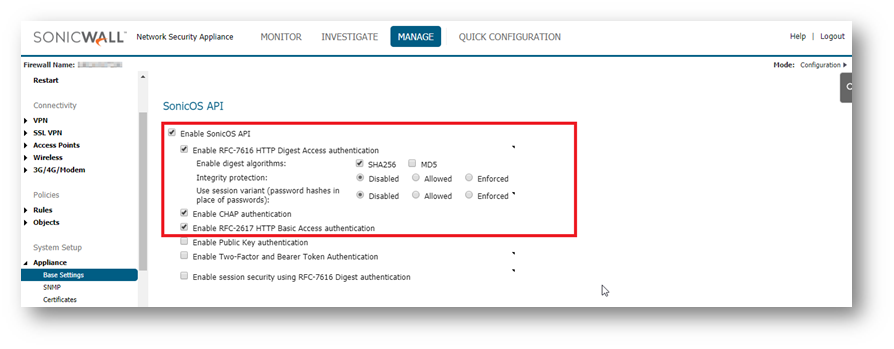
- List of applicable APIs
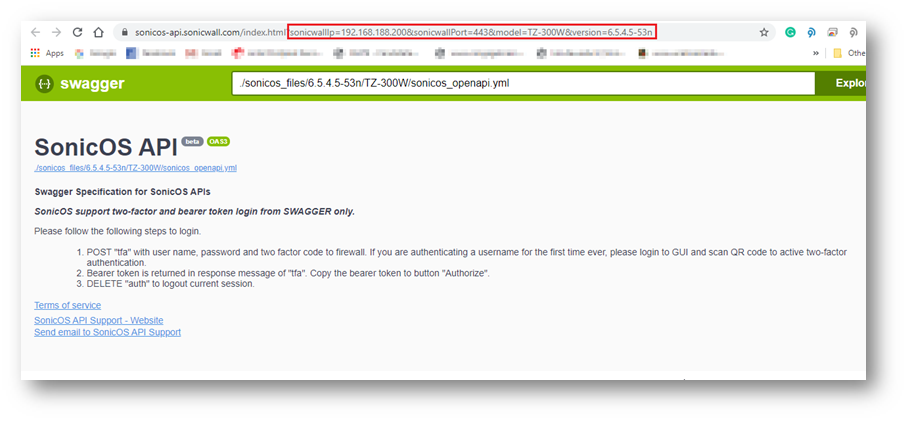
Navigate to MANAGE | API and click on the link https://SonicOS-api.sonicwall.com. Swagger will prepopulate your SonicWalls’s IP, MGMT Port, Firmware so it can give you a list of applicable APIs. TIP: You are free to choose Swagger, Postman, Git bash, or any application that allows API calls, if you are using a Linux based operating system you can execute cURL from the terminal. For this article I am using Git bash on Windows.
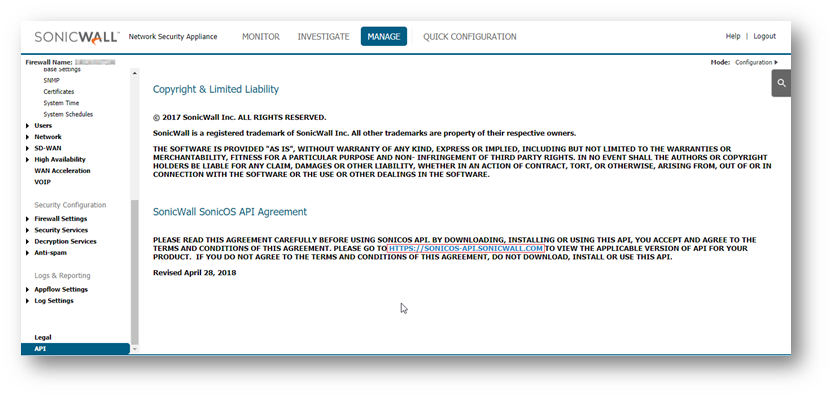
- LOGIN TO THE FIREWALL USING POSTMANThe following 3 steps need to be performed for every API request in Gen7 devices. NOTE: https://IP-address:port/– Replace this with your SonicWall’s Public or private IP address with the right management port number (If the management port is 443, you can directly use https:// followed by the IP address without the port number too).
a) The HTTP method should be POST and we need to use the URL: https://192.168.168.168/api/sonicos/auth
Under the authorization tab, select Basic Auth and mention the correct admin credentials.
b) Under the settings tab, turn OFF the Enable SSL certificate verification if the firewall is using a self-signed certificate for management.
c) Under the headers tab, include application/Json as the value for keys Accept and Content-type.
d) The Gen 7 devices are token-driven. Use the {“override” : true} under the body to override any older tokens. This is used only during login.
After this, click on the Send button and then you can see the response in the section below. The response should contain a message: “success”.
e) After this, click on the Send button and then you can see the response in the section below. The response should contain a message: “success”.
cURL code:curl --location --request POST 'https://192.168.168.168/api/sonicos/auth' \--header 'Accept: application/Json' \--header 'Content-Type: application/Json' \--header 'Authorization: Basic YWRtaW46cGFzc3dvcmQ=
--data-raw '{"override" : true}'
Command Output should contain a string: “success”: true - Restart command
Restart can be pushed in 2 ways: now or later. There is nothing in the body of the API call as you will notice in the screenshot below.- Restart now
cURL code:curl -L -X POST 'https://192.168.168.168/api/sonicos/restart' \-H 'Content-Type: application/Json' \-H 'Accept: application/Json' \-H 'Authorization: Basic YWRtaW46cGFzc3dvcmQ=' \-d '' - Restart in ___ minutes/hours/days/
If the plan is to restart after some time, you can schedule that. Please ensure you log out after the command, if there is a waiting period.
You can make other configurational changes, but it should be noted that you ‘commit’ the changes as a restart can clear off the pending configuration if not saved.
You may change the URL to suit your requirement. The number that you use should be an unsigned integer (UINT32) with values ranging from 0 to 4,294,967,295. For example, it can be made
../restart/in/2/days
../restart/in/24/hours
cURL code:curl -L -X POST 'https://192.168.168.168/api/sonicos/restart/in/10/minutes' \-H 'Content-Type: application/Json' \-H 'Accept: application/Json' \-H 'Authorization: Basic YWRtaW46cGFzc3dvcmQ=' \-d ''
- Restart now
- Log out the SonicWall with API
cURL command:curl -L -X DELETE 'https://192.168.168.168:443/api/sonicos/auth' \-H 'Authorization: Basic YWRtaW46cGFzc3dvcmQ='
Related Articles
- Apply BGP Route Map for Numbered VPN Tunnel Interface Between AWS and SonicWall
- Decryption Policy and Setting up the Decryption Policy Table in SONICOSX 7
- Signatures database not downloaded for App control, IPS, GAV.