Updated: Jan 31, 2024, 13:03 PM
By Claire Broadley Content Manager
REVIEWED By Jared Atchison Co-owner
Do you want to set up Postmaster Tools… but you’re not sure where to start?
Postmaster Tools lets you to monitor your spam complaints and domain reputation. That’s super important now that Gmail is blocking emails more aggressively.
Thankfully, Postmaster Tools is free and easy to configure. If you’ve already used a Google service like Analytics, it’ll take just a couple of minutes to set up.
In This Article
- Who Needs Postmaster Tools?
- How to Add a Domain to Postmaster Tools
- How to Read the Charts in Google Postmaster Tools
Who Needs Postmaster Tools?
You should set up Postmaster Tools if you meet any of the following criteria:
1. You Regularly Send Emails to Gmail Recipients
Postmaster Tools is a tool that Google provides to monitor emails to Gmail users.
Realistically, most of your email lists are likely to include a large number of Gmail mailboxes unless you’re sending to a very specific group of people, like an internal company mailing list. (According to Techjury, Gmail had a 75.8% share of the email market in 2023.)
Keep in mind that Gmail recipients aren’t always using Gmail email addresses. The people who use custom domains or Google Workspace are ‘hidden’, so it’s not always clear who’s using Gmail and who isn’t. To be on the safe side, it’s best to use it (it’s free).
2. You Send Marketing Emails (or Have a Large Website)
Postmaster Tools works best for bulk email senders, which Google defines as a domain that sends more than 5,000 emails a day.
If you’re sending email newsletters on a regular basis, having Postmaster Tools is going to help.
Likewise, if you use WooCommerce or a similar platform, you likely send a high number of transactional emails: password reset emails, receipts, and so on.
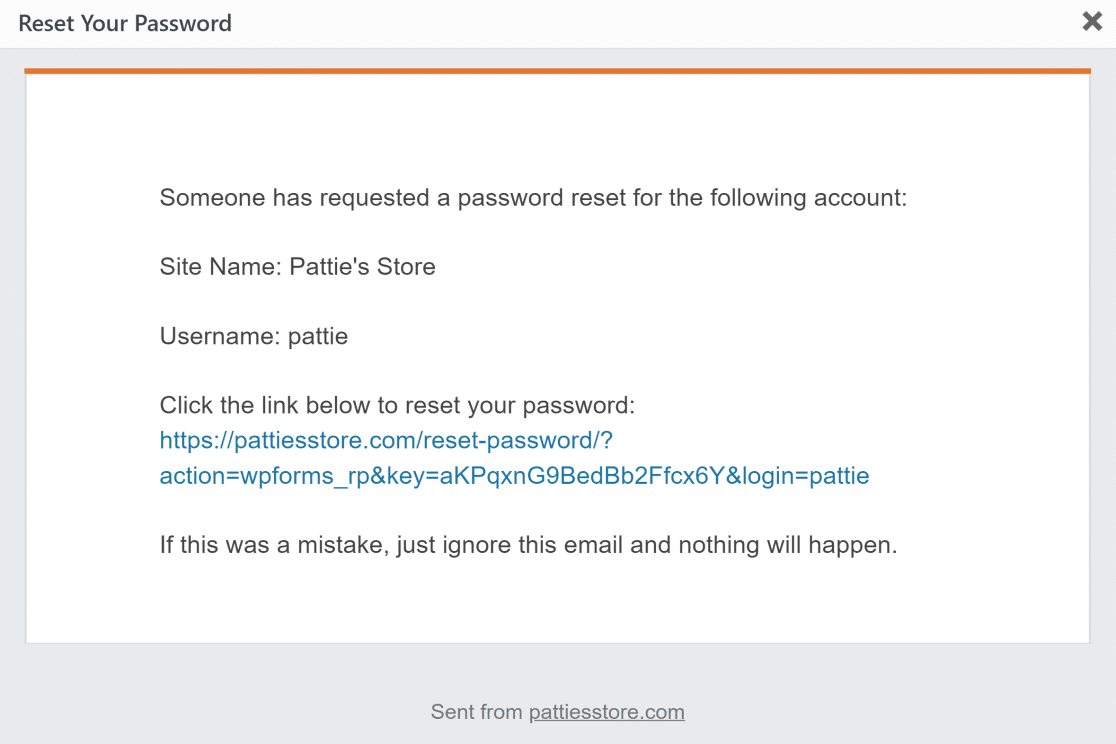
If you don’t send a large number of emails right now, you can still set up Postmaster Tools so you’re prepared for the time you might.
Just note that you may see the following message:
No data to display at present. Please come back later.
Postmaster Tools requires your domain to satisfy certain conditions before data is visible for this chart.
This usually means you’re not sending enough emails for Google to be able to calculate meaningful statistics.
It’s up to you if you want to set it up anyway, or skip it until your business grows a little more.
How to Add a Domain to Postmaster Tools
Adding a domain to Postmaster Tools is simple and should take less than 10 minutes.
To get started, head to the Postmaster Tools site and log in. If you’re already using Google Analytics, sign in using the email address you use for your Analytics account.
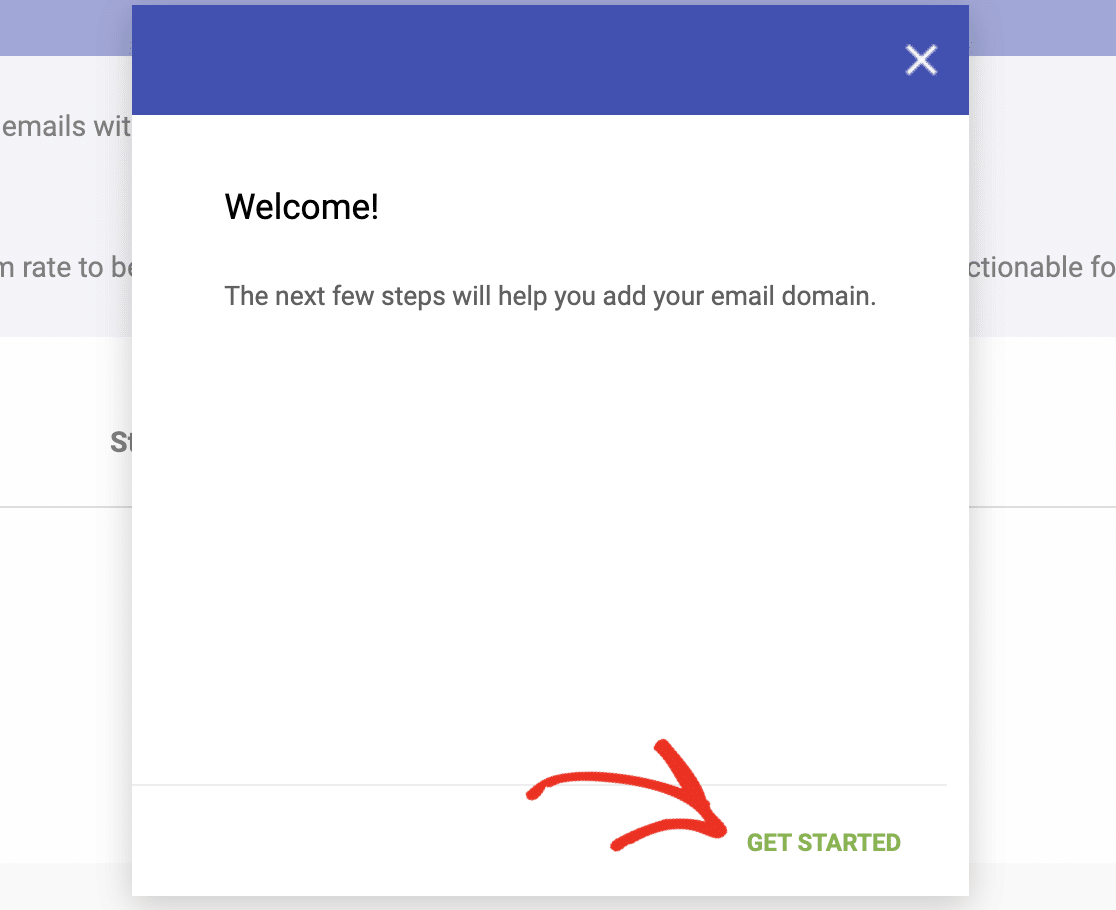
The welcome popup will already be open. Click on Get Started to begin.
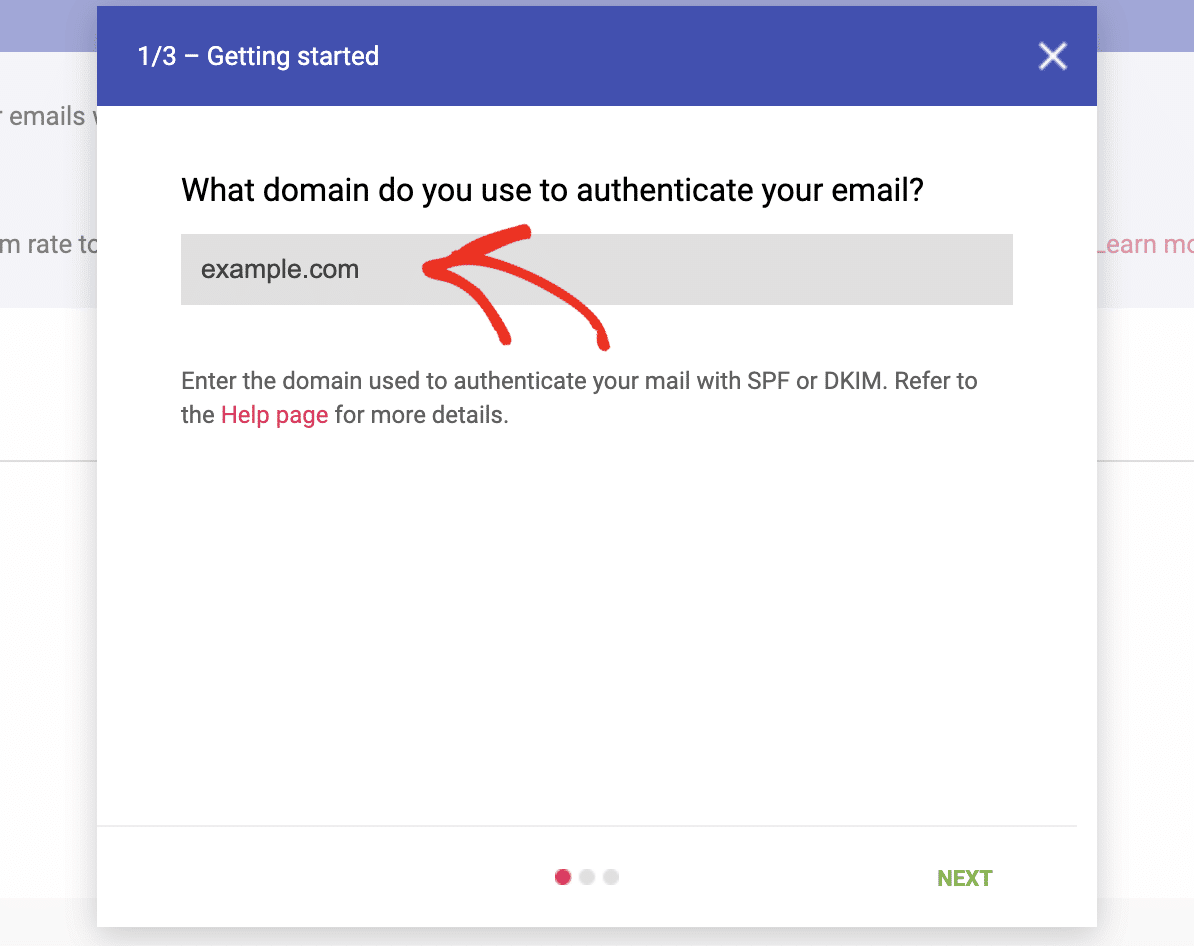
Next, enter the domain name that your emails come from.
This should be the domain you use as the sender, or the ‘from email’, when you’re sending emails from your domain. It will normally be your main website.
If your domain name is already verified for another Google service, that’s all you need to do! You’ll see confirmation that your domain is set up.

If you haven’t used this domain with Google services before, you’ll need to verify it. Google will ask you to add a TXT record to your DNS.
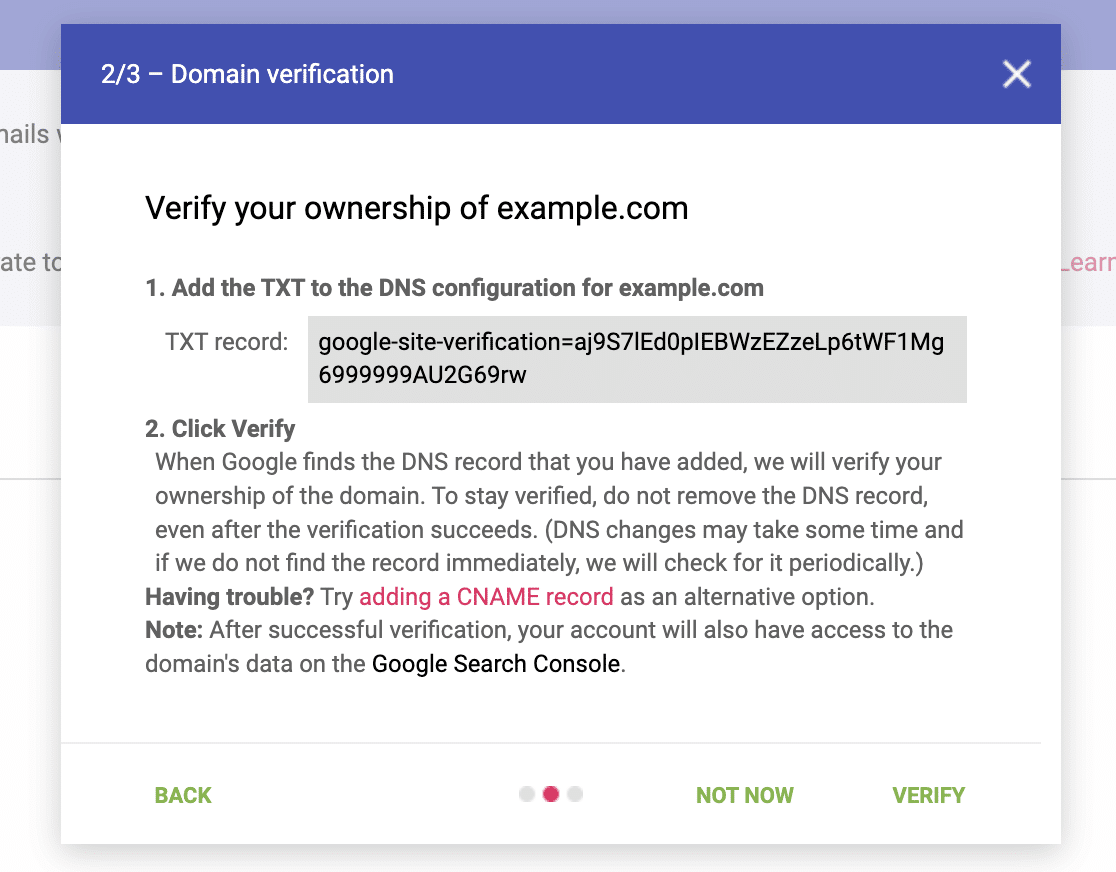
To complete this, head to the control panel for the company you bought your domain from. It’ll likely be your domain name registrar or your web host. If you’re using a service like Cloudflare, you’ll want to open up your DNS records there instead.
Locate the part of the control panel that handles your DNS (which might be called a DNS Zone) and add a new TXT record. Copy the record provided into the fields.
Note: Most providers will ask you to enter a Name, which isn’t shown in Google’s instructions. If your provider doesn’t fill this out by default, you can safely enter @ in the Name field.
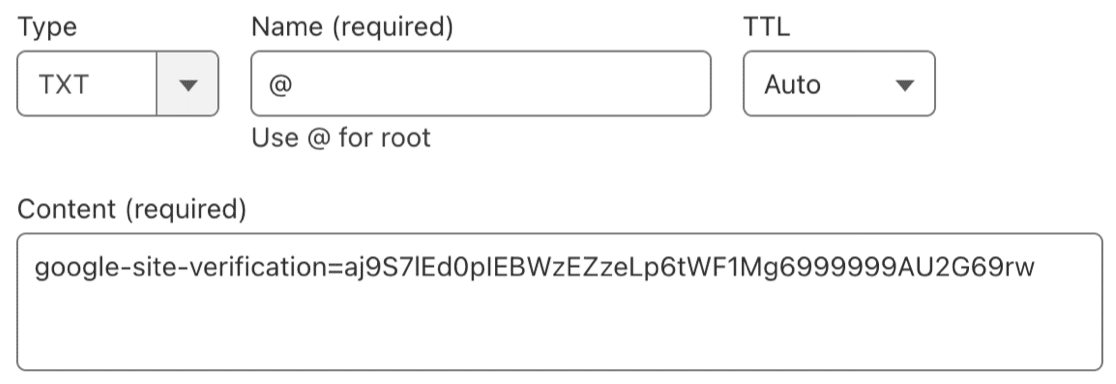
Now save your record and wait a few minutes. Changes in Cloudflare can be near-instant, but other registrars or hosts may take longer.
After waiting for your change to take effect, switch back to Postmaster Tools and hit Verify to continue.
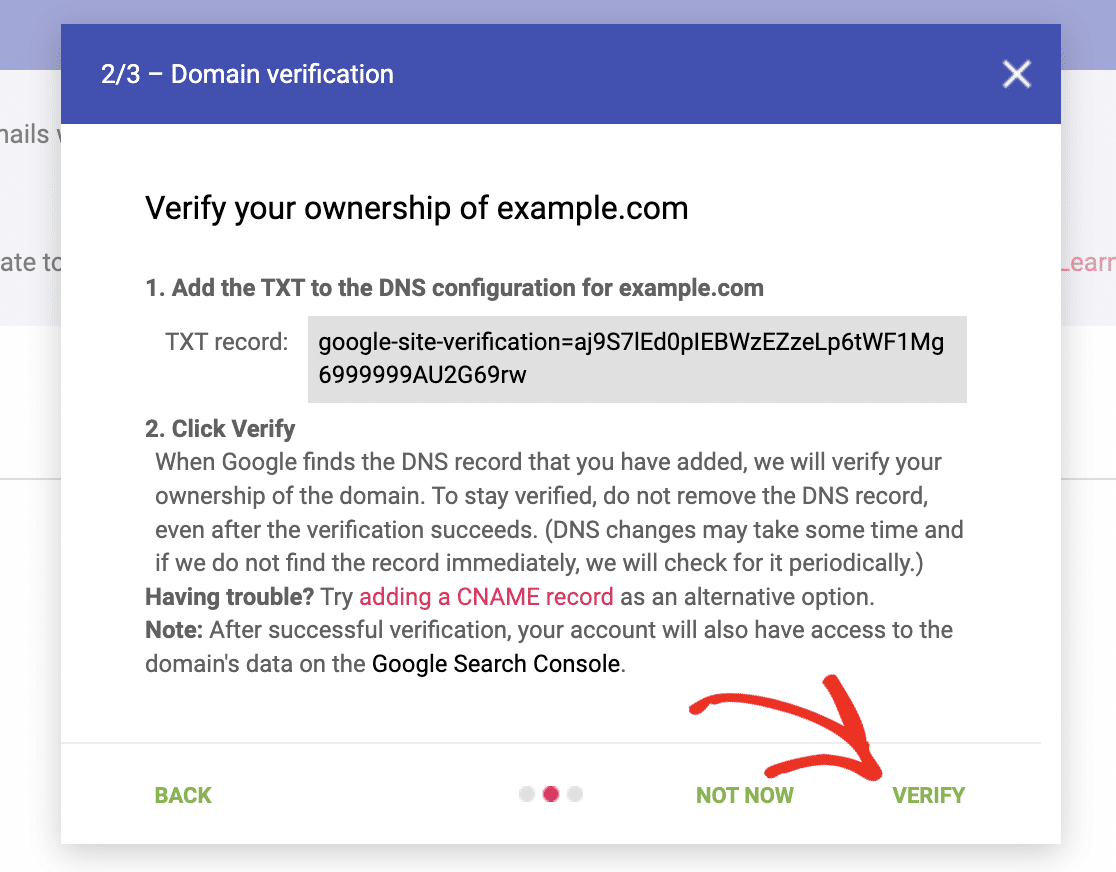
And that’s it! Now your domain has been added to Postmaster Tools.

How to Read the Charts in Google Postmaster Tools
Google is now tracking various aspects of your email deliverability. It’ll display the data in a series of charts in your account.
Here’s a quick overview of what you can see.
As I mentioned, keep in mind that the data here is only counted from Gmail accounts. It’s not a domain-wide measurement of everything you send.
Spam Rate
Your spam rate is the number of emails sent vs the number of spam complaints received each day. You should aim to keep this below 0.1%.
You can do that by making it easy for people to unsubscribe from marketing emails and using double optins rather than single optins.
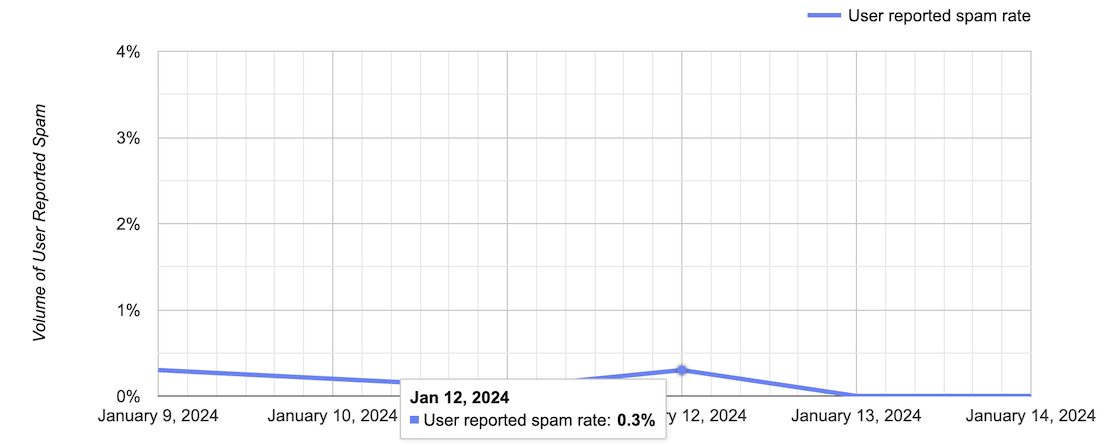
It’s normal for spam complaint rates to spike occasionally because Google measures each day in isolation.
If you’re seeing a spam rate that is consistently above 0.3%, it’s worth looking into why that’s happening. You might be sending emails to people who don’t want to receive them.
IP Reputation
IP reputation is the trustworthiness of the IP address your emails come from. Google may mark emails as spam if your IP reputation is poor.
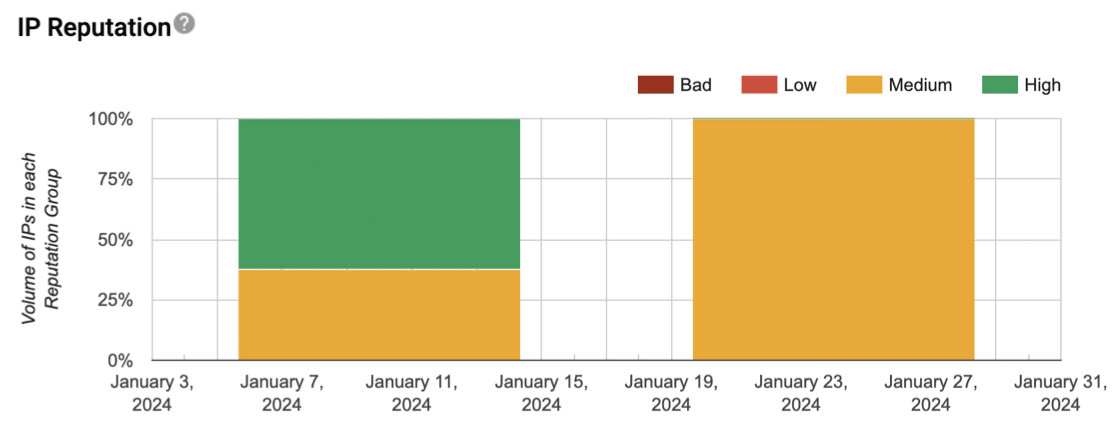
Keep in mind that IP reputation is tied to your email marketing provider. It’s a measure of their IP as well as yours.
If you see a downward trend, check in with the platform you’re using to ask if they’re seeing the same thing.
Domain Reputation
Domain reputation is the trustworthiness of the domain name you’ve verified in Postmaster Tools. This can be factored into Google’s spam scoring, along with other measurements.
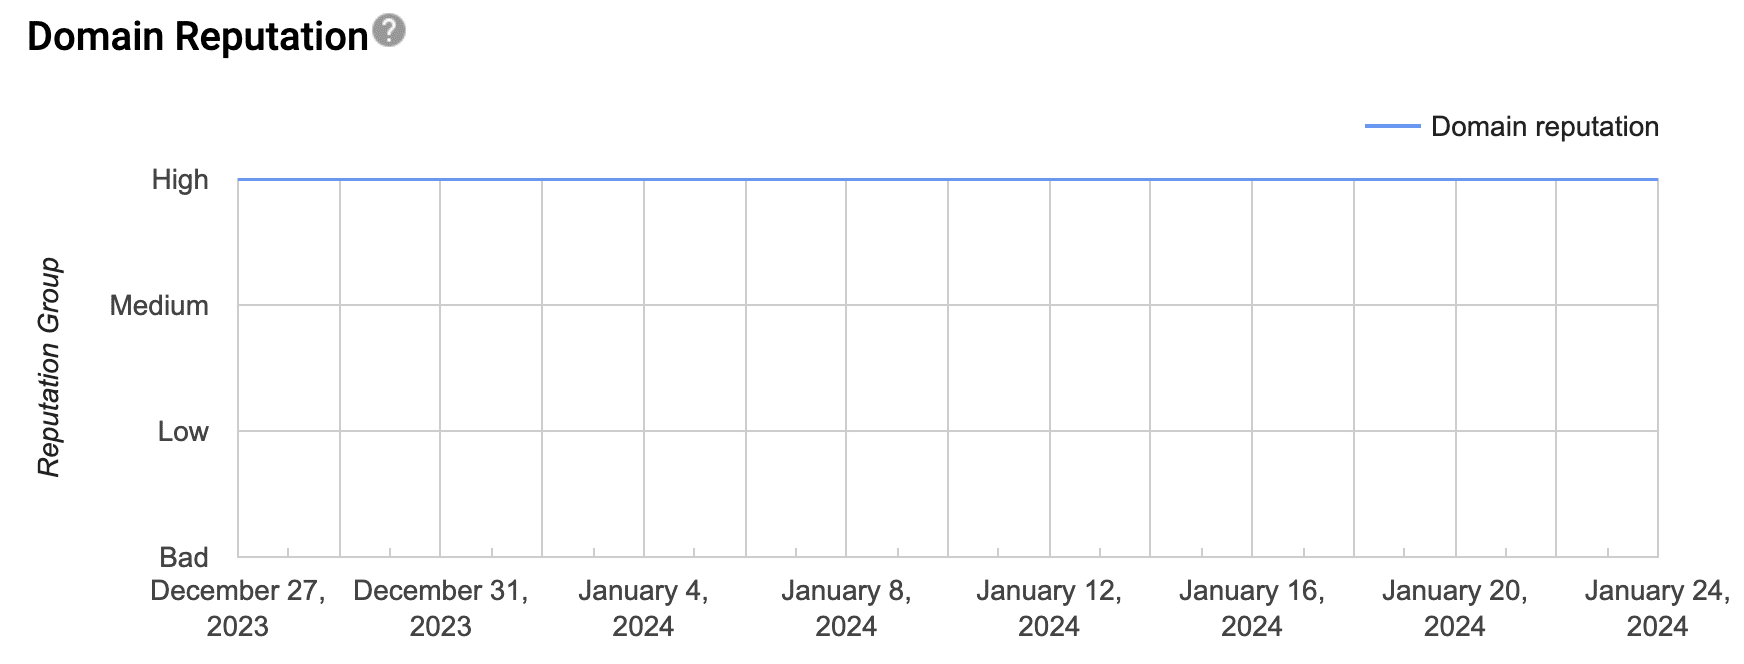
The ideal scenario is a consistent rating of High, as shown in our screenshot above.
Wait: What is IP Reputation vs Domain Reputation?
You’ll now see that Google has separate options for IP reputation and domain reputation. Here’s the difference:
- IP reputation measures the reputation of the server that actually sends your emails out. This might be a service like Constant Contact, ConvertKit, or Drip. Other people who use the service will share the same IP, so you’re a little more vulnerable to the impact of other users’ actions.
- Domain reputation is a measure of the emails that are sent from your domain name as a whole.
Feedback Loop
High-volume or bulk senders can activate this feature to track spam complaints in more detail. You’ll need a special email header called Feedback-ID if you want to use this. Most likely, you won’t need to look at this report.
Authentication
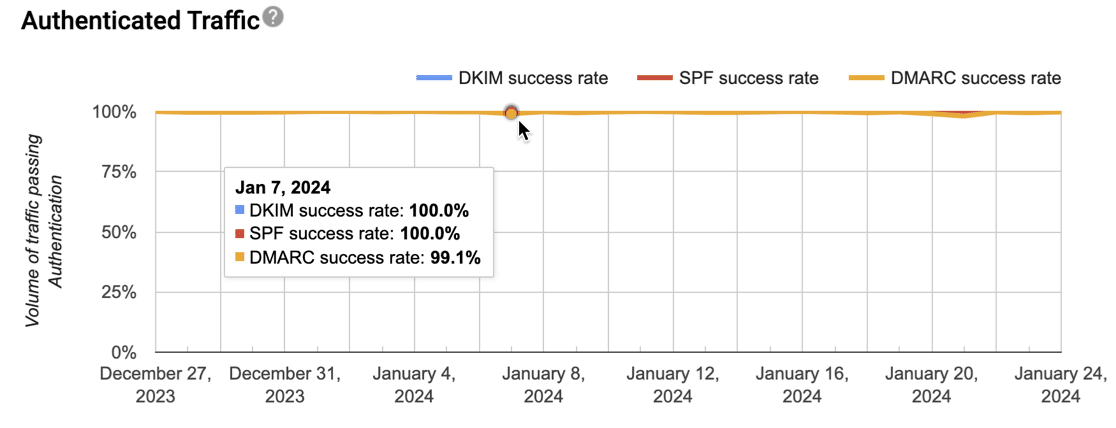
This chart shows you how many emails cleared security checks.
In more technical terms, it shows how many emails attempted to authenticate using DMARC, SPF, and DKIM vs. how many actually did.
Encryption
This chart looks very similar to the domain reputation chart we already showed. It should sit at 100%.
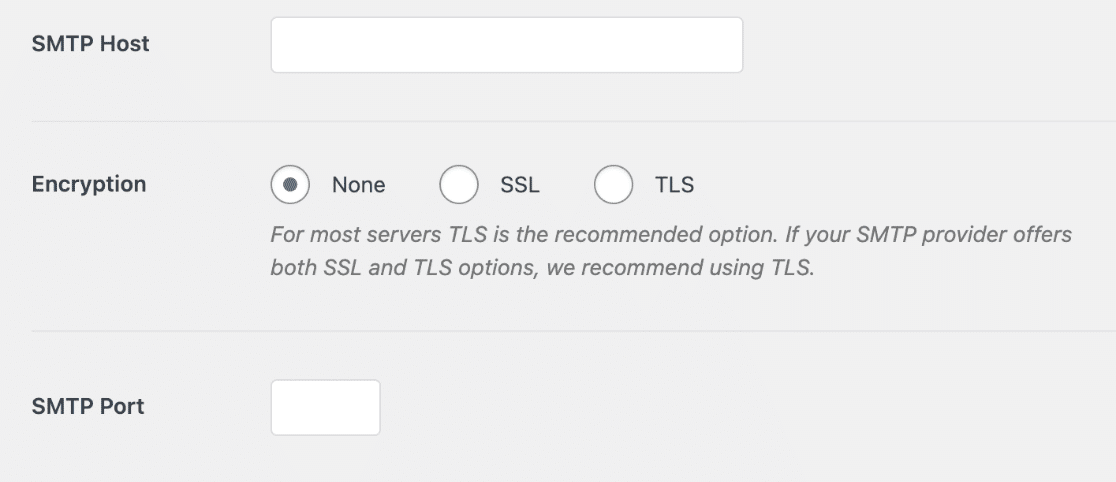
If you’re seeing a lower percentage, you may be using outdated connection details for your email provider.
Check the websites or platforms that are sending emails from your domain and update them from an SSL connection to a TLS connection.
Delivery Errors
Last but not least, the final chart is the most useful. The Delivery Errors report will show you whether emails were rejected or temporarily delayed. A temporary delay is labeled as a TempFail in this report.
This chart is going to tell you whether Gmail is blocking your emails, and if so, why.
If you see any jumps, click on the point in the chart and the reason for the failures will be displayed below it.
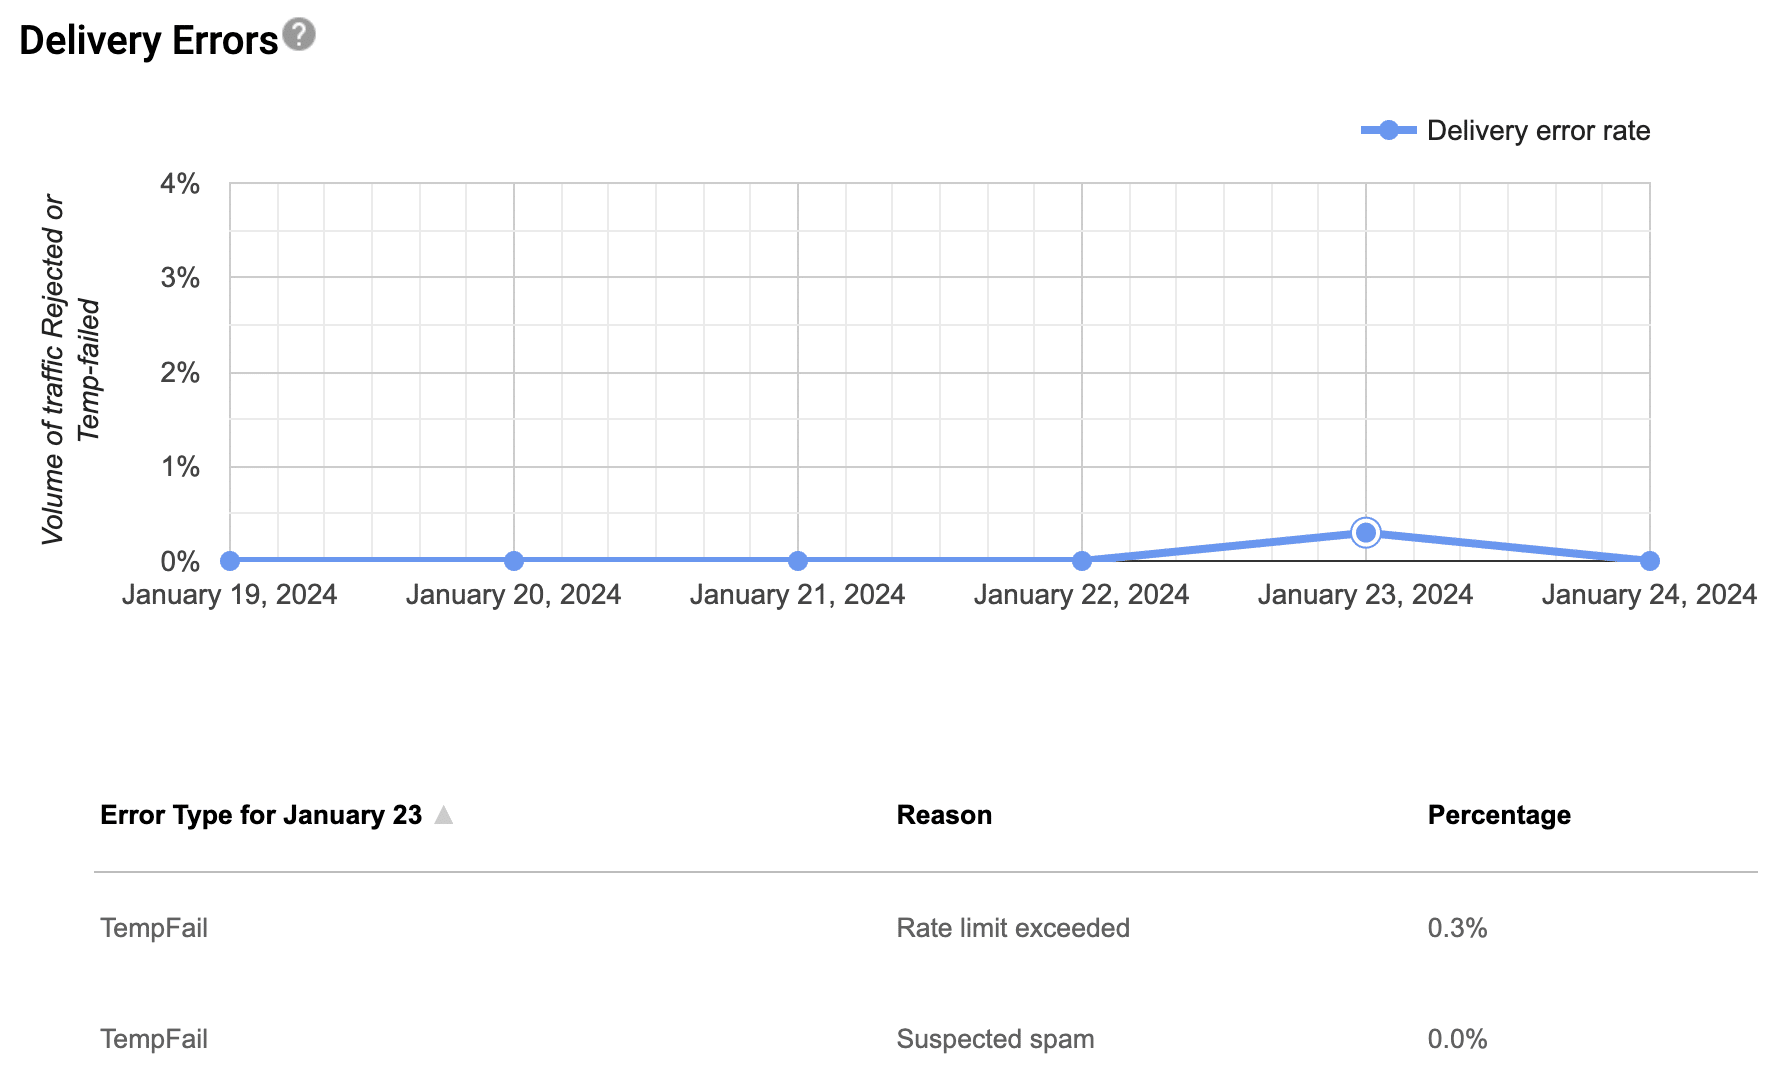
Small jumps here and there are not a huge cause for concern. However, very large error rates are a definite red flag. You may have received a 550 error or a 421 error that gives you more clues as to why they’re happening.
Here are the 3 most important error messages related to blocked emails in Gmail:
421-4.7.0 unsolicited mail originating from your IP address. To protect our users from spam, mail sent from your IP address has been temporarily rate limited.
550-5.7.1 Our system has detected an unusual rate of unsolicited mail originating from your IP address. To protect our users from spam, mail sent from your IP address has been blocked.
550-5.7.26 This mail is unauthenticated, which poses a security risk to the sender and Gmail users, and has been blocked. The sender must authenticate with at least one of SPF or DKIM. For this message, DKIM checks did not pass and SPF check for example.com did not pass with ip: 192.186.0.1.
If you’re seeing these errors, check that your domain name has the correct DNS records for authenticating email. It’s also a good idea to examine your emails to ensure you have the right unsubscribe links in them.
Note: WP Mail SMTP preserves the list-unsubscribe headers that your email provider adds. That means that your emails will have a one-click unsubscribe option at the top.

If you’re using a different SMTP plugin, make sure it’s preserving that crucial list-unsubscribe header. If it’s not there, If not, you may want to consider switching to WP Mail SMTP for the best possible protection against spam complaints and failed emails.
Next, Authenticate Emails from WordPress
Are your emails from WordPress disappearing or landing in the spam folder? You’re definitely not alone. Learn how to authenticate WordPress emails and ensure they always land in your inbox.
Ready to fix your emails? Get started today with the best WordPress SMTP plugin. If you don’t have the time to fix your emails, you can get full White Glove Setup assistance as an extra purchase, and there’s a 14-day money-back guarantee for all paid plans.
If this article helped you out, please follow us on Facebook and Twitter for more WordPress tips and tutorials.
Source :
https://wpmailsmtp.com/how-to-set-up-google-postmaster-tools/