Are you worried about hackers attacking your website?
Cross-site scripting, also called XSS, is one of the most common attacks on WordPress sites. Hackers find vulnerabilities on your site and use them to steal information and misuse your website.
What’s worse is that if you don’t fix it immediately, these hacks could lead to more severe damage – the kind that’s really hard to recover from.
You can prevent these hacks by installing a firewall on your WordPress site.
If your website is already under attack, we’ll show you how to fix it right away in simple beginner-friendly language. We’ll keep cybersecurity jargon to the bare minimum in this tutorial. We’ll also show you how to prevent future attacks.
First, let’s quickly understand what happens in an XSS attack so that you’ll be better equipped to handle it.
What is an XSS Attack in WordPress?
XSS stands for Cross Site Scripting which is a kind of injection attack where hackers inject malicious scripts into a website.
These scripts are disguised as good code on a trusted website. Next, when a user lands on this website, their browser executes all the code, including the malicious script, because it thinks it’s all trusted instructions.
In simpler terms, imagine you’re a spy and you’ve just received an official email from the government about a top-secret mission. It contains all the instructions you need to follow down to the T.
What you don’t know is that someone intercepted that email and added a few more instructions of their own. The government has no clue about it and you don’t bother to double check because you trust the source.
Some of it doesn’t make sense but you’re trained to obey every order to achieve your mission.
In this scenario, the government is your website, and the spy is the user’s browser. The browser follows the instructions from your website and can’t differentiate between the good and bad scripts.
These scripts are usually in Javascript, one of the most popular and widely-used programming languages. Although, these attacks can take place using any client-side language.
Now there are many ways to carry out an XSS attack. One way is to send a link to unsuspecting users to get them to click on it. Once they click on it, the attack can possibly do one or more of the following:
- Redirect users to a malicious site
- Capture the user’s keystrokes
- Run web browser-based exploits
- Steal cookie information of the user logged into an account
If the hacker is able to steal cookie information, they can completely compromise the user’s account. For instance, if you’re logged into your website’s wp-admin panel, the hacker can steal your credentials and log into your site.
What you need to do to prevent these attacks is to make sure all user data is validated and sanitized properly before it enters your website. That way, no user input can be malicious Javascript code. Added to that, you need to make sure there are no XSS vulnerabilities on your site that can allow a hacker to attack.
We’ve barely scratched the surface of XSS attacks but we hope you have a decent understanding of how a WordPress XSS attack works. Now if you suspect your site is hacked, follow our easy step-by-step tutorial below.
How to Find and Fix an XSS Attack in WordPress
To find any kind of malware or hacks on your site, you’ll need to run a deep scan on your entire website including its files and database.
We’ll be using Sucuri to scan and clean up your hacked site. Sucuri gives you a robust security setup including a firewall, malware scanner, and malware cleaner.
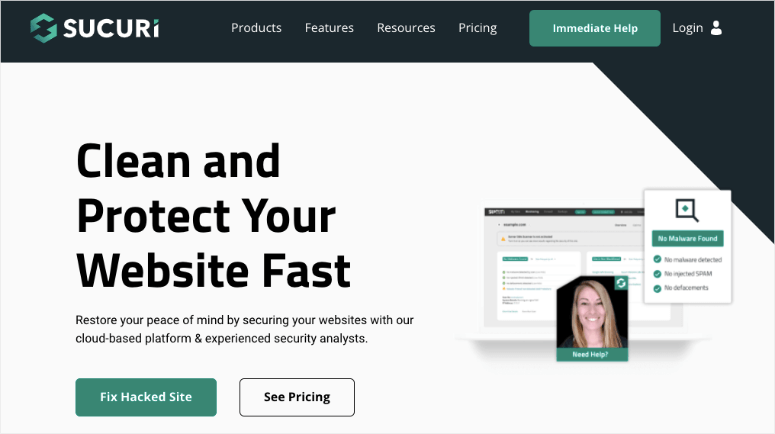
Sucuri offers a free website malware scanner that you can install inside your WordPress site by navigating to Plugins » Add New tab.
We recommend using the premium server-side scanner. This will turn your website inside out to find any trace of malware.
Added to that, here are a few of its highlights:
- Monitors spam and malicious scripts
- Checks for hidden backdoors created by hackers
- Detects changes made to DNS (domain name system) and SSL
- Checks for blacklists with search engines and other authorities
- Monitors website uptime
- Instant alerts via email, SMS, Slack, and RSS
For more details, read our Sucuri Review.
Sucuri comes with a price tag of $199.99 per year. If that’s out of your budget, you can try other security plugins. See our list: 9 Best WordPress Security Plugins Compared.
While selecting a security plugin, make sure it gives you all the cyber security features you need to find and fix malware infections and protect your website.
Step 1: Scanning Your Website
To get started, you’ll need to sign up for a plan with Sucuri. Then, log in to the Sucuri dashboard where you can add your site.

Here, you’ll need to connect your website by entering your FTP credentials. If you don’t know your FTP credentials, you can get them from your web host.
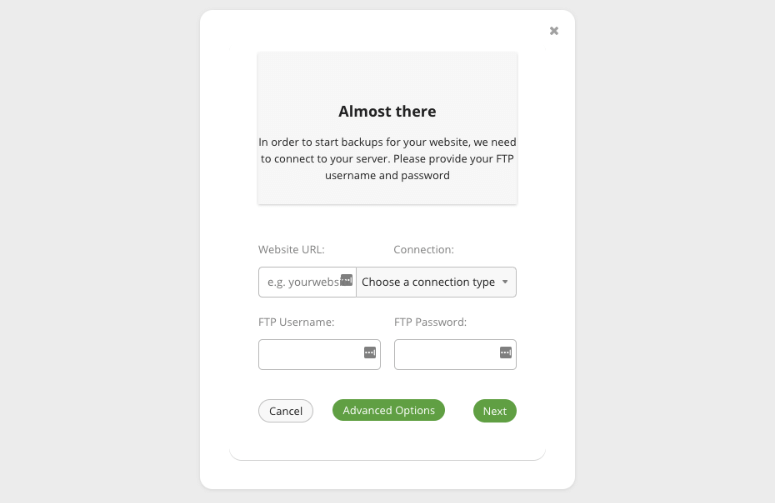
When your site is connected, Sucuri will automatically run a thorough scan of your website. Once done, it will show you a detailed report under the ‘My Sites’ tab.
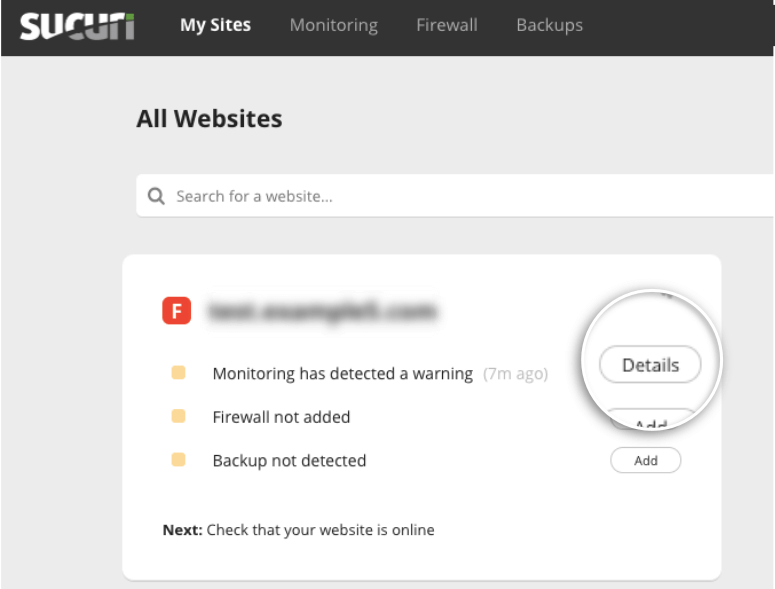
Now you can click on the ‘Details’ button next to the warning message. This will open up the Monitoring page where you can view the details of the hack or infection.
Step 2: Requesting a Malware Cleanup
On the Monitoring page, you can see what kind of malware has infected your site. Sucuri adds a rating to indicate the risk level. So if it’s a critical or high risk, you know that you need to fix it right away. Added to that, it will also show you if your site has been blacklisted by any search engines.
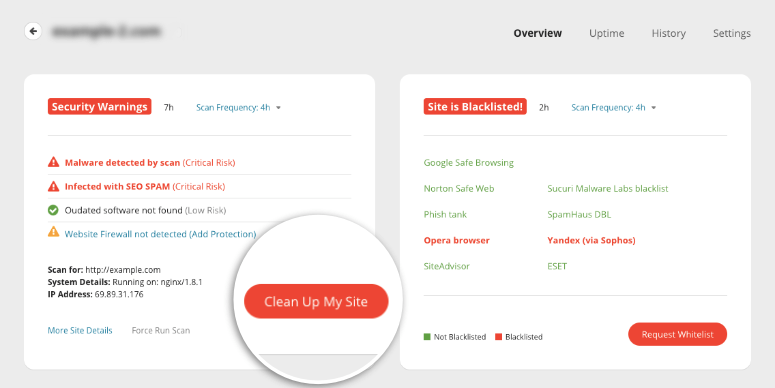
Now that you know your site is infected, you need to clean it up and Sucuri makes this really easy for you. To get started with the process, click on the ‘Clean Up My Site’ button.
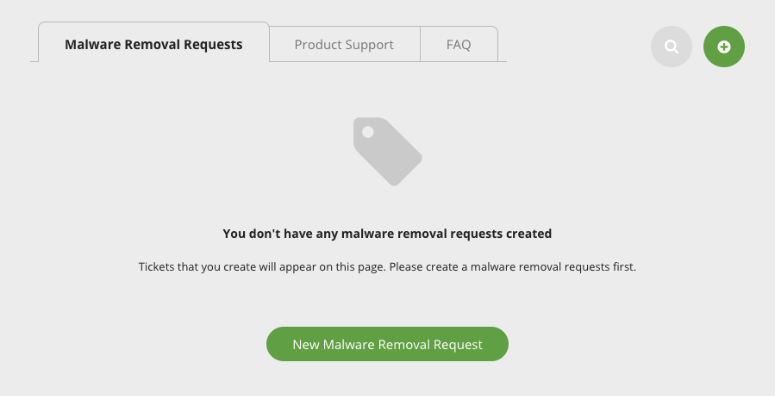
On the next page, click on New Malware Removal Request button and a form will appear where you can enter your site’s details.
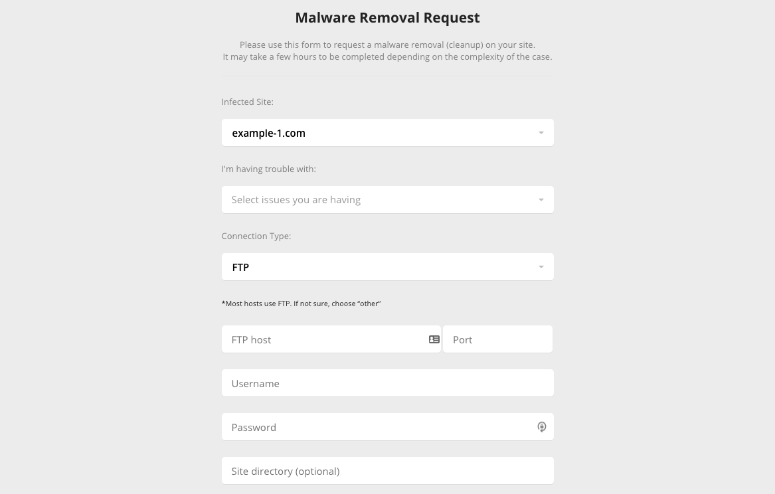
Simply fill out the form and submit it. Once done, Sucuri’s security experts will clean up your site for you. In case you don’t know any of the details you need for the form, you can ask your web host for them.
Now you may be wondering how long would it take to get your site cleaned.
Sucuri gives first preference to users on the Business plan. They assure a turnaround time of 6 hours. For other plans, it depends on how complex your site’s infection is and the volume of requests they have in queue.
Immediately after an attack, we strongly recommend logging all users out of your site and changing your login credentials to be on the safe side.
How to Prevent XSS Attacks on Your WordPress Site
It’s always best to protect your website and prevent these kinds of malware attacks on your site. It’s much easier and cheaper than trying to fix a hacked website. Here are our top recommended steps to prevent XSS attacks on your site.
1. Enable a Web Application Firewall (WAF)
Sucuri has one of the best firewalls for WordPress sites. It not only blocks XSS attacks but all sorts of other malware attacks like DDoS, Brute Force, Phishing, and SQL injections.
The firewall will sit in front of your website and scan every user coming through. It will identify and block bad bots before they reach your site.
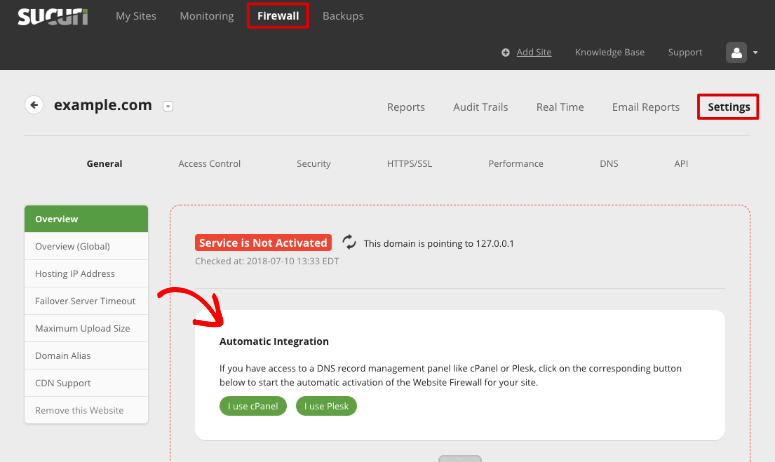
To enable the Sucuri firewall, navigate to the Firewall tab on your Sucuri dashboard.
Select your site, and you’ll see setup instructions that you can follow. Sucuri gives you 2 options to set up the firewall:
1. Automatic Integration: Simply enter your hosting credentials using cPanel or Plesk. This method requires you to give Sucuri access to your website’s server to automatically set up the firewall on your site.
2. Manual Integration: You can set up the firewall on your own without granting internal access to Sucuri. To get started, click on the internal domain link and make sure that it loads.
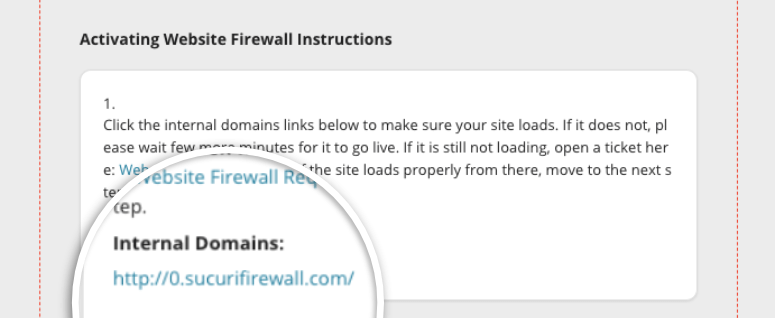
Next, you can configure your DNS to point your web traffic at the Sucuri firewall. For this, you’ll need to access the DNS records in your hosting account. Here, you can change the ‘A’ record of your site and enter the IP addresses that Sucuri provides.
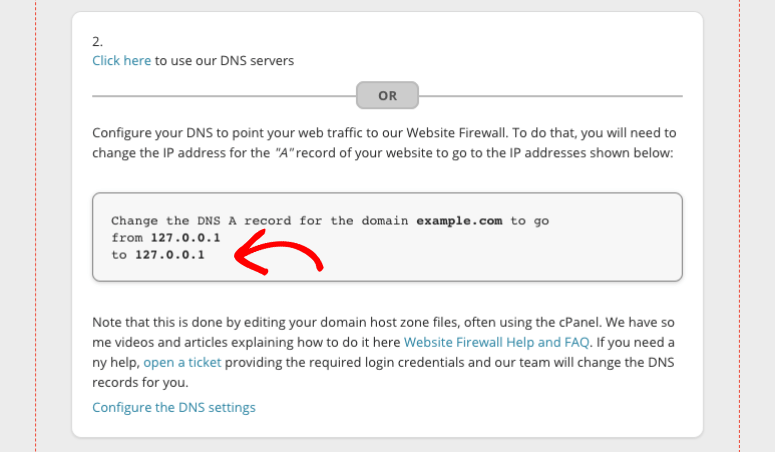
If you’re stressed that this is all too complicated, you can ask your web host for help and they will guide you through the process. Added to that, you can also raise a support ticket with Sucuri and their support team will help you change the DNS records.
To open a ticket, you’ll find a link inside the manual instructions on the same page.
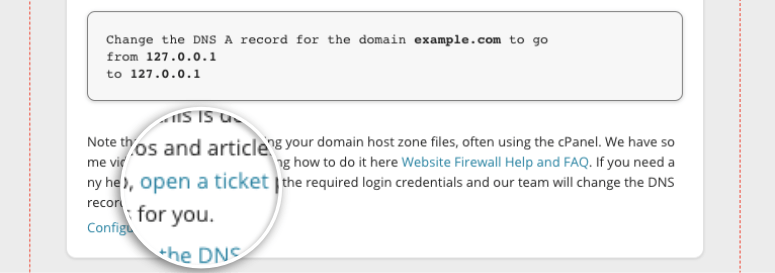
Once you’re done setting up the firewall, it usually takes a few hours for the changes to reflect. You can expect a maximum wait time of 48 hours.
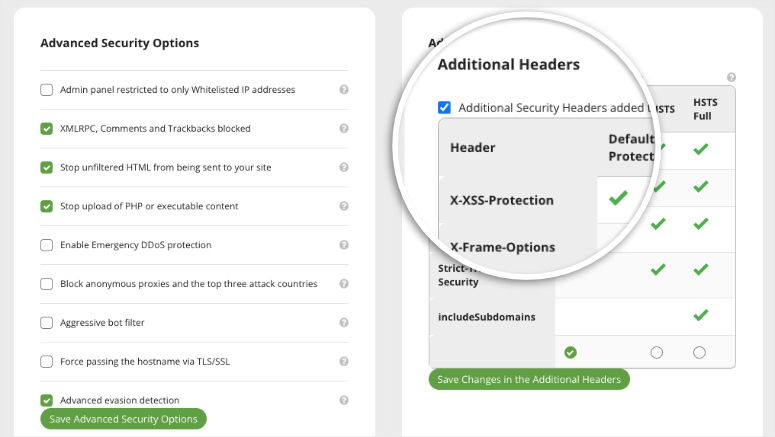
When you enable the firewall, it will automatically add security headers to your site to protect it from XSS attacks.
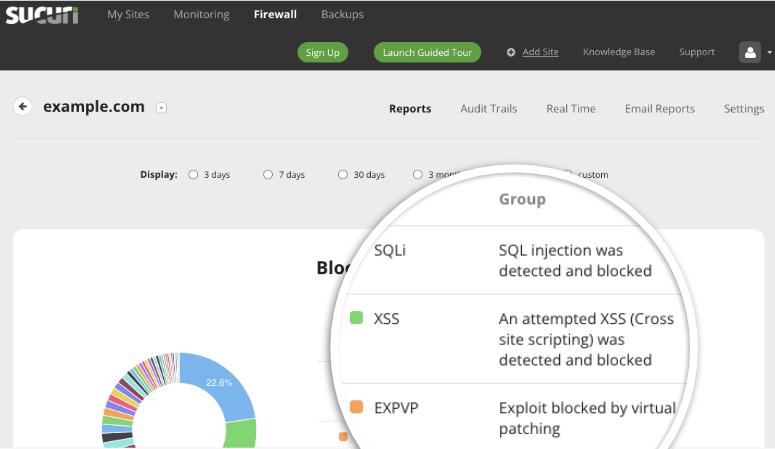
If there’s an attempted XSS attack Sucuri will block it and report it to you in the Reports tab.
Now what we love about the Sucuri firewall is that it’s so easy for anyone to use, including beginners. You don’t have to be a cyber security expert or know any coding.
You can enable all sorts of protection features with just a click in the Settings » Security tab.
So for instance, you can enable DDoS protection and geoblocking to make it harder for hackers to attack your site.
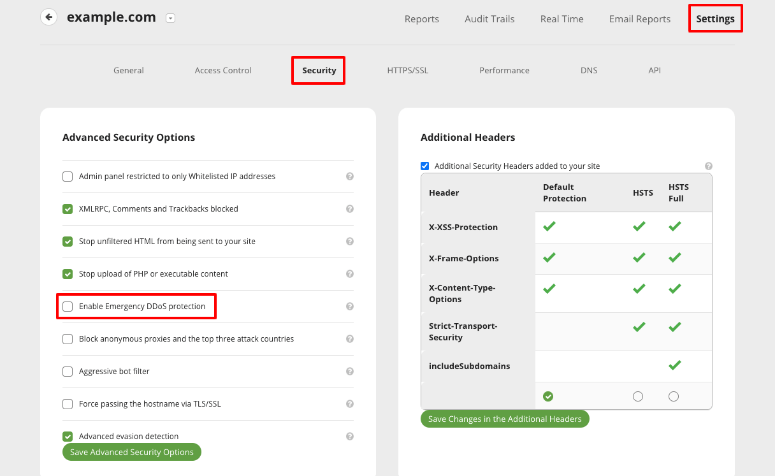
To enable a security feature here, all you have to do is check the box and save your settings. When you need to disable it, you simply have to uncheck the box.
Aside from this, the Sucuri plugin will:
- Regularly scan and monitor for spam and malicious code
- Alert you of any cross-site scripting vulnerability
- Block bad bots and hackers
- Check for blacklists with search engines and other authorities
- Monitor website uptime
- Detect changes made to DNS (domain name system) and SSL
- Send you instant security alerts via email, SMS, Slack, and RSS
So your site will be protected at all times.
2. Use Secure Forms
On a vulnerable website, forms are one of the most common targets for hackers. If your form is unsecured, this means anyone can simply enter malicious code in your form fields.
Our recommendation for securing your website’s forms is WPForms. It is the #1 WordPress form builder that has built-in security so your forms are protected right from the start.
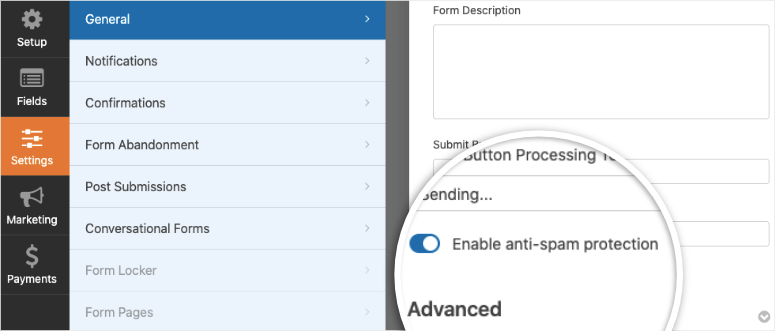
By default, the forms have anti-spam protection turned on. Plus, you can even add CAPTCHA to your forms to block spam bots.
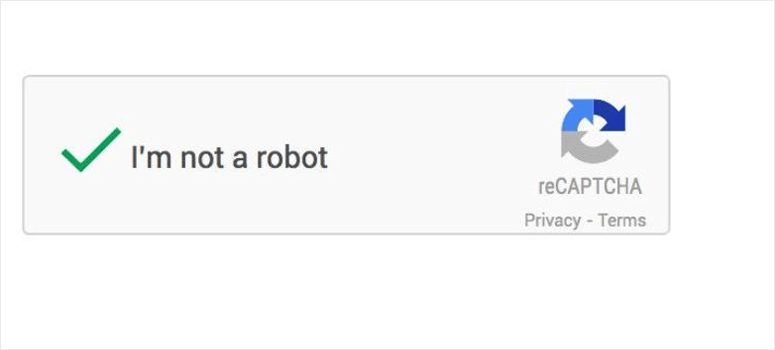
You can enable an invisible captcha or the type where a user will have to solve a little puzzle or tick a box to prove they’re human.
3. Set User Role Permissions
When you have multiple people working on your website, it isn’t wise to give everyone admin access. It’s better to assign them roles based on what permissions they need.
WordPress lets you create roles for:
- Super Admin
- Administrator
- Editor
- Author
- Contributor
- Subscriber
Now if a hacker gets control over a user’s account, they’ll be limited in what they can do on your site.
4. Auto-logout Inactive Users
Hackers can gain access to user accounts by hijacking their browser sessions and stealing cookies.
You can minimize this risk by logging out inactive WordPress users.
Many security plugins have an idle session logout feature or you can use the Inactive Logout plugin.
5. Update Your Website Regularly
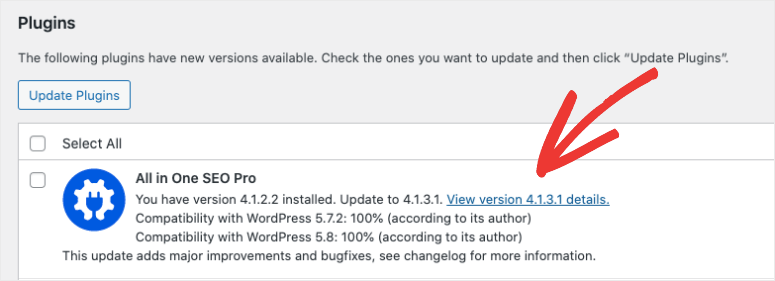
WordPress plugins, themes, and even your WordPress installation get updates regularly. You’ll see them inside your WordPress dashboard when they’re available:
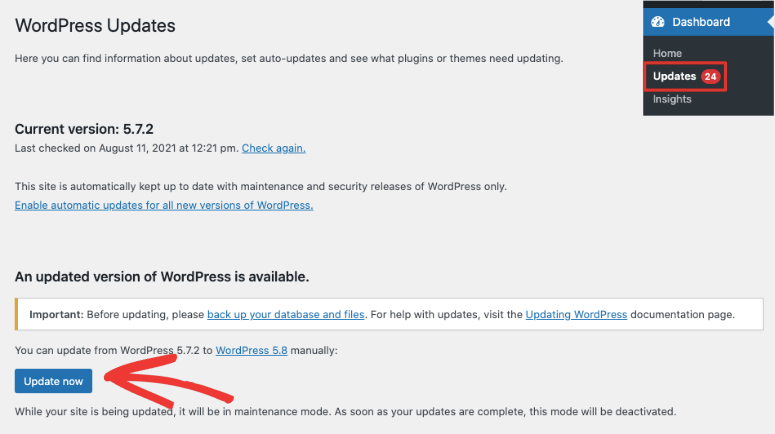
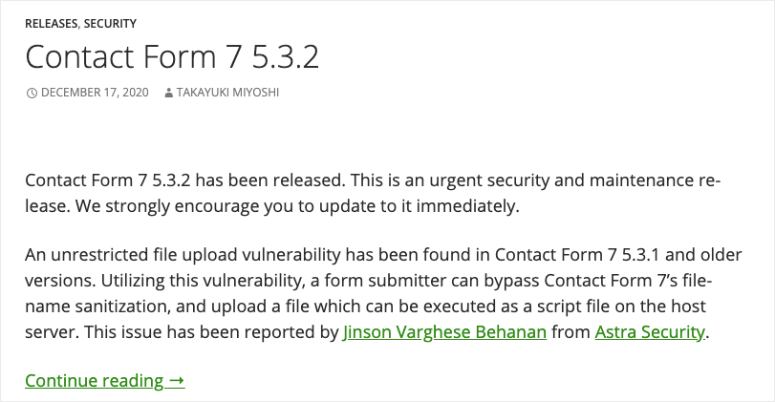
Many website owners ignore updates for a long time but this can expose your website to hackers. Updates usually carry bug fixes, new features, and improvements to the software. They can also have security patches. You can see if an update carries a security patch by viewing the details of the update.
This means a vulnerability was found in the software that hackers can use to attack your site. When developers find security problems, they patch them up and release a new version of the software.
All you have to do is update the software on your site.
So if you see it’s a security patch, update it immediately to avoid any risk of being hacked.
One of the main reasons site owners ignore updates is that they can sometimes break your site or cause incompatibility issues. We recommend that you test the update on a staging site and then run it on your live site.
With that, you’ve learned how to fix and prevent XSS attacks on your WordPress site.
Before we wrap up, we’ll give you one more security tip. Always take regular backups of your website.
Even with the strongest security measures on your site, there are many things that can go wrong. For instance, a user can make a simple human error that crashes your website.
You can set up automated backups using a backup plugin like UpdraftPlus. For more options, see our list of the top WordPress backup plugins.
FAQs
1. Is WordPress vulnerable to cross-site scripting attacks?
The WordPress core software is developed and maintained by some of the best experts in the world. Their software is pretty rock solid but keep in mind that no software is free from vulnerabilities.
The reason WordPress websites are attacked often is that the platform is so popular. And most users install tons of third-party themes and plugins. Vulnerabilities can develop in any of these elements and hackers can exploit them to hack your site.
2. Are there different kinds of cross site scripting attacks?
Yes. There are 3 main types of XSS attacks:
- Stored XSS (also know as persistent XSS): Attackers stores their payload on a compromised server, causing the website to deliver malicious code to other visitors.
- Reflected XSS: The payload is stored in the data sent from the browser to the server.
- DOM XSS: Here, the server itself isn’t the one vulnerable to XSS, but rather the JavaScript on the page is.
- Self cross-site scripting: Attackers can exploit a vulnerability that needs really specific context and manual changes. The victim here can only be yourself.
- Blind cross-site scripting: In these attacks, the vulnerability commonly lies on a page that only authorized users can access. The attacker can’t see the result of an attack.
3. How do I make sure there are no other security issues on my site?
Make sure you always have a security plugin installed on your website. This is a must for all kinds of websites including WooCommerce, blogs, and small business sites. We recommend Sucuri, but you can also check out Wordfence, MalCare, and SiteLock. See more of our top recommendations here: 9 Best WordPress Security Plugins Compared.
That’s all we have for you today. We hope this post has given you everything you need to secure your website.
For more on website security, see our resources on:
- The Complete WordPress Security Guide (Beginner Friendly)
- 5 Best WordPress Vulnerability Scanners To Find Threats
- 9 Best Activity Log Plugins to Track and Audit Your WordPress Site
These posts will give you more ways to seal vulnerabilities and protect your website from all risks.
Source :
https://www.isitwp.com/fix-prevent-xss-attacks-wordpress/