In a previous article, I showed you how to install Active Directory (AD), the first domain controller (DC) in a new forest and domain, using Server Manager in Windows Server 2019. But if you’re not afraid of the command line, there’s a much quicker way to get Active Directory up and running in Windows Server. In this article, I’ll show you how to configure AD using PowerShell.
There are two steps to installing AD in Windows Server 2019. The first is to install the Active Directory Domain Services (AD DS) server role. The second step is to configure your server as a domain controller. An AD domain must have at least one DC. Your server will be the first DC in a new AD forest and domain.
To complete the instructions below, you will need to have an account with administrator privileges in Windows Server 2019. I will also assume that you are using Windows Server 2019 with the Desktop Experience role installed. If you are using Server Core, the instructions vary a little but are more or less the same.
Active Directory prerequisites
Before you install your first domain controller in the new AD domain, there are a couple of things you should do to prepare the server. While it’s not absolutely necessary, I recommend giving the computer a name that makes it easy to identify. For example, I usually call the first domain controller in a new domain DC1. Secondly, you’ll need to set a static IP address and configure the network adapter’s DNS server.
Let’s start by renaming the server.
- Log in to Windows Server 2019 as an administrator.
- Open the Start menu and click the Windows PowerShell
- In the PowerShell window, run the command below and press ENTER. Replace ‘DC1’ with the name that you would like to use for your domain controller.
Rename-Computer -NewName DC1
- Restart the server.
Once the server has rebooted, we can configure the network adapter. Your DC will need to communicate with other devices on the local network, so it’s important to speak to whoever oversees your network and get them to provide you with a static IP address that isn’t already in use. On my network, I will assign a static IP address of 192.168.1.10/24 and the default gateway is 192.168.1.1.
- Log in to Windows Server 2019 as an administrator.
- Open the Start menu and click the Windows PowerShell
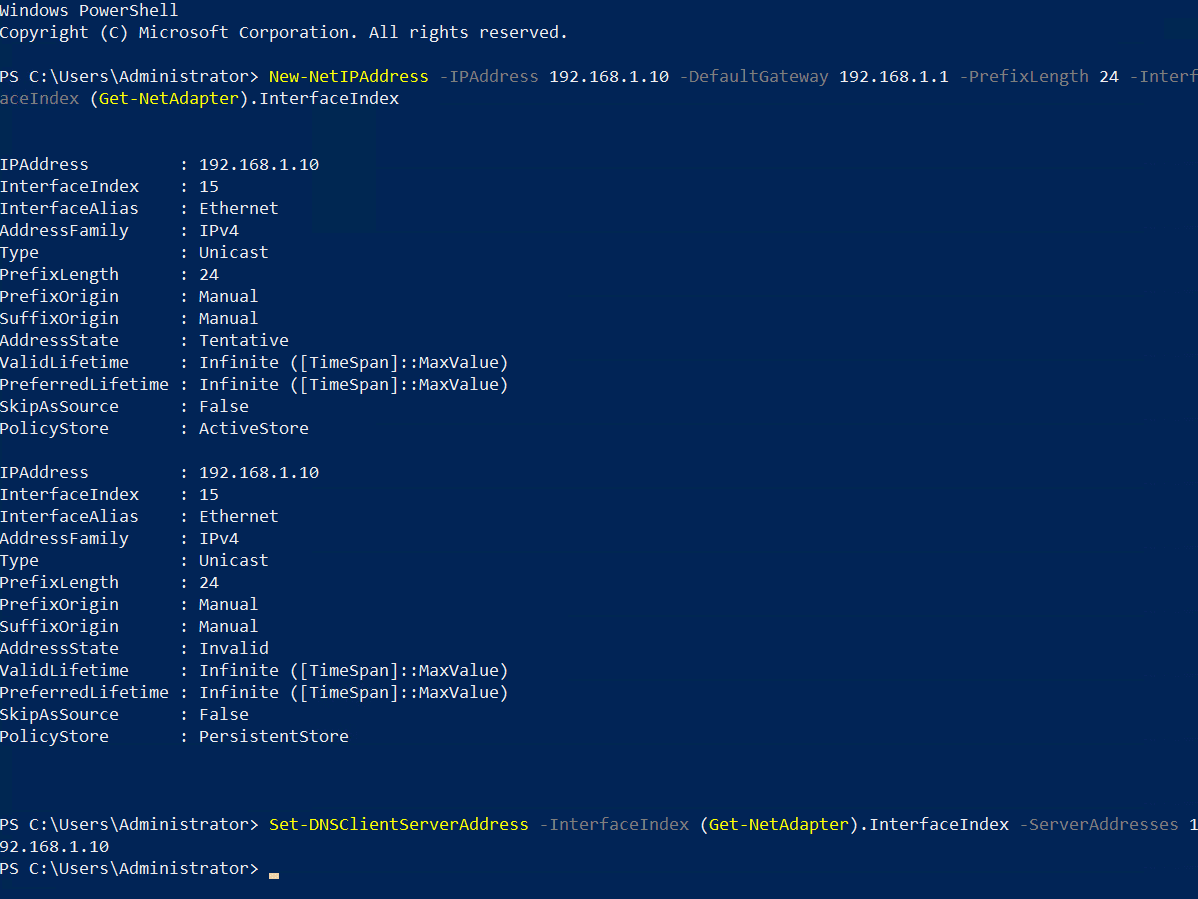
- In the PowerShell window, run the New-NetIPAddress command below and press ENTER. Replace the values for IPAddress, DefaultGateway, and PrefixLength to those provided by your network administrator.
New-NetIPAddress –IPAddress 192.168.1.10 -DefaultGateway 192.168.1.1 -PrefixLength 24 -InterfaceIndex (Get-NetAdapter).InterfaceIndex
The above command is designed to work on servers that have only one network adapter installed. If you have more than one adapter, you’ll need to enter the interface number instead of (Get-NetAdapter).InterfaceIndex. You can get the interface index number (ifIndex) for each adapter using Get-NetAdapter.
- Now configure the adapter’s DNS settings. We’ll set the preferred DNS server to be our domain controller’s IP address because the domain controller will also perform the function of DNS server for the domain. So, replace 192.168.1.10 with the same IP address you configured for the adapter. Run Set-DNSClientServerAddress as shown, and press ENTER.
Set-DNSClientServerAddress –InterfaceIndex (Get-NetAdapter).InterfaceIndex –ServerAddresses 192.168.1.10
Again, the command is designed to work on servers that have only one network adapter installed. If you have more than one adapter, you’ll need to enter the interface number instead of (Get-NetAdapter).InterfaceIndex.
Install the Active Directory Domain Services role
The next step is to install the AD DS server role. It’s easy to do using the Install-WindowsFeature cmdlet as shown below. If you are using Server Core, remove the -IncludeManagementTools parameter.
Install-WindowsFeature -name AD-Domain-Services -IncludeManagementTools
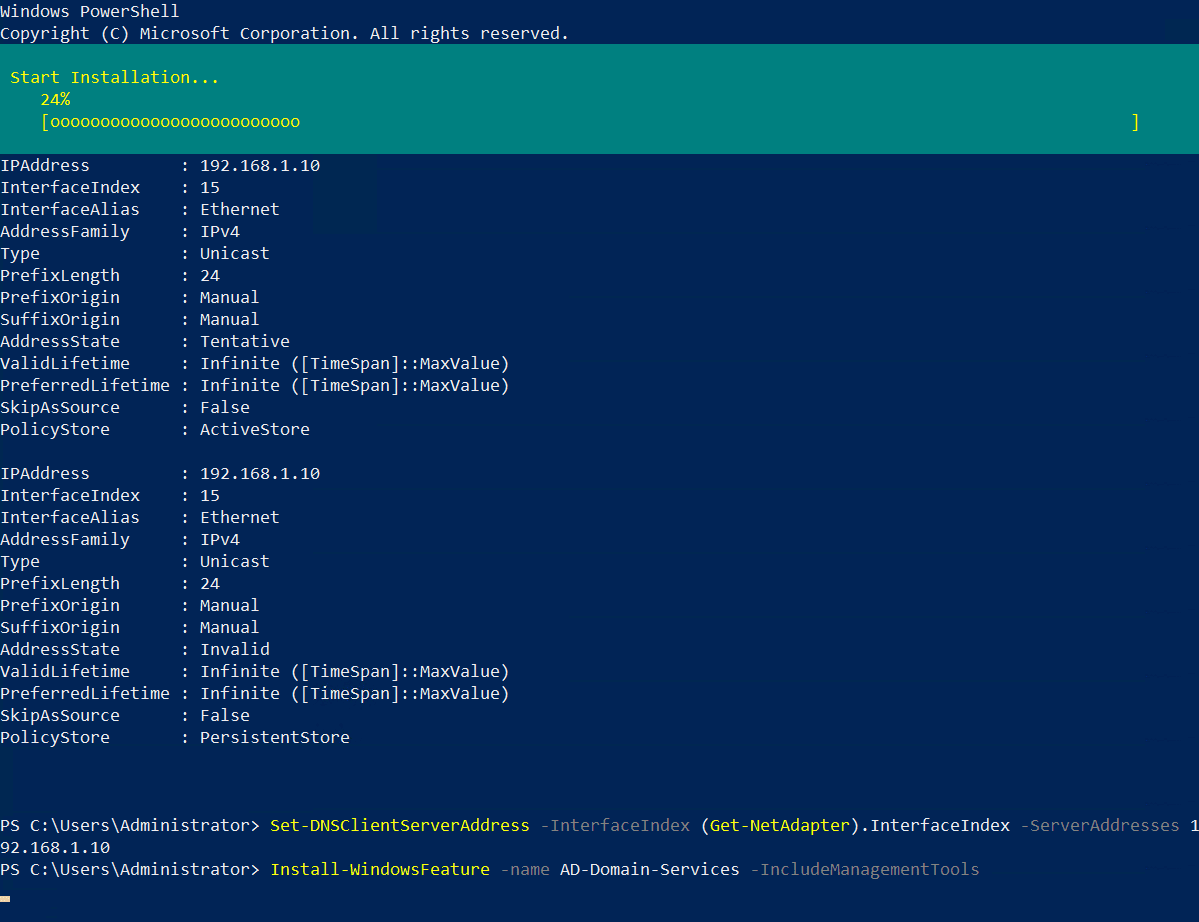
Once the AD DS server role is installed, you’ll get a message in the PowerShell window. The Success column should read True.

Configure the first domain controller in a new Active Directory forest
Before you continue, you should decide on a Fully Qualified Domain Name (FQDN) for your new domain. I’m going to use ad.contoso.com in this example. Where ‘ad’ is the name of my new domain and contoso.com is the top-level domain (TLD). You should make sure that you own the public TLD. In this example, I should own the contoso.com domain name. AD in the FQDN defines my internal DNS namespace for Active Directory.
To configure Windows Server 2019 as a domain controller, run Install-ADDSForest as shown in the example below. Replace ad.contoso.com with your chosen FQDN. DomainNetBIOSName is usually set to the part of your FQDN that identifies your internal AD DNS namespace. So, the part that comes to the left of the first period. In this case, ‘ad’.
Install-ADDSForest -DomainName ad.contoso.com -DomainNetBIOSName AD -InstallDNS
You should note that Install-ADDSForest is only used when you are installing the first domain controller in a new AD forest. Install-ADDSDomain and Install-ADDSDomainController are used respectively to create a new domain in an existing forest and install a new DC in an existing AD domain.
DomainName and DomainNetBIOSName are the only two compulsory parameters for the Install-ADDSForest cmdlet. If you want to explore what other options you can configure, run the command line below:
Get-Help Install-ADDSForest
When you run the Install-ADDSForest cmdlet, you’ll be prompted to enter a password for Directory Services Restore Mode (DSRM). Or Safe Mode password as it’s sometimes referred to. Enter a password and confirm it when prompted.
You’ll then see a message:
The target server will be configured as a domain controller and restarted when this operation is complete.
Do you want to continue with this operation?
Type y in the PowerShell window and press ENTER to confirm that you want to configure the server as a domain controller.
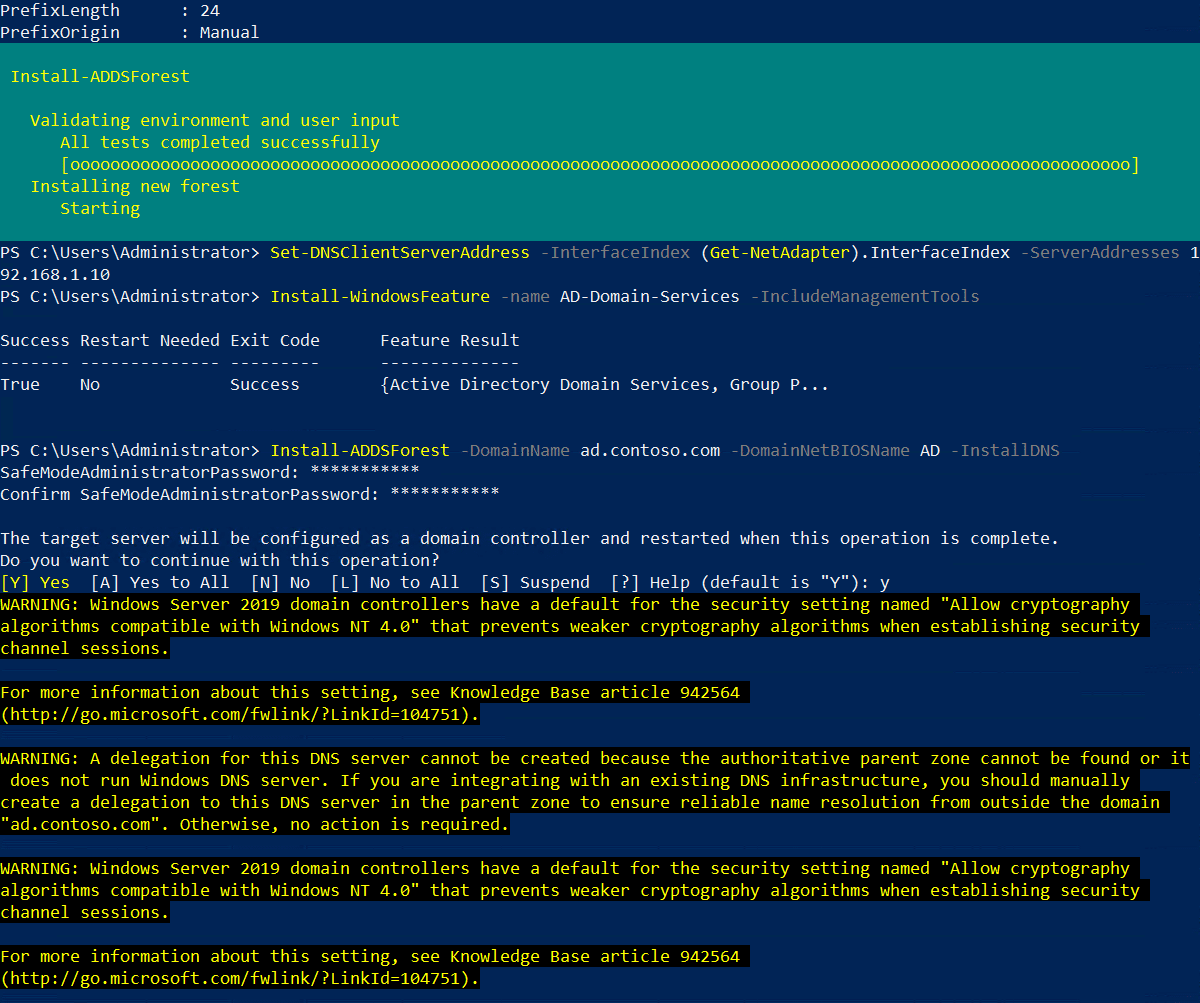
As AD is configured, you’ll see some yellow warnings appear in the PowerShell window. They are normal and you can safely ignore them. The server will automatically reboot. Once Windows Server has rebooted, you will need to log in with the domain administrator account. The domain administrator account is assigned the same password as the built-in administrator account.
On the sign-in page, type administrator in the User name field. Type the password for the administrator account, which is the same as the password for the previous built-in administrator account, and press ENTER.
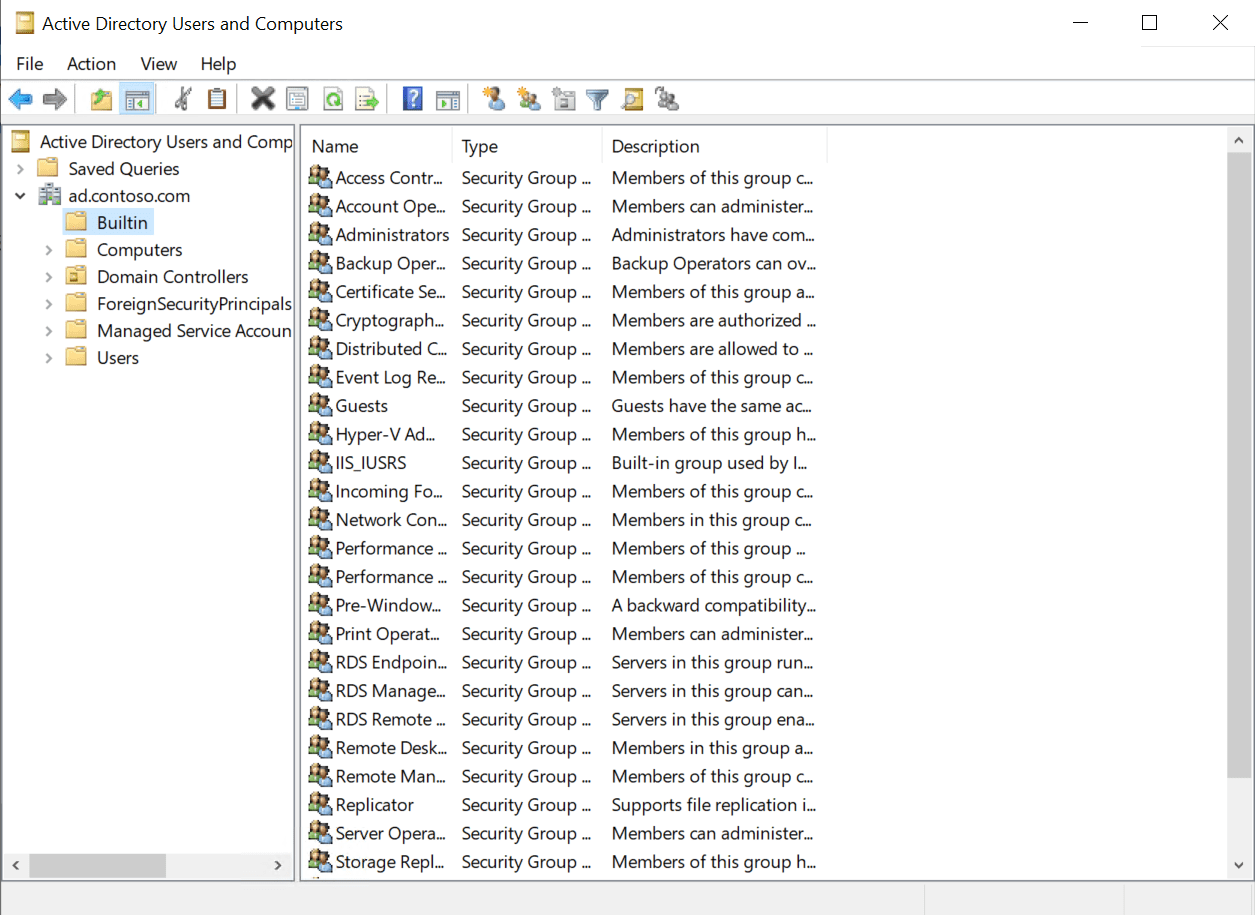
And that is it! You are now logged in to your AD domain’s first domain controller. You can access Server Manager from the Start menu. In Server Manager, click the Tools menu and then select Active Directory Users and Computers to start managing your domain.
Source :
https://petri.com/how-to-install-active-directory-in-windows-server-2019-using-powershell/