Ubiquiti UniFi – Troubleshooting Slow Wi-Fi Speeds

This article will provide suggestions for troubleshooting and resolving issues with slow Wi-Fi speeds on your UniFi network, as well as better understand what Wi-Fi speeds to expect and how to optimize your Wi-Fi configuration. 

Introduction

One of the most common Wi-Fi performance concerns reported is slower than expected Wi-Fi speed. This is due to a number of factors: 

  • Speed issues can result from a wide range of network limitations and problems, many of which have nothing to do with wireless.
  • Declined speed is easy to notice in typical network usage.
  • Internet speed tests are the most widely—and sometimes the only tool used to evaluate/benchmark network performance: and can be inconsistent and inaccurate. 
  • ISPs and hardware vendors market products with peak theoretical performance that differ from real-life usage. 

Measuring Wi-Fi Performance 

When looking at Wi-Fi performance it is important to take a step back and consider how Wi-Fi is supposed to work. Wi-Fi offers the benefit of mobility, scalability, and convenience over wired networks at the expense of maximum throughput and stability. With respect to client performance, modern Wi-Fi is designed to allow clients to enjoy the benefits of not being tethered to a wired network while preventing any visible reduction in performance across its area of coverage.  

Much of the concern about wireless throughput comes from a lack of understanding about how much bandwidth clients actually use. The difference between 300 Mbps and 500 Mbps may seem significant but the difference in performance would likely never be noticed through client use.

Here are estimated requirements of what throughput client devices need to use without declined performance (for more info see here): 

Client Application-specific Bandwidth Requirements

ApplicationPotential Peak ThroughputAvg. Throughput Used
Web Browsing/Email (Light) 1 Mbps.25 Mbps
Web Browsing/Email (Moderate)2 Mbps.5 Mbps
Web Browsing/Email (Heavy) 4 Mbps1 Mbps
Apple Facetime Video Call (HD quality).7 Mbps.7 Mbps
Skype Group Video Call (7+ people)8.5 Mbps8.5 Mbps
Netflix Video Streaming (HD Quality)5 Mbps5 Mbps
Netflix Video Streaming (Ultra HD Quality)25 Mbps25 Mbps

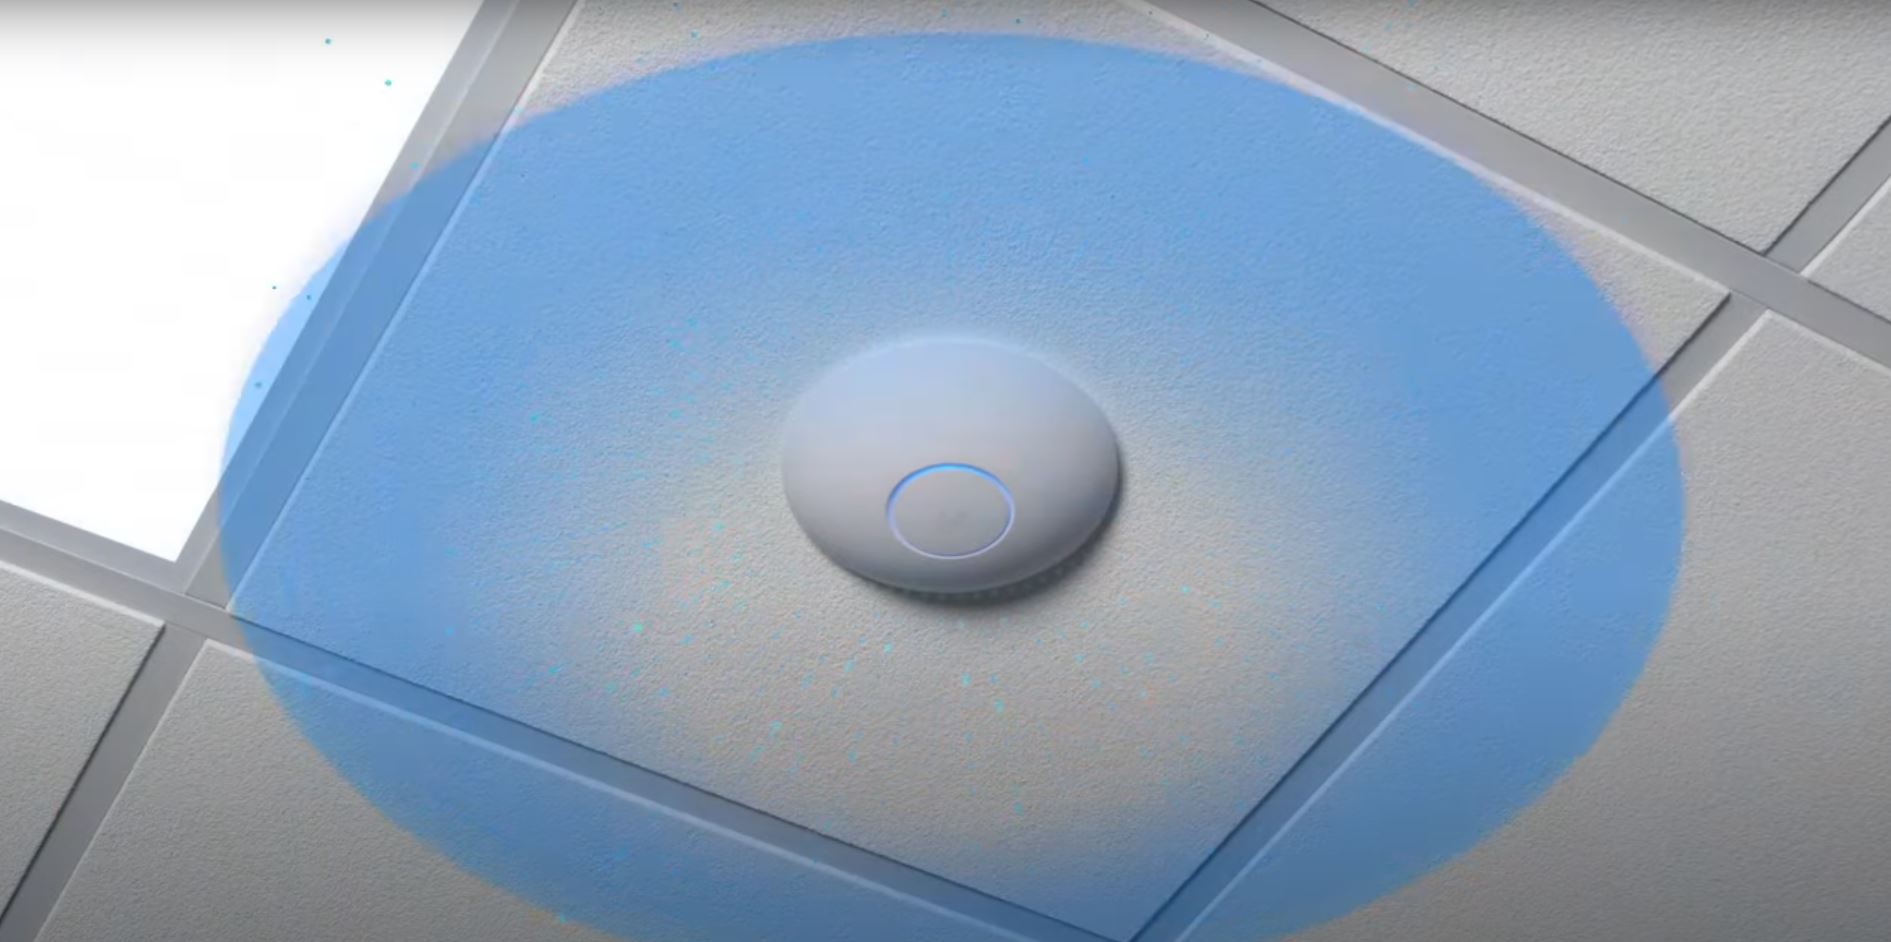
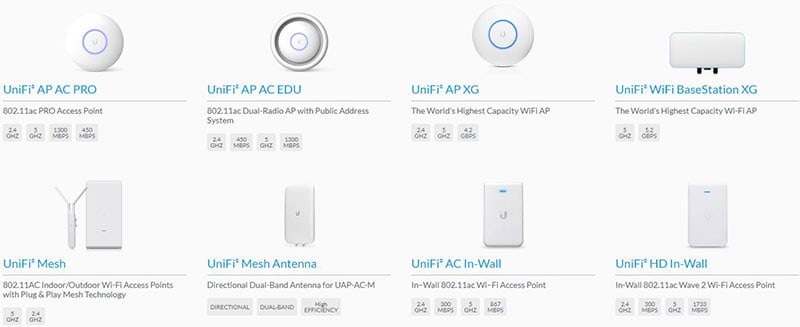
UniFi’s products are designed and tested to ensure they can provide for this typical use for many clients simultaneously. Any Access Point (AP) currently being offered in the UniFi product line offers far greater potential throughput than any client application could realistically require.

If a UniFi Access Point fails to provide the speed that it is capable of, this is most often a result of environmental limitations or other bottlenecks in the deployment. UniFi provides many tools that can help users identify these factors and mitigate them with proper configuration. 

Prerequisites 

The rest of this article assumes that the following prerequisites have been met: 

1. Eliminate any bottlenecks

Before working to improve your Wireless performance, it’s important to identify any bottlenecks outside of your Wireless network. A bottleneck is a point in a network infrastructure that limits performance everywhere else. Often poor Wi-Fi speed is incorrectly assumed to be a result of Wi-Fi hardware/config but actually is the result of a bottleneck upstream from the device. Here are some common examples of bottlenecks: 

  • ISP Plan limits performance/speeds far beneath what Wi-Fi is capable of providing. For example, a plan might have a 100Mb/25Mb down/up bandwidth limit on service. Every UniFi device, including legacy devices, is capable of far exceeding this limit. See the image below. 
  • Far too few APs for the number of clients/coverage requirements.
  • Old/faulty ethernet cables.
  • Outdated LAN hardware.
  • Outdated Wireless hardware.
  • Legacy client devices that don’t support 5GHz.
  • Too much noise on a single channel.

The following is an example of a common network bottleneck: 

bottleneckdiagram.PNG

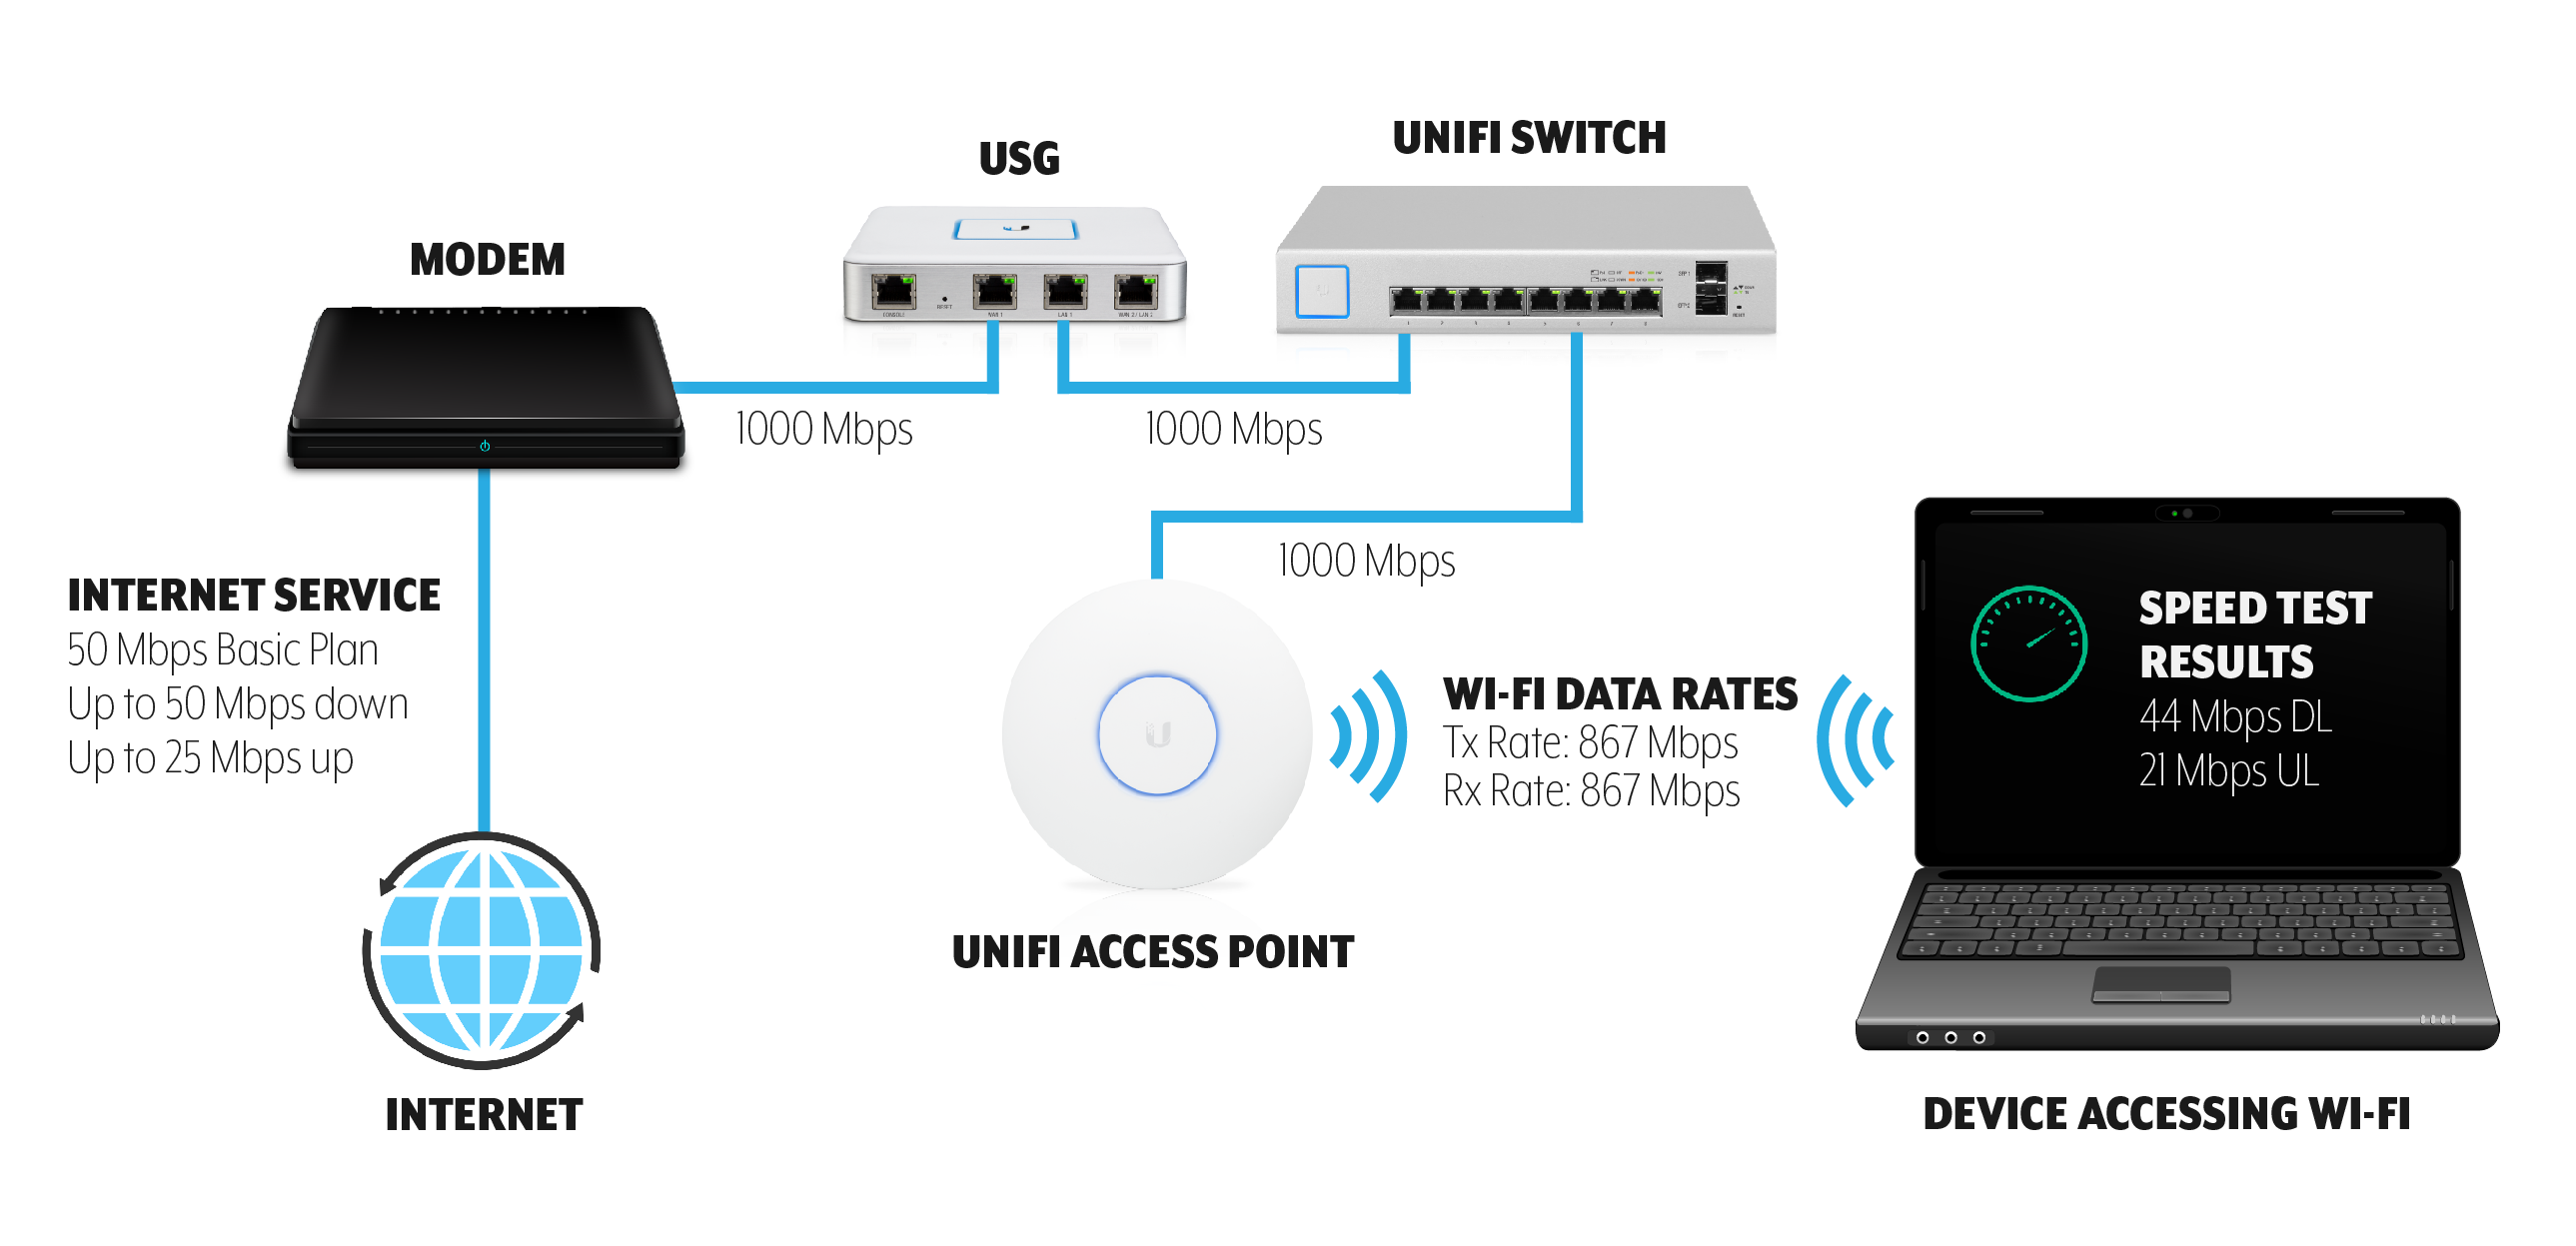
Diagram illustrating how Wi-Fi speed test results can be limited by ISP 

An easy way to at least rule out any bottleneck is to plug a wired device into the secondary port on an AP and perform the same speed test you are using to test Wi-Fi performance and compare the results to each other. It is normal to see some diminished performance on wireless compared to wired speed tests, but make sure you at least know what your wired network is capable of providing to the AP. 

2. Update your UniFi OS Console and UniFi Access Point (AP) Firmware to Current Version

Ubiquiti’s Firmware updates often include performance improvements: make sure that before testing the performance, you update your UniFi OS Console and your UniFi devices to the most current firmware available.

Common Issues/Steps to Fix

This section examines some of the most common issues that cause diminished speeds on UniFi Networks, as well as the steps that will solve them.

Channel Width

Channel width is the most common cause for poor speed test results after setting up UniFi, especially when being compared to a single wireless router the UniFi devices are replacing. Default UniFi config on 5GHz radio is optimized for large environments (40MHz channel width), while most standalone routers are optimized for use as the only AP in a home/office (80MHz).

To properly test the maximum speed of a UniFi AP, switch to 80 MHz. 80 MHz channels are capable of more than double the peak speed of 40 MHz channels.NOTE: These settings only apply to 5GHz. We do not recommend that channel width be increased from 20 MHz on 2.4GHz as this will often cause worse performance. 

To change AP to use 80MHz channel width, go to Devices > Click on AP to open Properties Panel > Radios RADIO 5G (11N/A/AC), Change Channel Width from VHT40 to VHT80, click Queue Changes, then Apply Changes. 

2018-11-30_21-57-20.gif


Summary: If using a small number of APs, switch 5GHz channel width on APs to 80 MHz for greater peak throughput. In larger environments, note that 40 or 20 MHz channel width is recommended for performance but can limit peak throughput.

Interference/Channel Overlap

The single most potentially negative environmental factor for Wi-Fi performance and stability is wireless interference. Interference can come from external sources like other wireless networks, weather radar, etc. while internal interference can come from devices overlapping with each other on the same channel. 

By default, UniFi Devices are set up with auto channel assignments, but this is something you will want to adjust for your deployment if there are concerns about speed/performance. 

It is recommended that a full site survey be performed for high-density/high-priority Wi-Fi deployments. If that has not been done or the site doesn’t warrant it, the Network application can help you find a better channel assignment for your APs by performing an RF scan. 

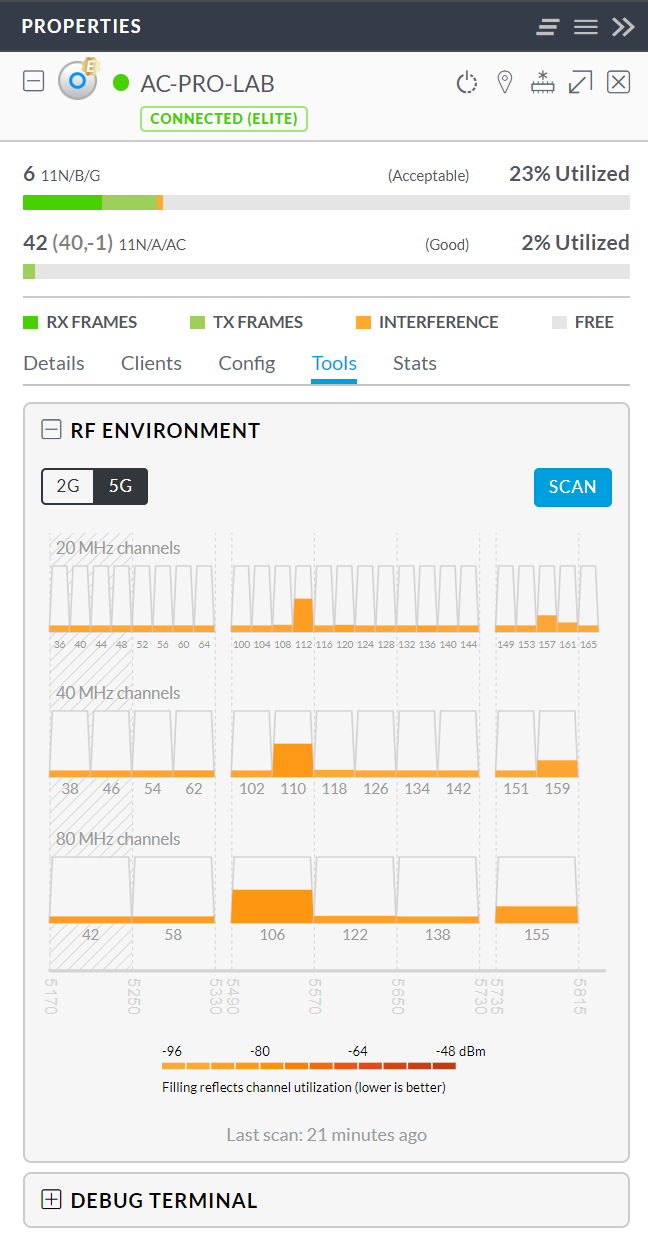
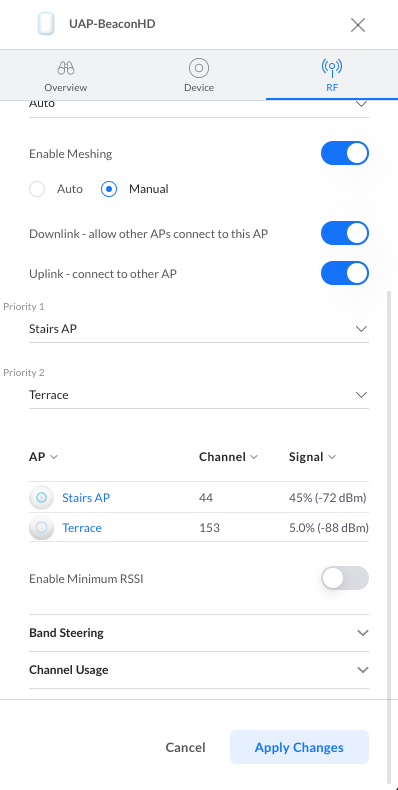
To do this, go to Devices > Click on AP to open Properties Panel Tools > RF Environment and click ScanUser Tips:Running an RF Scan will disconnect any wireless clients currently connected to the AP. Do not run during peak hours if this is a concern. Suggested Channel Settings: 2.4GHz:
Channel width: HT20
Chanel: 1/6/11 Choose one of these channels, an RF scan will help you choose the cleanest one.Transmit Power: Medium5GHz:
Channel width: VHT40 
Optional VHT80/VHT160  (It will increase speeds but might cause more interference.)
Chanel: 36/44 | Optional (149/157) 
Choose one of these channels, an RF scan will help you choose the cleanest one. 
Avoid using DFS Channels unless you understand DFS logic.  (DFS Alerts will cause interruptions) 
Transmit Power: Medium (High)You could also modify your DTIM Periods if you have more modern devices on the network.
Settings > Wireless Network > SSID > 802.11 Rate And Beacon Controls
DITM 2G Period: 3
DITM 5G Period: 3

This scan will take 5-10 minutes and will populate the 2.4GHz channels first and then 5 GHz channels will subsequently be updated.

Once your RF scan is finished, select 5G and you’ll see a list of channels arranged by channel width and how much each channel is being utilized. Select a channel that appears to have the least noise on it and assign your AP to this channel.

To do this go to Devices > Click AP to select it and open Properties Panel > Properties > Radios RADIO 5G (11N/A/AC), and choose the desired channel. 

If using multiple APs, make sure that each AP does not share the same channel as a nearby AP, and avoid having channels that are adjacent to each other as this can also cause interference. 

pasted_image_0__1_.png

Summary: Interference/channel overlap can cause performance to decline. To make sure speed test results are not being impacted by interference, make sure APs are assigned to the optimal channel and not sharing or adjacent to the channel of any nearby APs.

Signal Quality

Another factor that can strongly influence Wi-Fi speed is the signal quality between AP and client device. As clients get further away from an access point and the signal gets weaker, to ensure stability/offer the best possible performance, the AP will lower the rate of the data transfer to compensate. 

When testing peak throughput, be sure to be standing close enough to the AP without obstructions and make sure the client signal strength is close to the maximum of 99%. If your client devices consistently have poor signal strength on 5GHz try increasing Transmit Power on 5GHz. 

To increase TX power on 5GHz, go to device configuration > Radios Radio 5G (11N/A/AC), and only select “High” from the dropbox under Transmit PowerNOTE: Increasing transmit power on devices can have undesired effects, especially in a very high density environment. Consider starting on High or Auto and only reducing to Medium as needed on a per-AP basis.

Summary: When testing throughput make sure to consider the signal strength between the device and AP, you can find this under the Clients tab in the Network application. If the range on 5GHz is very low, consider increasing Transmit Power on the AP’s 5GHz radio. 

Inconsistent/Inaccurate Speedtest Methods

Another cause for poor speed test performance is inconsistent or inaccurate data. When comparing across devices, make sure to use the same speed test method as different speed test apps can vary wildly. 

While UniFi does include a speed test, the results are often far lower than reality, especially since UniFi’s available speed test servers are limited and results are very sensitive to the proximity of the speed test server. Try using a popular speed test app or website to test to check your UniFi results. Be sure to test multiple times and do not rely on assumptions or past data to inform your comparison.

If you wish to most accurately assess Wi-Fi speed alone and rule out other factors, try performing an iPerf test between a wired and wireless client/between two wireless clients. iPerf only measures bandwidth between two devices on your network. Note that iPerf can still be limited by the syntax you can use, the number of streams, packet size, etc. so make sure you understand what you’re doing before using iPerf. 

Summary: Speedtest results are often inaccurate. Make sure to use consistent speed test methods when comparing between devices, wired vs. wireless, etc. Confirm/test using multiple platforms. UniFi speed tests are often less accurate than other more popular speed test apps

Client-specific Issues & Limitations

When benchmarking Wi-Fi, it’s important to also compare across devices to ensure that the client itself isn’t limiting performance. Factors like client CPU utilization, network card driver, Wi-Fi specs, software, all can influence speed test results. 

Make sure to test with multiple devices. To truly measure peak throughput you must test a device that matches the capabilities of the UniFi AP. For instance, if you are testing with a device check the manufacturer specifications to see how many streams the 5GHz antenna supports i.e. Apple iPhone 7 is 2×2, UAP-AC-PRO has 3×3 5GHz radio, thus this iPhone will limit peak throughput. 

If a performance issue with Wi-Fi is isolated to one device, or multiple devices running the same software version, this will almost always point to a problem with the device/software. UniFi doesn’t change how it functions for each variety of client device. Try performing a web search to find other users experiencing similar issues with the same device on other vendor products. 

Keep in mind that declined performance on a single device isn’t a sign of a malfunctioning AP. UniFi APs are backwards compatible with older client devices and the fact that devices are able to connect with their older hardware is a sign the AP is working as designed. 

Summary: Test multiple client devices when benchmarking Wi-Fi performance. Client-specific issues are common but are largely unrelated to AP configuration/hardware.

Additional Steps

After reviewing each of the previous steps, if the issue does not appear to be resolved, check out this article for some further suggestions to troubleshoot wireless performance.

If you’d like to get suggestions from other UniFi administrators, feel free to post on our community.

For issues that point to an issue with UniFi devices/software with respect to wireless performance, feel free to reach out to UniFi support. Please note that the UniFi support team is not able to optimize networks for customers and will not be able to assist with performance issues that are cosmetic in nature or do not indicate an actual UniFi performance issue i.e. improving speed test results from 400 Mbps to 600 Mbps.

Source :
https://help.ui.com/hc/en-us/articles/360012947634-UniFi-Troubleshooting-Slow-Wi-Fi-Speeds-

Ubiquiti UniFi Network – Troubleshooting Wireless Uplinks

You can wirelessly adopt access points to your UniFi Network. This allows you to extend your coverage without adding cabling in hard-to-reach areas. When within range of your already-adopted access points, simply connect a new access point to power and it will appear as ready for adoption in the Network application.

General troubleshooting

Wireless UAP does not appear for adoption

1. Verify that the UAP is powering properly and is ready for adoption (steady white LED).

2. Connect it via Ethernet cable to your network and wait for it to appear for adoption. If it still won’t appear while connected, please see our general adoption troubleshooting steps.

3. Update to the current firmware version if an upgrade is available.

4. Once the UAP is adopted and running the newest version available, disconnect it from the wired LAN, and wait a few minutes while it connects wirelessly. After that, you may disconnect it from power to move it to its final position. Once it powers up again, the UniFi Network application will recognize it and start broadcasting the network’s WiFi through your wireless UAP.

The UAP is adopted but it will not work when moved to wireless networks

1. Verify that the UAP is receiving enough power from the PoE injector. The LED must be a steady blue. Take a look at the UAP’s datasheet to verify power requirements.

2. Verify that the Uplink Connectivity Monitor is enabled within Settings > System Settings > Controller Configuration > Uplink Connectivity Monitor.

uplink-connectivity-monitor.png

3. Verify that there is at least one wired UAP to act as an uplink and that Enable Meshing is turned on within the UAP’s properties panel > RF > Enable Meshing. And that the meshing configuration is set to Auto; or if set to Manual, that Downlink is enabled.

manual-meshing.downlink-enabled.png

Wireless uplink requirements

  • At least one wired access point to serve as the uplink UAP
  • A power source (i.e PoE injector) for the wireless UAP (downlink UAP)
  • (Recommended) Newest firmware and Network application versions.

Note: The wireless adoption process takes longer than the wired one; expect to wait a little longer for access point detection and for the adoption process to complete.

Modifying existing wireless uplink connections

You can design the topology to your liking by configuring how the wirelessly connected UAPs are linked. To change a UAP’s uplink:

  1. Select the UAP from the UniFi Devices section to open its properties panel.
  2. Go to the RF tab and select Manual under the Enable Meshing toggle. If the Enable Meshing option is not turned on, do so now to expose the wireless uplink settings.
  3. Select which UAP your wireless UAP will connect to (uplink).

Additionally, you can stipulate the uplink priority to define to which uplink your UAP will connect to if there is service degradation or if its current uplink goes offline. Use the Priority dropdown menus to select from the available uplinks.

pp.rf.manual-meshing.png

Frequently Asked Questions

Can a wireless UAP be the uplink to another wireless UAP?

Yes. This is known as a multi-hop wireless uplink and is supported by UniFi, as long as there is one wired access point to provide the first “hop”. Keep in mind that each wireless uplink will suffer service degradation, so this should only be done when necessary.

Can I connect older UAPs wirelessly?

Yes, you just need to make sure to configure them correctly. Some older UAPs only broadcast on a single band (2.4GHz) and will not work the same as newer models. The following older generation UAPs do support wireless uplink on the band they operate on and do not support multi-hop: UAP, UAP-LR, UAP-PRO, UAP-Outdoor, UAP-Outdoor+, UAP-Outdoor5, UAP-IW.

UAP-AC and UAP-AC-Outdoor do not support wireless uplink or multi-hop.

If you have a UAP that does support wireless uplinking and it is still not working, make sure to take the following into account:

Dual band uplink UAP to dual band downlink UAP: will uplink on 5GHz.
Dual band uplink UAP to single band downlink UAP: will uplink on the supported frequency of the single band model.
Single band uplink UAP to single band downlink UAP: will uplink, as long as the same band is supported on both sides of the link.
Single band (2.4GHz only models) uplink UAP to dual band downlink AP will not be able to uplink.

If you have several wired UAPs, these should have assigned channels that are different and do not overlap with other UAP channels to minimize interference.

  • If using all dual band UAPs
    • Set the wired UAP (uplink UAP) to static on 5GHz and to a static on 2.4GHz (1, 6 or 11 making sure it’s not a band also set for any of the other UAPs). Leave the wireless UAP (downlink UAP) set to Auto on the 5GHz radio and set a static channel on 2.4GHz not shared by others.
  • If using all single band UAPs
    • Set the wired UAP (uplink UAP) to a static channel on 2.4GHz. Leave the wireless UAP (downlink UAP) set to Auto on 2.4GHz. 
  • If using a dual band UAP as the uplink and single band UAP as the downlink
    • Set the wired UAP (uplink) to a static channel on 2.4GHz. Leave the wireless UAP (downlink) set to Auto.

      Source :
      https://help.ui.com/hc/en-us/articles/115002262328-UniFi-Network-Troubleshooting-Wireless-Uplinks

Ubiquiti UniFi – USG/UDM: Port Forwarding Configuration and Troubleshooting

With UniFi Network you can forward UDP and TCP ports to an internal LAN device using the Port Forwarding feature on the Dream Machine (UDM and UDM Pro) and USG models.

Requirements

  • Applicable to the latest firmware on all UDM and USG models.
  • The Port Forwarding feature is designed to only work on WAN1 on the USG models, but it can use both WAN1 and WAN2 on the UDM-Pro.
  • It is necessary to manually configure a Destination NAT (DNAT) + WAN firewall rule(s) to forward ports on the WAN2 interface on the USG models, see the section below.

Frequently Asked Questions (FAQ)

Do I need to manually create firewall rules for Port Forwarding?Can I forward ports on the WAN2 interface of the UDM/USG?How does the Port Forwarding feature interact with UPnP?Do I need to manually configure Hairpin NAT?Can I limit which remote devices are allowed to use the forwarded ports? My Port Forwarding rule does not work, what should I do?

Configuring a Port Forwarding Rule

1. Navigate to Settings > Advanced Features > Advanced Gateway Settings and create new port forwarding.

2. Fill in the settings:

  • Name: webserver
  • Enable Forward Rule: turn this on when ready to activate this rule
  • Interface: WAN / WAN2 / Both (UDM Pro only)
  • From: Anywhere or Limited
  • Port: 443
  • Forward IP: 192.168.1.10
  • Forward Port: 443
  • Protocol: TCP
  • Logging: Optional
From:The clients on the Internet that are allowed to use the Port Forwarding rule. Set to Anywhere by default, meaning all hosts. It is possible to limit the allowed hosts by specifying an IP address (for example 198.51.100.1) or subnet range (for example 198.51.100.0/24). 
Port:The WAN port that the clients on the Internet connect to, for example 443. This does not need to match the port used on the internal LAN host. You can forward TCP port 10443 to TCP port 443, for example.
Forward IP:The IP address used by the internal LAN host, for example 192.168.1.10.
Forward Port:The port used by the internal LAN host, for example TCP port 443.
port-forwarding.wan.png

3. Apply the changes.

Note: On the USG models, it is necessary to manually configure a Destination NAT (DNAT) + WAN firewall rule to forward ports on the WAN2 interface, see the section below.

4. The firewall rule(s) needed for the new Port Forwarding rule you created are automatically added.

5. You can verify the automatically created rules in the Settings > Security > Internet Threat Management > Firewall > Internet section.

firewall.internet.automatic.rule.png

USG/USG-Pro: Forwarding Ports on WAN2 using Destination NAT

ATTENTION: This is an advanced configuration that requires creating and modifying the config.gateway.json file. See the UniFi – USG/USG-Pro: Advanced Configuration Using JSON article for more information on using the JSON file.

Follow the steps below to forward ports on the WAN2 interface of the USG models. It is necessary to manually create a Destination NAT (DNAT) rule using the Command Line Interface (CLI) and a custom Firewall Rule using the UniFi Network application. Afterwards, the config.gateway.json file needs to be created or updated to incorporate the custom configuration into UniFi Network.

1. Begin by creating a new custom Firewall Rule within  Settings > Security > Internet Threat Management > Firewall > Internet section.

2. Create a new Firewall Port Group by clicking Create New Group.

firewall.internet.png

3. Fill in the information and specify the port that needs to be allowed through the firewall (443 in this example) and apply changes.

  • Name: https
  • Type: Port Group
  • Port: 443
firewall.create-new-group.png

4. Navigate to    Settings > Security > Internet Threat Management > Firewall > Internet and create new rule.

5. Fill in the information, selecting the previously created Port Group and apply changes.

  • General
    • Type: Internet In
    • Description: webserver
    • Enabled: turned on when ready to take this rule live
    • Rule Applied: After (after predefined rules)
    • Action: Accept
    • IPv4 Protocol: TCP
    • Match all protocols except for this: disabled
  • Source: Optional
  • Destination
    • Destination Type: Address/Port Group
    • IPv4 Address Group: Any
    • Port Group: https (select from any previously created firewall port groups)
  • Advanced: Optional
firewall.create-new-rule.png

6. The next step is to access the USG using the Command Line Interface (CLI) and add a custom Destination NAT (DNAT) rule. SSH access to your devices must be enabled within    Settings > System Settings > Controller Configuration > Device SSH Authentication.

7. Connect to the USG via SSH.SSH using WindowsSSH using macOS

8. Verify that the WAN2 interface is UP and that it is assigned an IP address by running the following command: 

show interfaces ; sudo ipset list ADDRv4_eth2

Click to copy

unifiadmin@usg:~$ show interfaces 
Codes: S - State, L - Link, u - Up, D - Down, A - Admin Down
Interface    IP Address                        S/L  Description                 
---------    ----------                        ---  -----------                 
eth0         203.0.113.1/24                    u/u  WAN                         
eth1         192.168.1.1/24                    u/u  LAN                         
eth2         192.0.2.1/24                      u/u  WAN2                           
lo           127.0.0.1/8                       u/u                              
             ::1/128                          
unifiadmin@usg:~$ sudo ipset list ADDRv4_eth2
Name: ADDRv4_eth2
Type: hash:net
Revision: 3
Header: family inet hashsize 1024 maxelem 65536
Size in memory: 16792
References: 1
Members:
192.0.2.1

NOTE: The ADDRv4_eth2 is a special address group that automatically uses the IP address that is assigned to the eth2 interface. On the USG-Pro, the WAN2 interface uses eth3 instead and thus the address group will be ADDRv4_eth3.

9. Enter configuration mode by typing configure and hitting enter.

10. Add the Destination NAT rule for the WAN2 interface of the USG/USG-Pro (replace eth2 with eth3 for the USG-Pro):

set service nat rule 4001 description 'webserver'
set service nat rule 4001 destination group address-group ADDRv4_eth2
set service nat rule 4001 destination port 443
set service nat rule 4001 inbound-interface eth2
set service nat rule 4001 inside-address address 192.168.1.10
set service nat rule 4001 inside-address port 443
set service nat rule 4001 protocol tcp
set service nat rule 4001 type destination

Click to copy

11. Commit the changes and exit back to operational mode by typing commit ; exit and hitting enter.

This is an example of the process:

custom-dnat-rule.gif

12. Use the mca-ctrl -t dump-cfg command to display the entire config in JSON format:

mca-ctrl -t dump-cfg

Click to copy

13. The Destination NAT section of the configuration in JSON format can then be used in the config.gateway.json file.

{
       "service": {
                "nat": {
                        "rule": {
                                "4001": {
                                        "description": "webserver",
                                        "destination": {
                                                "group": {
                                                        "address-group": "ADDRv4_eth2"
                                                },
                                                "port": "443"
                                        },
                                        "inbound-interface": "eth2",
                                        "inside-address": {
                                                "address": "192.168.1.10",
                                                "port": "443"
                                        },
                                        "protocol": "tcp",
                                        "type": "destination"
                                }
                        }
                }
       }
}

Click to copy

14. See the UniFi – USG/USG-Pro: Advanced Configuration Using JSON article for more information on how to create and modify the config.gateway.json file.

Troubleshooting Port Forwarding Issues

Refer to the troubleshooting steps below if the Port Forwarding or custom Destination NAT rule is not working. Either of the following options can be the cause:   Possible Cause #1 – The USG/UDM is located behind NAT and does not have a public IP address.   Possible Cause #2 – The UDM/USG is already forwarding the port to another device or has UPnP enabled.   Possible Cause #3 – The traffic from the Internet clients is not reaching the WAN interface of the UDM/USG.  Possible Cause #4 – The LAN host is not allowing the port through the local firewall or does not have the correct route configured. 

Source :
https://help.ui.com/hc/en-us/articles/235723207-UniFi-USG-UDM-Port-Forwarding-Configuration-and-Troubleshooting

Ubiquiti UniFi – Layer 3 Adoption for Remote UniFi Network Applications

Layer 3 adoption is the process of adopting a UniFi device to a remote UniFi Network application.

You might use Layer 3 adoption for applications located in the cloud (e.g. on Amazon EC2) or NOC.

For regular device adoption, see UniFi – Device adoption.

Overview

In many deployments where it’s not possible to have the UniFi Network host running on-premise, you can run the UniFi Network application in the Cloud or your NOC. For example, for a large-scale project with many devices there are a few possible methods for the adoption of devices:

  • Take a laptop to the device’s site to perform adoption via Chrome browser (easiest method).
  • When you’re at the site, open a browser and navigate to Cloud: either the UniFi Remote Access Portal or the UniFi Network application (when launched using Cloud).
  • Create a virtual application instance on Amazon EC2.
  • Either configure the DHCP server or DNS server.

Initial setup

Please make sure you’re familiar with how a regular L2 adoption on UniFi works (where the devices and UniFi Network application are on the same network) before attempting L3 (remote) adoption. Also, remember that in order to adopt, the following conditions must be true in order to have internet access and also have access to the router from within the network (locally):

1. WAN port connected to the Internet.
2. LAN port connected locally to access management features on the router (USG or third party).

UniFi APs have a default inform URL http://unifi:8080/inform. Thus, the purpose of using DHCP option 43 or DNS is to allow the AP to know the IP of the UniFi Network application host.

If you encounter discovery issues please use the UniFi – Troubleshooting Device Adoption article to help you troubleshoot the issue.

After installing the Discovery tool plugin (freely available in Chrome Web Store) on a computer running Chrome browser, any locally-available, unmanaged UniFi Devices (i.e., same L2 network as your computer) will appear as “Pending Adoption” in the UniFi Cloud Access Portal as well as your UniFi Network application itself (in the Devices section in both cases). To access the application remotely Remote Access will have to be enabled.

Via UniFi OS

1. Go to https://unifi.ui.com and login with your Ubiquiti SSO credentials.

2. Navigate to the Devices section.

3. The device to be adopted will appear as ready to be adopted. Click Adopt.

unifi-devices.wireless.adoption.png

Via the UniFi Remote Access Portal

1. Go to https://network.unifi.ui.com/ and log in with your Ubiquiti SSO credentials.

2. Go to the Devices section and locate the model with the Pending Adoption status. Click ADOPT.

3. In the Adopt window that will appear, select the UniFi Network host and the site that will be adopting the device (for multi-site hosts) and click Adopt.

Via the UniFi Network application

1. Launch UniFi Network, go to the Devices section, find the device that is to be adopted with the status “Pending Adoption” and click Adopt under Actions.

DNS

You’ll need to configure your DNS server to resolve ‘unifi’ to your UniFi Network host’s IP address. Make sure that the device can resolve the UniFi Network domain name. For example, if you are setting http://XYZ:8080/inform, then ping from the device to determine if XYZ is resolvable/reachable. Or you may also use FQDN for the application inform URL: http://FQDN:8080/inform

Troubleshooting: Device (with static IP) fails to connect to the L3 UniFi Network application

  • When configuring a device from DHCP to static in the UniFi Network application, make sure you have put the IP of DNS. If not, then the device cannot contact DNS to resolve UniFi Network’s domain name.
  • If the device has been reset, make sure that you have “informed” the device twice (using the Discovery Utility) about the UniFi Network application’s location. See steps in the section above.

DHCP Option 43

If using Ubiquiti’s EdgeMAX routers, then DHCP option 43 can be done by just entering the IP address of the UniFi Network host in the “unifi” field on the DHCP-server.NOTE: The UniFi Security Gateway (USG) will not use DHCP option 43 to add the UniFi Network application location when obtaining a DHCP lease on the WAN interface.

To use DHCP option 43 you’ll need to configure your DHCP Server. We provide some third party examples below, but please refer to the manufacturer’s support documentation for up to date instructions. For example:

Linux’s ISC DHCP server: dhcpd.conf

# ...
option space ubnt;
option ubnt.unifi-address code 1 = ip-address;

class "ubnt" {
        match if substring (option vendor-class-identifier, 0, 4) = "ubnt";
        option vendor-class-identifier "ubnt";
        vendor-option-space ubnt;
}

subnet 10.10.10.0 netmask 255.255.255.0 {
        range 10.10.10.100 10.10.10.160;
        option ubnt.unifi-address 201.10.7.31;  ### UniFi Network host IP ###
        option routers 10.10.10.2;
        option broadcast-address 10.10.10.255;
        option domain-name-servers 168.95.1.1, 8.8.8.8;
        # ...
}

Cisco CLI

# assuming your UniFi is at 192.168.3.10
ip dhcp pool <pool name>
network <ip network> <netmask>
default-router <default-router IP address>
dns-server <dns server IP address>
option 43 hex 0104C0A8030A # 192.168.3.10 -> CO A8 03 0A

# Why 0104C0A8030A ?
#
# 01: suboption
# 04: length of the payload (must be 4)
# C0A8030A: 192.168.3.10

Mikrotik CLI

/ip dhcp-server option add code=43 name=unifi value=0x0104C0A8030A
/ip dhcp-server network set 0 dhcp-option=unifi

# Why 0104C0A8030A ?
#
# 01: suboption
# 04: length of the payload (must be 4)
# C0A8030A: 192.168.3.10

User Tip: Find more DHCP Option 43 instructions in the User Notes & Tips section.

SSH

If you can SSH into the device, it’s possible to do L3 adoption via CLI command:

1. Make sure the device is running updated firmware. See this guide: UniFi – Changing the Firmware of a UniFi Device.

2. Make sure the device is in the factory default state. If it’s not, run the following command:

sudo syswrapper.sh restore-default

3. SSH into the device and type the following and hit enter, substituting “ip-of-host” with the IP address of the host of the UniFi Network application:

set-inform http://ip-of-host:8080/inform

4. After issuing the set-inform, the UniFi device will show up for adoption in the Devices section of UniFi Network. Once you click Adopt, the device will appear to go offline or have the status of “Adopting” then proceed to “Provision” and “Connected”.

Source :
https://help.ui.com/hc/en-us/articles/204909754-UniFi-Layer-3-Adoption-for-Remote-UniFi-Network-Applications

Ubiquiti UniFi – How to Create and Restore a Backup

This article describes how to generate a backup of the UniFi Network application as well as how to restore it. This article does not cover the Auto Backup feature. You may see this article for more information on that subject: UniFi – How to Configure Auto Backup.

Note: This article is applicable to current UniFi Network application versions. Instructions on backups for older versions can be found at the bottom of this page in the “Method 3: Restoring from the /data Directory” section. As always, we suggest you update to the newest software and firmware available.

Introduction

The UniFi backup file has an extension of .unifi and contains the settings and the database for the UniFi Network application. The database is not included in a “settings only” backup. The backup also includes the config.propertiessystem.properties and config.gateway.json advanced configuration files, maps, and any customized files in a site’s portal folder. You can download a backup at any time from the Network application following the steps below.

Generate a New Backup

To generate a new UniFi backup file (.unifi), on your UniFi OS Console:

  1. Access and log into your UniFi OS Console at unifi.ui.com or locally via its IP address.
  2. Go to System Settings Advanced and enable the Back up Device toggle if disabled.
  3. Click Download to download your backup file. 

You can also use the Backup Scheduler to schedule creating a backup at a certain occurrence and time. 

Screenshot_2021-05-05_at_14.13.24.png

Restore a Backup

Method 1: Restore in the UniFi Network application

To restore a backup you have previously generated:

  1. Access and log into your UniFi OS Console at unifi.ui.com or locally via its IP address.
  2. Go to System Settings > Advanced and click the Restore in the “Restore Device” section.
  3. Select the necessary settings in the Restore Backup pop-up window:
    1. Select the device on the Device Selection drop-down field which you will restore from a backup.
    2. Confirm that you will restore your device either to the latest backup or select another backup from a list by clicking on the here text button.
    3. Enter your SSO account password and click Restore to begin the restoring process. 

Once you confirm, the backup restoration will begin. This process takes a few minutes. Do not disconnect while the application is working on this. Once the new backup is restored, the application will restart.

Method 2: Restore in the UniFi Startup Wizard

If beginning a new installation, it will be easier to just use the option of restore from a previous backup as soon as the UniFi Startup Wizard launches, and select your .unf file.

Method 3: Restore from the /data Directory

Note: This method is for older Network application versions and is not recommended. For security reasons, we suggest always upgrading to the newest release available. If you still wish to use this method, click on the link below.

Click here to display Method 3: Restoring from the /data Directory.

Change the Inform Address for All Devices in the Network application

ATTENTION:Use this method with caution. After completing these steps the devices will be setting the inform address to the new IP address or FQDN specified.  

It may be desired to change the IP address or FQDN that the UniFi devices on multiple sites are reporting to after an application restore. This process is typically used when migrating from one functional UniFi OS Console to a new install.

  1. Download a backup file from the current UniFi OS Console.
  2. Install the Network application on the new UniFi OS Console. 
  3. Restore the backup that came from step 1 and let the upload process finish.
  4. Log into the new UniFi OS Console. 
  5. On the old UniFi OS Console’s Network application, go to Settings > System > Other Configuration and enable the Override Inform Host toggle.
  6. Type in the new UniFi OS Console’s Hostname or IP Address field. 
  7. Select Apply Changes.

After the changes are applied the old UniFi OS Console will send the configuration to adopted and currently connected devices stating the inform host is now what was input in the Hostname or IP Address field.

If this was performed correctly, the devices should start appearing in the new UniFi OS Console. This should not take longer than 5 minutes but can be longer depending on the number of devices, the physical proximity of the devices, and new UniFi OS Console’s technical specification.

Source :
https://help.ui.com/hc/en-us/articles/204952144-UniFi-How-to-Create-and-Restore-a-Backup

How Will You Connect? A Guide for Choosing the Right Ubiquiti UniFi Access Point


Our selection of UniFi access points vary by functionality and design. Each model is thoughtfully engineered to meet precise user needs and optimize performance within specific environments. Together, they offer an ideal solution for everyone — whether you prioritize performance, design, aesthetics, or network simplicity.

Because each access point is so unique, it’s important to choose a model that best suits your needs.

A Best-in-Class Wireless Experience

Our line of UniFi 6 access points, beginning with the recently introduced U6 Lite and U6 Long-Range, mark our introduction of WiFi 6 technology to UniFi. With these and future U6 models, your network can support over 300 concurrent devices and deliver a reliably smooth wireless experience to each of them with OFDMA technology, which transfers high volumes of data more tactically across multiple devices to improve upload and download speeds.

While the U6 access points represent the future, tried-and-true models like the UniFi HD and nanoHD remain favorites for a wide variety of users, not just because of their speed and range but also their ability to provide a consistently strong signal to a large number of devices, which is crucial in our digital world.

These access points expand signal coverage with an integrated, directional antenna while only consuming a small amount of power. When mounted to the ceiling, these UniFi access points widen their coverage zones even further to ensure fast, stable connections across high-traffic environments.

You can also give your access points a bit of flair and align them with your space’s look and feel. For instance, you can change the color of your U6 access point’s LED ring or change the exterior of certain models with a variety of skins including wood, black fabric, and camouflage.

Extend Your WiFi and Connect More People

If you’re looking to extend your WiFi signal easily and without cumbersome equipment, a mesh access point could be the right device for you. Although all of our access points can link with the other access points in your office or home to enhance your signal’s reach and prevent dead zones, our mesh access points are specifically designed to do so. As such, mesh access points are often a go-to solution for hotels, museums, and other high-traffic areas.

Many mesh access points are also very compact and easily deployable. They can be mounted to a wall or ceiling, placed on a tabletop, or attached to a pole outdoors to improve connection quality throughout your property. 

WiFi extenders are also designed to improve the reach of your wireless signal by doubling your coverage area. These models are the definition of  plug-and-play; just plug them into a standard US wall outlet and instantly improve your WiFi experience! However you choose to extend your network, you’ll have a device that can support hundreds of concurrent connections with minimal power consumption.

Wireless Excellence for Thousands

What if you need to provide high-speed internet access to a lot of people—like, a LOT of people. Maybe it’s a concert hall packed with people livestreaming the headline act, or a stadium filled with thousands using their mobile devices simultaneously at halftime?

To give the people what they want, you’ll need a really powerful, high-capacity access point. As always, UniFi is ready for you with the WiFi BaseStation XG, one of the world’s best large-venue WiFi installations because of its ability to support up to 1,500 concurrent device connections. The BaseStation can dynamically filter and evenly distribute traffic to avoid channel congestion, as well as maximize coverage with its directional beamforming antenna.

Maybe you’re not just dealing with one location, though. What if you need to bridge the networks of two buildings in a downtown commercial district or industrial park? To help with these types of large networking projects, we offer point-to-point bridges that create multi-gigabit wireless links between two locations up to 500 meters apart. These bridging devices are designed to be highly adaptive to the layout of the area you’re looking to connect, sporting directional antennas that ensure strong, unobstructed links regardless of area zoning or building positioning.


Robust and Versatile Wireless Delivery

No matter how large or unique your network is, there’s a UniFi access point that can enhance your wireless experience, support your devices, and simplify your traffic management. 

To see the different UniFi access points in action, check out Which AP is Right for Me?, and for more detailed model information, head to the Ubiquiti Store. Also, remember to keep it tuned here and on our revamped YouTube channel for brand-new UniFi content, including how-to videos, unboxings, and more to help you build your network!

Source :
https://blog.ui.com/2021/02/19/how-will-you-connect-a-guide-for-choosing-the-right-unifi-access-point/

How to install and configure Ubiquiti Unifi controller on Raspberry Pi?

How to install and configure Unifi controller on Raspberry Pi?

Written by Patrick Fromagetin How-To Tutorials

If you have already managed multiple Wi-Fi access points, you should know that this can be a nightmare …
But with good choices for hardware and a controller, this becomes easier.
It’s the main goal of the Unifi controller: manage most of the tasks on a wireless network to avoid issues.
It’s available on Raspberry Pi and I will show you how to install it.

How to install and configure Unifi controller on Raspberry Pi?
Start by adding the Ubiquiti server to the list of repositories for Raspberry Pi OS.
Then, the Unifi controller can be installed with apt and managed as a system service.

The installation is straightforward, you can install it like any Debian package.
But the access points configuration is not so easy and I saw no article explaining this.
As I’m using it at work, I can show you all the configuration steps with real access points and clients.

Before switching to Ubiquiti products, I remember having tested many brands to solve my issues, but none of them could not support over 10-20 users simultaneously (I even tested a fireproof model from D-Link, something like this one on Amazon ^^). So I definitely recommend trying Ubiquiti, this is cheap compared to other famous brands but works very well.
Let’s see how to do this!

Table of Contents

Ubiquiti Networks products

Ubiquiti Networks introduction

Ubiquiti Networks is an American company, selling hardware for wireless technologies like access points, routers and cameras.
They started with wireless devices, and they are now diversifying upon a broader range of products.
The latest innovative product concerns the solar technology, they help you to manage solar farms.

Anyway, the product that interests us today is a software: Unifi controller.
The goal of this product is to manage access points and wireless devices from a unique web interface.
From the interface, you can see all the access points and broadcast a unique SSID.
The controller will handle the roaming between access points and load distribution.

Raspberry Pi Course
Sale: 10% off today. Take it to the next level.
I’m here to help you get started on Raspberry Pi, and learn all the skills you need in the correct order.YES, I WANT TO IMPROVE

Why do I need these products?

These products target mainly companies and large areas but you can have the same needs at home if you get some issues with your Wi-Fi connection (rooms with no network, roaming, stability, etc.).
If you need over one access point to cover all the house, it could be interesting to install these products at home.

For example, let’s say you install three access points and the controller somewhere.
You’ll have only one Wi-Fi SSID in all the area (outdoor included).
And you can move from one side to another without disconnection.

Ubiquiti products

Ubiquiti products are distributed by resellers, but are also available on several e-commerce websites:

To test these products, you don’t need many things.
Just buy one or more access points and build your professional wireless network.
Here is the link: Ubiquiti Unifi AP on Amazon.

You have several packages available: Only one, 2 AP (access point), 4 AP, etc.
Choose the one you prefer, but there is not a big saving by taking big packs, so you can try with one or two, and order the others after.

If you have a PoE Switch (this one for example on Amazon), you can plug them only to the network cable. An Ubiquiti switch is not mandatory, this one from Cisco is cheaper for example. It depends on what you want to do with it and how many AP you have.

Whatever your choice, a PoE switch will make the installation easier
If you want to start without it, there is a last option.
Ubiquiti provides an adapter with the AP (power cord + network = PoE Network), but you need a power outlet and two RJ45 cables instead of only one cable for everything.
Here is the link to the PoE injector on Amazon, make sure to check the AP power requirements are they are not all the same (a Pro AP needs PoE-48 for example).

Unifi controller installation

Now that you understand what are the Unifi products, we can move to the controller installation.

Installation on Raspberry Pi OS

As for any tutorial on this site, you firstly need to install Raspberry Pi OS on your Raspberry Pi.
Any version will do the job (I’m doing it with Raspberry Pi OS Lite).
If you don’t know how to do this, read my article on How to install Raspberry Pi OS on your Raspberry Pi.

Once installed, update it and reboot:
sudo apt update
sudo apt upgrade
sudo reboot

And enable SSH access with:
sudo service ssh start
This way you can follow this tutorial from your computer (if needed, check this post to learn more about this).

Set a static IP address

As our Raspberry Pi will be like a server on our network, we need to use:

  • A wired connection
    If you want a fast Wi-Fi network, you need to have your controller and your access point on a good connection.
    So, I don’t recommend setting up the controller with a Wi-Fi connection (at home it’s probably ok).
  • A static IP address
    The Raspberry Pi will become an important node on your network, so we need to fix its IP.
    By default, the Raspberry Pi use the DHCP to get a random IP among those available.

For the static IP, you can either fix the IP in the DHCP server (your Internet router probably), or set a static IP in the Raspberry Pi configuration.

If you don’t know how to do this, I already explained it at the end of this article: Set a static IP address on your Raspberry Pi.

Master your Raspberry Pi in 30 days
Sale: 25% off today. Download the eBook.
Uncover the secrets of the Raspberry Pi in a 30 days challenge.GET IT NOW!

Unifi controller installation

Now we are ready to start the installation.
For these steps you have two choices:

  • Download and install directly the official Debian package from the website.
  • Add a new repository to manage the Unifi package with apt.

On the Ubiquiti downloads page you can find the Debian package to install the controller.
You can download it and install it on your Raspberry Pi.
But I don’t recommend it.

Because the Controller has many updates, about every month you have to download and install a new version manually.
There is a repository available and it’s easier to manage all updates with apt rather than doing everything manually.

  • Connect with SSH to your Raspberry Pi.
  • Add the repository in the apt configuration file:
    echo 'deb https://www.ui.com/downloads/unifi/debian stable ubiquiti' | sudo tee /etc/apt/sources.list.d/100-ubnt-unifi.list
  • Add the key to the trusted keys:
    sudo wget -O /etc/apt/trusted.gpg.d/unifi-repo.gpg https://dl.ui.com/unifi/unifi-repo.gpg
    This allows us to use software from the previous repository
  • Run apt update to update the available packages list :
    sudo apt update
  • And finally, install the Unifi package:
    sudo apt install unifi
    Answer yes and wait a few seconds for the installation process to finish.

This is the end of the installation procedure, but your controller may not work yet.
You can check the service status with:
sudo service unifi status
If you get an error like this one on a fresh Raspberry Pi OS installation:

Starting Ubiquiti UniFi Controller: unifi
Cannot locate Java Home

Then you need to install Java to start the Unifi service.
Currently, the Unifier controller requires Java 8.
You may already have it from another application, but if you have this error, here is how to fix it:
sudo apt install openjdk-8-jre
And finally start the Unifi service:
sudo service unifi start
You can find more details about Java in this tutorial.

Check the status again if you want:

If everything is ok, you can move on to the next part to know how to use the software.You may also like:

Unifi controller configuration

First access

To access the web interface, go to https://<IP>:8443
For example, in my case it’s https://192.168.1.25:8443/
You’ll get a browser warning because we don’t have a secured certificate for the moment.

Accept the exception and move to the next page to configure everything you need to get started:

  • Step1: Start by giving a name to his controller and click on “Next”
  • Step 2: Choose if you want to enable the cloud interface (default) or not (advanced).
    It depends on what you are trying to do.
    If you are always on the same network (home or in a company), you don’t really need the cloud panel. But it can be useful for remote sites.
    • If you keep the default option, fill the form to create an Unifi account.
    • On the advanced option, you have a form like this:

      If you enable one option, you need to create a cloud account AND a local account.
      I don’t need it for my test, so I disable everything.
  • Step 3: Sign in or configure options.
    This step is also different depending on your choice in the previous step
    You may need to sign in your account, or just to configure two additional options (auto backup and auto-optimize).
    Keep them enabled if asked.
  • Step 4: Configure your devices.

    You can just skip this, it’s not required for now. You can add devices at anytime in the interface
  • Step5: You can finally configure your Wi-Fi settings now.

    You can also change this in the interface, so just pick something to get started.
  • Step6: Finally, you also need to review your settings and you are ready to go.

Good job! You will now be redirected to the web panel.
We can finally see it and configure more things if needed.

Web interface overview

Once logged in the web interface, you’ll get many submenus to manage everything.
For the moment, it should be pretty empty, but in the left bar you can see:

  • Dashboard: Here you can have a preview of your network performance (number of APs and clients).
    Most of this dashboard needs the Unifi Security Gateway, so it’s not an important page.
  • Statistics: In this page you can monitor clients and traffic in the whole network.
    For the moment, nothing here 🙂
  • Map: In this one you can upload a map of your building, and place all APs on it.
    This way you can know where they are and see the global Wi-Fi coverage (approximately).
  • Devices: This page shows you all the Unifi devices you have on your network.
    It’s the most important page, you will manage APs from here.
  • Clients: Same thing for the clients. You’ll see here all the connected clients with information about them (IP, AP, network usage, …):
  • Insights: Here you can see miscellaneous information.
    I’m using this mainly to see known clients (not connected now, but you can check the history, block or unblock them).
  • Events: This window shows you all the recent logs on your network
    This can be clients connections, AP upgrades, roaming, …
  • Alerts: Same thing with errors and warnings.
  • Settings: And this is the page where you’ll configure everything.
    We’ll use it to create the wireless network.
  • Chat support: If you need help from Unifi, you can ask for help here.

Now that you have visited the whole interface, we can move forward to configure the access point.

Add the first access point

Physical preparation

There are two possibilities for the access point cabling.

With a PoE switch:

  • Plug the access point to the POE Switch with an RJ45 cable.
  • Basically, that’s it.
    The status light should turn on and you can move to the next step.

Without PoE switch:

  • You must have a POE adapter like this:
    unifi poe adapter
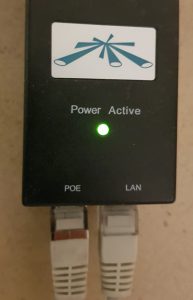
(it’s available on Amazon if you don’t have one with your access point: check it here).
  • Connect the LAN port to your switch or wall network socket.
  • Connect the POE port to the access point.
  • If the access point LED starts to blink, it’s ok.

Software configuration

Now that we powered on the access point, we can go back to the Unifi web interface for the next steps:

  • Access the web interface: https://IP:8443.
  • Click on “Devices” in the left menu.
  • You should now see your access point in the list:
    unifi ap pending adoption
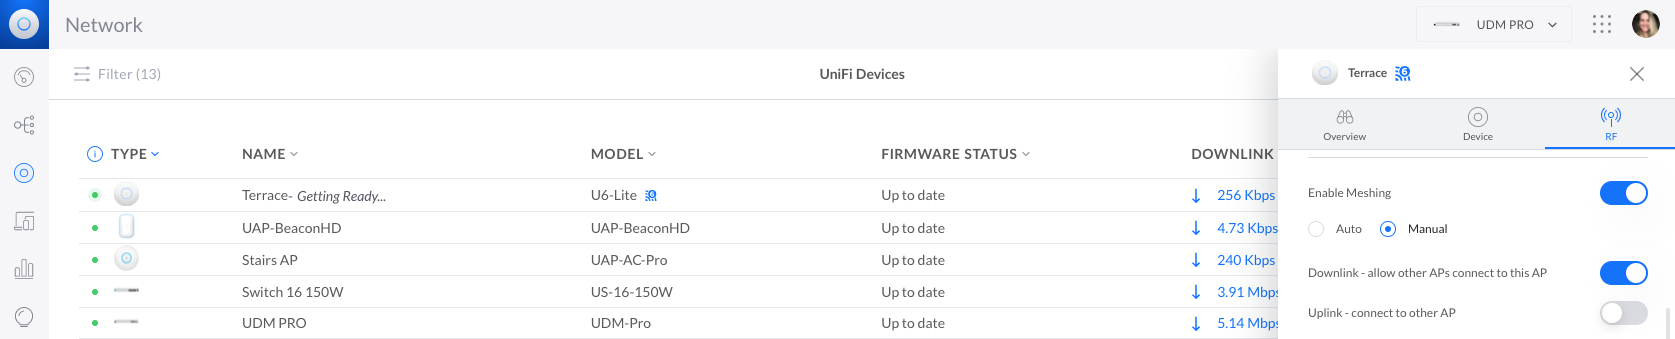
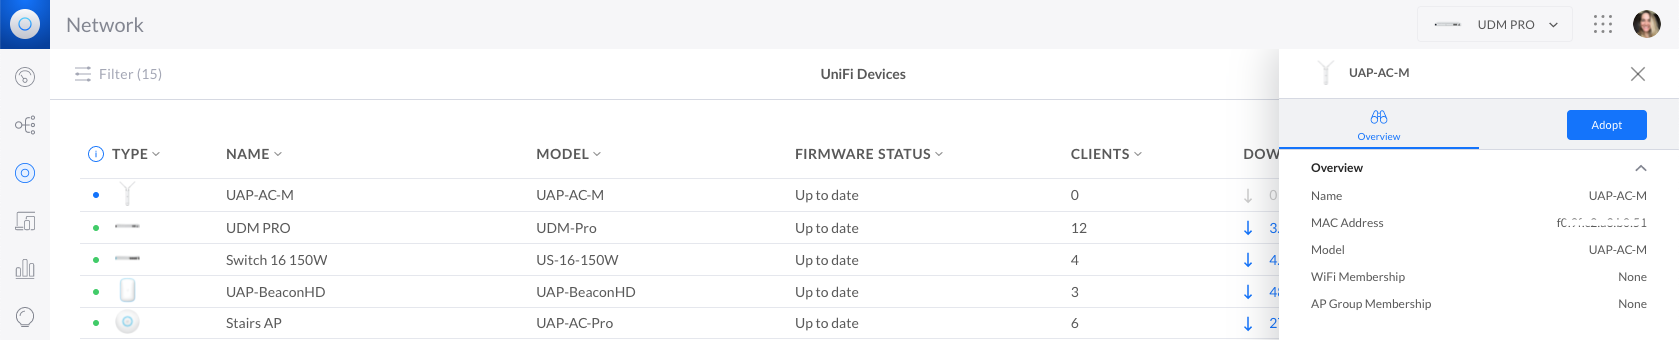
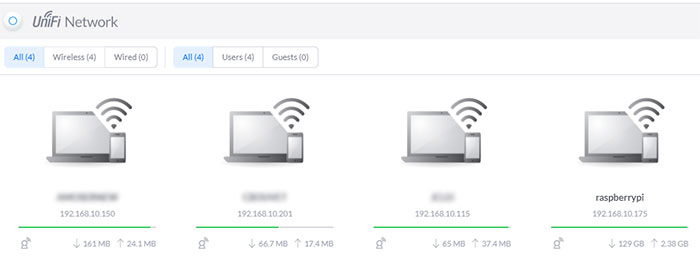
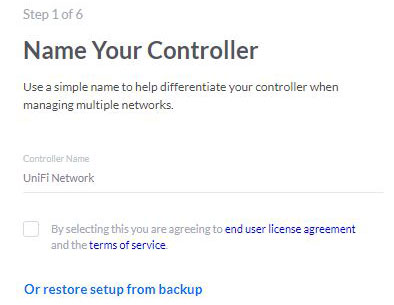
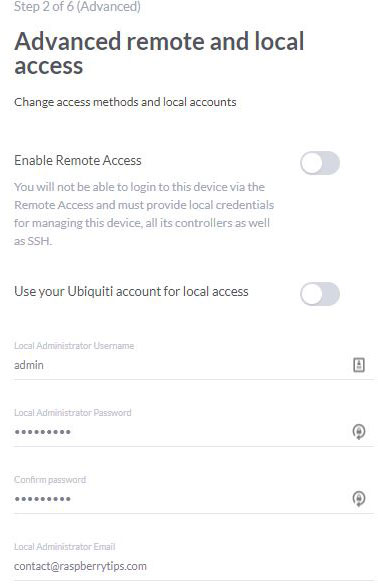
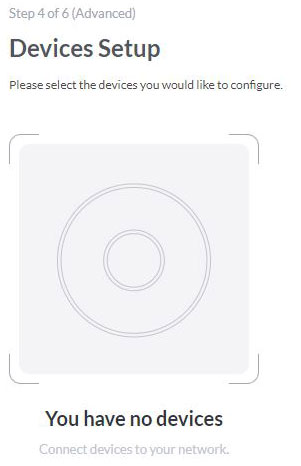
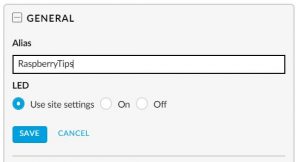
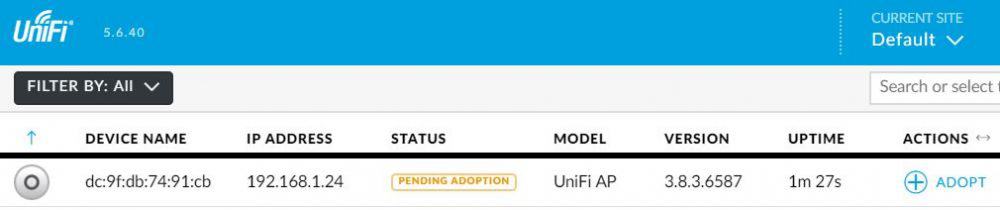
The controller is seeing it, but we need to tell that it’s an access point for this controller.
  • Click on “Adopt” at the end of the line.
    The adoption process starts, after a few seconds, you should get the “Connected” status.
    unifi ap connected
  • If needed (probably), you can upgrade the AP firmware to the latest version by clicking “Upgrade”.
    Your access point will take a few minutes to download and update the firmware.
    unifi ap upgrade

Anyway, the first access point is ready, and we can now create the wireless network (SSID).

unifi ap properties

You can click on the line to see and change other settings for the access point (on the right).

unifi set alias access point
unifi access point new name

For example, you can set an alias for each access point to know which one is which.
In the properties window, click on the config tab and set an alias.

Change everything you want on the access point and move to the SSID creation.

Create your wireless network

Creating a wireless network is basically setting an SSID, a password and a security type.
You can do this in the “Settings” menu from the left bar:

  • In settings, click on “Wireless Networks”.
  • Then click on the “Create a new wireless network” button:
    create new network
  • In the new window, choose an SSID, a security type and a password:
    new wireless network creation
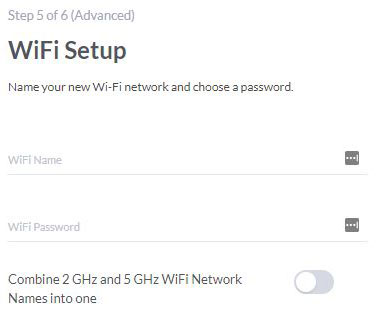
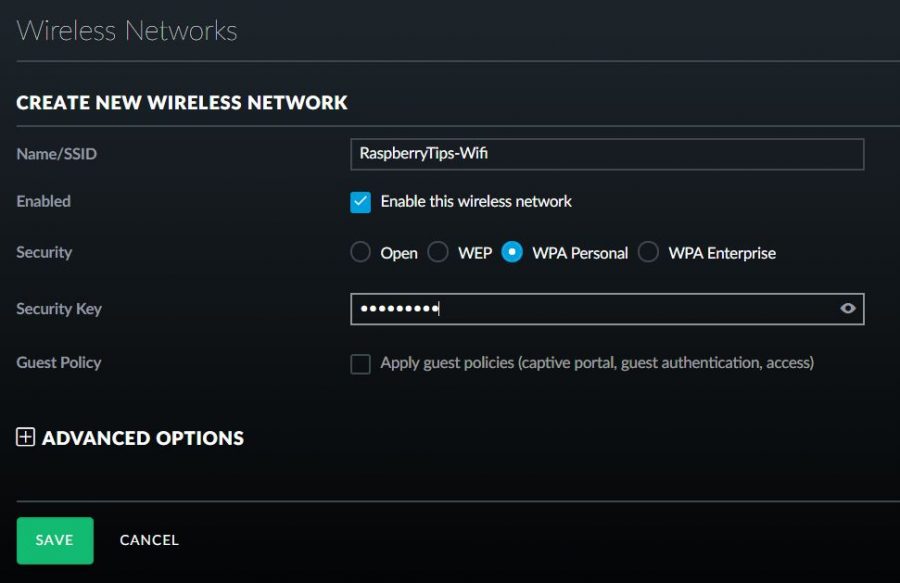
Choose WPA-Personal for security, WEP is not secure.
    And prefer a long password (ideally a phrase from 15 to 30 characters).
  • Click “Save”.

The access points will restart with the new settings.
After a few seconds, the new wireless network is available for all your devices.

unifi wifi windows

Connect to it and check that everything works fine.
By default, the Unifi controller will give you an IP address within your main network.
You have nothing else to do, but you can change it in Settings > LAN.

Then go back to the different menus to see information and statistics about your device.
Enjoy 🙂

Related questions

Do I need to keep the Raspberry Pi on? Not really. As soon as the Raspberry Pi stops, the controller is no longer available but the access point continue to work. You can still access the Wi-Fi network, but you lose controller’s features like roaming between APs.

Do the Unifi controller have advanced features you don’t talk about? Yes, a lot. I made a quick tutorial, but you can do a lot more: schedule downtimes, create guest access with VLAN or not, Radius with Active Directory, filter MAC address, block and unblock clients, etc …

How to reset an Unifi access point? If you lose access to an access point or have strange scenarios in the adoption process, you can reset it to factory defaults. To do this, use the reset button near the RJ45 socket. While the access point is on, let the button pressed for 10 seconds and then wait for the reset.

Conclusion

That’s it, you know how to install and configure an Unifi controller on your Raspberry Pi.
This controller is running perfectly on my Raspberry Pi (3B+ and 4).
I don’t know how many clients it would handle, but at home it’s more than enough.

If you have questions on this topic, leave a comment below and I’ll help you.
I’m using this software at work for five years now, so I may have the answer 😉

Source :
https://raspberrytips.com/unifi-controller-raspberry-pi/

Ubiquiti Payment Gateway

We believe that WISPs serve a crucial role in these difficult times by providing Internet connectivity to all our communities. Our goal with UNMS Cloud and CRM is to empower WISPs with world-class tools and services so that they can focus on connecting the world.

That’s why we are proud to introduce the Ubiquiti Payment Gateway.

Easy and Affordable Payment Processing

We know that fees can add up. That’s why Ubiquiti Payment Gateway is offering an industry-leading processing fee of 1.9%+30c per transaction for the first year.

Better yet, the UPG is simple to use! No need to set up accounts with other payment gateways or use a separate site to manage your subscriptions – simply activate the UPG with a few clicks, go through our quick onboarding process, and you will be using the UPG in no time.

If you are currently using other payment options for your subscriptions, you can easily switch to the UPG from the billing settings. We will continue to support other payment options, if you prefer to keep your existing payment processors.

For now, Ubiquiti Payment Gateway is only available in the United States, but we are working to bring it to other countries. Stay tuned.

Automatic Payments

The UPG isn’t the only thing we’ve been working on. We know that managing monthly payments can be time-consuming. That’s why we have built autopayments into the latest release of CRM. You can activate it in the billing settings:

Autopayments can be set to trigger at invoice creation date or at the due date. No more need to keep track of due dates!

Source :
https://blog.ui.com/2020/05/22/announcing-ubiquiti-payment-gateway/

Ubiquiti Telnet Commands

telnet/ssh commands

UniFi Command Line Interface – Ubiquiti Networks info                      display AP information
set-default               restore to factory default
set-inform <inform_url>   attempt inform URL (e.g. set-inform http://192.168.0.8:8080/inform)
upgrade <firmware_url>    upgrade firmware (e.g. upgrade http://192.168.0.8/unifi_fw.bin)
reboot                    reboot the APsource:
https://community.ubnt.com/t5/UniFi-Wireless/Telnet-commands/td-p/1338536