HDDs are not required for normal operation, however they expand the functionality by enabling things such as video recording from UniFi Protect, and call recordings and voicemails from UniFi Talk.
We strongly recommend using the UniFi 8TB HDD for UniFi OS Consoles with a 3.5” HDD bay (UDM Pro, UDM SE, UNVR, and UNVR-Pro). These are specialized, industrial-grade drives that can support continuous read and write operations required by a video surveillance system.
Cloud Keys (UCK-G2-PLUS) require a 2.5” HDD for which we strongly recommend continuing to use the drive shipped natively with your equipment. If it will be replaced, the Toshiba 2.5″ 5400RPM 1TB HDD (MQ01ABD100V) appears most stable according to internal testing.
Incorrect drives will result in premature failure which can degrade your entire network’s performance, as well as prevent remote management.
Third-party Drives
If you insist on using a third-party drive, it should meet the following criteria:
It fits inside the HDD tray
3.5” for Dream Machines and Network Video Recorders
2.5” for the UCK Gen2 Plus
It is a surveillance-grade drive designed for continuous load
These are generally 7200RPM, CMR Drives. SMR drives are not recommended and may lead to performance issues, loss of video footage, or even system crashes.
It offers at least 1 TB of storage. No maximum HDD capacity has been established.
If you’re using multiple HDDs with your UniFi OS Console, they must all be the same size.
The total usable storage capacity will be affected based on whether either the redundancy level is set to One Disk (RAID1 / RAID5) or Half of Disks (RAID10).
Incompatible HDDs
Some hard drives require an additional 12V external power supply. These hard drives are not supported by the UCK Gen2 Plus or the UNVR.
The following is a list of 3.5” drives that are confirmed to be incompatible with our UniFi OS Consoles:
Vendor
Series
Model
Capacity
Notes
Seagate
SkyHawk
ST10000VX0004
10TB
Does not fit the drive tray.
Seagate
Ultrathin
ST500LT032
500GB
Does not have bottom screws.
Western Digital
UltraSlim
WD5000MPCK
500GB
Does not have bottom screws and connectors do not fit the tray.
Any
Any
SMR Drives
Any
Drives fit the tray but cause issues.
If you have questions about a particular hard drive or need help choosing a hard drive, please reach out to the Ubiquiti Community for insights and recommendations.
In this article, we are going to talk about this and see what you can do to resolve the Error 740 Printer install error with some simple solutions. Some users are unable to add a Printer to their computer. When they try to do the same, they see the following error message.
That didn’t work We can’t install this printer right now. Try again later or contact your network administrator for help. Error: #740
Can’t install this printer right now #740?
Error message, Can’t install this printer right now, comes with error code: 740. The issue, sometimes, can be nothing more than a glitch. Windows is notorious for having glitches, and this can be one of them. However, as reports from other victims and from our own probing of this error code, we found the Printer wizard is unable to get installed on your system. The most common reason for this peculiar behavior is lack of administrative privilege, which is a bit weird as more often than not, the issue has been reported on an administrator system. We have mentioned all the solutions you need to resolve the issue later in this guide.
We can’t install this printer right now, Error 740
You can fix Error #740, We can’t install this printer right now on Windows 11/10 by following these suggestions:
Remove the Printer and restart your computer
Run Printer Wizard as an administrator
Disable UAC or User Account Control
Run Printer Troubleshooter
Create a new Administrator Account
Let us talk about them in detail.
1] Remove the Printer and restart your computer
Maybe the issue is nothing more than a glitch. This glitch can be resolved by just restarting the process. So, first up, try removing your printer, turn off your device and detach all the cables. Now, see if the issue is resolved. If the issue persists, try restarting your system. Make sure to not, click on the Restart button, instead, click on Shutdown and then reopen your system. Hopefully, this will do the job for you.
2] Run Printer Wizard as an administrator
If the issue was not a glitch, then this is the solution you need. After studying the error code for a while we stumbled upon a solution that worked for a lot of users. According to them, all you have to do to add the Printer is manually install the wizard with administrative privileges. So, open Command Prompt as an administrator and run the following command.
rundll32 printui.dll,PrintUIEntry /il
This should do the job for you.
3] Disable UAC or User Account Control
UAC or User Account Control helps in preventing malware from attacking and damaging your computer. Even though it is a good thing to have, sometimes, it can the reason for your issue, as in this case. You should try and disable UAC temporarily and see if it helps. Follow the given steps to do the same.
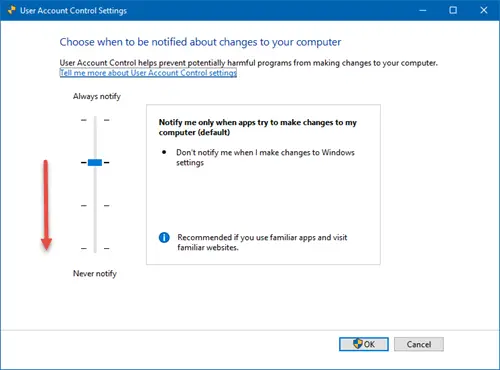
Open Run by Win + R.
Type useraccountcontrolsettings and click Ok.
Select Never and press OK.
Finally, retry adding your Printer. Hopefully, it will be added without any hassle.
4] Run Printer Troubleshooter
Next up, we are going to give put some load on your Operating System to resolve the issue. The Printer Troubleshooter is a utility that not only looks for the problem but also resolves it. We are going to deploy it and see if it helps.
Windows 11
Open Settings from the Start Menu.
Click System > Troubleshoot > Other troubleshooters.
Look for the Printer troubleshooter, and click on the Run button.
Windows 10
Open Settings.
Go to Update & Security > Additional troubleshooter.
Click Printer > Run the troubleshooter.
Let the troubleshooter do its job and then see if the issue persists. Hopefully, the troubleshooter will resolve the issue for you.
5] Create a new Administrator Account
Maybe there is an issue with your account. The issue can sometimes be a glitch, and sometimes, a misconfiguration. What you have to do is create a new account and retry adding your Printer. Follow the prescribed steps to do the same.
Launch Settings.
Go to Accounts and then to Family and other users.
Click on Add account from the Other users section.
Click on I don’t have this person’s sign-in information.
Select Add a user without a Microsoft account.
Enter the username you want and Security questions.
Finally, a user account will be created.
Now, click on Change account type.
Select Administrator > Ok.
Now, log out from your current account and log in to the newly created one.
There are two Error 740s that users are facing. One of them is, We can’t install this printer right now. Try again later or contact your network administrator for help, we have mentioned all the required solutions for this error in this post, but if you are looking for solutions for The requested operation requires elevation, then check our post.
In this article, we’ll show you how to integrate CrowdSec at the appliance level of a modern IT infrastructure thanks to Blocklist Mirror component.
The majority of modern IT infrastructures already includes some form of the security appliance. Our users requested some way to integrate CrowdSec at the appliance level, within their pre-existing ecosystem. In this article, we’ll show you how to make it happen, using the new crowdsec-blocklist-mirror component.
Overview
Leveraging the firewall’s ability to pull IP blocklists from external HTTP URLs, we’ll deploy a crowdsec-blocklist-mirror in the network and configure the appliance to pull IP lists from it.
For this example we are going to use FortiGate, but the steps are similar for other vendors.
Deploying Blocklist Mirror
For this, you’ll need a machine that is accessible from the appliance. You can deploy the blocklist mirror in multiple ways, either by installing from a Linux package manager or deploying with docker. This machine should also be able to access the CrowdSec Local API. The Local API can either be installed on the same machine or can be deployed elsewhere.
For this tutorial we’ll assume that CrowdSec Local API is already installed and listening at port 8080. The OS being used here is ubuntu.
Install Blocklist Mirror
Make sure you have set up the CrowdSec repository. See this to learn how. Then run:
sudo apt install crowdsec-blocklist-mirror
Or if you’re using a RPM-based Linux distribution, run
sudo yum install crowdsec-blocklist-mirror
Configure Blocklist Mirror
After this, we will check and eventually modify the config file located at /etc/crowdsec/bouncers/crowdsec-blocklist-mirror.yaml
Make sure that the lapi_url parameter is correct. If your Local API is deployed on some other machine, please change the lapi_url to the appropriate address and set the lapi_key to a key generated by running the command sudo cscli bouncers add blocklistMirror on the LAPI machine.
By default the blocklist mirror server listens at 127.0.0.1:41412, let’s change this to 0.0.0.0:80 to make this simpler. We can do this by setting listen_uri parameter to 0.0.0.0:80
You can do things like setting authentication, multiple endpoints, TLS etc by tweaking the configuration. Learn more here.
Configure firewall appliance to pull blocklist
This tutorial assumes you are using a FortiGate firewall. Please note that for other vendors steps may vary.
Configuring external blocklist
Open the FortiGate dashboard and navigate to Security Fabric -> External Connectors and click on Create New button.
Scroll down and select Threat Feed -> IP Address and create a connector
Make sure that the appliance can access the URL. This URL should be the one where the blocklist we deployed earlier is serving the IP-list. Finally, click OK.
After a while you can see that this threat feed will be filled. These are from blocklist mirror.
Create a firewall policy referencing the blocklist
You can now create a firewall policy/policy which will deny access to your infrastructure if the incoming IP is present in blocklist. To do this you can navigate to Policy & Objects and click on the Create New button.
Specify the fields as required, and you need to reference the blocklist by selecting it in the Source dropdown
All you have to do next is save the policy and enable it by clicking OK.
Great job!
To sum up
In this way we leveraged CrowdSec in a firewall appliance by using blocklist mirror bouncer. You can further configure the blocklist mirror with authentication, TLS and other security goodies. If you have a question or a suggestion feel free to reach out to us on Discord.
Using Orange Pi R1+, Netfilter, AdGuard and CrowdSec to preserve your security & privacy. The third part is on how to set up a canary device that ‘tweets’ when unexpected events occur.
Welcome to the third and final part of our trilogy where the goal is to inspire and show you how to create a very efficient firewall to secure home network or your small business, which offers a serious level of security, at low cost.
The first part focuses on selecting hardware and installing the base OS.
The second part is dedicated to setting up firewall functionality, client VPN to protect your identity online, AdGuard for the entire network, DuckDNS if you don’t have a static IP as well as port knocking to close down your internet exposed services to anyone but you.
This third and final part is about how to secure your network even further with CrowdSec – how to set up a canary device that notifies you when unexpected events such as scanning occur; something you would typically never do yourself.
Part 3: Setting up a canary device with CrowdSec
The end goal of this third part is to show how CrowdSec can do cool stuff acting as a canary, but we need a few preliminary steps. We want to set up an alarming system so we know when a new system has been connected to our local network. That is a two-part thing consisting of installing ARP Watch and notifications via Pushover. After that we’ll talk about what CrowdSec can do in the sense of alarming you when odd things are happening on your network. First things first:
ARP Watch
To proceed further in securing ourselves, it would be cool to know whenever a new machine is connecting to the LAN. And since we can now get instant notifications with the above script, let’s send an alert every time a new device is detected in the LAN.
$ sudo apt-get install arpwatch
In the /etc/default/arpwatch file add lan0 (or whatever is the name of your LAN interface):
INTERFACES="lan0"
And create a file in /etc/arpwatch/lan0.iface (if lan0 is your LAN interface) to add some email addresses. Here, to reuse our pushover system, we can input the email address that is provided for your app in pushover. If you send an email to this address, it’ll be forwarded as a push notification to your phone.
$ cat | sudo tee /etc/arpwatch/lan0.iface
Paste:
IFACE_ARGS="-m xmmmm1fjoejf@pomail.net"
Where xmmmm1fjoejf@pomail.net should be replaced by the email address listed under your login. As usual, end with CTRL + D to return to your shell.
Setting up a notification system
Pushover is an iOS and Android app that allows you to send plenty of notifications to your phone for free (around 7500 per app per month). You can obviously use it wherever you feel, for whatever reason. In the above crontab script you can, for example, notify yourself when the machine boots. But we may also want to know when a new mac address is registering in our network or if a port scan was fired from within the LAN area (which is quite bad news, see below section “Protecting yourself even from (w)LAN devices”)
So, once you have set up your Pushover App and account online, you should have a user token and an app token:
Next, create an APP and locate your App token.
Create a script to send yourself notifications:
$ cat > /usr/local/scripts/pushover.sh
cut/paste the script below, finish it with CTRL+D and issue the classical chmod:
Now to send yourself a message, you just need to type in:
$ ./pushover.sh "Most kittens" "Are too cute"
And you should get this on your phone screen:
Protecting yourself even from (w)LAN devices
One thing you cannot really trust, but nevertheless like to have, are connected speakers like Sonos, your voice assistants like Alexa or even your IP cameras or just your smartphone. All those IoT devices make our life easier but also come with a substantial amount of potential security issues.
I’ve tried several approaches here, but none is at the same time realistic in terms of daily usage and secure enough. Segregating all those machines in a sub-lan (or rather a sub-wlan for most of them) using a different vlanid and trying to limit the exposure to your secure devices is a complicated task and usually cripples the usability we all appreciate as well.
One simple example would be your Sonos speakers. You want them to connect to online streaming systems like Deezer or Spotify and be able to control them with your phone through airplay. At the same time, if (when) a hacker is able to upload a rigged firmware by breaching into Sonos systems, they can infect your local speakers and establish a local presence in your LAN, scan, harvest, invade, etc. The same is true of most voice assistants, IP cameras, smartwatch, smartphone, TV, and generally speaking of *any* IoT devices.
Now if you isolate them in a sub (w)LAN, you’ll not really be able to control them comfortably since anytime a friend comes over you’d have to add a rule to your firewall as well as probably other cumbersome modifications.
So to be more realistic, I decided to proceed in a different way. Let’s not suspect those things right away but rather detect if (when) they start to behave suspicious. Apart from cameras that should not be able to access the Internet and send private video streams across the globe to god knows how, we can just monitor our IoT devices. Most of those devices could be let loose and if ever they are compromised a hacker will very likely use them to scan and compromise your network.
There are other more complicated ways, like having different, firewalled vlans, tag packets, and using multicast forwarding, but beyond complication, you’re not always sure not to lose functionalities of some of your IoT devices. Also this method is more generic (although less protective).
Using CrowdSec to setup a Canary device
The concept is fairly old and simple. Coal miners during the 19th century used to bring a canary with them down the mine and if a gas leak would occur (which was odorless) it’d kill the canary and miners would evacuate, hopefully before a potential blast.
Nowadays, and in an IT context, a canary is a device that is stealthy sitting in your network that should bever be queried. It’s doing nothing, hosts no service and there is no reason in the world it should ever be poked. If it is accessed, that means something/someone in your network is scanning it and 99.999% of the time, this is bad news.
If a hacker ever hijacks any of your IoT devices, no matter the method, it’s very likely that they’ll scan your LAN. In this case your canary should be triggered and alerting you. We have all the needed tools to do it already, either locally on the firewall we are building, or on a separate similar pi device with just one LAN interface. No matter how you choose to do it, CrowdSec will be a very useful tool to set up the canary and our pushover script can alert us. After all, our scenario is known : multiport scan and it already exists on the hub. The bouncer (the component that deals with the detect menace) also exists: we’ll simply use the one that triggers a script, here our script to send us a notification using pushover.
Remember we added those lines in our firewalling script:
Well, basically they say that if ports on the LAN interface are contacted on any other ports than 22:TCP and 8080:TCP (8080 is just an example), then someone is scanning you and you should drop the packets. But the trick here is that since we drop the packet, CrowdSec iptables multiscan scenario, crowdsecurity/iptables-scan-multi_ports , will catch the signal.will catch the signal.
CrowdSec
CrowdSec will spot hacking attempts by looking at the logs generated on the OPI. If you intend to run more services than just those in this tutorial, remember to reconfigure it (either by running the installation wizard again or by adding it manually to /etc/crowdsec/acquis.yaml). If you choose the latter method make sure to install a suitable scenario either using cscli or by visiting https://hub.crowdsec.net.
In one sentence, CrowdSec is crowd powered cyber security software. It’s an open source & free IPS system. It detects attacks in your logs, bans the IP and then shares the aggressive IP with the community so that everyone else is also protected against this aggressor. As well, your instance of CrowdSec benefits from the global sightings of the network.
While CrowdSec is available in Debian (but not Ubuntu) it’s highly recommended to add our own repo since the available package has been deprecated since last OS release. To do that follow the (easy) instructions at our documentation site. Once added, simply install the CrowdSec package and the nftables bouncer:
Installing both packages with one command can be a bit of a hassle since we can’t control the order of which packages are installed. So to make sure that the agent is installed first, we do it like this. This ensures that the bouncer is added automatically to the CrowdSec agent.
The installer will pretty much do all the job for you. After installing add the netfilter log collection by issuing this:
(note: In spite of the name, the collection is also valid for nftables)
Ok we’re all set on that front. CrowdSec will create two nftables IP sets named crowdsec and crowdsec6, containing ipv4 blocklist for the first one and ipv6 for the latter. Basically those sets are automatically banned by the firewall bouncer daemon residing in memory. If someone agresses your machine and tries to port scan it, scan your web server or bruteforce your ssh / ftp or other accesses, not only will it get banned, but its IP will also be reported to the central CTI. In return, we do benefit for free from the knowledge of the Crowd as well and our IP sets are automatically filled with new dangerous IPs sent by the central API of CrowdSec. We defend, we partake and in return we are even better defended by all the other members. Neat.
You can obviously block those IP sets yourself wherever you feel.
The configuration resides in /etc/crowdsec/bouncers/crowdsec-firewall-bouncer.yaml and is very straightforward:
Note: you won’t need to edit the file; this is the default configuration.
So not only will your (potential) services be protected, but your firewall output will also generate bans for people trying to hack you, share their IP to protect everyone else and CrowdSec will send you dangerous IPs constantly to be blocked directly in your firewall. One stone, three birds. Bingo!
Next, we need to set up the custom bouncer that comes with CrowdSec. Luckily it’s also available as binary package on arm-based devices running debian-based distros:
$ sudo apt install crowdsec-custom-bouncer
In its essence the custom bouncer simply executes a custom script whenever a scenario triggers.
Obviously, we’re using it to execute the pushover_crowdsec.sh script whenever a scenario triggers.
After installation, we need to edit the config file located in/etc/crowdsec/bouncers/crowdsec-custom-bouncer.yaml:
You would only need to edit the bin_path item in the configuration file above as everything else, even registering the bouncer with the agent has been taken care of by the install script run automatically upon installation.
Copy/paste the content of the script after this command to ensure that the script is added to the file system correctly:
$ cat | sudo tee /usr/local/scripts/pushover_crowdsec.sh
Remember to chmod 755to make the script executable.
Now, anytime a scan would be initiated from the LAN, we are notified directly on our Phone. Our Canary is alive and kicking!
Conclusion
For a marginal budget, you can protect your family, your work and your privacy. All it takes is 50€ and a couple of hours. You’ll learn a lot, be autonomous and better protected. Doesn’t it sound like a fair investment of your time in 2022?
How to set up an effective firewall and preserve your security & privacy with Orange Pi R1+, Netfilter, AdGuard and CrowdSec.
Welcome to the second part of our trilogy where the goal is to inspire you to create a very efficient firewall to protect your remote work environment, family, or your small business, which offers a serious level of security, at a low cost.
Have you not yet read the first part that focuses on selecting hardware and installing the base OS it’s not too late. Find it here.
This second part is focused on how to set up firewall functionality, setup client VPN to protect your identity online, setting up AdGuard for the entire network, DuckDNS if you don’t have a static IP as well as port knocking which is a cool way to close down your internet exposed services to anyone but you (or anyone else who knows the secret combination to enter). The third and final part will be about how to secure your network even more with CrowdSec – how to set up a canary device that ‘tweets’ when unexpected events like for instance port scanning occurs; something you would typically never do yourself.
It’s also being part of a larger project, CrowdSec, which is blocking Internet attacks and sharing IPs that launched them. You protect yourself and others at the same time. In essence, this comprehensive guide will show you how to:
Create security robust enough to resist even if passwords are compromised
Create a reliable hardware environment for your firewall
Install the OS on it and create a rock-solid Firewall to protect your activities
Add CrowdSec to protect your WLAN services you’d like to expose over the Internet and detect if any local IoT device is going rogue (e.g. cams, assistants, connected speakers, etc.)
Allow external access to DMZ-like services to control your home on distance and access your firewall
Add a VPN to protect your anonymity online
Add an anti-advertisement & anti-tracking system
Part 2: The Software stack
The firewall
It’s already in there, provided by the netfilter subsystem, which is integrated into the kernel. The nft (nftables) command is here to help us interact with the netfilter layer. The following script is commented so that you can easily modify it according to your needs and projects or even port it to iptables (nftable predecessor). All scripts can be found here.
Out of the box, it handles:
Multiple internet connection with a dynamic routing table capable of sending packets to one or the other connection based on your rules (destination port, src or destination IP, protocols, etc.)
Protection against usual network shenanigans
Inbound, forward and outbound traffic filtering
CrowdSec integration to defend your exposed services and have a Canary to detect if your LAN is being scanned
Port knocking integration so that you can simply use a port knocking app to unlock access to your network from wherever you are.
Just cut/paste it from this doc:
$ cat | sudo tee /etc/nftables.conf
Here is the script to adapt and copy/paste:
#!/usr/sbin/nft -f

#Part 1: Setting statics
define wan                     = eth0
define lan                       = lan0
define vpn                      = tun0
define localhost            = lo
define vpn_net              = 10.8.0.0/24
define vpnserver           = tun1
define vpn_server_net  = 10.0.0.0/24
define machine1           = 192.168.0.2
define machine2           = 192.168.0.3
define antilanscan        = { 22, 8080 } #Part 8: Anti lan scan
define cameras             = { 192.168.0.4, 192.168.0.5 }
define icmp_v6          = { destination-unreachable, echo-reply, echo-request, nd-neighbor-solicit, nd-router-advert, nd-neighbor-advert, packet-too-big, parameter-problem, time-exceeded }

#Part 2: Reset nft tables
flush ruleset

#Part 3: NAT
table ip nat {
  chain prerouting {
    type nat hook prerouting priority -100; policy accept;
      iif $wan tcp dport 2222 dnat to $machine1:22 # incoming connexion on port 2222 will be forwarded to 192.168.0.2  on 22
      iif $wan tcp dport 5001 dnat to $machine2      # sames port 5001 and 192.168.0.3 but this time port is 5001 to 5001, no change
  }
  chain postrouting {
    type nat hook postrouting priority 100; policy accept;
      oif $wan snat to 192.168.1.1
      oif $wan2 snat to 192.168.2.1
      oifname $vpn masquerade # snat to $vpnip
      oifname $vpnserver snat to 10.0.0.1
  }
}

#Part 4: Creating IP sets
table inet filter {

  set whitelist_candidates {
    type ipv4_addr . inet_service
    flags timeout
  }

  set whitelist {
     type ipv4_addr
     flags interval, timeout
  }

  set whitelist_portknockd {
     type ipv4_addr
     flags timeout
  }

  chain input {
    type filter hook input priority 0; policy drop;
      icmpv6 type $icmp_v6 accept
    #Part 5: Portknocking (next 4 lines)
      tcp dport 314 add @whitelist_candidates {ip  saddr . 18 timeout 2s}
      tcp dport 18 ip saddr . tcp dport @whitelist_candidates add @whitelist_candidates {ip  saddr . 939 timeout 2s}
      tcp dport 939 ip saddr . tcp dport @whitelist_candidates add @whitelist_candidates {ip  saddr . 101 timeout 2s}
      tcp dport 101 ip saddr . tcp dport @whitelist_candidates add @whitelist {ip saddr timeout 180s} log prefix "Portknocked: "
      ct state related,established            accept
      iif $lan tcp dport != $fwopenports log prefix "LAN SCAN:"  drop #Part 8: Anti lan scan
      ip saddr @whitelist                            accept
      ip saddr @whitelist_portknockd      accept
      iifname $lan                                       accept
      iifname $localhost                            accept
      iifname $vpnserver                           accept
      iifname $wan ip saddr != @whitelist                             drop
      iifname $wan ip saddr != @whitelist_portknockd       drop
      iifname $wan ct state invalid                                        log prefix "Invalid packet:" drop
      iif != lo ip saddr 127.0.0.0/8                                            log prefix "Fake localhost:" drop
  }

  chain forward {
    type filter hook forward priority 0; policy drop;
    #Part 6: Prerouting (next two lines)
      iifname $vpn meta l4proto udp ip daddr $machine1 udp dport 22 accept
      iifname $vpn meta l4proto tcp ip daddr $machine2 tcp dport 5001 accept
    #Part 4: Creating IP sets (next two lines)
      ip saddr @whitelist                       accept
      ip saddr @whitelist_portknockd accept
      iif $lan                                            accept
      iifname $vpnserver                      accept
      ct state established,related       accept
      ip saddr $cameras log prefix "Camera trying to exit:" drop
      ct state invalid log prefix "Invalid packet:" drop
  }

  chain output {
    type filter hook output priority 0; policy accept;
  }
}
#Part 7: Mangling
table ip mangle {
  chain prerouting {
    type filter hook prerouting priority -150; policy accept;
      mark != 0x0                                               meta mark set ct mark
      ip saddr $machine1 tcp sport 10001    meta mark set 0x2
      ip saddr $machine1 udp sport 10001   meta mark set 0x2
      ip saddr $machine1                                meta mark set 0x1
      ip saddr $machine2                                meta mark set 0x4
  }

  chain postrouting {
    type filter hook postrouting priority -150; policy accept;
      ct mark set mark
  }
}
After inserting it, save the file by pressing CTRL+D.
This version is a simplified version of the firewall script available from the repo above, but the most important part is here already. This nftables.conf file would not be enough by itself to handle several possible routes. Be sure to also use the ip rules script to create your routing tables, see below, section IP route.
NFtables (netfilter) Firewall details
Part 1 are basic variable definitions.
Part 2 resets all nft tables. (Used to take 10 lines with Iptables)
In part 3 (NAT) we are defining what happens to packets that are incoming and destined to another machine behind the firewall. They are dealt with very early in the filtering process, in a prerouting chain. The postrouting chain is about telling what IP should be used for translating IPs coming from various subnets.
The second table, filter, is part 4 that create IP sets. They are tables that contain IP addresses, sometimes with expiry dates. Three sets are created, one for potential candidates to whitelisting, the second for confirmed whitelisted IPs and the third will be used in conjunction with port knocking. The reason for creating two different whitelists of IPs is that the port knocking integrated in this NFT configuration (part 5) will only store the IP that knocked. Logical? No, not really. But CGNAT, used by telecom operators to run 4G networks, ruins it all and usually, it’s not a 1:1 IP translation but a range of IP that is used. So when your phone is port knocking 3 ports quickly, it’s usually with one IP but then when you connect on your SSH port, another IP is used. Luckily, they often sit in the same /24 range. The problem doesn’t exist with IPv6 obviously. So knockd will fill the second set with a range and the first one is still useful when you connect from elsewhere like a hotel. (I didn’t find any way to add a range to the set directly from an nft configuration file)
Part 6 is related to prerouting. It’s not enough to redirect the connection since the packet is passing two interfaces, we also need to accept this in the forward rules.
Part 7 is mangling. This is where we instruct the firewall to mark packets according to our own rules. 0x03 is the VPN server you host yourself and where you receive inbound traffic, 0x02 is the VPN client which you use to establish an outbound tunnel through a VPN provider. It’s through here you send the traffic of machine 1. In this example, we want machine1 to be using connection 2 when it’s starting a connection on port UDP or TCP 10001, otherwise it will be using connection 1. Machine 2 will always use your alt connection (here marked as 0x4) and machine 1, except for ports 10001 will use connection 1. This can be adapted with ports, source addresses, destination addresses, protocols, etc. (Note that the table has the highest priority and will be “executed” first, before all other rules). Use cases are easy here: you can send your professional workstation packets through a dedicated connection for example. Or send all your peer-to-peer traffic through a VPN or your TV IP through a VPN to avoid Geo limitations, etc. See the IP route section to understand fully how nft mangle + IP route cooperate here.
Part 8, Anti lan scan will be covered later on in this guide, but the global concept is to watch for unusual port scans, coming from our LAN-facing ethernet adapter, that would denote an IoT device being compromised or a hacker doing a lateral move in your network (classic in Ransomware scenario). We’ll have a canary setup here, see below for a more detailed description.
Obviously, all those rules are given as examples but it should be fairly easy for you to adapt them to your own context.
Port knocking
So this script handles port knocking by itself with the lines tagged in yellow, but the CGNAT problem forces us to have a fallback plan. We’ll use knockd to handle the matter on our machine.
But why is port knocking in the first place?
Well, take for granted that any application you expose might have an unknown security flaw. Or that your passwords are compromised. If the attacker doesn’t have access to the application port in the first place, even if he knows your pass or has a secret “headshot” 0 days exploit to launch, with port knocking he cannot even try in the first place, except if he uses the exact same IP as you do. This very heavily limits the risks of getting compromised. Also, using your 4G connection is far less risky than connecting to a Hotel (or public place) Wifi. But how to just allow a temporary connection from those locations? Well, port knocking is the (very underrated) key.
So before connecting to your machine, you will just launch a little app that will port “knock” your machine, nicely whitelisting the public IP you’re using and give you access to VPN, SSH, RDP, whatever you want.
KnockonD will do nicely on iOS, Knock on Ports for Android). It sends a stream of packets, in a certain order, to add your current IP address in a set that is whitelisted in the firewall. (Careful, some ISPs (like broadband carriers) are doing CGNAT, which can cripple this technique, but we’ll try to put a workaround together)
On the OPI you just need to run:
$ apt-get install knockd
And edit the configuration file (/etc/knockd.conf) as follows. Modify to your own port sequence:
Two sequences here, one classic and another one that is compatible with heavily filtered networks that won’t allow you to access all ports freely. Both add not just your IP but your IP in a 24 range in the whitelisted set. This one is really made to address the pesky CGNAT problem.
IP Route
You also need a script that will create those multiple routing tables, and that will be able to use the marks we set in the script (part 7 in the nftables script).
Here is the script creating multiple routing tables, allowing different default routes for different usages. It’s also available from my GitHub:
Note: If you don’t have multiple wan connections like me, adjust accordingly by removing all occurrences of WAN2.
#!/bin/bash

### BEGIN INIT INFO
# Provides:                  multiroute
# Required-Start:        $network
# Required-Stop:        $network
# Should-Start:
# Should-Stop:
# Default-Start:            2 3 4 5
# Default-Stop:            0 1 6
# Short-Description:    Multiroute manager
# Description:              Manage multi-routing
### END INIT INFO

Set_variables()
{
   WAN="eth0"
   LAN="lan0"
   WAN2="eth2"
   VPN=`ifconfig|grep tun0`
   VPNSERVER=`ifconfig|grep tun1`
 [[ ! -z "$VPN" ]] && VPNIF="tun0" && VPN=1 && VPNCLIENTIP=`ip -o addr | grep -v inet6 | grep tun0 | awk '{split($4, a, "/"); print a[1]}'` &&  VPNCLIENTROUTE=`ip route show|grep -v inet6 | grep "tun0 proto" | cut -f 1 -d " "`
  [[ ! -z "$VPNSERVER" ]] && VPNSERVERIF="tun1" && VPNSERVER=1 && VPNSERVERIP=`ip -o addr |grep -v inet6 | grep $VPNSERVERIF |awk '{split($4, a, "/"); print a[1]}'` && VPNSERVERROUTE=`ip route show |grep -v inet6 | grep $VPNSERVERIF | cut -f 1 -d " " | head -1`
}

Env_Cleanup()
{
  ip rule del from all fwmark 1 2>/dev/null
  ip rule del from all fwmark 2 2>/dev/null
  ip rule del from all fwmark 3 2>/dev/null
  ip rule del from all fwmark 4 2>/dev/null
  ip rule del lookup maincnx    2>/dev/null
  ip rule del lookup vpnclient  2>/dev/null
  ip rule del lookup vpnserver  2>/dev/null
  ip rule del lookup altcnx     2>/dev/null
  ip route flush table maincnx
  ip route flush table vpnclient
  ip route flush table vpnserver
  ip route flush table altcnx
  for i in /proc/sys/net/ipv4/conf/*/rp_filter; do echo 0 > "$i"; done # To avoid packet drop
}

Routing_Init()
{
  [[ $VPN ]] && echo -e "$ORANGE -> VPN IS UP (route: $VPNCLIENTROUTE, on dev: $VPNIF, ip: $VPNCLIENTIP) $END"

  ip route add table maincnx default dev $WAN via 192.168.1.2
  ip route add table maincnx 192.168.0.0/24 dev $LAN src 192.168.0.1
  ip route add table maincnx 192.168.1.0/24 dev $WAN src 192.168.1.1
  ip route add table maincnx 192.168.2.0/24 dev $WAN2 src 192.168.2.1
  [[ $VPN ]] && ip route add table maincnx $VPNCLIENTROUTE dev $VPNIF src $VPNCLIENTIP
  [[ $VPNSERVER ]] && ip route add table maincnx 10.0.0.0/24 dev $VPNSERVERIF src 10.0.0.1
  ip rule add from 192.168.1.2 table maincnx

  [[ $VPN ]] && ip route add table vpnclient default dev $VPNIF via $VPNCLIENTIP
  [[ $VPN ]] && ip route add table vpnclient $VPNCLIENTROUTE dev $VPNIF src $VPNCLIENTIP
  [[ $VPN ]] && ip route add table vpnclient 192.168.0.0/24 dev $LAN src 192.168.0.1
  [[ $VPN ]] && ip route add table vpnclient 192.168.1.0/24 dev $WAN src 192.168.1.1
  [[ $VPN ]] && ip route add table vpnclient 192.168.2.0/24 dev $WAN2 src 192.168.2.1
  ip rule add from $VPNCLIENTIP table vpnclient

  [[ $VPNSERVER ]] && ip route add table vpnserver default dev $VPNSERVERIF via $VPNSERVERIP
  [[ $VPNSERVER ]] && ip route add table vpnserver 192.168.0.0/24 dev $LAN src 192.168.0.1
  [[ $VPNSERVER ]] && ip route add table vpnserver 192.168.1.0/24 dev $WAN src 192.168.1.1
  [[ $VPNSERVER ]] && ip route add table vpnserver 192.168.2.0/24 dev $WAN2 src 192.168.2.1
  [[ $VPNSERVER ]] && ip route add table vpnserver 10.0.0.0/24 dev $VPNSERVERIF src 10.0.0.1
  [[ $VPNSERVER ]] && ip rule add from $VPNSERVERIP table vpnserver

  ip route add table altcnx default dev $WAN2 via 192.168.2.2
  ip route add table altcnx 192.168.0.0/24 dev $LAN src 192.168.0.1
  ip route add table altcnx 192.168.1.0/24 dev $WAN src 192.168.1.1
  ip route add table altcnx 192.168.2.0/24 dev $WAN2 src 192.168.2.1
  ip rule add from 192.168.2.2 table altcnx

  ip rule add from all fwmark 1 table maincnx
  [[ $VPN ]] && ip rule add from all fwmark 2 table vpnclient
  [[ $VPNSERVER ]] && ip rule add from all fwmark 3 table vpnserver
  ip rule add from all fwmark 4 table altcnx
  ip route flush cache

  for i in /proc/sys/net/ipv4/conf/*/rp_filter; do echo 0 > "$i"; done # To avoid packet drop
  echo 1 | sudo tee /proc/sys/net/ipv4/ip_forward > /dev/null
}

case "$1" in

start)
  Set_variables
  [[ $VPN ]] && sleep 5 # Wait for VPN to be up if not yet started when the firewall script kicks in
  /usr/bin/logger -t "Multi route" "Starting" -p4
  /usr/bin/logger -t "Multi route" "VPN CLIENT DETECTED, ADDING RULES" -p4
  /usr/bin/logger -t "Multi route" "VPN SERVER DETECTED, ADDING RULES" -p4
  Env_Cleanup
  Routing_Init
  exit 0
;;

stop)
  Set_variables
  /usr/bin/logger -t "Multi route" "Stopped" -p4
  echo 0 | sudo tee /proc/sys/net/ipv4/ip_forward > /dev/null
  ip rule del from all fwmark 1 2>/dev/null
  ip rule del from all fwmark 2 2>/dev/null
  ip rule del from all fwmark 3 2>/dev/null
  ip rule del from all fwmark 4 2>/dev/null
  ip route flush cache
  exit 0
;;

restart)
  /usr/bin/logger -t "Multiroute" "restart initiated" -p4
  $0 stop
  sleep 1
  echo -e '\n'
  $0 start
;;

*)
  echo -e "$YELLOW Usage: /etc/init.d/multiroute.sh {start|stop|restart}$END"
  exit 1
;;

esac
exit 0
The script is an old-fashioned SysV init script that goes into /etc/init.d after you’ve made it executable with chmod 755 and will be executed during startup.
This script basically creates four different routing tables. So instead of having just one “default route” for all your machines, your firewall now has four different tables, each containing a set of specific routing rules. So if you mark a packet with 0x2, (see in the nftables configuration, the mangle part) the machine will ship it through the VPN connection. If you tag it with 0x4, it will use your alternate connection, say a 4G for example. The tag 0x3 will be for the VPN Server and the 0x2 for VPN client. It’s just magic how many opportunities this kind of IPtables / Nftables mangling system, coordinated with IP routing can open.
VPN
We speak here of a client VPN. A VPN that you subscribed to and want to be able to use in certain situations, or more precisely with certain packets. If you want to bypass a geographical lock from some TV broadcasters or Netflix or use some protocols rather on an anonymous connection than the usual one, or just to preserve your anonymity this is the way to do it.
Once you find your dream VPN provider, they will most likely give you files to set up your VPN connection, and usually, they are made for both Wireguard and OpenVPN. I will show you how to install and configure the latter. You will just need to install OpenVPN, upload those files (usually a .conf file also embedding all certificates and a user.pass file with the credentials) in the /etc/openvpn directory, enable openvpn in /etc/default/openvpn and you should be able to connect.
A typical OpenVPN client configuration looks like this:
client
dev tun
proto udp
remote [OPENVPN SERVER IP] 1194
resolv-retry infinite
remote-random
nobind
tun-mtu 1500
tun-mtu-extra 32
mssfix 1450
persist-key
persist-tun
ping 15
ping-restart 0
ping-timer-rem
reneg-sec 0
comp-lzo no
log /var/log/openvpn.log
remote-cert-tls server
auth-user-pass /etc/openvpn/user.pass.vpn
route-nopull
verb 3
pull
fast-io
cipher AES-256-CBC
auth SHA512
script-security 2
up "/etc/init.d/firewall restart"
down "/etc/init.d/firewall restart"

-----BEGIN CERTIFICATE-----
[YOUR CERTIFICATE]
-----END CERTIFICATE-----

key-direction 1

#
# 2048 bit OpenVPN static key
#
[YOUR KEY]
CAUTION: There is a minor security vulnerability here. Using the auth-user-pass /etc/openvpn/user.pass.vpn file is not ideal. This file contains your credentials for connection in plaintext to avoid providing them manually during initialization of the VPN. This plaintext isn’t encrypted and could expose your credentials if your firewall is ever seized or you become prone to a very critical vulnerability, like a 0day buffer overflow of some sort, would successfully compromise your firewall. On my end, I live with it, but you’ve been warned.
PS: The firewall is automatically reloaded when the VPN goes up or down to add the proper rules.
Create the directory for custom scripts
We need a directory to save custom scripts. Create /usr/local/scripts and sudo chown it to your current user for convenience.
DuckDNS
While we are at it, let’s make this machine easy for you to locate online. Should you have a dynamic IP address, just crash by DuckDNS, create yourself an account and register your IP and duckdns.org subdomain for free. Here is a little script to help you update it on a regular basis:
The token is found under your login at duckdns.org after clicking the ‘>>> reCAPTCHA <<<’ button.
Use the script by saving it to e.g./usr/local/scripts/duckdns.sh, chmod 755 it and execute it every half an hour with a crontab like this:
$ crontab -e
$ crontab -e
It should look somewhat like this:
MAILFROM=[YOUR_SENDING_EMAIL]
MAILTO=[YOUR_RECEIVING_EMAIL]

#m   h  dom mon dow      command
17   *   *   *   *       cd / && run-parts --report /etc/cron.hourly
45  10   *   *   *       test -x /usr/sbin/anacron || ( cd / && run-parts --report /etc/cron.daily )
47   6   *   *   7       test -x /usr/sbin/anacron || ( cd / && run-parts --report /etc/cron.weekly )
52   6   1   *   *       test -x /usr/sbin/anacron || ( cd / && run-parts --report /etc/cron.monthly )
30   *   *   *   6       /usr/local/scripts/duckdns.sh
Only the last line is added by us. The first lines are usually present default. YMMV.
Note: In order for the user who executes the duckdns.sh script to have permissions to write a log file in /var/log it needs to be part of the syslog group. This can easily be done by running sudo addgroup <user> syslog.
Adguard
Adguard is a really cool piece of software that is basically running a DNS that resolves all advertisement servers to 127.0.0.1 (resulting in many ads not being shown. Hooray!). You install it on your LAN and instead of connecting directly to 8.8.8.8 or your ISP DNS, you tell all your LAN users to rather use it.
If your request is not going toward an Ad server, it’s just resolved by the DNS you instructed Adguard to use. Otherwise, your client, say your mobile phone, will just ask this ad from 127.0.0.1 (himself), getting nothing in return. With this, a chrome plugin like Adblock as well as youtube Adblock and advertisement will be a thing of the past.
I highly recommend visiting their Github here. Installation is fairly easy:
Note: The script will obtain root permissions and ask for those as needed.
Now we have a DNS relay running on localhost.
You can also just use the DNS servers of Adguard directly. These are present at 94.140.14.14 and 94.140.15.15.
If you want to finalize your setup of Adguard, just connect with a browser to the firewall (likely on 192.168.0.1 at this stage), on port 3000. It should look like this:
Adguard wizard
Use the wizard to set up Adguard and continue the tutorial.
Adding a DHCP server to finalize our LAN setup
Well, now that most of the tools are up & running, let’s have a DHCP running to give addresses to machines in the LAN, which your ISP box won’t do anymore since it’s on the other side of the firewall. While we are at it, we can now ship IP addresses with the local Adguard DNS to get rid of ads.
Given as an example, I advise you to have static IPs directly like for machine 1 & 2 in this file if you can. This makes it easier to locate them later. We point the DNS to our local instance of Adguard and, as a backup also to their online DNS if our own is not replying fast enough.
So this was part 2 of our trilogy of how to install the CrowdWall. I hope you enjoyed reading it as much as I enjoyed writing it. Stay tuned for part 3 where things really start to get interesting once we add CrowdSec to the mix.
How to set up an effective firewall and preserve your security & privacy with Orange Pi R1+, Netfilter, AdGuard and CrowdSec.
Welcome to the first part of our trilogy where the goal is to inspire you to create a very efficient firewall to protect your remote work environment, family, or your small business, which offers a serious level of security, at a low cost.
This first part will be centered around the basics: choosing hardware and installing the operating system and doing basic configuration. Part two will be on how to set up firewall functionality, setup client VPN to protect your identity online, setting up AdGuard for the entire network, DuckDNS if you don’t have a static IP as well as port knocking which is a cool way to close down your internet exposed services to anyone but you (or anyone else who knows the secret combination to enter). The third and final part will be about how to secure your network even more with CrowdSec – how to set up a canary device that ‘tweets’ when unexpected events like for instance port scanning occurs; something you would typically never do yourself.
It’s also being part of a larger project, CrowdSec, which is blocking Internet attacks and sharing IPs that launched them. You protect yourself and others at the same time. In essence, this comprehensive guide will show you how to:
Create security robust enough to resist even if passwords are compromised
Create a reliable hardware environment for your firewall
Install the OS on it and create a rock-solid Firewall to protect your activities
Add CrowdSec to protect your WLAN services you’d like to expose over the Internet and detect if any local IoT device is going rogue (e.g. cams, assistants, connected speakers, etc.)
Allow external access to DMZ-like services to control your home on distance and access your firewall
Add a VPN to protect your anonymity online
Add an anti-advertisement & anti-tracking system
Needed skills
You should have basic knowledge of Linux and Shell. If you can download and install a Linux distribution by yourself, nothing should sound overly difficult.
Enough talk. Let’s get started!
Part 1: Choosing hardware and installing OS
Needed hardware
The CrowdWall is among the cheapest possible decent security setup you can get.
The components are correct but your networks will not be very isolated internally. The advanced version offers both better security and performance. The “expert” CrowdWall is made to protect a small business of tens of coworkers.
In the basic CrowdWall setup, you can also add cost-efficient Wifi Access Points like this Tenda (around 45€) or add a third Ethernet interfaceor Wifi connection (over USB).
Should you want to organize a large distribution of the CrowdWall, say equip all your remote working force with it, you can look at the GL Inet products line. They are nicely priced if you go for volumes and offer real good performances for the money.
Table 1: Possible variations
The Orange PI R1+ benefits from very interesting characteristics beyond its small price tag. It runs on a 1.5 GHzGhz SoC with 1 GB ram which is enough for the job. It also provides two ethernet ports, has marginal power consumption, and even provides a USB port and a GPIO. (The Rock Pi-E can also do the job nicely and offers a bigger GPIO but for slightly more money)
If you don’t have an Orange PI R1+ other similar single-board computers can be used instead: Orange PI R1+ LTS (Same SOC, slower, low power RAM), NanoPi R2S, NanoPi R4S, ROCK Pi E, or even a Raspberry Pi 3 or 4 with an extra ethernet plug. In the latter case, you probably want to use one connected via HAT. In either case, you won’t be able to use the same fancy case but would have to design your own or adapt mine.
Setting up your firewall
Going forward I will describe setting up using Orange PI R1+.
Physical setup
Just plug your Internet connection (usually the Box from your ISP) to the lower port (the one down, closest to the GPIO, on the above picture) and your LAN (usually your switch) to the left port above picture.
Plug the Orange Pi (from hereon ‘OPI’) to the Power supply, or if you want for redundant power supply, power up the OPI from the power bank and the bank from a regular power plug. This should give you some hours before the firewall shuts down and eventually give it time to notify you beforehand.
The physical setup should look like this:
Figure 1: The set-top box, local LAN & WAN setup, you can leave the Box Wifi for home & family use and dedicate the other Access Point to business.
Software initial setup
1/ At the time of writing the newest supported version of Armbian is Armbian 22.05 Jammy, based on Ubuntu 22.04 Jammy Jellyfish. It doesn’t matter too much if the version of Armbian you install on is based on Debian or Ubuntu as long as it’s a supported version. Download it here. Other Debian-based distros like https://dietpi.com/ should also work although this hasn’t been tested.
2/ Download a USB stick/SDcard flasher. Balena etcher is great for this. It’s very straightforward to use and runs on both Windows, Linux & macOS environments.
Remember we are on a headless device with no HDMI port, so we are going to use it in command-line (CLI) mode only. That being said you could get a serial TTY console, but the effort and complication is really not worth the time (unless you need it for debugging).
After flashing and booting your appliance you should connect it to the eth0/WAN ethernet plug (furthest away from the power connector). You will have to check your DHCP server which IP is assigned to your CrowdWall (it’s usually residing on the box you got from your internet provider). The default ssh login is root and the password is 1234. After connecting to it you will be walked through an installation wizard that will set you up with a personal user account and sudo.
The other ethernet interface will be called lan0. And for everything to work you will need to configure it.
Setting up lan0
Configure a static IP on lan0 by editing /etc/network/interfaces and adding the following:
auto lan0
iface lan0 inet static
address 192.168.0.1/24
Start lan0 with the new configuration by typing sudo ifup lan0. Verify that the lan0 interface is up by typing ip addr show lan0 in a terminal.
Setting up your Internet Box in DMZ mode (Full NAT)
No two providers have the same box, OS, hardware, interface etc. hence no universal cut/paste commands, or screenshots to help here.
The feature you’re looking for is usually named “DMZ IP”. Enabling this feature requires you to input a LAN IP address, which will be the one to which all the Internet traffic will be redirected, without filtering. This is essential if you later intend to accept connections from the Internet to your home by exposing some services, like your home automation, NVR / IP cameras, or even a VPN server.
There are other ways of doing this, like enabling ports one by one, probably in a “Network”, “NAT” or “Network Address Translation” tab, but this requires you to get into the box interface every time you need to update a port, it’s error-prone and less flexible.
Basically, where/when possible, one shouldn’t trust the ISP’s Box either. So if you can bypass it totally, do it. Often enough, specifically in an FDDI context, you can just use the little modem that connects to your fiber and connects with Ethernet to your box, and plug yourself right in instead of the ISP box. There are tutorials online, just Duckduckgo (same as Googling but with privacy) for “how to bypass [BOX PROVIDER NAME] box”.
Absolutely not mandatory and mainly interesting for paranoïd people, but if you can do it, this is an even safer setup, even though bringing back the TV and Phone feature (should you want them), could be slightly more complicated, but far from impossible for advanced users.
So this was part 1 of our trilogy of how to install the CrowdWall. Part 2 will continue with configuring your installation with essential firewall functionality like traffic filtering, anti-ad features, and much more. Stay tuned!
You can secure your WordPress sites with CrowdSec using our latest application bouncer, available on the WordPress marketplace. This new plugin is compatible with versions 1.0.x and beyond. Given that the vast majority of websites in the world are hosted on WordPress, this plugin improves our defense arsenal in our mission to defend the greatest number.
Step one: Install CrowdSec agent
This bouncer has been designed to protect WordPress-hosted websites from all kinds of attacks. To be able to use this blocker, the first step is to install the CrowdSec agent.
Then, both installation and configuration of the plugin can be done in a few clicks from the WordPress marketplace.
CrowdSec plugin available on WordPress
Please note that first and foremost CrowdSec must be installed on a server that is accessible via the WordPress site. Remember: CrowdSec detects, bouncers deter.
Both pieces of software don’t have to be installed on the same server, although that would be easiest. To protect your server in the best possible way, the CrowdSec agent needs to be able to read relevant logs – either via file, syslog or whatever works best in your environment.
Step two: Install WordPress plugin
Installing the CrowdSec WordPress plugin is as easy as installing any other WordPress plugin:
Click ‘Plugins’ in the left navigation on your site’s dashboard.
Type ‘CrowdSec’ in the text field to the right. Hit enter.
In the CrowdSec plugin click ‘Install Now’
Once installed click ‘activate’ as illustrated below.
Now configure the plugin by clicking CrowdSec in the left navigation as shown below.
Set LAPI URL to the location of your CrowdSec agent. Is it installed on the same server, fill it out as shown above.
‘Bouncer API’ is created in cscli. Just follow the instructions.
For details on how to configure the CrowdSec WordPress bouncer, go to the official documentation or read on. Pay special attention to the option ‘Public website only’. This must be disabled if you wish to protect wp-admin (which you most likely would want to).
The “Flex mode” – a bulwark agains false positives
Thanks to the “Flex mode”, it is impossible to accidentally block access to your site to people who don’t deserve it. This mode makes it possible to never ban an IP but only to offer a Captcha, in the worst-case scenario.
CrowdSec blends into your design
When a user is suspected to be malevolent, CrowdSec will either send them her a Captcha to resolve or simply a page notifying that access is denied. Please note that it is possible to customize all the colors of these pages in a few clicks so that they integrate best with your design. On the other hand, all texts are also fully customizable. This will allow you, for example, to present translated pages in your users’ language.
The right balance between performance and security
By default, the “live mode” is enabled. The first time a stranger connects to your website, this mode means that the IP will be checked directly by the CrowdSec API. The rest of your user’s browsing will be even more transparent thanks to the fully customizable cache system.
But you can also activate the “Stream mode.” This mode allows you to constantly feed the bouncer with the malicious IP list via a background task (CRON), making it even faster when checking the IP of your visitors. Besides, if your site has a lot of unique visitors at the same time, this will not influence the traffic to the API of your CrowdSec instance.
Stream mode activation
If you’ve ever been confronted with high traffic, you are probably familiar with Redis or Memcached technologies. You have the capability to activate these caching technologies in the CrowdSec bouncer settings to guarantee invisible IP control on your site. For further explanation on stream vs live mode, check the official documentation.
CDN-friendly without forgetting other load balancers
If you use a CDN, a reverse proxy, or a load balancer, it is now possible to indicate in the bouncer settings the IP ranges of these devices to check the IP of your users. For other IPs, the bouncer will not trust the X-Forwarded-For header.
Coming up next
Soon, the plugin will have a dashboard allowing you to visualize the activity of your bouncer in live. It will also be possible to connect directly to CrowdSec’s global reputation database, without having to install an agent on your machine if you don’t wish to.
Widely tested, 100% open source
This plugin has been tested on the vast majority of WordPress versions installed in the world (90%+), according to WordPress real-time statistics. It has also been tested on a very wide range of PHP versions (7.2, 7.3, 7.4 and 8), the language in which WordPress is coded.
This plugin is released under MIT license, the most permissive and free license in the world. Its source code is fully available on GitHub. You can discover the entire collection of CrowdSec bouncers at our Hub. Beyond this one, you will find there more freshly released additions.
We would love to hear your feedback about this WordPress plugin. If you are interested in testing the bouncer to protect your sites or would like to get in touch with the team, give us a shout!
Today we’re thrilled to announce our new partnership with CrowdSec.
This is easily one of the most exciting developments in WordPress security for a long time, and it aligns with our goals to make Shield Security the best WordPress security solution, for everyone.
Our #1 mission with Shield is to deliver the most powerful security for WordPress sites. We’re not out to make millions in sales and scare you into upgrading to ShieldPRO because we have KPI targets.
We’re here simply to protect people and their businesses.
Our partnership with CrowdSec helps us fulfill that aspiration as we’re convinced it’ll deliver major security enhancements for every WordPress site running on Shield Security.
We hope you’ll be as excited as we are, after you learn about this collaboration!
In this article you’ll discover:
What CrowdSec is.
Why we decided to partner with CrowdSec.
How your WordPress security is enhanced with this integration.
How the CrowdSec integration differs between ShieldPRO and ShieldFREE
By gathering threat data about bots from millions of different sources, Crowdsec can build and share reliable intelligence about malicious bots (their IP addresses).
As a subscriber to CrowdSec, they’ll notify you about bad IP addresses, so that when those IPs send requests to your site/app, you can take action to block them immediately.
The reason this is so powerful is that when you block an IP address that you know is “bad”, you block all security threats from that IP completely. So the more quickly you can know about those bad IPs, the safer your sites will be.
Summary: Crowdsec offers you faster identification of bad IP addresses based on information gathered from other sites/servers across the globe.
It’s a complex system and we were working our way through it when we stumbled upon CrowdSec. It immediately piqued our interest since their focus is somewhat similar to our own.
We figured that if we could get their knowledge fed into Shield, then our customers could indentify bad bots more quickly and thereby instantly increase their protection.
We reached out to them to discuss whether there was scope for collaboration and they could immediately see, in-principle, that there was potential for mutual benefit.
Afterall, if Shield can give them access to data points about bad IPs from across 60,000+ WordPress websites, it’d be a huge addition to their network.
And conversely, if WordPress sites running Shield can access shared intelligence from all those sites and other websites/apps/platforms, our customers will also benefit.
What’s not to like about this idea?
They agreed that a collaboration between was definitely beneficial, and so here we are today!
How Does the CrowdSec Partnership Enhance Your WordPress Security?
We briefly touched upon this topic already, but we’ll go into a bit more below.
On any given WordPress site, Shield’s Automatic IP blocking system gathers intelligence about IP addresses that send requests to the site. It keeps track of bad IPs using a counter of “offenses” and when that IP has exceeded the allowed limit, it’s blocked from further access.
Basically a bad bot has 10 chances before it’s completely blocked. (10 is configurable)
This means there’s a small “window” open to any IP address to probe, attack or exploit your site, before Shield can be sure that they’re malicious.
With the CrowdSec integration, your WordPress sites will have access to intelligence about malicious IP addresses before they’ve ever accessed your website. (This intelligence will have already been gathered for you by other websites.)
This reduces that “window” available to malicious bots to zero.
Reducing the time window to zero means a malicious bot can’t:
Of course, this IP intelligence is formed through the activity of IP addresses on other websites, and sometimes your own.
With CrowdSec’s integration switched on, Shield will share its internal offenses-tracking with CrowdSec, which ultimately then shares the data with other WordPress sites.
This all happens seamlessly with zero effort or configuration needed by the security admin.
So in a nutshell, CrowdSec gives us a head-start against malicious bots and lets us block IPs before your Shield plugin needs to perform any assessments, relying on tracking already done by other Shield plugins, elsewhere on the Internet.
How Does The CrowdSec Integration Differ Between ShieldPRO and ShieldFREE?
ShieldPRO is designed to protect businesses and mission critical WordPress sites. If your WordPress site plays a critical role in your business, or even your personal endeavours, then ShieldPRO is definitely something you should consider.
If, however, your website isn’t so important, or you’re comfortable with restoring a website quickly from a backup after a hack, or you have other security systems in-place and feel you don’t need the extra protection that ShieldPRO offers, then ShieldFREE will go a long way to protecting your sites and users and offering useful extra features like Two-Factor Authentication.
The CrowdSec integration with Shield reflects this. When you’re running ShieldPRO you’ll get access to much more IP intelligence data, and also IP data from sources that reflect business or mission-critical websites, such as e-commerce stores etc.
As well receiving more relevant IP data, and at higher volumes, ShieldPRO installations will receive IP data more frequently. The current implementation is “every 2 hours” for ShieldPRO and “every week” for ShieldFREE.
This simply means that if you’re running ShieldFREE, your IP intelligence data will become increasingly stale, but you’ll be refreshed with the latest data each week.
We may adjust these settings over time.
If you need or desire greater protection based on the nature and purpose of the WordPress sites you’re operating, then we strongly urge you to move to the extra protection afforded to you by ShieldPRO.
CrowdSec and GDPR Compliance
Like ourselves, CrowdSec is commited to full compliance with privacy regulations, such as GDPR.
Please note, also, that CrowdSec integration is completely voluntary – you can switch it off on your Shield website at any time with no impact on your performance or security. Shield will continue to protect your site as it’s always done.
Future Plans For Our Partnership
You can already create a free account with CrowdSec over on their homepage. And once our Shield integration has been released, you’ll able to link your WordPress sites into your CrowdSec App account and view the data being sent to the network from all your sites.
We have a few further things under consideration to deepen our integration with CrowdSec, but we’ll annouce these as the integration progresses.
When Can You Get ShieldPRO + CrowdSec?
We’re getting set to release v16 of Shield Security in the coming weeks. Stay tuned to the newsletter or the changelog to get further details as they are published.
Thoughts, Suggestions and Feedback?
As always, we encourge our clients to share their thoughts with us when at any time, and in particular when we release a new feature such as this. Please feel free to leave your comments in the section below.
Scanning your WordPress sites for Malware is the most important thing you can do to protect your site.
This approach is common and is actually the USP (Unique Selling Point) of several popular WordPress security plugins and services.
Conventional wisdom and marketing emphasises to us all that scanning for malware is pinnacle of WordPress security greatness.
In this article I’ll argue that incessent Malware scanning isn’t going to keep your WordPress site secured.
I want to challenge your approach to WordPress site security and hope that by the end of the article your focus will have shifted a little.
Instead of endless “scanning for malware” treadmill, along with the anxiety that this produces in us, I want to show you there’s an alternative. And it’s a hugely effective way to keep your WordPress sites secure, and your data (and your customers’ data) safe.
Malware Scanning Is Super Important If You’re Already Hacked!
So yes, malware scanning is hugely important when you’re already compromised. You gotta find and eliminate the infection!
But let’s be absolutely clear here, statistically speaking, your site probably isn’t hacked. Yet.
Give me any random WordPress site and I’ll bet that “no”, it hasn’t been hacked. Afterall there are more non-hacked websites than hacked sites, so we’ve got better than a 50:50 chance.
So why on earth do we need powerful security plugins like ShieldPRO? What’s all that malware scanning for then?
Firstly, it’s important to realise that “under attack” and “hacked” are 2 different things. While you may not be compromised, if you’re not already under attack, I’d be very, very suprised.
So while I’d bet that you’re probably not hacked yet, the odds are good that if your site isn’t hacked today, it’ll be hacked eventually without robust security practices and defenses in-place.
The strategies and tools we need to handle both these scenarios (hacked and under attack) are different. ShieldPRO comes with all the powerful tools that work for both, but we’ll get to that a little later.
So What Is The Most Important Aspect Of WordPress Security Protection?
The clue is in the question – “PROTECTION“.
You’ll have heard the phrase that “prevention is better than cure”. This is a real thing.
It’s not a marketing ploy or persuasion tactic. It’s one of the rare times you can say ‘true fact‘ without sounding a little silly.
It is why, for example, Smallpox has been eradicated from planet earth, and why vaccines are the fastest way out of a global pandemic. <insert conspiracy theory counterargument here>
So it is, too, for WordPress site security.
It’s much easier and far cheaper to prevent a WordPress site from getting hacked and keep it clean, than it is to clean up after a site has been compromised.
If you’ve ever had to clean up a hacked site, you’ll know this to be true.
But it is depends on what you’re using you malware scanner for.
Malware scanning has 2 primary purposes:
To quickly detect hidden malware scripts, allowing you to eliminate infection more easily.
To let you know your website is vulnerable.
You see, many of us get it backwards. We think our website is vulnerable because we have malware.
But it’s the other way around: we have a malware infection because our website is vulnerable!
So if your favourite WordPress security plugin touts their primary feature is that they’re the #1 malware detector for WordPress, then you should also double-check with them that they actually prevent infection in the first place.
Sure you can detect and remove malware, but if you haven’t eliminated the root cause, you’re playing whack-a-mole with malware scripts.
Life’s too short for that.
I would never say, and certainly don’t imply, that malware scanning isn’t necessary as part of a holistic WordPress security strategy. We’ve made huge investments into our malware detection and repair engine within ShieldPRO because we know it’s important.
Being able to detect malware reliably, and eliminate it quickly, is critical in our efforts to secure WordPress sites after they’ve been compromised, and Shield fulfills this role for us.
But once malware has been discovered and cleaned, your work is only beginning. You’ll need to plug the hole that allowed the malware to get in there in the first place.
So, rather than set your primary goal to be detecting and eliminating malware, you’ll want to shift your focus a little and ask yourself…
What’s the Best Way To Stop Hacking in WordPress?
We said this earlier – good prevention is the path to robust WordPress security.
To prevent WordPress malware infections, we must understand how it happens in the first place.
There are a couple of angles to answering this. The most common answer you’ll hear is that vulnerable plugins and themes are single biggest vector for WordPress compromise.
This is true. But it’s not the whole story.
Let’s Play: Hacker Role Play
So let’s pretend you’re a WordPress website hacker and your stated goal is:
hack as many WordPress sites as you can all day, every day, and infect them with your malware scripts.
Here are some of your likely thoughts:
Firstly, you’d have a think about your target market – i.e. there are millions and millions of WordPress websites. Win!
Next, in order to hack 30,000+ websites every day you will need either:
a whole lot people to do a lot of manual work, or
automated bots and scripts to do all the hard work for you quickly
Since you don’t have the resources to hire people, you decide to build automated bots and scripts.
At this point you’ve decided to create automated bots to do your hacking for you. But there are a few things you must take into consideration when you design these bots:
You must “discover” the WordPress sites. Not all sites are WordPress, so you have to first find potential targets. So you’ll have your bots probe the websites to determine if they’re actually WordPress sites.
You have a library of publicly known (and maybe even non-public) WordPress plugin and theme vulnerabilities you’re going to exploit to gain access. So you narrow down your list of WordPress sites based on which sites have these vulnerable plugins/themes installed. This involves a lot more probing on the site.
You’ve now got a good list of sites to attack.
Attack!
Of course this layout is for illustrative purposes. But the principle of what’s happens in the real world is no different.
Some bots may not probe for discovery first, and instead go straight for the vulnerability itself, only to find it’s not present. But this can be considered a probing/exploit attempt, too.
In the end you’ll have lots of bots probing lots of websites.
Back To Preventing Malware and Hacking…
The first stage in hacking at scale is probing, with the use of bots/scripts, by either checking what the site has, or by directly targeting known vulnerabilities and hoping to get a hit.
If you track 404 errors on your own WordPress sites, you’ll see for example, there are often many requests to URLs that simply don’t exist. You’re being probed.
If we can detect these probing bots, determine that they’re sending requests for nefarious purposes, then we can completely block them from accessing our sites altogether.
This is true prevention and it works far better, and much more efficiently than repeatedly cleaning-up our sites after they’ve been compromised.
And this holds true not only for malware infections, but any possible compromise to your WordPress sites.
So your #1 goal shouldn’t be “find the best malware cleaner” – it should be: “find the best prevention against WordPress site hacking and compromise”.
How Does ShieldPRO Prevent WordPress Site Hacking?
The main area of focus of Shield Security for WordPress is in prevention.
We believe strongly that if we can prevent problems in the first place, we free ourselves and our WordPress sites to focus on the work that’s most important.
ShieldPRO achieves this by doing its utmost to detect bad bots and block them.
We use our exclusive, custom built AntiBot Detection Engine to detect bad bots. Detecting bad bots isn’t simple, because they do everything they can to hide their malicious intent. Shield builds up a profile for each IP address based on their activities and depending on their reputation, blocks certain requests.
Use our exclusive “NotBot” javascript snippet to quickly and reliably identify bots vs humans.
Gathers 25+ distinct “bot signals” to monitor, track and score visitors to build a unique “bot” profile.
Once we’ve accessed a visitor and determined it to be a bot, and more specifically, a bad bot, we prevent that visitor from performing certain requests against the site. And, depending on the Shield configuration, we can block that bot from sending any requests to the site entirely.
ShieldPRO prevents 10,000s of WordPress sites from being hacking every single day by standing in the way of malicious bots.
Of course, Shield will also scan for malware and filesystem modifications, vulnerable plugins and all the other usual suspects, but this “after-the-fact” scanning is no match for preventing such things in the first place.
Is Your WordPress Protection Focused On Prevention, or Cure?
If you ask yourself nothing else after reading this article, it should be whether your existing WordPress Security strategy is focused on prevention, or focused on cure.
We’ve argued that the biggest positive impact on your security lies in preventing the problems in the first place, and that ShieldPRO is built with this strategy in-mind.
While you might have the best or most expensive malware scanning engine on the market, if it’s consistently picking up threats, then you may not have the best WordPress protection available.
On August 30, 2022, the WordPress core team released WordPress version 6.0.2, which contains patches for 3 vulnerabilities, including a High Severity SQLi vulnerability in the Links functionality as well as two Medium Severity Cross-Site Scripting vulnerabilities.
These patches have been backported to every version of WordPress since 3.7. WordPress has supported automatic core updates for security releases since WordPress 3.7, and the vast majority of WordPress sites should receive a patch for their major version of WordPress automatically over the next 24 hours. We recommend verifying that your site has been automatically updated to one of the patched versions. Patched versions are available for every major version of WordPress since 3.7, so you can update without risking compatibility issues. If your site has not been updated automatically we recommend updating manually.
Vulnerability Analysis
As with every WordPress core release containing security fixes, the Wordfence Threat Intelligence team analyzed the code changes in detail to evaluate the impact of these vulnerabilities on our customers, and to ensure our customers remain protected.
We have determined that these vulnerabilities are unlikely to be targeted for exploitation due to the special cases needed to exploit. In most circumstances these vulnerabilities require either elevated privileges, such as those of an administrator, or the presence of a separate vulnerable or malicious plugin. Nonetheless, the Wordfence firewall should protect against any exploits that do not require administrative privileges. In nearly all cases administrators already have the maximum level of access and attackers with that level of access are unlikely to use convoluted and difficult exploits when simpler paths to making configuration changes or obtaining sensitive information are readily available.
The WordPress Link functionality, previously known as “Bookmarks”, is no longer enabled by default on new WordPress installations. Older sites may still have the functionality enabled, which means that millions of legacy sites are potentially vulnerable, even if they are running newer versions of WordPress. Fortunately, we found that the vulnerability requires administrative privileges and is difficult to exploit in a default configuration. It is possible that 3rd party plugins or themes might allow this vulnerability to be used by editor-level users or below, and in these cases the Wordfence firewall will block any such exploit attempts.
Vulnerable versions of WordPress failed to successfully sanitize the limit argument of the link retrieval query in the get_bookmarks function, used to ensure that only a certain number of links were returned. In a default configuration, only the Links legacy widget calls the get_bookmarks function in a way that allows this argument to be set by a user. Legacy widgets involve additional safeguards, and the injection point of the query itself poses additional difficulties, making this vulnerability nontrivial to exploit.
Description: Contributor+ Stored Cross-Site Scripting via use of the_meta function Affected Versions: WordPress Core < 6.0.2 Researcher: John Blackbourn CVE ID: Pending CVSS Score: 4.9 (Medium) CVSS Vector:CVSS:3.1/AV:N/AC:H/PR:L/UI:N/S:C/C:L/I:L/A:N Fully Patched Version: 6.0.2
WordPress content creators, such as Contributors, Editors, Authors, and Administrators, have the ability to add custom fields to any page and post created. The purpose of this is to make it possible for site content creators to add and associate additional data to posts and pages.
WordPress has several functions available to site owners to display custom fields created and associated with posts and pages. One of these functions is the the_meta function which retrieves the supplied post’s or page’s custom field data, which is stored as post meta data, through the get_post_custom_keys and get_post_custom_values functions. Once the custom fields for a post/page are retrieved, the function outputs the post meta keys and values data as a list. Unfortunately, in versions older than 6.0.2 this data was unescaped on output making it possible for any injected scripts in post meta keys and values to be executed.
Due to the fact that any user with access to the post editor can add custom meta fields, users with access to the editor such as contributors could inject malicious JavaScript that executes on any page or post where this function is called.
WordPress core does not call the_meta anywhere in its codebase by default. As such this vulnerability does require a plugin or theme that calls the the_meta function, or for this function to have been programmatically added to a PHP file for execution, so the vast majority of site owners are not vulnerable to this issue. The the_meta function is considered deprecated as of 6.0.2 and get_post_meta is the recommended alternative.
The Wordfence Threat Intelligence Team deployed a firewall rule to help protect Wordfence Premium, Care & Response customers today. Wordfence Free users will receive the same protection in 30 days on September 29, 2022.
The final vulnerability involves the error messages displayed when a plugin has been deactivated due to an error, or when a plugin can not be deleted due to an error. As these error messages were not escaped, any JavaScript present in these error messages would execute in the browser session of an administrator visiting the plugins page. This vulnerability would require a separate malicious or vulnerable plugin or other code to be installed on the site, which would typically require an administrator to install it themselves. In almost all cases where this vulnerability might be exploitable an attacker would already have a firm foothold on the vulnerable site.
Our built-in XSS rule should block any attempts to generate crafted error messages based on user input to a vulnerable plugin, and the Wordfence scanner will detect any malicious plugins uploaded by an administrator.
Conclusion
In today’s article, we covered three vulnerabilities patched in the WordPress 6.0.2 Security and Maintenance Release. Most actively used WordPress sites should be patched via automatic updates within the next 24 hours, and any sites that remain vulnerable would only be exploitable under very specific circumstances.
We have released a firewall rule to Wordfence Premium, Care, and Response users to protect against any exploits targeting the the_meta function and this rule should become available to Wordfence free users after 30 days, on on September 29, 2022.
As always, we strongly recommend updating your site to a patched version of WordPress if it hasn’t been updated automatically. As long as you are running a version of WordPress greater than 3.7, an update is available to patch these vulnerabilities while keeping you on the same major version, so you will not need to worry about compatibility issues.
Props to Khalilov Moe, John Blackbourn, & FVD for discovering and responsibly disclosing these vulnerabilities. Special thanks to Wordfence Threat Intelligence Lead Chloe Chamberland for collaborating on this post.