Last Updated: July 27, 2023 by Robert Allen
This is a list of 10 best NTFS permissions management tips, techniques, and best practices.
These are strategies I have used to implement and manage NTFS security permissions on Windows file shares in medium and large organizations.
NTFS permissions management is critical to ensuring your data is secure from threats and prevents unauthorized access. NTFS permissions need to be properly configured when enabling shared folders on your network.
Let’s get started.
1. Audit & Review NTFS Permissions
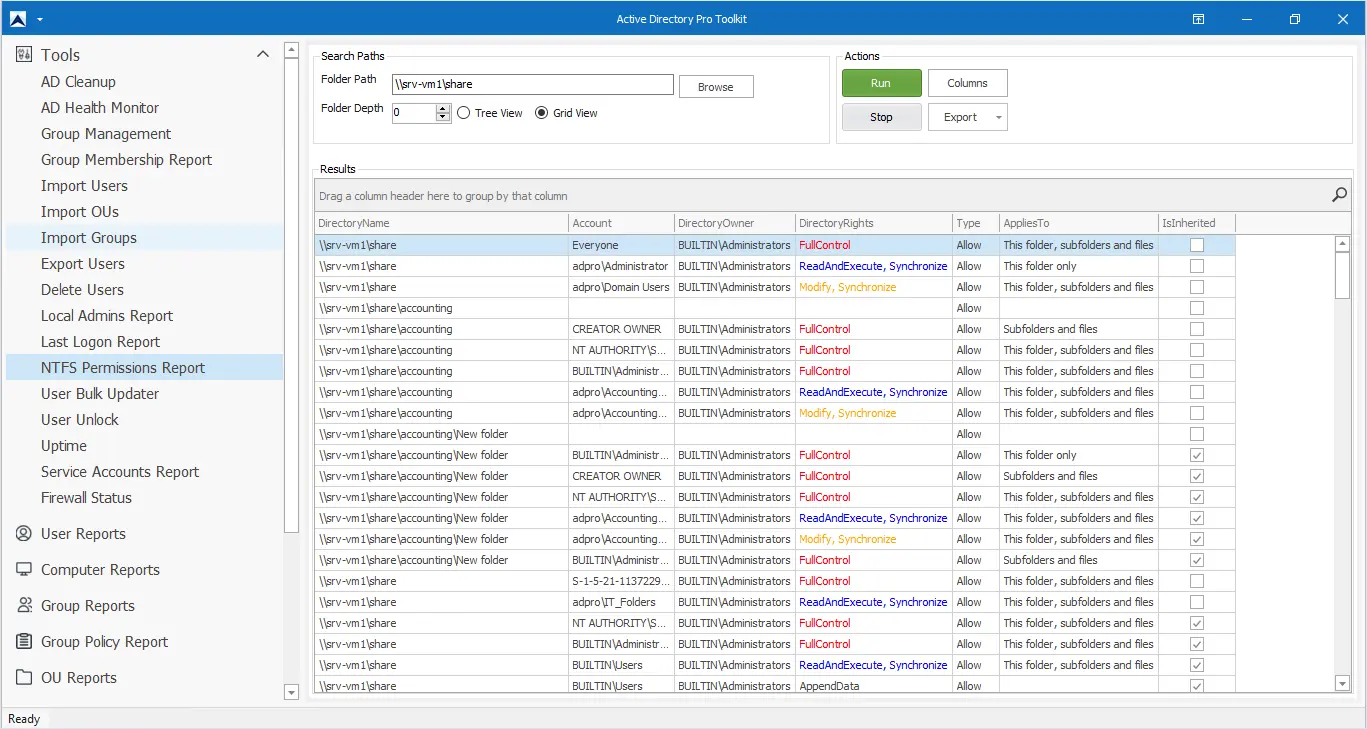
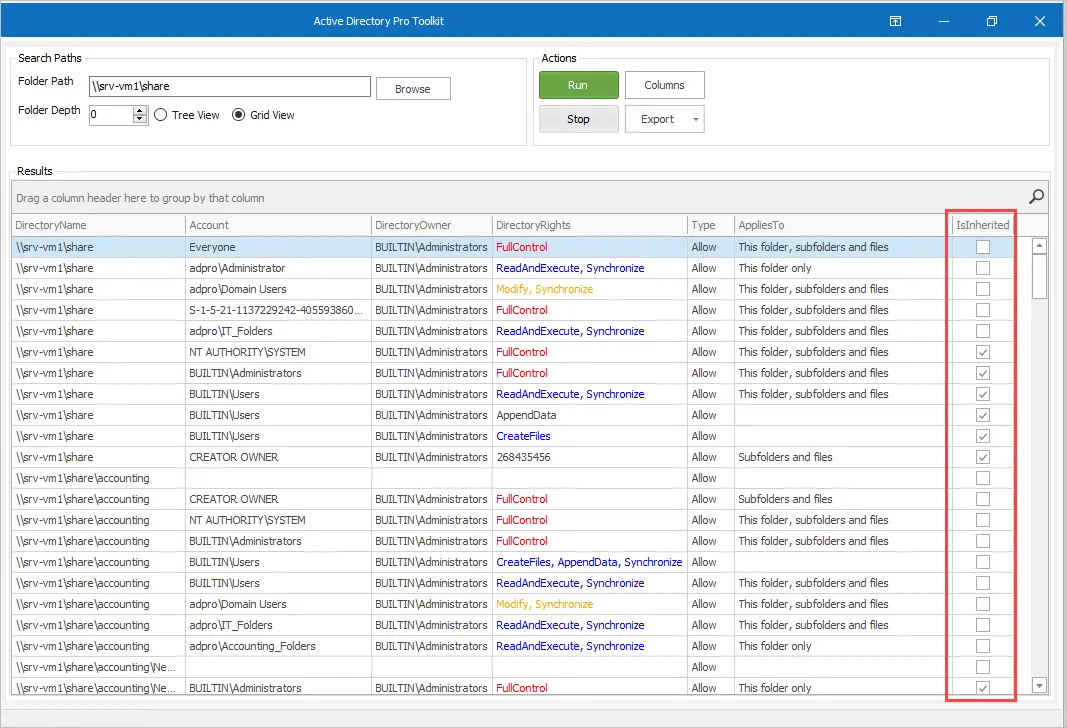
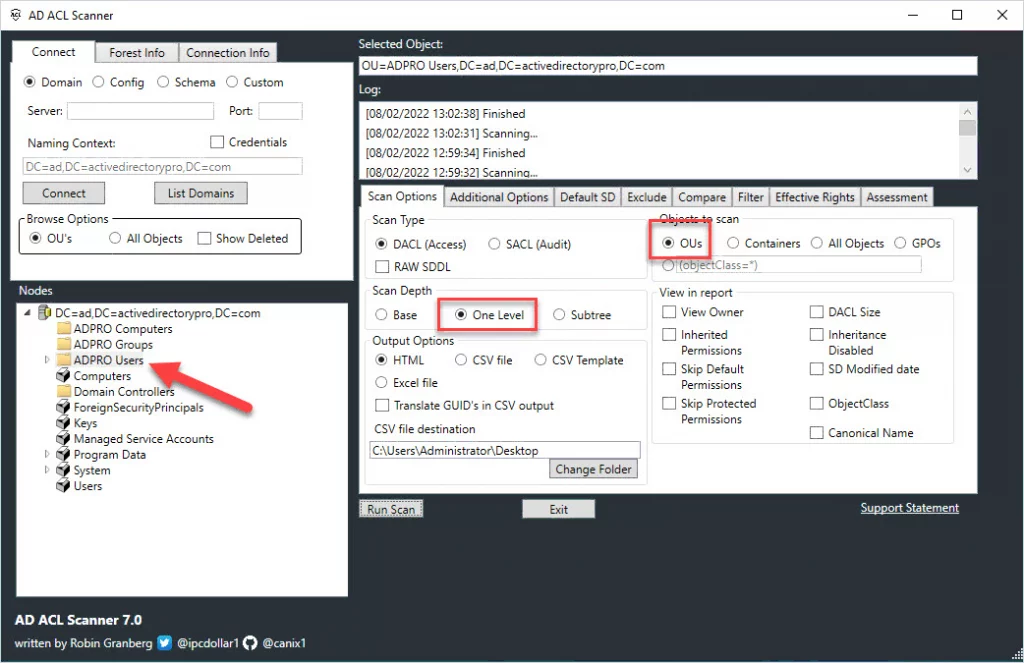
Whether you have an existing file server or are setting up a new one it is important to review your NTFS permissions, this at times can even be a requirement of an audit. To simplify this task I recommend using an NTFS Permissions Report Tool that can scan all folders and show you who has access to what. With a reporting tool, you can list all folder permissions, verify users have the correct permissions, check inheritance, find insecure permissions, verify directory rights, and export the report to CSV, Excel, or PDF.
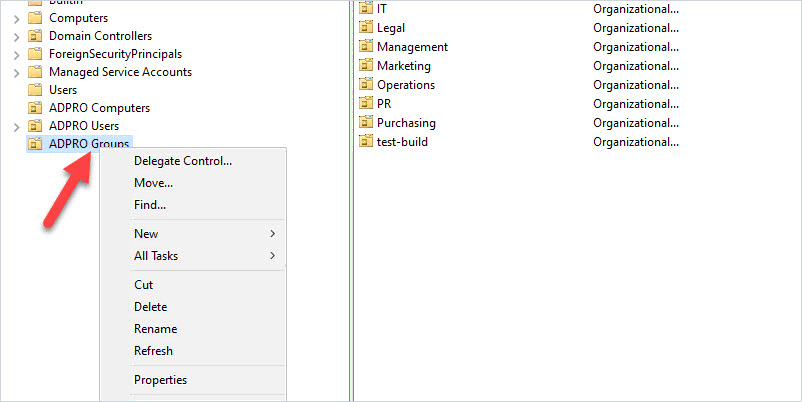
2. Secure NTFS Permissions with Security Groups
It is a best practice to create security groups to set NTFS permissions rather than using individual user accounts. Security groups have the following advantages:
- Easier to manage permissions for a group of users
- Easily remove user’s permissions
- Easily grant users access to a file or folder
- Makes it easier to identify who has access to what
- Simplifies auditing and compliance reports
Let me walk through an example of how using security groups simplifies NTFS permissions management.
Say you have 100 employees that need access to the accounting folder, 80 need read/write permissions, and the other 20 need read-only access.
To set these permissions you only need to create two security groups, and then configure the permissions for these two groups. Example below.
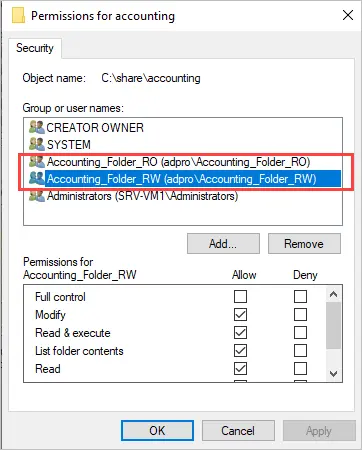
Now as new employees are hired, all you need to do is add the user to one of these groups to give them access. To remove access you would just remove them from the group.
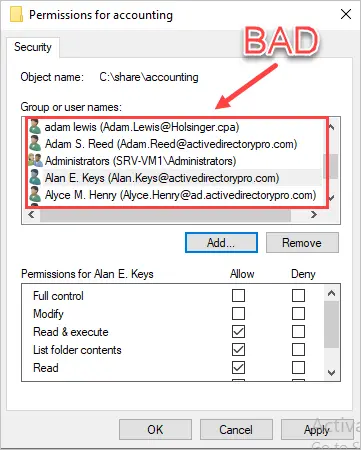
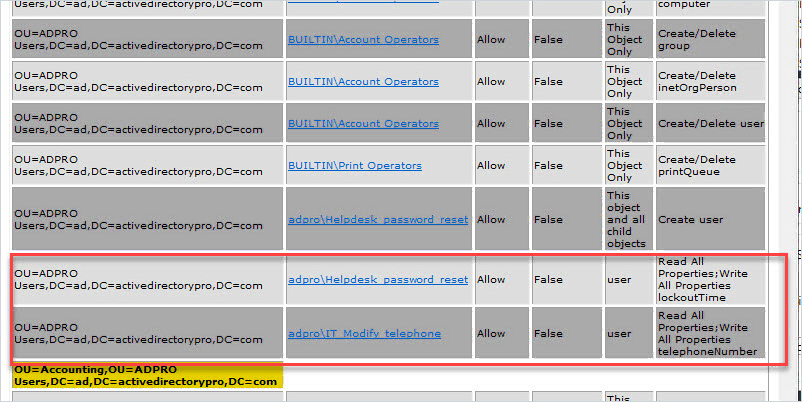
If you did not use security groups for the NTFS permissions you would have to add all 100 users to the ACL, this would be very time consuming and difficult to manage. Example below.
Always use security groups to manage the ACL on NTFS permissions.
3. Standardized Naming Convention & Documentation
This is my favorite NTFS Permissions management tip.
You can easily provide groups of users with unwanted access if you do not use descriptive security group names.
For example, the accounting department just purchased a SaaS based accounting program. It can sync with Active Directory for single sign-on and permissions. The administrator created an Accounting_1 and Accounting_2 group to manage access to the software. Accounting_1 is full access and Accounting_2 is limited. Both groups are generic and have no description or documentation.
The accounting department also needs a shared folder setup so they can share and collaborate on some files. The administrator thinks, oh I’ve already got accounting groups configured, and therefore proceeds to use Accounting_1. Users are added to Accounting_1 to provide access to the NTFS share, but unfortunately this now grants users full access to the SaaS accounting program.
Bad Security Group Names
The groups below are examples of bad security group names because there is no description and are generic, telling the administrator nothing. You would have to scan the entire network to know where these groups are being used.

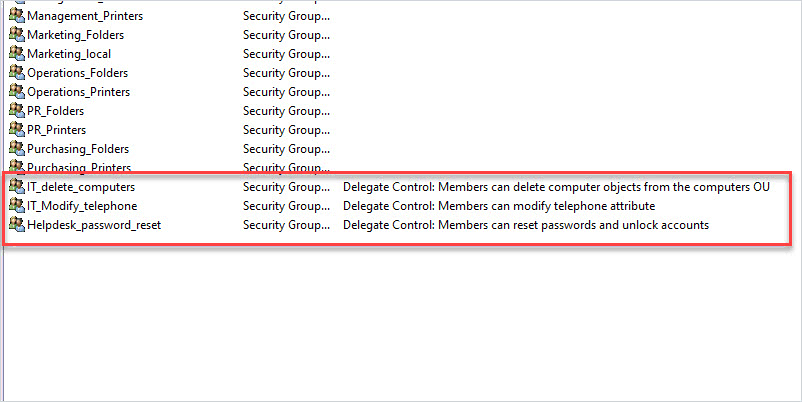
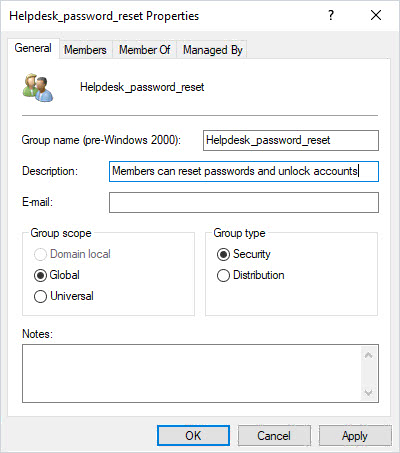
Good Security Group Names
In the examples below you can look at the group name and instantly know what it is used for and there is information in the description box.

Do not create generic security group names, instead be descriptive in their use and use the description field.
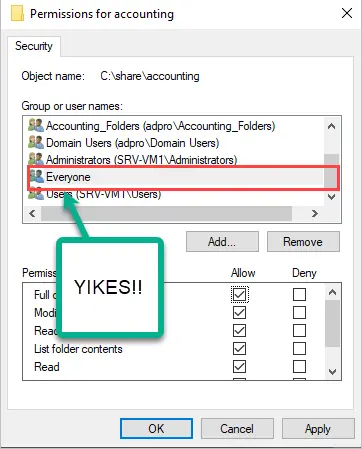
4. Do Not Use the Everyone Group (For Anything)
I might get some hate mail for this but seriously what is the justification for using the everyone group? There is no good reason to use it.
What is the Everyone group?
All interactive, network, dial-up, and authenticated users are members of the Everyone group. This special identity group gives wide access to system resources. When a user logs on to the network, the user is automatically added to the Everyone group. Membership is controlled by the operating system.https://learn.microsoft.com/en-us/windows-server/identity/ad-ds/manage/understand-special-identities-groups
The Everyone group also includes the Guest account. This is just bad news for security so I highly recommend never using the Everyone group for anything.
Unfortunately, there are some poorly designed programs and tech support that do not understand this. Has a vendor tech support ever told you, “you need to add the everyone group and give them it permissions”? This is horrible advice and if followed you have significantly weakened security in your network.
Some admins will argue that it is not an issue to use everyone on shared permissions and then lock it down using NTFS permissions. This would still allow hackers to scan and detect shared folders in the network so why allow it? Instead, use the least principle model and only allow those that need access to it.
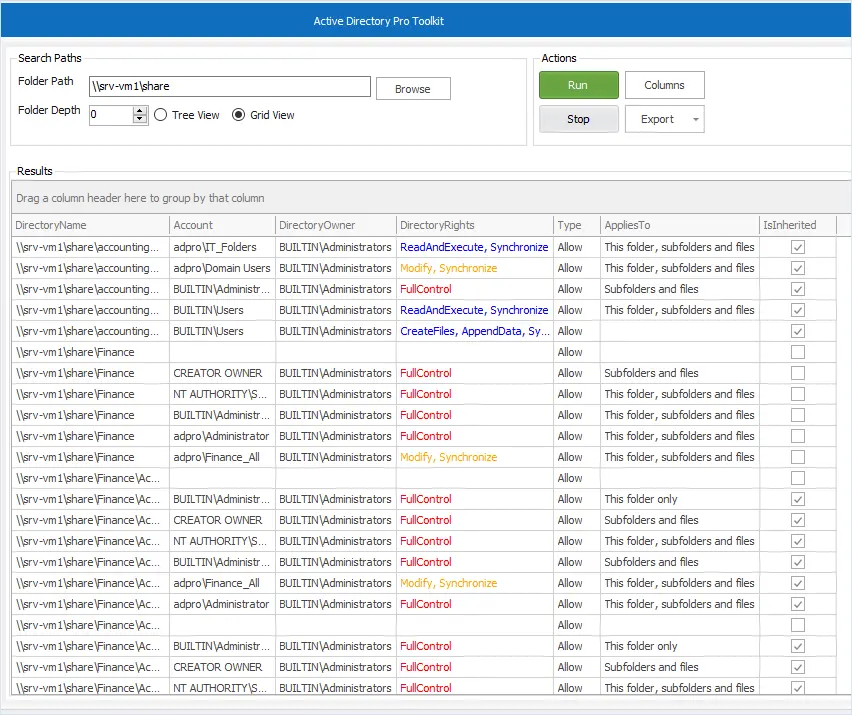
You can quickly find where the Everyone account is in use by using a reporting tool and filter for the account.
In the example below, I scanned my file server and found 4 folders that are using the Everyone account and have full control, and this is not good.

5. Use the Principle of Least Privilege
The principle of least privilege means a user should only have access to the data, resources, and applications needed to complete a required task.
Preventing unnecessary permissions prevents mishandling of company data and helps to mitigate security threats.
Just because a user is part of a department doesn’t mean they need full access to all department folders and files. Consider using read-only and read/write groups to set granular permissions on files and folders.
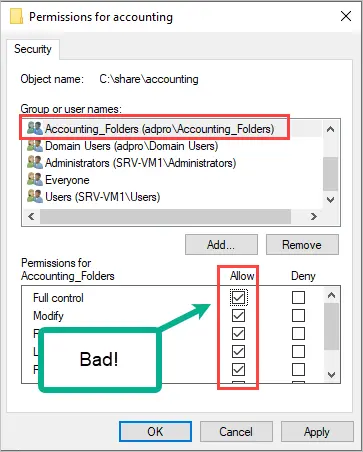
6. Avoid setting Full Access Permissions
Only the administrator account or other IT staff should have full control of files and folders. I can’t think of a good reason a regular user needs full control. By giving regular users full control they are granted the ability to change settings and permissions, which is a bad idea.
7. Limit the Depth of Setting NTFS Permissions
Try and limit settings NTFS permissions to no more than two or three levels deep. There will always be exceptions to this rule, but if you set no rules for this these permissions, things will get out of control. Your users will request for every file or folder to have special permissions which will cause problems.
Here is an example.
The accounting department has a folder that has a level 1 folder and two subfolders (level 2 and level 3). It is no problem to set explicit permissions on level 1 and level 2 but I would not go any level deeper (level 3) as this becomes difficult to manage, and the same goes for files.
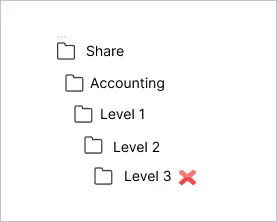
I would also try to limit setting explicit permissions to folders only. Users will call and will want to set specific permissions on individual files, this will become a pain to manage so try to avoid this.
8. Avoid Breaking Inheritance
By default, the permissions set at the root folder will be inherited by all subfolders. If you break inheritance it can make it difficult to read and manage NTFS permissions.
Let’s look at an example.
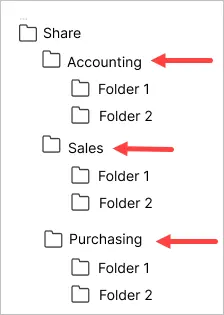
In the above screenshot, accounting, sales, and purchasing are what I consider the root folder. These folders have NTFS permissions set and all the subfolders will inherit their permissions.
For example, I set permissions on the accounting folder, and therefore all its subfolders inherit its permissions. If I broke the inheritance I would have to set the NTFS permissions on the folder.
There will be times when you need to break inheritance such as limiting access to a specific folder but this should be kept to a minimum.
You can easily check for folder inheritance with the AD Pro Toolkit.
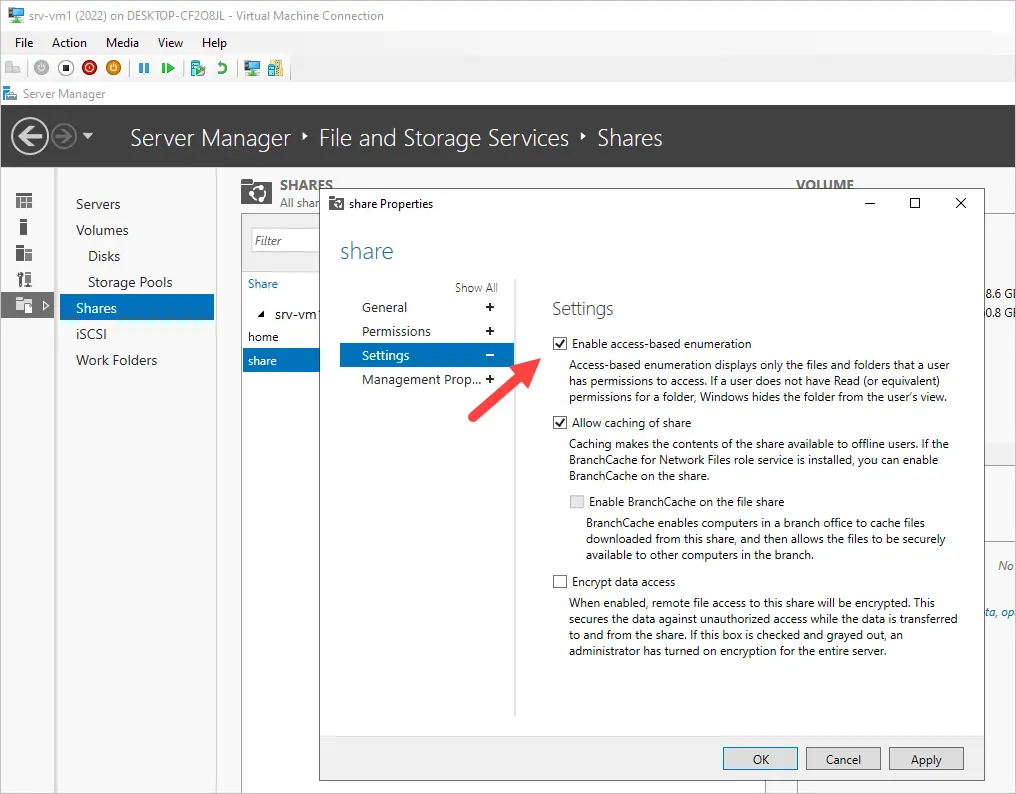
9. Use Access Based Enumeration (ABE)
Access Based Enumeration allows you to hide files and folders from users who do not have permission. Limiting visibility to files and folders makes it easier for your users to browse and access resources.
If ABE is not enabled users will still see folders they do not have access to but will be denied if they try to open them. This can cause some confusion and so it is best to just hide them.
To enable ABE follow these steps.
1. Open Server Manager
2. Click on File and Storage Services (left sidebar menu)
3. Click on Shares
4. Right click the share and select properties.
5. Click on Settings
6. Check “Enable Access based enumeration.
10. Prevent Users from Creating Folders in the Root
It can be frustrating when you take the time to organize your folders and get it all cleaned up just to then find a bunch of new folders in the root directory.
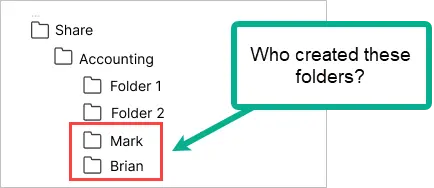
What usually then happens is someone will create a folder and use it to share files with other users bypassing the security you have put in place. To fix this you need to set read and execute permissions at the root folder only, do not set this permission on subfolders. You will then need to add the group again and set the permissions for the subfolders. Be careful configuring this as you can easily mess up permissions.
Bonus #1. File Screening Management
File screen management can increase security and help control data on your Windows file shares. File screen management can be used for the following:
- Block certain files types such as exe, bat files, videos files.
- Quote Management – Limit disk space usage to users and groups.
- Storage Reports – Generate store reports and see who is using the most space and what file types.

Bonus #2. Use Volume Shadow Copy Service (VSS)
VSS is a built-in Windows technology that allows you to take point-in-time snapshots of an entire disk. This allows you to create a backup of your file shares or any other data that resides on the disk. VSS works great as a quick solution to recover deleted files and folders from your file servers. VSS should not be used as your only backup solution.
I hope you enjoyed this article. If you have questions or comments please post them below.
Source :
https://activedirectorypro.com/ntfs-permissions-management-best-practices/


