By: Trend Micro
August 08, 2023
Read time: 4 min (1020 words)
How generative AI influenced threat trends in 1H 2023
A lot can change in cybersecurity over the course of just six months in criminal marketplaces. In the first half of 2023, the rapid expansion of generative AI tools began to be felt in scams such as virtual kidnapping and tools by cybercriminals. Tools like WormGPT and FraudGPT are being marketed. The use of AI empowers adversaries to carry out more sophisticated attacks and poses a new set of challenges. The good news is that the same technology can also be used to empower security teams to work more effectively.
As we analyze the major events and patterns observed during this time, we uncover critical insights that can help businesses stay ahead of risk and prepare for the challenges that lie ahead in the second half of the year.
AI-Driven Tools in Cybercrime
The adoption of AI in organizations has increased significantly, offering numerous benefits. However, cybercriminals are also harnessing the power of AI to carry out attacks more efficiently.
As detailed in a Trend research report in June, virtual kidnapping is a relatively new and concerning type of imposter scam. The scammer extorts their victims by tricking them into believing they are holding a friend or family member hostage. In reality, it is AI technology known as a “deepfake,” which enables the fraudster to impersonate the real voice of the “hostage” whilst on the phone. Audio harvested from their social media posts will typically be used to train the AI model.
However, it is generative AI that’s playing an increasingly important role earlier on in the attack chain—by accelerating what would otherwise be a time-consuming process of selecting the right victims. To find those most likely to pay up when confronted with traumatic content, threat groups can use generative AI like ChatGPT to filter large quantities of potential victim data, fusing it with geolocation and advertising analytics. The result is a risk-based scoring system that can show scammers at a glance where they should focus their attacks.
This isn’t just theory. Virtual kidnapping scams are already happening. The bad news is that generative AI could be leveraged to make such attacks even more automated and effective in the future. An attacker could generate a script via ChatGPT to then convert to the hostage’s voice using deepfake and a text-to-speech app.
Of course, virtual kidnapping is just one of a growing number of scams that are continually being refined and improved by threat actors. Pig butchering is another type of investment fraud where the victim is befriended online, sometimes on romance sites, and then tricked into depositing their money into fictitious cryptocurrency schemes. It’s feared that these fraudsters could use ChatGPT and similar tools to improve their conversational techniques and perhaps even shortlist victims most likely to fall for the scams.
What to expect
The emergence of generative AI tools enables cybercriminals to automate and improve the efficiency of their attacks. The future may witness the development of AI-driven threats like DDoS attacks, wipers, and more, increasing the sophistication and scale of cyberattacks.
One area of concern is the use of generative AI to select victims based on extensive data analysis. This capability allows cybercriminals to target individuals and organizations with precision, maximizing the impact of their attacks.
Fighting back
Fortunately, security experts like Trend are also developing AI tools to help customers mitigate such threats. Trend pioneered the use of AI and machine learning for cybersecurity—embedding the technology in products as far back as 2005. From those early days of spam filtering, we began developing models designed to detect and block unknown threats more effectively.
Trend’s defense strategy
Most recently, we began leveraging generative AI to enhance security operations. Companion is a cybersecurity assistant designed to automate repetitive tasks and thereby free up time-poor analysts to focus on high-value tasks. It can also help to fill skills gaps by decoding complex scripts, triaging and recommending actions, and explaining and contextualizing alerts for SecOps staff.
What else happened in 1H 2023?
Ransomware: Adapting and Growing
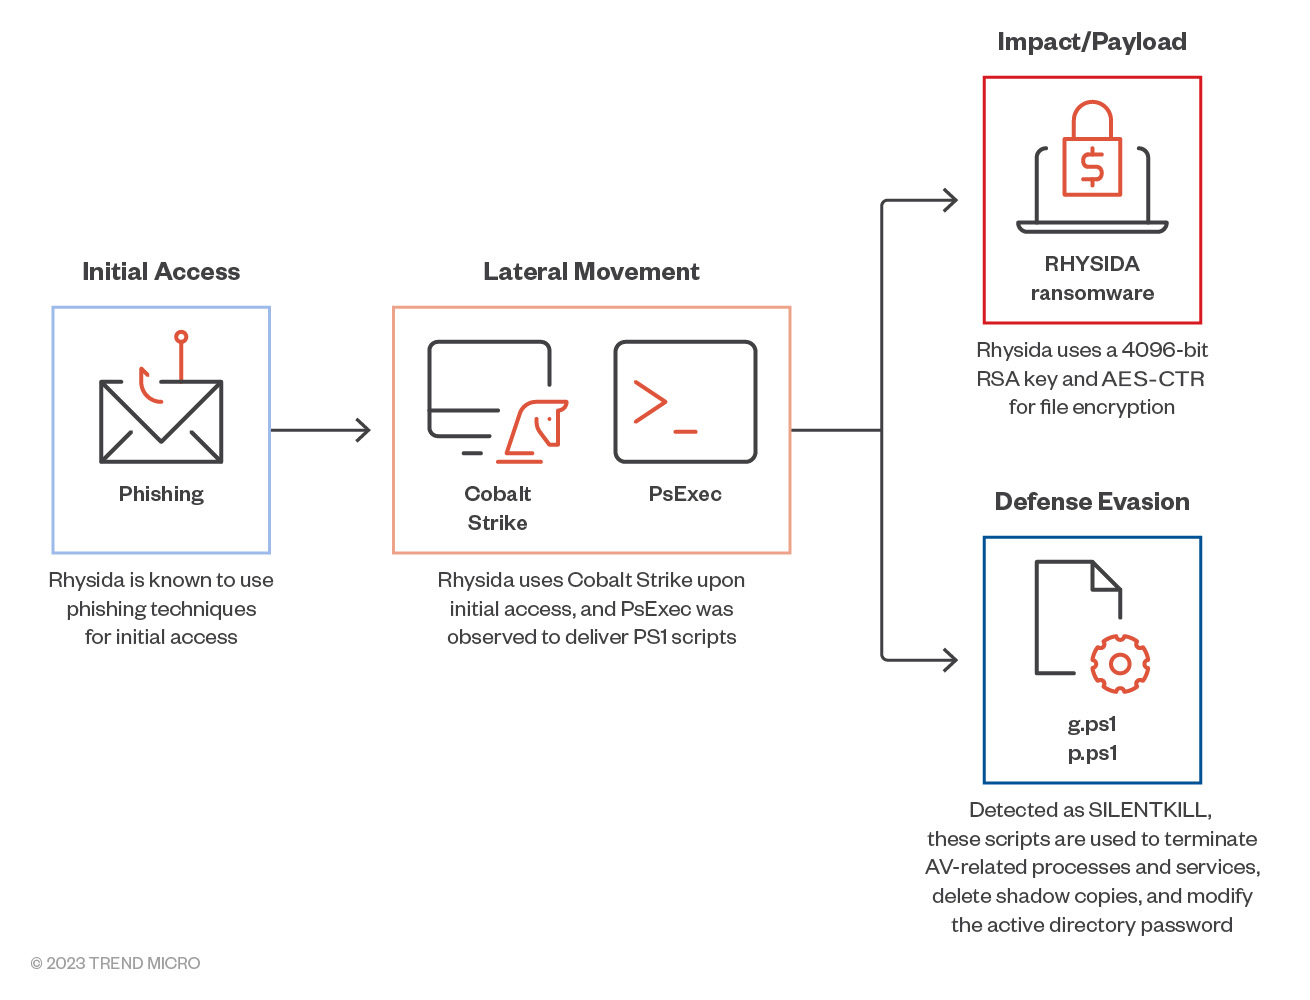
Ransomware attacks are becoming sophisticated, with illegal actors leveraging AI-enabled tools to automate their malicious activities. One new player on the scene, Mimic, has abused legitimate search tools to identify and encrypt specific files for maximum impact. Meanwhile, the Royal ransomware group has expanded its targets to include Linux platforms, signaling an escalation in their capabilities.
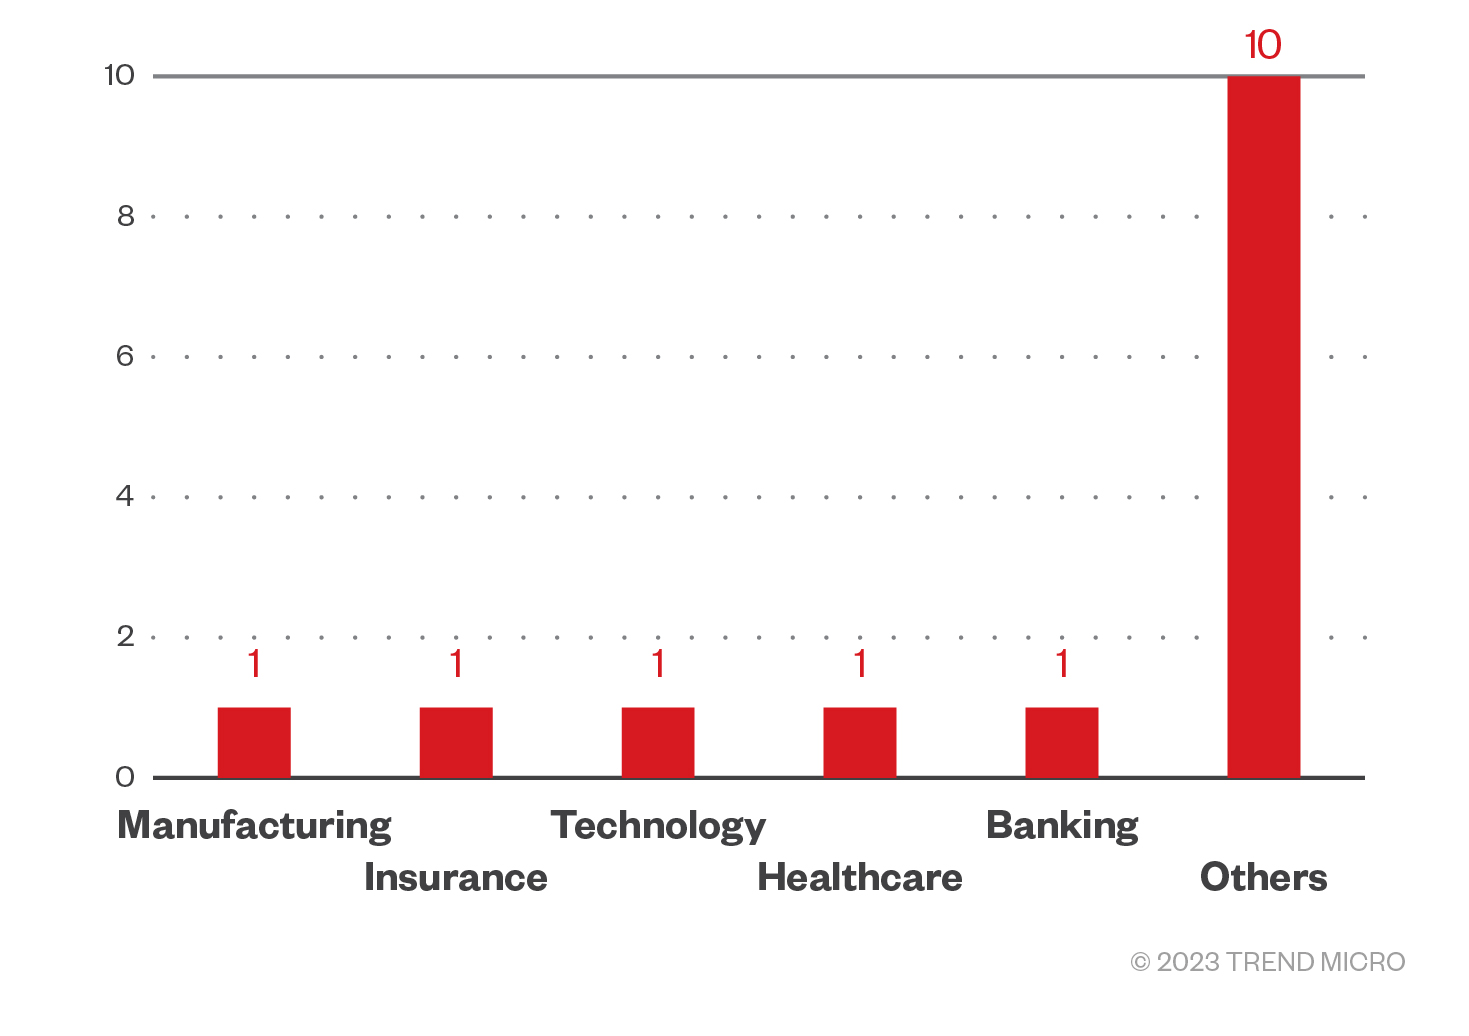
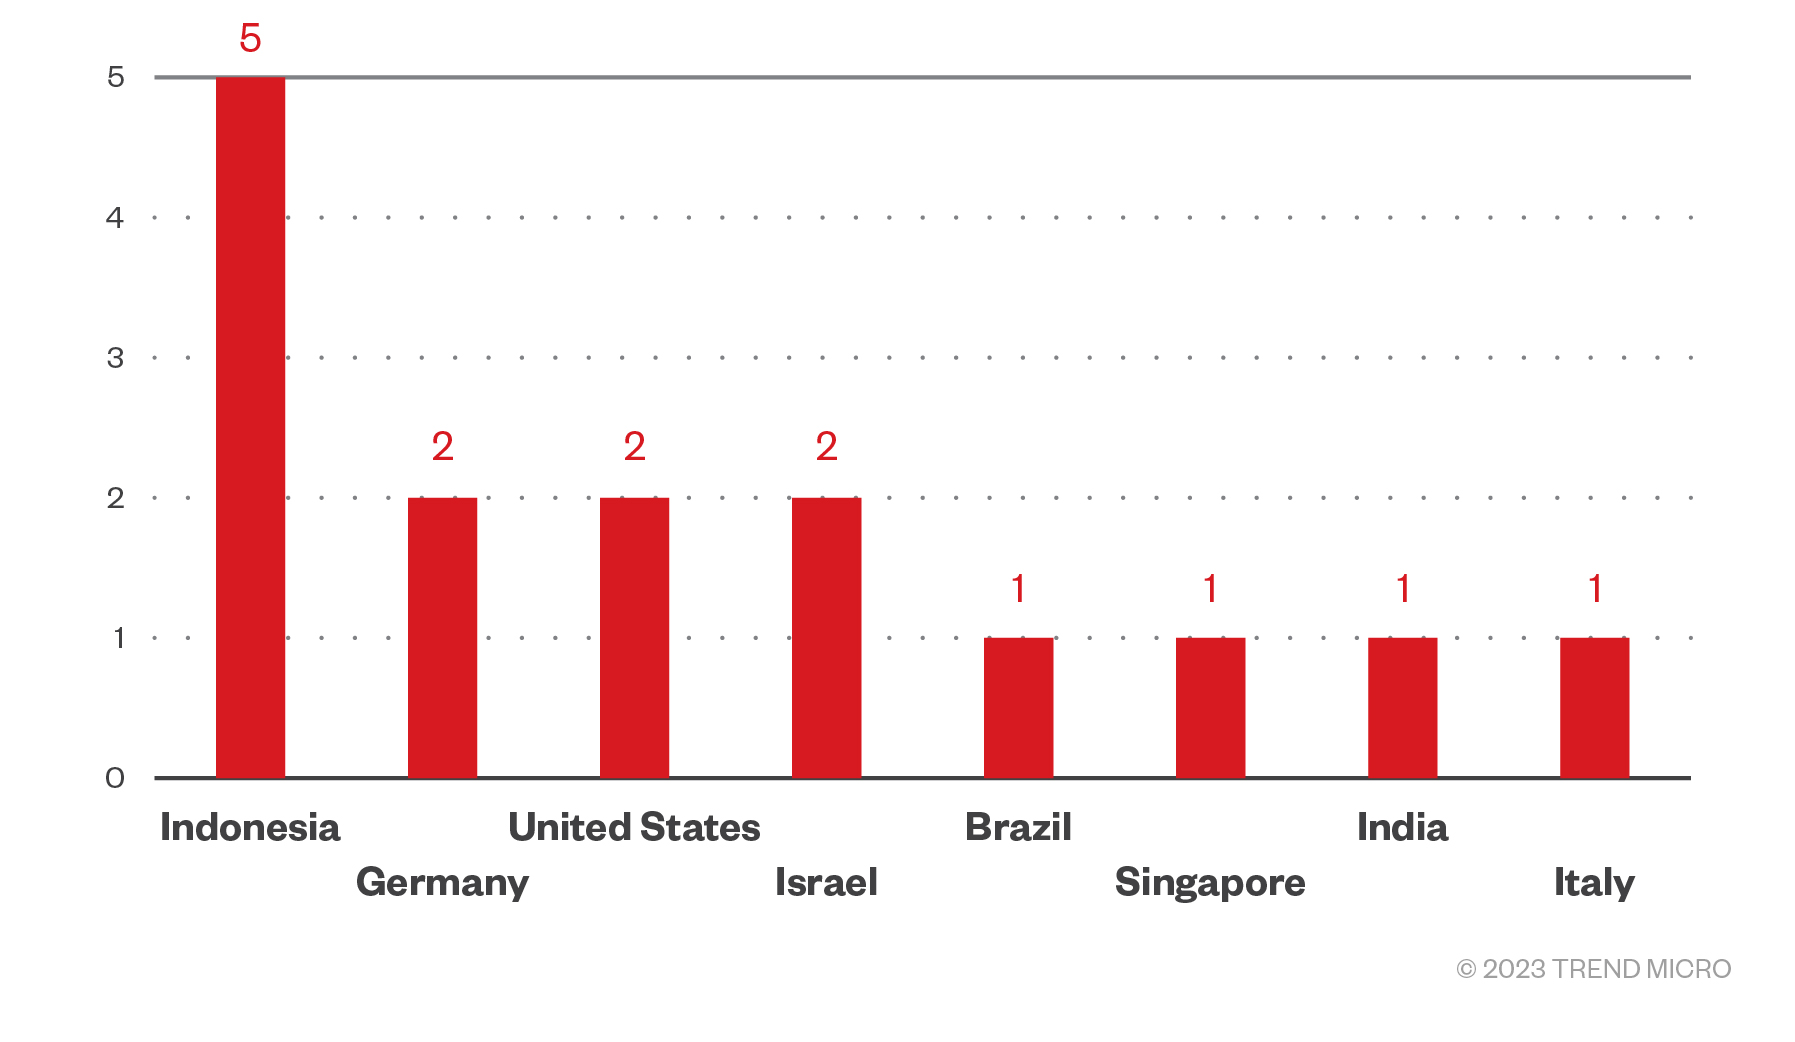
According to Trend data, ransomware groups have been targeting finance, IT, and healthcare industries the most in 2023. From January 1 to July 17, 2023, there have been 219, 206, and 178 successful compromises of victims in these industries, respectively.
Our research findings revealed that ransomware groups are collaborating more frequently, leading to lower costs and increased market presence. Some groups are showing a shift in motivation, with recent attacks resembling those of advanced persistent threat (APT) groups. To combat these evolving threats, organizations need to implement a “shift left” strategy, fortifying their defenses to prevent threats from gaining access to their networks in the first place.
Vulnerabilities: Paring Down Cyber Risk Index
While the Cyber Risk Index (CRI) has lowered to a moderate range, the threat landscape remains concerning. Smaller platforms are exploited by threat actors, such as Clop ransomware targeting MOVEIt and compromising government agencies. New top-level domains by Google pose risks for concealing malicious URLs. Connected cars create new avenues for hackers. Proactive cyber risk management is crucial.
Campaigns: Evading Detection and Expanding Targets
Malicious actors are continually updating their tools, techniques and procedures (TTP) to evade detection and cast a wider net for victims. APT34, for instance, used DNS-based communication combined with legitimate SMTP mail traffic to bypass security policies. Meanwhile, Earth Preta has shifted its focus to target critical infrastructure and key institutions using hybrid techniques to deploy malware.
Persistent threats like the APT41 subgroup Earth Longzhi have resurfaced with new techniques, targeting firms in multiple countries. These campaigns require a coordinated approach to cyber espionage, and businesses must remain vigilant against such attacks.
To learn more about Trend’s 2023 Midyear Cybersecurity Report, please visit: https://www.trendmicro.com/vinfo/us/security/research-and-analysis/threat-reports/roundup/stepping-ahead-of-risk-trend-micro-2023-midyear-cybersecurity-threat-report
Source :
https://www.trendmicro.com/en_us/research/23/h/cybersecurity-threat-2023-generative-ai.html


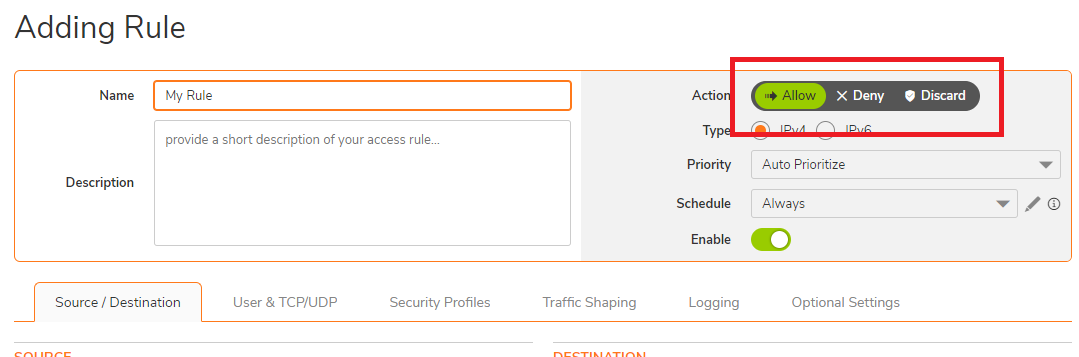
 NOTE: When creating a new access rule, the default Action on your firewall is set to Allow.
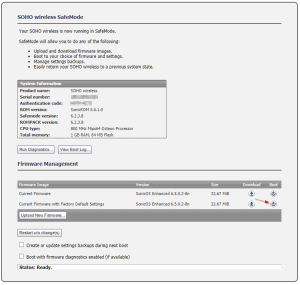
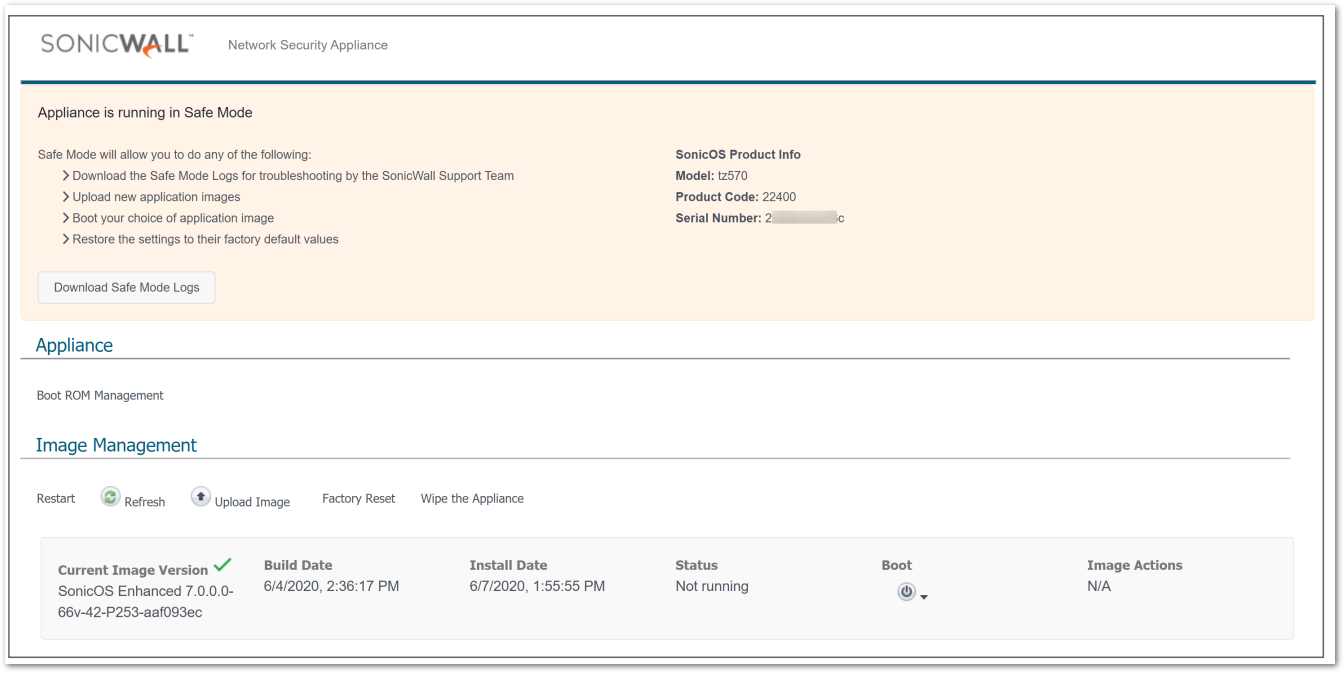
  CAUTION: Safemode is only available via HTTP so you have to manually type http:// otherwise the browser will automatically take you to https://.

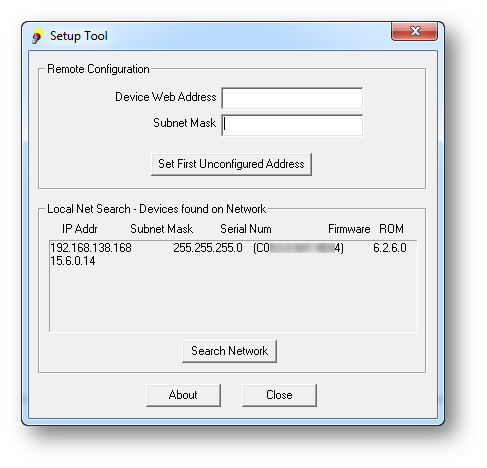
 EXAMPLE:192.168.168.2 with subnet mask of 255.255.255.0.
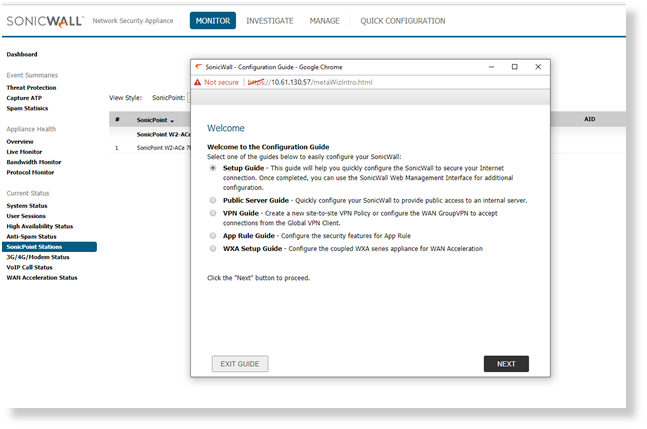
 TIP: If physical connection has been established but the user is unable to access the management interface try doing a ping to the IP address 192.168.168.168 from the computer.