Altaro VM Backup has a number of services, handing different types of operations and in certain cases it’s important to know the role of a specific service.
Below you can find an extensive list of each service’s responsibility.
Services on the Altaro VM Backup Console
The list below can also be used for services running on an Altaro Offsite Server machine only.
Display Name
Description
Altaro VM Backup Engine
Management of backup schedules and configuration
Altaro VM Backup Deduplication Service
Performs deduplication of data during backup operations
Altaro Offsite Server 6
Altaro Offsite Server for v5 & v6 Offsite Copies
Altaro Offsite Server 8
Altaro Offsite Server for Offsite Copies
Altaro Offsite Server 8 Controller
Provides an interface between the Offsite Server Management Console UI and the Altaro Offsite Server
Altaro VM Backup API Service
Enables a RESTful API interface to Altaro VM Backup
Altaro VM Backup Hyper-V Host Agent – N1
Facilitates backup and restore operations for Virtual machines on a Hyper-V Host and/or a VMware Host using VDDK 5.5
Altaro VM Backup Hyper-V Host Agent – N2
Facilitates backup and restore operations for Virtual machines on a VMware Host using VDDK 6.5 & 6.7
Altaro VM Backup Controller
Provides an interface between the Management Console UI and the Altaro VM Backup Service
Services on a Hyper-V Host added to Altaro VM Backup
DisplayName
Description
Altaro VM Backup Hyper-V Host Agent – N1
Facilitates backup and restore operations for Virtual machines on a Hyper-V Host and/or a VMware Host using VDDK 5.5
Altaro VM Backup Hyper-V Host Agent – N2
Facilitates backup and restore operations for Virtual machines on a VMware Host using VDDK 6.5 & 6.7
This best practice guide goes through the Altaro VM Backup features explaining their use and the optimal way to configure them in order to make the best use out of the software.
You will need to adapt this to your specific environment, especially depending on how much resources you have available, however this guide takes you through the most important configurations that are often overlooked too.
Setting up the Altaro VM Backup Management Console
The Altaro VM Backup Management Console can be utilised to add and manage multiple hosts in one console. However these hosts must be in the same LAN and at the same physical site (same building). Setups with multiple physical sites must have an instance of Altaro VM Backup at each site.
To manage these multiple installations, you can utilise the ‘Central Monitoring Console’ where you’ll be able to monitor as well as manage these Altaro VM Backup installations remotely.
A single Altaro VM Backup instance can manage both Hyper-V & VMware hosts.
For optimal results, Altaro runs some maintenance specific tasks using (multiple) single threaded operations. For this reason installing on a machine which has a CPU with a higher single thread performance would yield better results than installing on a machine which has a CPU with more cores and lower single thread performance.
Thus for the fastest results, installing Altaro VM Backup on a machine with a higher single thread CPU speed would be best.
Backup Locations
Make sure Opportunity Locks (Oplocks) are disabled if the backup location is a NAS.
If your backup location is a Windows machine, the equivalent to Oplocks is: Set-SmbServerConfiguration -EnableLeasing 0
You can choose a Physical Drive connected to the management console (the best practice for offsites is to have them located in another building/location).
Drive Rotation/Swap which allows you to set up a pool of drives/network paths.
A Network Path (LAN Only) or else to an offsite location via a WAN/VPN/Internet connection, which is an ideal tool for Disaster Recovery purposes. Please note that the latter situation (non-LAN) requires use of the Altaro Offsite Server
Setting up an offsite copy location is as crucial as setting up backups to a primary location. Apart from the obvious reason that you’ll have a redundant set of backups to restore from, should the local backups become unusable due to disk corruption or other disk failures. Having a secondary copy of your backup sets also allows you to keep a broader history for your VM backups on your secondary location and you’ll be able to go further back when restoring if required.
Deduplication
Altaro VM Backup makes use of Augmented In-line Deduplication. Enabling this is highly recommended and is done from the ‘Advanced Settings’ screen as this will essentially ensure that any common data blocks across virtual machines are only written to the backup location once. This helps by saving a considerable amount of space and also makes backups much quicker since common information is only transferred once.
Boot From Backup
The Boot From Backup drive feature comes along with 2 options, either ‘Verification Mode’ or ‘Recovery Mode’. This is a very good option for getting your RTO down since you’re able to boot up the VM immediately from a backup location and start a restore in the background as well.
However it’s very important that if you are planning to do this, you’ll need a fast backup location that can handle the I/O of a booted VM that’s essentially going into production. Please note that when the VM has finished restoring, it’s suggested to restart the restored VM as soon as you get a chance in order to switch to the restored drives, which would have faster I/O throughput.
Notifications
E-mail notifications are a simple and effective method of monitoring the backup status, yet it’s often overlooked. Setting up these notifications will provide you with a quick overview of the status over your of your backup jobs, hence – you won’t need to login into the Altaro Management console every day to confirm the backup status.
This way you’ll be alerted of any backup failures, allowing you to address said issues before the next backup schedule. Thereby ensuring that you always have a restorable backup point; so as a general best practice, always monitor your backup notifications.
Master Encryption Key
The Master Encryption Key in Altaro is utilised to encrypt the backups using AES 256-bit. It’s used if you choose to encrypt the local backups from the ‘Advanced Settings’ screen, while if you’re configuring offsite copies it must be used as offsite copies must be encrypted.
Altaro VM Backup will require the encryption key upon restoring, so it’s critical that you either remember it or take note of it in a secure password manager as there is no method of recovery for the master encryption key.
Scheduled Test Drills
Altaro VM Backup has the ability to run manual or automated verification of your backup data. This allows you to run scheduled verification jobs that will check the integrity of your backups on your backup location, or schedule full VM restores so that you can actually boot up the VM and confirm that everything works as expected. The VM will be restored with the NIC disabled so as to avoid IP conflicts with the production machine as well.
Backups and production VM’s should not be placed on the same drive.
Make sure Opportunity Locks (Oplocks) are disabled if the backup location is a NAS.
Backups should not be placed on a drive where an OS is running.
Altaro uses the drive it’s installed on as temporary storage and will require a small amount of free space (varying according to the size of the VMs being backed up).
Keep at least 10% of the backup location free.
The main Altaro VM Backup installation should not be installed on a machine that is also a domain controller (DC).
Directories/files inside the Altaro backup folder should not be tampered with, deleted or moved.
Do not take snapshots DFSR databases: “Snapshots aren’t supported by the DFSR database or any other Windows multi-master databases. This lack of snapshot support includes all virtualization vendors and products. DFSR doesn’t implement USN rollback quarantine protection like Active Directory Domain Services.” Source.
Best Practices for Replication
Exclude Page File from Backup
As you’re aware Altaro VM Backup will take note of all changes since the last backup and transfer over all of the blocks that changed to the backup location. The page file will be changing very often and potentially causing your replication jobs to take longer.
Therefore, excluding the page file from backup equals, less transferred changes and as a result the replication jobs takes less time. This can be done by placing the page file onto a separate VHDX/VMDK file from the VM itself and then you can follow the steps here, in order to exclude the VHDX/VMDK file.
High Disk IO and Hypervisor Performance
Replication needs to make use of CDP (Continuous Data Protection), in order to take a backup every couple of minutes/hours, which makes Replication possible.
It’s important to note however that you should only enable high-frequency CDP (15 minutes or less) on VM’s that you really need to. This will ensure that the VM’s you really need to will be able to achieve the selected maximum frequency and in order not to have an impact your Hypervisor’s performance.
Firstly, create a folder named “Overrides” in this path: C:\ProgramData\Altaro\AltaroBackupProfile If you’d like to move the temp files on the Altaro Offsite Server, create a folder named “Overrides” in this path: C:\ProgramData\Altaro\AltaroOffsiteServerProfile
Then create a text file named “OverrideTempFolder.txt” inside the newly created folder
In the text file enter the path where you wish to store Altaro’s temp files, for example:{ “TempFolderPathOverride”:”E:\\Temp\\Altaro” }Ensure this location exists & that you use a double backslash as a separator (like above)
Restart all Altaro services and on next Operation, the Altaro temporary files will now be stored in the above directory
7.5 and older
To do so, you can follow these steps:
Ensure you are running at least version 5.0.97
Firstly, create a folder named “Overrides” in this path: C:\ProgramData\Altaro\AltaroBackupProfile If you’d like to move the temp files on the Altaro Offsite Server, create a folder named “Overrides” in this path: C:\ProgramData\Altaro\AltaroOffsiteServerProfile
Then create a text file named “OverrideTempFolder.txt” inside the newly created folder
In the text file enter the path where you wish to store Altaro’s temp files, for example: “E:\AltaroTemp” (without quotes) — ensure this location exists
Restart all Altaro services and on next Operation, the Altaro temporary files will now be stored in the above directory
Tips
ProgramData is a hidden folder by default
Ensure that the file extension is showing, or you might end up with a file named “OverrideTempFolder.txt.txt”
Ensure there are no spaces at the end of the path and no extra line breaks in the text file
If you are running an AntiVirus software or a file-scanning software, we do recommend excluding a couple of directories used by Altaro in order to ensure that it’s operation remains undisrupted.
We do recommend excluding the following:
all onsite backup drive directories
all offsite backup drive directories
C:\ProgramData\Altaro on the Altaro Management and on the Hyper-V hosts
C:\Program Files\Altaro on the Altaro Management and on the Hyper-V hosts
The backup fails with a one of the following errors:
“Windows Error 64: The specified network name is no longer available.”
“Windows Error 59: An unexpected network error occurred.”
CAUSE
There’s a number of reasons that can very easily cause networks issues which will result in a failed backup pointing to a Windows Error 64 or 59. Mainly it could be down to potential hardware failures/issues or even configuration of network devices for that matter.
Aside from that, firewalls, other traffic on the line or other software could be causing load on the network or even on the storage device itself, that might be going over timeouts or maximum retransmission limits.
Sending backups over an unreliable connection such as a VPN/WAN connection can also result in such a failure, unless using the Altaro Offsite Server tool for offsite copies.
Timeouts from specific NAS boxes when using domain credentials can also be causing such disconnections.
SOLUTION
There are numerous, distinct solutions applicable for backups failing with this error, seeing as it could be occurring for a number of reasons.
If you’re using a NAS as a backup location, it’s recommended that you utilise the credentials of the NAS box itself, even if it’s connected to Active Directory. The reason behind this, being that certain NAS’s have a timeout period associated for connections connected via domain credentials, so it could be the cause for the backup failure.
Another point to keep in mind if you’re using a NAS box, is to check whether the particular model you’re using has a sleep/standby option that could be causing such backup failure.
If you have other storage media available, try taking backups to this location, as the previous location may be experiencing hardware or software issues that may only present themselves during backup times. This will serve as a definite confirmation if the issue is with the previously configured location as well as a temporary solution.
If the backup location you have configured is going over an unreliable network, such a VPN/WAN connection, please note that this is not supported. This would only be supported if you’re making use of the Altaro Offsite Server which is only applicable for offsite copies and not primary backups.
If you’re using a backup device, such as a NAS which supports connections via iSCSI it’s recommended to set up the backup location this way. Devices connected via iSCSI usually perform better and in turn offer increased performance.
If the backup device is connected to a different switch to the backup server then it’s best to connect it to the same switch and re-test.
It’s recommended to change the network cables that the backup device and the backup server are connected with; additionally changing the ports on the switch would also be suggested.
Make sure Opportunity Locks (Oplocks) are disabled if the backup location is a NAS
If your backup location is a Windows machine, the equivalent to Oplocks is: Set-SmbServerConfiguration -EnableLeasing 0
Run the above command via Powershell.
It’s also a good idea to reboot the backup device as well as the backup server to clear any open connections and refresh the devices.
SessTimeout Key:HKLM\SYSTEM\CurrentControlSet\Services\LanmanWorkstation\Parameters\ DWORD: SessTimeoutThe value entered here should be in seconds. You can try entering a value of 300 seconds (5 minutes) or 600 seconds (10 minutes). The default for this is 1 minute. This will increase the time the backup server waits for a response before the connection is aborted.
TcpMaxDataRetransmissions Key:HKLM\SYSTEM\CurrentControlSet\Services\Tcpip\Parameters DWORD: TcpMaxDataRetransmissions The value entered here will reflect the number of retries. The default number for this is 5.This will increase the number of tries the TCP retransmission mechanism will attempt to transmit data before the connection is aborted.
If the above does not help and you’re still experiencing issues, it’s recommended to temporarily disable any firewalls and antivirus products on the backup server, the hosts and the backup device. This applies for both software and hardware firewalls.
For many years, a home IT lab was a “requirement” for any budding IT Pro – you needed a place to test out new software and learn. In some ways, this requirement has lessened with the rise of cloud computing but many of our great DOJO contributors continue to use a home labs setup. In this article, we’ll hear from them, what their setup is, why, choices they made along the way and what they plan for the future.
Andy Syrewicze
Altaro/Hornetsecurity Technical Evangelist – Microsoft MVP
Why do you have a lab?
The main reason I’ve always maintained a lab is to keep my skills current. Not only does my lab allow me to fill knowledge gaps in existing technologies I work with, but it allows me to test new features, or work with other technologies I’ve never worked with before. In doing this I can make sure I’m effective with and knowledgeable about current and emerging technologies. Plus… it’s just fun as well =)
How did I source my home lab?
I research other commonly used home lab equipment on the web and paired that with my working knowledge of the hardware industry and settled on commodity SuperMicro gear that was cost-effective yet had some of the features I was looking for. Other bits and pieces I picked up over the years as needed. For example, I’ve recently been doing some work with Azure site-to-site VPNs and as such purchased a Ubiquiti firewall capable of pairing with an Azure VPN gateway.
1 x Intel i350 1Gbps Quad Port Ethernet Adapter for management and compute traffic
1 x Dual port 10Gbps Mellanox Connect-X 3 for east/west storage traffic
Additionally, my physical lab has:
1 Cyberpower UPS with about 1-hour runtime in case of power outages
1 ReadyNAS 316 for backup storage with 4 x 1TB HDDs
1 Ubiquiti UDM Pro for firewalling and layer-3 routing
2 Ubiquiti WAPs for Wireless access in the house
2 NetGear ProSAFE switches wired in a redundant capacity
On top of that, I do pair some Azure cloud resources with my lab and send private traffic over my site-to-site VPN between my UDM-Pro and my Azure vNet. Services running in the cloud include:
1 x IaaS VM with AD Domain Services running on it
1 x storage account for Azure Files storage
1 x storage account for blob offsite backup storage
1 x container in Azure container instance running a Minecraft Server for my son and his friends (HIGHLY critical workload I know…)
Some basic Azure ARC services (Been slowly working on this over the last few months)
What services do you run and how do they interact with each other?
I mostly run virtualized workloads on the on-prem cluster. This is typically VMs, but I’ve started tinkering a bit with containers and Azure Kubernetes Service. The cluster also runs VMs for AD/DNS, DHCP, Backup/DR, File-Service and a few other critical gaming workloads for the end-users in the house! The cloud resources also have backup AD/DNS components, file storage, and offsite storage for the on-prem backups. I also use Azure for the occasional large VM that I don’t have the resources on-prem to run.
What do you like and don’t like about your setup?
I’ll start with the positive. I really like that my lab is hyper-converged as well as hybrid-cloud in that there are used resources in Azure access via VPN.
There are two things I’d like to change about my setup they’d:
>More memory for the compute nodes. When running VMware VSAN, VSAN itself and vCenter (required for VSAN) consume about 48GB of memory. This doesn’t leave much memory left over for VMs. Thankfully S2D and Azure Stack HCI don’t have this issue. Either way, memory is my next upgrade coming soon
Upgraded Mellanox Cards. Don’t get me wrong, the Connect-X 3s were amazing for their time, but they are starting to get quite outdated. More recent Connect-X cards would be preferred and better supported, but there certainly is a cost associated with them.
What does your roadmap look like?
As mentioned above I’m likely to add more memory soon, and potentially upgrade my storage NICs. Additionally, I’d like to add a 3rd node at some point but that is quite a ways down the line.
Any horror stories to share?
Not really, I had one situation where I was away from the house on a work trip and the cluster rebooted due to an extended power outage. The OpenSM service which runs the subnet for the storage network between the direct-connected Mellanox cards didn’t start, thus the storage network never came online. This meant that the core services never came online for the house. Thankfully, the VPN to azure remained online and things in the house were able to use my Azure IaaS hosted Domain Controller for DNS resolution until I got home.
Eric Siron
Senior System Administrator – Microsoft MVP
You may know Eric as a long-time DOJO contributor whose first articles for this site were written on stone tablets. He knows more about the inner workings of Hyper-V than anyone else I know.
All the technical articles that I write depend on first-hand tests and screenshots. My home lab provides the platform that I need while risking no production systems or proprietary data. Like the small business audience that I target, I have a small budget and long refresh cycles. It contained no cutting-edge technology when I originally obtained it, and it has fallen further behind in its four years of use. However, it still serves its purpose admirably.
Component Selection Decisions
Tight budgets lead to hard choices. Besides the cost restraint, I had to consider that my design needed to serve as a reproducible model. That ruled out perfectly viable savings approaches such as secondhand, refurbished, or clearance equipment. So, I used only new, commonly available, and inexpensive parts.
Architectural Design Decisions
Even on a budget, I believe that organizations need a strong computing infrastructure. To meet that goal, I designed a failover cluster with shared storage. As most of the items that I used now have superior alternatives at a similar or lower price, I will list only generic descriptions:
>2x entry-level tower server-class computers with out-of-band module
All the technical articles that I have written in the last few years involved this lab build in some fashion.
Lab Configuration and Usage
Since the first day, I have used essentially the same configuration.
The two towers with an out-of-band module run Windows Server with Hyper-V and belong to a cluster. Each one hosts one of the lab’s domain controllers on mirrored internal storage.
The single tower with the large drive set acts as shared storage for the cluster. The drives are configured in a RAID-5. Also, because this is a lab, it contains virtual machine backups.
I generally do not integrate cloud services with my lab, primarily because a lot of small businesses do not yet have a purpose for integration between on-premises servers and public clouds. I do use basic services that enhance the administrative quality of life without straining the budget, such as Azure Active Directory.
Lab Maintenance, Management, and Monitoring
Whenever possible and practical, I use PowerShell to manage my lab. When graphical tools provide better solutions, I use a mix of Windows Admin Center and the traditional MMC tools (Hyper-V Manager, Failover Cluster Manager, Active Directory Users and Computers, etc.). For monitoring, I use Nagios with alerts through a personal e-mail account. I back up my virtual machines with Altaro VM Backup.
Aside from Altaro, none of the tools that I use in the lab requires additional license purchases. For instance, I do not use any System Center products. I believe that this practice best matches my audience’s uses and constraints. Most paid tools are too expensive, too complex, too resource-hungry, and require too much maintenance of their own to justify use in small businesses.
I only reformat drives for operating system upgrades. The in-place upgrade has become more viable through the years, but I still see no reward for the risk. On general principle, I do not reload operating systems as a fix for anything less than drive failures or ransomware. Once I feel that Windows Server 2022 has had enough testing by others, these hosts will undergo their third ever reformat.
Pros and Cons of this Lab
Overall, this lab satisfies me. A few of the reasons that I like it:
Low cost
Stability
Acceptable performance for typical small business daily functions
Good balance of performance and capacity
Ability to test the most common operations for a Microsoft-centric shop
Things that I would improve:
The storage performs well enough for a regular small business, but I’m an impatient administrator
Memory
Network adapter capabilities
Theresa Miller
Principal Technologist at Cohesity and Microsoft MVP
Why do you have a lab?
I have had various forms of home labs over the years for varying reasons. In fact, when I built my home, I made sure my house was hard-wired for internet, which shows how long I have been in the technology industry. At the time hard wiring was the only way to distribute the internet to all the rooms in your home; unlike today where we have wireless and Wi-Fi extender options to help with network stability, Wi-Fi extending to places like the outdoors, and additional security features. Back to the question at hand, What do you use it for? my home lab options are what enable to me put forth the IT Community work that I have done. This includes having the tech to create training courses, blogging, events speaking and more. So, “When and why did you decide to get a home lab? I decided to get a home lab over 8 years ago and continue to use every evolution of my home lab for this function, educating myself and others.
How did I source my home lab?
Initially, my home lab was sourced by end-of-life equipment that my employer allowed employees to wipe the storage on, but eventually, I transitioned to source my hardware through a side business I have had for over 8 years. Purchasing a single Dell PowerEdge server, I was able to virtualize all of the servers I needed to run Active Directory and any necessary windows servers needed at the time. Beyond that my IT Community involvement has allowed me to enjoy the appropriate software licensing needed to support such an environment.
Over time my home lab has changed, my hardware became end-of-life and what was once set up in my basement lab is now hosted in the Azure Cloud. Yep, I decommissioned my hardware and switched to cloud.
What were your considerations and decision points for what you decided to purchase?
The transition to the cloud came from the fact that has become a challenge to deal with end-of-life hardware, and ever-evolving hardware requirements becoming outdated for the latest software running. Not only did it become time-consuming to manage, but it also became too costly.
What’s your setup?
My setup today is now in the Azure cloud, so the only hardware I have in my home is my internet router and the appropriate Eero wifi extenders that are needed to ensure network reliability. I find that running all cloud keeps my backend infrastructure up to date accordingly. For storage, I leverage all Azure-managed disks are block-level storage volumes that are managed by Azure on my servers that I need to leverage with keeping the consumption of resources low in mind.
What services do you run and how do they interact with each other and what services do you run and how do they interact with each other?
My minimal environment consists of a windows VM with Active Directory deployed the Azure DNS service, and one additional basic VM that changes depending on the technology I am testing. The basic VM can sometimes grow to multiple VMs if the project software being deployed requires it. In that scenario, I may also have SQL server deployed if that’s required. I try to keep the deployment simple but keep the core foundational elements in place as needed, and wipe systems as needed. How do I manage all of this? I leverage cost management services that notify me if I hit the threshold that I am willing to pay. At that point I may need to make some decisions around which systems must stay online and what I can shut down, or if I want to pay more that month.
What do you like and don’t like about your setup?
I am really happy with my setup since I have moved to a cloud model because maintaining the hardware including the cost of electricity became time-consuming. While costs with the cloud virtual machines that I have to keep me from having a large-scale deployment, I am ok with that. It’s fun to tear down and bring online what I need when I am looking to try something new with technology.
What does your roadmap look like?
My roadmap is strictly focused on what technology to try out next, and I find that I make these decisions based on technology that I cross paths with that is interesting in that moment. It could be something new, or something that has been around for some time that I may need to dive deeper into for a project or just for new learning and sharing.
Any horror stories to share?
I don’t have any horror stories to share when it comes to my home lab. I have adapted as needed from on-premises hardware in my home to a cloud model that has allowed me to be agile and keep my learning and technology sharing ongoing.
Paul Schnackenburg
Finally, here are some words from me. IT Consultant & DOJO editor.
If you’re starting out in IT today, you probably don’t realize the importance of having a home IT lab setup. But when the cloud was just a faint promise if you wanted to practice on your own, to further your skills or try something out, you had to have your own hardware to do it on. Early on I used VMware workstation to spin up VMs, but there are limitations on what you can fit, especially when you need multiple VMs running simultaneously, and 15 years ago, RAM was a lot more expensive (and came with a lot less GB) than it is today.
After some years I realized that I needed separate machines to practice setting up Hyper-V clusters, Live Migration etc. so I bought the first parts of my set-up back in 2012, starting with three “servers”. I couldn’t justify the cost of real servers, so I got desktop-class motherboards, Intel i5 CPUs and 32 GB of RAM for three servers. One became a storage server, running Windows Server 2012 as an iSCSI target (again I didn’t have the budget for a real iSCSI SAN), and the other two VM hosting nodes in the cluster. Connectivity came from Intel 4 port 1 Gb/s NICs, offering decent bandwidth between nodes. A few years later I added two more nodes and a separate domain controller PC. The backend storage for Hyper-V VM disks was changed over to an SMB 3 file server as Hyper-V was now supporting this. All throughout this time, I was writing articles on Hyper-V and System Center for various outlets and this setup served as my test bed for several different applications and systems. From an “investment” point of view, it made perfect sense to have these systems in place.
I also worked as a part-time teacher and because we were only given “hand me down” hardware for the first few years of Hyper-V and VMware becoming mainstream and part of the curriculum I opted to house the servers on a desk in our hardware lab. That way my students could experiment with Live Migration etc. and through my own VPN connection to the boxes, I could access the cluster after hours to test new software apps and write articles.
In early 2016 this cluster was three nodes and one storage server, but two things happened – Windows Server 2016 offered a new option – Storage Spaces Direct (S2D) and I outfitted all four servers with two 1 TB HDDs and two 120 GB SSDs (small by today’s standard, but this is now eight years ago). These were all consumer grade (again – budget) and wouldn’t have been supported for production, especially not connected to desktop-class hardware but they did allow me (and my students) to explore S2D and VM High Availability.
The other thing that happened was that Chelsio – makers of high-end Remote Direct Memory Access (RDMA) / iWarp 10/25/40 Gb/s Ethernet hardware offered me some NICs in exchange for writing a few reviews. So, two nodes in the cluster were outfitted with a two-port 40 Gb/s card, and the other two with a two-port 10 Gb/s card. Initially, I did testing with the cabling running directly between two nodes, but this didn’t allow for a full, four-node cluster so I purchased a Dell X4012, 12 port 10 Gb/s switch. The two 10 Gb/s NICs used two cables each for a total bandwidth of 20 Gb/s, while the 40 Gb/s NICs came with “spider” cables with a 40 Gb/s interface in the server end, and four 10 Gb/s cables connected to the switches for a total bandwidth of 40 Gb/s. This was ample for the S2D configuration and gave blazing-fast Live Migrations, storage traffic and other East-West flows.
Dell X4012 10Gb/s switch
In late 2020 I left the teaching job so the whole cluster was mothballed in my home office for 1 ½ years and over the last month I’ve been resurrecting it (after purchasing an Ikea bookshelf to hold it all). Currently, it’s running Windows Server 2022 Datacenter. Each upgrade has been a complete wipe and reinstall of Windows Server (desktop experience, Server Core is just too hard to troubleshoot).
Trying to revive this old hardware has taught me two things – first, the “fun” of misbehaving (or just plain old) hardware to wrestle with was a lot more attractive when I was younger, and the cloud is SO much better for this stuff. Hence my home lab was mothballed for so long and I didn’t really miss it.
I use Windows Admin Center to manage it all, and I’ll also use various Azure cloud services for backup etc. to test them out.
My only “horror story” (apart from all the silly, day-to-day mistakes we all make) is during the wipe and reinstall to Windows Server 2019, using the wrong product key and ending up with four Windows Server Standard nodes – which don’t support Storage Spaces Direct.
What’s your Homelab Setup (and do you even need one)?
As you can see, home labs come in many shapes and sizes. If you’re a budding IT Pro today and you’re wondering if a home lab is right for you, consider the use cases it would fulfil for you very carefully. I see some trainers and IT Pros opting for laptops with large amounts of storage and memory and virtualizing everything on a single PC – certainly that cover many use cases. But if your employers are still mostly on-premises and supporting server clusters is still part of your daily life, nothing beats having two or three physical cluster nodes to test and troubleshoot. Expect to pay a few thousand US dollars (or the equivalent in your currency) and balance the extra cost of “real” servers with the cost savings but time investment in building your own PCs.
If you’re considering setting up a machine or two for your home lab I have the following recommendations – select cases that allow for upgrades and changes in the future, you never know what you’ll need to install and test. Don’t spend money on expensive, server-grade hardware unless you have to – your home lab is unlikely to be mission-critical. Go for fewer nodes, it’s easy to fit a cost-effective machine today with 64, 128 or even more RAM, giving you plenty of space for running VMs. And use SSDs (or NVMe) for all storage if you can afford it, using HDDs is just too slow.
And don’t forget the power of hosting your lab in the cloud, making it easy to rebuild and scale up and down, with a lower initial cost but a monthly subscription cost instead to keep an eye on.
Working in infrastructure has been a blast since I went down that route many years ago. One of the most enjoyable things in this line of work is learning about cool tech and playing around with it in a VMware homelab project for instance. Running a homelab involves sacrificing some of your free time and dedicating it to learning and experimenting.
Now, it is obvious that learning without a purpose is a tricky business as motivation tends to fade quite quickly. For that reason, it is best to work towards a goal and use your own hardware to conduct a VMware homelab project that will get you a certification, material to write interesting blogs, automate things in your home or follow a learning path to aim for a specific job or a different career track. When interviewing for engineering roles, companies are receptive to candidates that push the envelope to sharpen their skills and don’t fear investing time and money to get better.
This article is a bit different than usual as we, at Altaro, decided to have a bit of fun! We asked our section editors, authors, as well as third-party authors to talk about their homelabs. We set a rough structure regarding headlines to keep things consistent but we also wanted to leave freedom to the authors as VMware homelab projects are all different and serve a range of specific purposes.
In my honest opinion, it is one of the best investments in the learning and career goals I have made – a home lab. However, as the investment isn’t insignificant, why would I recommend owning and running a home lab environment? What do you use it for? What considerations should you make when purchasing equipment and servers?
Around ten years ago, I decided that having my own personal learning environment and sandbox would benefit all the projects and learning goals I had in mind. So, the home lab was born! Like many IT admins out there, my hobby and my full-time job are geeking out on technology. So, I wanted to have access at home to the same technologies, applications, and server software I use in my day job.
Why do you have a lab?
Like many, I started with a “part-time” VMware homelab project running inside VMware Workstation. So, the first hardware I purchased was a Dell Precision workstation with 32 gigs of memory. Instead of running vSphere on top of the hardware, I ran VMware Workstation. I believe this may have been before the VMUG Advantage subscription was available, or at least before I knew about it.
I would advise anyone thinking of owning and operating a home lab to start small. Running a lab environment inside VMware Workstation, Hyper-V, Virtualbox, or another solution is a great way to get a feel for the benefits of using a home lab environment. It may also be that a few VMs running inside VMware Workstation or another workstation-class hypervisor is all you need.
For my purposes, the number of workloads and technologies I wanted to play around with outgrew what I was able to do inside VMware Workstation. So, after a few years of running VMware Workstation on several other workstation-class machines, I decided to invest in actual servers. The great thing about a home lab is you are only constrained in its design by your imagination (and perhaps funds). Furthermore, unlike production infrastructure, you can redesign and repurpose along the way as you see fit. As a result, the home lab can be very fluid for your needs.
What’s your setup?
I have written quite a bit about my home lab environment, detailing hardware and software. However, I am a fan of Supermicro servers for the hardware side of things. I have found the Supermicro kits to be very stable, affordable, and many are supported on VMware’s HCL for installing vSphere, etc.
Enclosure
Sysracks 27U server enclosure
Servers
I have the following models of Supermicro servers:
(4) Supermicro SYS-5028D-TN4T
Mini tower form factor
(3) are in a vSAN cluster
(1) is used as a standalone host in other testing
(1) SYS-E301-9D-8CN8TP
Mini 1-U (actually 1.5 U) form factor
This host is used as another standalone host for various testing and nested labs
Networking
Cisco SG350-28 – Top of rack switch for 1 gig connectivity with (4) 10 gig SFP ports
Ubiquiti – Edgeswitch 10 Gig, TOR for Supermicro servers
Cisco SG300-20 – Top of rack IDF
Storage
VMFS datastores running on consumer-grade NVMe drives
vSAN datastore running on consumer-grade NVMe drives, (1) disk group per server
Synology Diskstation 1621xs+ – 30 TB of useable space
In terms of license requirements; I cannot stress enough how incredible the VMUG Advantage subscription is for obtaining real software licensing to run VMware solutions. It is arguably the most “bang for your buck” in terms of software you will purchase in your VMware homelab project. For around $200 (you can find coupons most of the year), you can access the full suite of VMware solutions, including vSphere, NSX-T, VMware Horizon, vRealize Automation, vRealize Operations, etc.
The VMUG Advantage subscription is how I started with legitimate licensing in the VMware home lab environment and have maintained a VMUG Advantage subscription ever since. You can learn more about the VMUG advantage subscription here: » VMUG Advantage Membership.
I used Microsoft Evaluation center licensing for Windows, suitable for 180 days, generally long enough for most of my lab scenarios.
What software am I running?
The below list is only an excerpt, as there are too many items, applications, and solutions to list. As I mentioned, my lab is built on top of VMware solutions. In it, I have the following running currently:
vSphere 7.0 Update 3d with latest updates
vCenter Server 7.0 U3d with the latest updates
vSAN 7.0 Update 3
vRealize Operations Manager
vRealize Automation
vRealize Network Insight
VMware NSX-T
Currently using Windows Server 2022 templates
Linux templates are Ubuntu Server 21.10 and 20.04
Running Gitlab and Jenkins for CI/CD
I have a CI/CD pipeline process that I use to keep VM templates updated with the latest builds
Running vSAN nested labs with various configurations
Running vSphere with Tanzu with various containers on top of Tanzu
Running Rancher Kubernetes clusters
Do I leverage the cloud?
Even though I have a VMware homelab project, I do leverage the cloud. For example, I have access to AWS and Azure and often use these to build out PoC environments and services between my home lab and the cloud to test real-world scenarios for hybrid cloud connectivity for clients and learning purposes.
What does your roadmap look like?
I am constantly looking at new hardware and better equipment across the board on the hardware roadmap. It would be nice to get 25 gig networking in the lab environment at some point in the future. Also, I am looking at new Supermicro models with the refreshed Ice Lake Xeon-D processors.
On the software/solutions side, I am on a continuous path to learning new coding and DevOps skills, including new Infrastructure-as-Code solutions. Also, Kubernetes is always on my radar, and I continue to use the home lab to learn new Kubernetes skills. I want to continue building new Kubernetes solutions with containerized workloads in the home lab environment, which is on the agenda this year in the lab environment.
Any horror stories to share?
One of the more memorable homelab escapades involved accidentally wiping out an entire vSAN datastore as I had mislabeled two of my Supermicro servers. So, when I reloaded two of the servers, I realized I had rebuilt the wrong servers. Thankfully, I am the CEO, CIO, and IT Manager of the home lab environment, and I had backups of my VMs .
I like to light up my home lab server rack
One of the recent additions to the VMware homelab project this year has been the addition of LED lights. I ran LED light strips along the outer edge of my server rack and can change the color via remote or have the lights cycle through different colors on a timer. You can check out a walkthrough of my home lab environment (2022 edition with lights) here: (574) VMware Home Lab Tour 2022 Edition Server Room with LED lights at night! A geek’s delight! – YouTube
When I started my career in IT, I didn’t have any sort of lab and relied exclusively on the environment I had at work to learn new things and play around with tech. This got me started with running virtual machines in VMware workstations at home but computers back then (10 years ago) didn’t come with 16GB of RAM as a common requirement so I had to get crafty with resources.
When studying to take the VCP exam, things started to get a bit frustrating as running a vCenter with just 2 vSphere nodes on 16 GB of ram is cumbersome (and slow). At this point, I got lucky enough that I could use a fairly good test environment at work to delay the inevitable and manage to get the certification without investing a penny in hardware or licenses.
I then changed my employer and started technical writing so I needed the capacity to play around with and resources pile up fast when you add vSAN, NSX, SRM and other VMware products into the mix. For that reason, I decided to get myself a homelab that would be dedicated to messing around. I started with Intel NUC mini-PCs like many of us and then moved to a more solid Dell rack server that I am currently running.
I decided to go the second-hand route as it was so much cheaper and I don’t really care about official support, newer software usually works unless on dinosaur hardware. I got a great deal on a Dell R430, my requirements were pretty easy as I basically needed lots of cores, memory, a fair amount of storage and an out-of-band card for when I’m not at home and need to perform power actions on it.
What’s your setup?
I am currently running my cluster labs nested on the R430 and run natively in VMs when possible. For instance, I have the DC, NSX manager, VCD, and vCenter run in VMs on the physical host, but I have a nested VSAN cluster with NSX-T networking managed by this same vCenter server. This is the most consolidated way I could think of while offering flexibility.
Dell R430
VMware vSphere ESXi 7 Update 3
2 x Intel Xeon E5-2630 v3 (2 x 8 pCores @2.40GHz)
128GB of RAM
6 x 300GB 15K rpm in RAID 5 (1.5TB raw)
PERC H730 mini
Dual 550W power supply (only one connected)
iDRAC 8 enterprise license
I keep the firmware up to date with Dell OME running in a VM in a workstation on my laptop that I fire up every now and again (when I have nothing better to do).
On the side, I also have a Gigabyte mini-pc running. That one is installed with an Ubuntu server with K3s running on it (Kubernetes). I use it to run a bunch of home automation stuff that are managed by ArgoCD in a private Github repository (GitOps), that way I can track my change through commits and pull requests. I also use it for CAPV to quickly provision Kubernetes (and Tanzu TCE) clusters in my lab.
Gigabyte BSi3-6100
Ubuntu 20.04 LTS
Core i3 6th gen
8GB of ram
I also have an old Synology DS115j NAS (Network Access Storage) that participates in the home automation stuff. It is also a target for vCenter backups and a few VMs I don’t want to have to rebuild using Altaro VM backup. It’s only 1TB but I am currently considering my options to replace it with a more powerful model with more storage.
Network wise all the custom stuff happens nested with OpnSense and NSX-T, I try to keep my home network as simple as possible if I don’t need to complicate it any further.
I currently don’t leverage any cloud services on a daily basis but I spin up the odd instance or cloud service now and again to check out new features or learn about new tech in general.
I try to keep my software and firmware as up-to-date as possible. However, it tends to depend on what I’m currently working on or interested in. I haven’t touched my Horizon install in a while but I am currently working with my NSX-T + ALB + VCD + vSAN setup to deploy a Kubernetes cluster with Cluster API.
“VMware homelab project architecture”
What do you like and don’t like about your setup?
I like that I have a great deal of flexibility by having a pool of resources that I can consume with nested installs or natives VMs. I can scratch projects and start over easily.
However, I slightly underestimated storage requirements and 1.5TB is proving a bit tricky as I have to really keep an eye on it to avoid filling it up. My provisioning ratio is currently around 350% so I don’t want to hit the 100% used space mark. And finding spare 15K SAS disks isn’t as easy as I’d hope.
What does your roadmap look like?
As mentioned, I’m reaching a point where storage can become a bottleneck as interoperable VMware products require more and more resources (NSX-T + ALB + Tanzu + VCD …). I could add a couple of disks but that would only add 600GB of storage and I’ll have to find 15K rpm 300GB disks with caddies so not an easy find. For that reason, I’m considering getting a NAS that I can then use as NFS or iSCSI storage backend with SSDs.
Things I am currently checking out include VMware Cloud Director with NSX-T and ALB integration and Kubernetes on top of all that. I’d also like to get in touch with CI/CD pipelines and other cloud-native stuff.
Any horror stories to share?
The latest to date was my physical ESXi host running on a consumer-grade USB key plugged in the internal USB port, which got fried (the USB key) after a few months of usage. My whole environment was running on this host and I had no backup then. But luckily, I was able to reinstall it on a new USB key (plugged in the external port) and re-register all my resources one by one manually.
Also, note that I am incredibly ruthless with my home lab. I only turn it on when needed. So, when I am done with it, none of that proper shutdown sequence, thanks very much. I trigger the shut down of the physical host from vCenter which takes care of stopping the VMs, sometimes I even push the actual physical button (yes there’s one). While I haven’t nuked anything that way somehow, I would pay to see my boss’s face should I stop production hypervisors with the button!
Ivo Beerens
https://www.ivobeerens.nl/
Why do you have a lab?
The home lab is mainly used for learning, testing new software versions, and automating new image releases. Back when I started down this journey, my first home lab was in the Novell Netware 3.11 era which I acquired using my own money, no employer’s subvention
My main considerations and decision points for what I decided to purchase were low noise, low power consumption for running 24×7, room for PCI-Express cards and NVMe support.
What’s your setup?
From a hardware standpoint, computing power is handled by two Shuttle barebone machines with the following specifications:
500 W Plus Silver PSU
Intel Core i7 8700 with 6 cores and 12 threads
64 GB memory
Samsung 970 EVO 1 TB m.2
2 x 1 GbE Network cards
Both barebones are running the latest VMware vSphere version.
In terms of storage, I opted for a separate QNAP TS-251+ NAS with two Western Digital (WD) Red 8 TB disks in a RAID-1 configuration. The barebones machines have NVM drives with no RAID protection.
The bulk of my workloads are hosted on VMware vSphere and for the VDI solution, I run VMware Horizon with Windows 10/11 VDIs. Cloud-wise, I use an Azure Visual Studio subscription for testing IAAS and Azure Virtual Desktop services.
I manage the environments by automating as much as possible using Infrastructure as Code (IaC). I automated the installation process of almost every part so I can start over from scratch whenever I want.
What do you like and don’t like about your setup?
I obviously really enjoy the flexibility that automation brings to the table. However, the lack of resources sometimes (max 128 GB) can sometimes be a limiting factor. I also miss having remote management boards such as HPE iLO, Dell iDRAC or a KVM switch to facilitate hardware operations.
What does your roadmap look like?
I currently have in the works to upgrade to a 10 GbE Switch and bump the memory to 128GB per barebone.
Paolo Valsecchi
https://nolabnoparty.com/
Why do you have a lab?
I am an IT professional and I often find myself in the situation of implementing new products and configurations without having the right knowledge or tested procedures at hand. Since it is a bad idea to experiment with things directly on production environments, having a lab is the ideal solution to learn, study, and practice new products or test new configurations without the hassle of messing up critical workloads.
Because I’m also a blogger, I study and test procedures to publish them on my blog. This required a better test environment than what I had. Since my computer didn’t have enough resources to allow complex deployments, in 2015 I decided to invest some money and build my own home lab.
It was clear that the ideal lab was not affordable due to high costs. For that reason, I decided to start with a minimum set of equipment to extend later. It took a while before finding the configuration that met the requirements. After extensive research on the Internet, I was finally able to complete the design by comparing other lab setups.
My requirements for the lab were simple: Low power, cost-effective hardware, acceptable performance, at least two nodes, one external storage, compatibility with the platforms I use, and components size.
What’s your setup?
Despite my lab still meeting my requirements, it is starting to be a little bit obsolete now. My current lab setup is the following:
PROD Servers: 3 x Supermicro X11SSH-L4NF
Intel Xeon E3-1275v5
64GB RAM
2TB WD Red
DR Server: Intel NUC NUC8i3BEH
Intel Core i3-8109U
32GB RAM
Kingston SA1000M8 240G SSD A1000
Storage PROD: Synology DS918
12TB WD Red RAID5
250GB read/write cache
16GB RAM
Storage Backup: Synology DS918
12TB WD Red RAID5
8GB RAM
Storage DR: Synology DS119j + 3TB WD Red
Switch: Cisco SG350-28
Router: Ubiquiti USG
UPS: APC 1400
The lab is currently composed of three nodes cluster running VMware vSphere 7.0.2 with vSAN as main storage. Physical shared storage devices are configured with RAID 5 and connected to vSphere or backup services via NFS or dedicated LUNs.
Installed Windows Servers are running version 2016 or 2019 while Linux VMs belong to different distributions and versions may vary.
My lab runs different services, such as:
VMware vSphere and vSAN
Active Directory, ADFS, Office 365 sync
VMware Horizon
Different backup solutions (at least 6 different products including Altaro)
In terms of Cloud service, I use cloud object storage (S3 and S3-compatible) solutions for backup purposes. I also use Azure to manage services such as Office 365, Active Directory and MFA. Due to high costs, workloads running on AWS or Azure are just created on-demand and for specific tests.
I try to keep the software always up-to-date with in-place upgrades, except for Windows Server which I always reinstall. Only once did I have to wipe the lab due to hardware failure
What do you like and don’t like about your setup?
With my current setup, I’m able to run the workloads I need and do my tests. Let’s say I’m satisfied with my lab, but…
vSAN disks are not SSD (only the cache), RAM installed on each host is limited to 64GB and the network speed is 1GB. These constraints are affecting the performance and the number of running machines that are demanding always more and more resources.
What does your roadmap look like?
To enhance my lab, the replacement of HDDs with SSDs is the first step in my roadmap. Smaller physical servers to better fit in my room as well as a 10 Gbps network would be the icing on the cake. Unfortunately, this means replacing most of the installed hardware in my lab.
Any horror stories to share?
After moving my lab from my former company to my house, the original air conditioning system in use during the very first days was not so good and a hot summer was fatal to my hardware… the storage with all my backups failed, losing a lot of important VMs. Pity that some days before I deleted such VMs from the lab. I spent weeks re-creating all the VMs! I have now a better cooling system and a stronger backup (3-2-1!)
I use my Home LAB primarily for testing various products to explore new features and functionality that I’d never played with before. This greatly helps me in learning about the product as well as testing it.
I decided to go for a Home Lab 4 years ago because of the complete flexibility and control you have over your own environment. You can easily (or not) deploy, configure and manage things yourself. I bought my Dell Workstation directly from Dell by customizing its configuration according to my needs and requirements.
The first thing I considered was whether it should be bare metal with Rack servers, Network Switches and Storage devices or simply nested virtualization inside VMware Workstation. I went for the nested virtualization route for flexibility and convenience and sized the hardware resources according to what I needed at the time.
What’s your setup?
My home lab is pretty simple, it is made up of a Dell Workstation, a TP link switch and a Portable hard drive.
Dell Workstation:
Dell Precision Tower 5810
Intel Xeon E5-2640v4 10 Core processor
96 GB of DDR4 Memory
2x1TB of SSDs
2 TB of Portable hard drive
Windows 10 with VMware Workstation
At the moment I currently run a variety of VMs such as ESXi hosts, AD-DNS, Backup software, a mail server and a number of Windows and Linux boxes. Because all VMs running on VMware Workstation there is no additional network configuration required as all VMs can interact with each other on virtual networks.
Since my Home LAB is on VMware Workstation it gives the flexibility to keep up-to-date versions as well as lower versions to test and compare features for instance. Because it runs in VMware Workstation, I often got to wipe out and recreate the complete setup. Whenever newer versions are released, I always upgrade to try out new features.
What do you like and don’t like about your setup?
I like the flexibility VMware Workstation gives me to set things up easily and scratch them just as easily.
On the other hand, there is a number of things I can’t explore such as setting up solutions directly on the physical server, working on Firmware, Configuring Storage & RAID levels, Configure Networking, routing and so on.
What does your roadmap look like?
Since I bought my Dell Workstation, I constantly keep an eye on the resources to avoid running out of capacity. In the near future, I plan to continue with that trend but I am considering buying a new one to extend the capacity.
However, I am currently looking at buying a NAS device to provide shared storage capacity to the compute node(s). While I don’t use any just now, my future home lab may include cloud services at some point.
Any horror stories to share?
A couple of mistakes I made in the home lab included failure to create DNS Records before deploying a solution, messed up vCenter Upgrade which required to deploying new vCenter servers or a failed Standard Switch to Distributed Switch migration which caused network outage and needed to reset the whole networking stack.
Simon Cranney
https://esxsi.com/
Why do you have a lab?
A couple of years ago I stood up my first proper VMware home lab project. I had messed about with running VMware Workstation on a gaming PC in the past, but this time I wanted something I could properly get my teeth into and have a VMware vSphere home lab without resource contention.
Prior to this, I had no home lab. Many people that are fortunate to work in large enterprise infrastructure environments may be able to fly under the radar and play about with technologies on works hardware. I cannot confirm nor deny if this was something I used to do! But hey learning and testing new technologies benefits the company in the long run.
What’s your setup?
Back to the current VMware home lab then, I had a budget in mind so ended up going with a pair of Intel NUC boxes. Each with 32 GB RAM and a 1 TB PCIe NVMe SSD.
The compute and storage are used to run a fairly basic VMware vSphere home lab setup. I have a vCenter Server as you’d expect, a 2-node vSAN cluster, and vRealize Operations Manager, with a couple of Windows VMs running Active Directory and some different applications depending on what I’m working on at any given point in time.
My VMware home lab licenses are all obtained free of charge through the VMware vExpert program but there are other ways of accessing VMware home lab licenses such as through the VMUG Advantage membership or even the vSphere Essentials Plus Kit. If you are building a VMware home lab though, why not blog about it and shoot for the VMware vExpert application?
In terms of networking, I’ve put in a little more effort! Slightly out of scope here but in a nutshell;
mini rack with the Ubiquiti UniFi Dream Machine Pro
UniFi POE switch
And a number of UniFi Access Points providing full house and garden coverage
I separate out homelab and trusted devices onto an internal network, partner and guest devices onto an external network, and smart devices or those that like to listen onto a separate IoT network. Each network is backed by a different VLAN and associated firewall rules.
What do you like and don’t like about your setup?
Being 8th Generation, the Intel NUC boxes caused me some pain when upgrading to vSphere 7. I used the Community Network Driver for ESXi Fling and played about adding some USB network adapters to build out distributed switches.
I’m also fortunate enough to be running a VMware SD-WAN (VeloCloud) Edge device, which plugs directly into my works docking station and optimizes my corporate network traffic for things like Zoom and Teams calls.
What does your roadmap look like?
In the future, I’d like to connect my VMware home lab project to some additional cloud services, predominantly in AWS. This will allow me to deep dive into technologies like VMware Tanzu, by getting hands-on with the deployment and configuration.
Whilst VMware Hands-on Labs are an excellent resource, like many techies I do find that the material sticks and resonates more when I have had to figure out integrations and fixes in a real-life environment. I hope you found my setup interesting. I’d love to hear in the comments section if you’re running VMware Tanzu in your home lab and from any other UniFi fans!
Get More Out of Your Homelab
It is always fun to discuss home labs and discover how your peers do it. It’s a great way to share “tips and tricks” and to learn from the success and failures of others. Hardware is expensive and so is electricity, real estate to store it and so on.
Learn how to design on a budget for the VMware homelab building process
For these reasons and many others, you should ask yourself a few questions before even looking at home lab options to better steer your research towards something that will fit your needs:
Do I need hardware, Cloud services or both? On-premise hardware involves investing a chunk of money at the beginning but it means you are in total control of the budget as electricity will be the only variable from now on. On the other hand, cloud services will let you pay for only what you use. It can be very expensive but it could also be economical under the right circumstances. Also, some of you will only require Azure services because it’s your job, while I couldn’t run VMware Cloud Director, NSX-T and ALB in the cloud.
Do you have limited space or noise constraints? Rack and tower servers are cool, but they are bulky and loud. A large number of IT professionals went for small, passive and silent mini-pcs such as Intel NUC. It grew in popularity after William Lam from VMware endorsed it and network drivers for the USB adapters were released as Flings. These small form factor machines are great and offer pretty good performances with i3, i5 or i7 processors. You can get a bunch of these to build a cluster that won’t use up much energy and won’t make a peep.
Nested or Bare-Metal? Another question that is often asked is if you should run everything bare-metal. I personally like the flexibility of nested setups but it’s also because I don’t have the room for a rack at home (and let’s face it, I would get bad looks!). However, as you saw in this blog, people go for one or the other for various reasons and you will have to find yours.
What do you want to get out of it? If you are in the VMware dojo, you most likely are interested in testing VMware products. Meaning vSphere will probably be your go-to platform. In which case you will have to think about licenses. Sure, you can use evaluation licenses but you’ll have to start over every 60 days, not ideal at all. The vExpert program and the VMUG advantage program are your best bets in this arena. On the other hand, if you are only playing with Open-source software you can install Kubernetes, OpenStack or KVM on bare metal for instance and you won’t have to pay for anything.
How much resources do you need? This question goes hand in hand with the next one. While playing around with vSphere, vCenter or vSAN won’t set you back that much. If you want to get into Cloud Director, Tanzu, NSX-T and the likes, you will find that they literally eat up CPU, memory and storage for breakfast. So, try to look at the resource requirements for the products you want to test in order to get a rough idea of what you will need.
What is your budget? Now the tough question, how much do you want to spend? In hardware and energy (which links back to small form factor machines)? It is important to set yourself a budget and not just start buying stuff for the sake of it (unless you have the funds). Home lab setups are expensive and, while you might get a 42U rack full of servers for cheap on the second-hand market, your energy bill will skyrocket. On the other hand, getting a very cheap setup will cost you a certain amount of money but you may not get anything from it due to hardware limitations. So set yourself a budget and try to find the sweet spot.
Check compatibility: Again, don’t jump in guns blazing at the first offer. Double-check that the hardware is compatible with whatever you want to evaluate. Sure, it is likely to work even if it isn’t in the VMware HCL, but it is always worth it to do your research to look for red flags before buying.
Those are only a few key points I could think of but I’d be happy to hear about yours in the comments!
Is a VMware Homelab Worth it?
We think that getting a home lab is definitely worth it. While the money aspect might seem daunting at first, investing in a home lab is investing in yourself. The wealth of knowledge you can get from 16 cores/128GB servers is lightyears away from running VMware Workstation on your 8 cores/16GB laptop. Even though running products in a lab isn’t real-life experience, this might be the differentiating factor that gets you that dream job you’ve been after. And once you get it, the $600 you spent for that home lab will feel like money well spent with a great ROI!
VMware Homelab Alternatives
However, if your objective is to learn about VMware products in a guided way and you are not ready to buy a home lab just yet for whatever reason, fear not, online options are there for you! You can always start with the VMware Hands-on-labs (HOL) which offers a large number of learning paths where you can get to grips with most of the products sold by the company. Many of them you couldn’t even test in your home lab actually (especially the cloud ones like carbon black or workspace one). Head over to https://pathfinder.vmware.com/v3/page/hands-on-labs and register to Hands-on-labs to start learning instantly.
The other option to run a home lab for cheap is to install a VMware workstation on your local workstation if you have enough resources. This is, in almost 100% of the cases, the first step before moving to a more serious and expensive setup.
To protect your VMware environment, Altaro offers the ultimate VMware backup service to secure backup quickly and replicate your virtual machines. We work hard perpetually to give our customers confidence in their backup strategy.
Plus, you can visit our VMware blog to keep up with the latest articles and news on VMware.
What Homelab Set Up is Right for You?
I think we will all agree that our work doesn’t fit within the traditional 9-to-5 as keeping our skills up is also part of the job and it can’t always be done on company time. Sometimes we’ll be too busy or it might just be that we want to learn about something that has nothing to do with the company’s business. Home labs aren’t limited to VMware or Azure infrastructure and what your employer needs. You can put them to good use by running overkill wifi infrastructures or by managing your movie collection with an enterprise-grade and highly resilient setup that many SMBs would benefit from. The great thing about it is that it is useful on a practical and personal level while also being good fun (if you’re a nerd like me).
Gathering testimonies about VMware homelab projects and discussing each other’s setup has been a fun and very interesting exercise. It is also beneficial to see what is being done out there and identify ways to improve and optimize our own setup, I now know that I need an oversized shared storage device in my home (This will be argued)!
Now we would love to hear about your VMware homelab project that you run at home, let’s have a discussion in the comments section!
Today, there is no question that IT admins are busier than ever, juggling multiple tasks and responsibilities. These include managing and administering Exchange email services, both on-premises and in the cloud. Exchange Online is an extremely popular solution for organizations to host mail services as many businesses have migrated email and file storage to the public cloud. PowerShell is a great scripting language that allows admins to make the best use of their time by automating common tasks and day-to-day activities.
Why use PowerShell?
Before considering PowerShell specifically in the context of Exchange Online, why should admins consider using PowerShell in general? Today, PowerShell has quickly become one of the most popular and fully-featured scripting languages. Many software vendors are developing and releasing their own PowerShell modules, allowing admins to control, configure, and manage many different solutions across the board with the familiar PowerShell syntax.
IT admins, especially Windows admins, are familiar with PowerShell as version 1.0 was released in 2006 for Windows Server 2003, Windows XP SP2, and Windows Vista. In addition, Windows PowerShell is included in modern Windows Server and client operating systems, with the newer PowerShell Core as an optional download.
PowerShell is both familiar and understandable for many admins, given its verb-noun constructs and very human-readable syntax. However, even for non-developers, writing simple PowerShell one-liner scripts can significantly reduce the number of manual tasks performed daily.
PowerShell is also very extensible. As mentioned, third-party software vendors can write their own PowerShell snap-ins and modules to integrate into the PowerShell framework, allowing PowerShell to be customized to work with many different software solutions. Third-party vendors are not the only ones that have extensively used Powershell modules and cmdlets. Most modern Microsoft software and cloud solutions have their own PowerShell modules, allowing for seamless automation, including configuration and management.
What is Exchange Online (EXO)?
Microsoft Exchange Online (EXO) is a hosted unified messaging solution that provides email, calendaring, contacts, and task management from a wide range of devices. Exchange Online is a modern counterpart to the traditional Exchange on-premises solutions organizations have used for decades. In addition, Exchange Online can leverage modern Microsoft technologies, including Azure Active Directory. With Exchange Online’s Azure integration, organizations have the tools needed to support the modern hybrid workforce worldwide.
Exchange Online is the email component included in an Office 365 or Microsoft 365 subscription. However, you can purchase Exchange Online services without the other components of Office/Microsoft 365. With Exchange Online, you retain control over the messaging services offered to your users.
Microsoft Exchange Online PowerShell
Exchange Online includes the ability to administer, configure, and manage your Exchange Online environment using PowerShell. In addition, Exchange Online Powershell provides many robust cmdlets allowing administrators to automate many common tasks.
The Exchange Online PowerShell V2 module is the latest iteration and release of the Exchange Online module and provides modern features, such as the ability to work with multi-factor authentication (MFA). With MFA, organizations can greatly bolster the security of their PowerShell sessions by requiring more than one authentication factor, such as a one-time code delivered via an authenticator app or text message.
Automated Configuration and Benefits of Exchange Online PowerShell
IT admins may ask why they would want to use PowerShell instead of simply using the GUI that is familiar and does most of what they way to do. When performing specific tasks one time or only a few times during a day on one object, the GUI tools are well suited to carry out these tasks and are quite efficient at carrying out a single job or a few tasks in an ad-hoc way. However, there are multiple reasons why you would use PowerShell instead of the Exchange Online GUI management tools. These include:
Bulk operations
Data filtering
Data piping
Bulk operations
GUI management tools do not scale well when dealing with tasks that may need to be performed on multiple users or other objects. Also, what if you need to carry out specific tasks on hundreds of objects on a schedule? GUI management tools are not suited for doing this. For example, can you imagine manually changing an attribute on hundreds of Exchange Online users through the GUI? It would be extremely time-consuming and not very efficient.
When needing to perform bulk operations on multiple objects, PowerShell is much better suited at doing this than the Exchange Online GUI. For example, when manually changing values and attributes on an object numerous times through a GUI, there is a high likelihood a mistake can be made. However, if you use PowerShell to make the changes, the actions are repeated precisely each time the code updates the object, eliminating mistakes due to human error.
Making changes using a PowerShell script on hundreds of users might take minutes or less, whereas making the same changes manually through the GUI might take hours. It can save many hours and manual labour for low-level administrative tasks.
Data filtering
One of the powerful reasons to use PowerShell with Exchange Online is the data filtering capabilities of PowerShell. Powershell is a powerful object-oriented scripting language that can pull out objects and filter data in ways that may not be available in the Exchange Online Management GUI.
When you think about it, GUI tools only allow filtering by the specific criteria built into the GUI tool or management console. If the specific filter you need is not available, you can’t see the information in the way you need it displayed. In addition, GUI tools generally do not provide IT admins with the filtering and data extraction capabilities of command-line tools and scripting languages.
With the filtering capabilities built into PowerShell for Exchange Online, IT admins can query and filter data as needed. PowerShell is an object-oriented scripting language that can return various data objects. For example, let’s say you want to get the archivestatus attribute from all your user mailboxes. You could do that with a simple PowerShell one-liner as follows:
get-mailbox | select name, archivestatus
With Exchange Online PowerShell, getting the value of any mailbox attribute is the same as following this simple syntax shown above. Now, things get more interesting by piping returned values and data into other PowerShell cmdlets.
Data piping
Another powerful capability of data filtering with PowerShell is to take the data returned from a data query with a filter and then pipe the return into another PowerShell command. This simple feature contained natively in PowerShell allows querying for specific matching objects such as mailboxes and then doing something with those returned objects, such as running another Exchange Online PowerShell cmdlet on them.
A very simple example of piping your return data into another PowerShell cmdlet is a simple “out-file” cmdlet. It allows you to export your returned data to a simple text file.
But, you can do anything you want with the pipe from a get-mailbox, get-user, or other PowerShell “get” command. You can think of the workflow like this: you are querying for a specific list of objects that match the filter criteria you have specified and then take that set of matching objects and then feed these into another PowerShell cmdlet.
Manually Configuring Exchange Online PowerShell
To get started using Exchange Online PowerShell cmdlets, you need first to install the required PowerShell modules to work with Exchange Online PowerShell. The Exchange Online PowerShell module is part of several modules that fall under the umbrella of services contained in Microsoft 365. As mentioned earlier, the Exchange Online service can be purchased as a standalone product or included with the mail services offered by Microsoft 365.
Each of the Microsoft 365 services has its own PowerShell modules, including:
Azure Active Directory (Azure AD)
Exchange Online
SharePoint Online
Skype for Business Online
Teams
If you are explicitly working with Exchange Online (EXO), two modules are needed to interact with the low-level Azure AD user objects and the Exchange Online mailboxes:
Azure Active Directory (Azure AD) PowerShell – Allows querying the Azure Active Directory environment users, attributes, etc
Exchange Online PowerShell – Allows querying and performing critical tasks at the mailbox level for users with Exchange Online mailboxes
Let’s see how to install both of these PowerShell modules for specifically interacting with Exchange Online via PowerShell.
Azure Active Directory (Azure AD)
First, we are going to install the AzureAD PowerShell module. As a note. It does not matter if you install the AzureAD module first or the ExchangeOnline module. To install the module, run the following cmdlet:
Install-Module AzureAD
Accept the warning message displayed regarding the untrusted repository by typing “Y.” Learn more about AzureAD PowerShell module cmdlet reference here: AzureAD Module | Microsoft Docs.
Installing AzureAD PowerShell module using Windows Terminal
Installing Exchange Online PowerShell Module
Now, installing the Exchange Online PowerShell module is the same process. To install the Exchange Online Powershell module, run the following cmdlet:
Install-Module ExchangeOnlineManagement
Installing the ExchangeOnlineManagement PowerShell module
Accept the warning message displayed regarding the untrusted repository by typing “Y.” For details on using the Exchange Online Management PowerShell, look at Microsoft’s Exchange Online PowerShell documentation here: Exchange Online PowerShell | Microsoft Docs.
Allowing all of the features of Exchange Online to PowerShell
By default, all accounts you create in Microsoft 365 can connect to and use Exchange Online PowerShell. However, IT admins can use Exchange Online PowerShell to enable or disable a user’s ability to use Exchange Online PowerShell in the environment.
As a security note, just because a user can connect to Exchange Online PowerShell, it does not give them administrator access. A user’s permissions in Exchange Online are defined by the built-in role-based access control (RBAC) used by Exchange Online.
Using the Exchange Online PowerShell cmdlets shown below, Exchange administrators can enable or disable users’ access to Exchange Online PowerShell.
To enable or disable for multiple users based on a user attribute, you can also use the filtering and piping features discussed above with Exchange Online PowerShell. To enable Exchange Online Powershell for users with a specific Title, like “Manager,” you can do the following:
Connecting to Exchange Online PowerShell with Basic Authentication
If you search for connecting to Exchange Online PowerShell, you will see reference to basic authentication and modern authentication. To follow best practices, don’t attempt to use Basic Authentication any longer. All organizations at this point need to be switching to modern authentication with MFA enabled.
There is an additional reason. Microsoft is deprecating Basic Authentication access to Exchange Online on October 1, 2022. With this announcement, starting on October 1, 2022, they will begin disabling Basic Authentication for Outlook, EWS, RPS, POP, IMAP, and EAS protocols in Exchange Online. SMTP Auth will also be disabled if it is not being used. Read the official announcement here.
If you want to use the older Exchange Online Remote connection using Basic Authentication, you can view those instructions from Microsoft here. Again, note this method will be deprecated later this year.
Connecting to Exchange Online PowerShell with Modern Authentication
To connect to Exchange Online, use the Exchange Online PowerShell V2 module (installation shown above) to connect to your Exchange Online environment. The EXO PowerShell V2 module uses modern authentication and works with multi-factor authentication (MFA) for securing your Exchange Online PowerShell environment.
To connect to your Exchange Online environment, you need to import the ExchangeOnlineManagement module and then use the Connect-ExchangeOnline cmdlet.
Import-Module ExchangeOnlineManagement
Connect-ExchangeOnline -ShowProgress $true
Connecting to Exchange Online using the Connect-ExchangeOnline cmdlet
It will bring up the login box to log into your Office/Microsoft 365 account. It allows taking advantage of the MFA configured for the account, etc.
Logging into Exchange Online with the Exchange Online PowerShell management module
The Top 10 Most Common Tasks in Exchange Online PowerShell
Now that we have installed the Exchange Online PowerShell module, what are some common tasks we can accomplish using Exchange Online PowerShell? Let’s take a look at the following:
Getting Migration information
Getting mailboxes
Viewing mailbox statistics
Increasing deleted items retention
Enable Mailbox Audit Logging
Identify inactive mailboxes
Identify mailboxes enabled with forwarding
Setting mailbox autoreply configuration
Assigning roles to users
Identifying ActiveSyncDevices
1. Getting Migration Information
You may be migrating users from one Exchange Server, such as on-premises, to another Exchange Server (Exchange Online). The Get-MigrationUser cmdlet is a great command to check the status of a migration batch used to migrate user batches.
One of the most basic tasks an Exchange admin needs to carry out is getting information about mailboxes. The most basic cmdlet to use for this use case is the Get-Mailbox cmdlet. The Get-Mailbox cmdlet is generally used with piping into other cmdlets to pull mailboxes meeting specific filters and then performing configuration on the mailboxes queried with the Get-Mailbox cmdlet.
Using the Get-Mailbox cmdlet to get mailbox information in Exchange Online
3. Viewing mailbox statistics
A common task of Exchange admins is keeping an eye on the size of mailboxes in the environment, so these do not become unwieldy. Using the Get-MailboxStatistics cmdlet allows getting the size information, the number of messages it contains, and the last time it was accessed.
Get-MailboxStatistics -identity <username>
Using the Get-MailboxStatistics cmdlet in Exchange Online to get mailbox information
4. Increasing deleted items retention
By default, Exchange Online is configured to retain deleted items for 14 days. However, this limit can be increased easily for users using the Exchange Online PowerShell module cmdlet Set-Mailbox.
The Set-Mailbox cmdlet allows configuring many aspects of the user mailbox in Exchange Online
5. Enable Mailbox Audit Logging
Even though audit logging is on by default for all organizations in Microsoft 365, only users with E5 licenses will return mailbox audit log events in audit log searches. If you want to retrieve audit log events for users without an E5 license, PowerShell is a great way to do that. You can use the Exchange Online PowerShell cmdlet one-liner:
Getting the last logon time using Exchange Online PowerShell
7. Identify mailboxes enabled with forwarding
What if you want to identify mailboxes enabled with a forwarding address as these have not been documented? You can easily do this with another useful Exchange Online PowerShell one-liner:
Get-mailbox -ResultSize Unlimited| where {$_.ForwardingAddress -ne $Null} | select DisplayName,ForwardingAddress
8. Setting mailbox autoreply configuration
A user may forget to set their autoreply configuration. If they go away on vacation or if there is a need to set the autoreply on a user mailbox for other reasons, you can easily accomplish this using PowerShell. It eliminates the need to log in as that user and do this interactively in Outlook.
To do this, you can use the Set-MailboxAutoReplyConfiguration cmdlet. It allows setting both an internal message and an external message for the mailbox.
Setting autoreply messages using PowerShell
9. Manage roles for groups
Using the New-ManagementRoleAssignment cmdlet, you can assign a management role to a management role group, management role assignment policy, user, or universal security group.
New-ManagementRoleAssignment -Role “Mail Recipients” -SecurityGroup “Tier 2 Help Desk”
Assigning management roles using the New-ManagementRoleAssignment cmdlet
10. Identifying ActiveSync Devices
Identifying and seeing ActiveSync Devices in use in the organization can easily be accomplished with Exchange Online PowerShell using the Get-MobileDevice cmdlet.
Getting mobile devices paired with Exchange Online Users
To properly protect your Hyper-V virtual machines, use Altaro VM Backup to securely backup and replicate your virtual machines. We work hard perpetually to give our customers confidence in their Hyper-V backup strategy.
To keep up to date with the latest Hyper-V best practices, become a member of the DOJO | Hyper-V now (it’s free).
The Future is Automated
Many organizations are now migrating and hosting their mail services in the cloud. Exchange Online provides businesses with a great way to host their mail services in Microsoft’s cloud infrastructure, either as a standalone subscription or part of their Office/Microsoft 365 subscription.
While Exchange admins can undoubtedly use the GUI management tools for daily tasks, Exchange Online PowerShell provides a great way to automate and carry out everyday tasks much more quickly, efficiently, and using automation. The Exchange Online PowerShell module is easy to install. In addition, it provides quick time to value by allowing Exchange admins to easily query and configure multiple objects in their Exchange Online environments.
Used in automated processes, Exchange Online PowerShell allows Exchange admins to carry out tasks consistently and in a way that helps to eliminate human error from mundane low-level tasks.
When the CEO realizes they deleted a vital email thread three weeks ago, email recovery becomes suddenly becomes an urgent task. Sure, you can look in the Deleted Items folder in Outlook, but beyond that, how can you recover what has undergone “permanent” deletion? In this article, we review how you can save the day by bringing supposedly unrecoverable email back from the great beyond.
Deleted Email Recovery in Microsoft And Office 365
Email Recovery for Outlook in Exchange Online through Microsoft and Office can be as simple as dragging and dropping the wayward email from the Deleted Items folder to your Inbox. But what do you do when you can’t find the email you want to recover?
First, let’s look at how email recovery is structured in Microsoft 365. There are few more layers here than you might think! In Microsoft 365, deleted email can be in one of three states: Deleted, Soft-Deleted, or Hard-Deleted. The way you recover email and how long you have to do so depends on the email’s delete status and the applicable retention policy.
Let’s walk through the following graphic and talk about how email gets from one state to another, the default policies, how to recover deleted email in each state, and a few tips along the way.
Items vs. Email
Outlook is all about email yet also has tasks, contacts, calendar events, and other types of information. For example, you can delete calendar entries and may be called on to recover them, just like email. For this reason, the folder for deleted content is called “Deleted Items.” Also, when discussing deletions and recovery, it is common to refer to “items” rather than limiting the discussion to just email.
Policy
Various rules control the retention period for items in the different states of deletion. A policy is an automatically applied action that enforces a rule related to services. Microsoft 365 has hundreds of policies you can tweak to suit your requirements. See Overview of Retention policies for more information.
‘Deleted Items’ Email
When you press the Delete key on an email in Outlook, it’s moved to the Deleted Items folder. That email is now in the “Deleted” state, which simply means it moved to the Deleted Items folder. How long does Outlook retain deleted email? By default – forever! You can recover your deleted mail with just a drag and drop to your Inbox. Done!
If you can’t locate the email in the Deleted Items folder, double-check that you have the Deleted Items folder selected, then scroll to the bottom of the email list. Look for the following message:
If you see the above message, your cache settings may be keeping only part of the content in Outlook and rest in the cloud. The cache helps to keep mailbox sizes lower on your hard drive, which in turn speeds up search and load times. Click on the link to download the missing messages.
But I Didn’t Delete It!
If you find content in the Deleted Items and are sure you did not delete it, you may be right! Administrators can set Microsoft 365 policy to delete old Inbox content automatically.
Mail can ‘disappear’ another way. Some companies enable a personal archive mailbox for users. When enabled, by default, any mail two years or older will “disappear” from your Inbox and the Deleted Items folder. However, there is no need to worry. While apparently missing, the email has simply moved to the Archives Inbox. A personal Archives Inbox shows up as a stand-alone mailbox in Outlook, as shown below.
As a result, it’s a good idea to search the Archives Inbox, if it is present when searching for older messages.
Another setting to check is one that deletes email when Outlook is closed. Access this setting in Outlook by clicking “File,” then “Options,” and finally “Advanced” to display this window:
If enabled, Outlook empties the Deleted Items when closed. The deleted email then moves to the ‘soft-delete’ state, which is covered next. Keep in mind that with this setting, all emails will be permanently deleted after 28 days
‘Soft-Deleted’ Email
The next stage in the process is Soft-Deleted. Soft-Deleted email is in the Deleted-Items folder but is still easily recovered. At a technical level, the mail is deleted locally from Outlook and placed in the Exchange Online folder named Deletions, which is a sub-folder of Recoverable Items. Any content in Recoverable Items folder in Exchange Online is, by definition, considered soft-deleted.
You have, by default, 14 days to recover soft-deleted mail. The service administrator can change the retention period to a maximum of 30 days. Be aware that this can consume some of the storage capacity assigned to each user account and you could get charged for overages.
How items become soft-deleted
There are three ways to soft-delete mail or other Outlook items.
Delete an item already in the Deleted Items folder. When you manually delete something that is already in the Deleted Items folder, the item is soft-deleted. Any process, manual or otherwise that deletes content from this folder results in a ‘soft-delete’
Pressing Shift + Delete on an email in your Outlook Inbox will bring up a dialog box asking if you wish to “permanently” delete the email. Clicking Yes will remove the email from the Deleted-Items folder but only perform a soft-delete. You can still recover the item if you do so within the 14 day retention period.
The final way items can be soft-deleted is by using Outlook policies or rules. By default, there are no policies that will automatically remove mail from the Deleted-Items folder in Outlook. However, users can create rules that ‘permanently’ (soft-delete) email. If you’re troubleshooting missing email, have the user check for such rules as shown below. You can click Rules on the Home menu and examine any created rules in the Rules Wizard shown below.
Note that the caution is a bit misleading as the rule’s action will soft-delete the email, which, as already stated, is not an immediate permanent deletion.
Recovering soft-deleted mail
You can recover soft-deleted mail directly in Outlook. Be sure the Deleted Items folder is selected, then look for “Recover items recently removed from this folder“ at the top of the mail column, or the “Recover Deleted Items from Server” action on the Home menu bar.
Clicking on the recover items link opens the Recover Deleted Items window.
Click on the items you want to recover or Select All, and click OK.
NOTE: The recovered email returns to your Deleted Items folder. Be sure to move it into your Inbox.
If the email you’re looking for is not listed, it could have moved to the next stage: ‘Hard-Deleted.’
While users can recover soft-deleted email, Administrators can also recover soft-deleted email on their behalf using the ‘Hard-Deleted’ email recovery process described next (which works for both hard and soft deletions). Also, Microsoft has created two PowerShell commands very useful in this process for those who would rather script the tasks. You can use the Get-RecoverableItems and Restore-RecoverableItems cmdlets to search and restore soft-deleted email.
Hard-Deleted Email
The next stage for deletion is ‘Hard Delete.’ Technically, items are hard deleted when items moved from the Recoverable folder to the Purges folder in Exchange online. Administrators can still recover items in the folder with the recovery period set by policy which ranges from 14 (the default) to 30 (the maximum). You can extend the retention beyond 30 days by placing legal or litigation hold on the item or mailbox.
How items become Hard-Deleted
There are two ways content becomes hard-deleted.
By policy, soft-deleted email is moved to the hard-deleted stage when the retention period expires.
Users can hard-delete mail manually by selecting the Purge option in the Recover Deleted Items window shown above. (Again, choosing to ‘permanently delete’ mail with Shift + Del, results in a soft-delete, not a hard-delete.)
Recovering Hard-Deleted Mail
Once email enters the hard-delete stage, users can no longer recover the content. Only service administrators with the proper privileges can initiate recovery, and no administrators have those privileges by default, not even the global admin. The global admin does have the right to assign privileges so that they can give themselves (or others) the necessary rights. Privacy is a concern here since administrators with these privileges can search and export a user’s email.
Microsoft’s online documentation Recover deleted items in a user’s mailbox details the step-by-step instructions for recovering hard-deleted content. The process is a bit messy compared to other administrative tasks. As an overview, the administrator will:
Assign the required permissions
Search the Inbox for the missing email
Copy the results to a Discovery mailbox where you can view mail in the Purged folder (optional).
Export the results to a PST file.
Import the PST to Outlook on the user’s system and locate the missing email in the Purged folder
Last Chance Recovery
Once hard-deleted items are purged, they are no longer discoverable by any method by users or administrators. You should consider the recovery of such content as unlikely. That said, if the email you are looking for is not recoverable by any of the above methods, you can open a ticket with Microsoft 365 Support. In some circumstances, they may be able to find the email that has been purged but not yet overwritten. They may or may not be willing to look for the email, but it can’t hurt to ask, and it has happened.
What about using Outlook to backup email?
Outlook does allow a user to export email to a PST file. To do this, click “File” in the Outlook main menu, then “Import & Export” as shown below.
You can specify what you want to export and even protect the file with a password.
While useful from time to time, a backup plan that depends on users manually exporting content to a local file doesn’t scale and isn’t reliable. Consequently, don’t rely on this as a possible backup and recovery solution.
Alternative Strategies
After reading this, you may be thinking, “isn’t there an easier way?” A service like Altaro Office 365 Backup allows you to recover from point-in-time snapshots of an inbox or other Microsoft 365 content. Having a service like this when you get that urgent call to recover a mail from a month ago can be a lifesaver.
Summary
Users can recover most deleted email without administrator intervention. Often, deleted email simply sits in the Deleted folder until manually cleared. When that occurs, email enters the ‘soft-deleted stage,’ and is easily restored by a user within 14-days. After this period, the item enters the ‘hard-deleted’ state. A service administrator can recover hard-deleted items within the recovery window. After the hard-deleted state, email should be considered uncoverable. Policies can be applied to extend the retention times of deleted mail in any state. While administrators can go far with the web-based administration tools, the entire recovery process can be scripted with PowerShell to customize and scale larger projects or provide granular discovery. It is always a great idea to use a backup solution designed for Microsoft 365, such as Altaro Office 365 Backup.
Backup completes but gives a warning that it “The backup snapshot for this VM is not application consistent. The backup will proceed in crash-consistent mode. (Error code ‘RCTCONTROLLER_011’)”
SOLUTION
The Microsoft Volume Shadow Service (VSS) is Microsoft technology that forms part of Windows Server 2008 R2. This component allows applications to access a “point in time” snapshot of a logical drive on the host machine, including any VHDX and related virtual machine files on that drive. This enables these files to be accessed even if they are in use or locked. It also ensures that the VHDX and related files are in a consistent state and all data has been flushed to disk before they are accessed for backup purposes.
Going forward, Microsoft have made improvements to this technology and in Server 2016 and newer they have changed the way it works once again. Now they’re using “Production Checkpoints” as a gateway between backup applications and the operating system. VSS exists to address the fact that data can and does change while backups are being taken.
In fact if you’re getting this warning through Altaro VM Backup, you’ll see that you will also get this when running a Production Checkpoint. In order to run a production checkpoint as opposed to a standard one, you can follow the steps below:
Go to Hyper-V Manager
Right-click on the VM > Settings
Go to Checkpoints
Un-tick the option “Create standard checkpoints if it’s not possible to create a production checkpoint”
Apply and OK
Right-click on the VM “Checkpoint”
The checkpoint operation should now fail, the reason being because it didn’t manage to run VSS inside the VM and tell applications to cease all I/O and flush outstanding data and operations from memory to disk so that the backup doesn’t miss anything. VSS in general is broad and can be affected by any application running inside the VM.
With that said, this means that it’s not always easy or straight-forward to resolve a ‘crash-consistent’ backup, however you should proceed to troubleshoot as follows:
Firstly, check whether your VM actually requires an Application-Consistent backup. If it does not, you can disable it from the “VSS Settings” screen. Simply uncheck “Application Consistent” and Save changes. More information here.
If your VM is running a non-VSS aware guest, such as a Linux OS, you can simply go to “VSS Settings” and disable “Application Consistent” for these VM’s.
Ensure you have the latest Windows Updates installed as “Integration Services” are now being deployed through the updates.
If the VM giving trouble is running Microsoft SBS 2011, then please go throughthis article.
In the Properties dialog of the VM, from either Hyper-V Manager or SCVMM, look on the Integration Services tab and ensure that “Backup (volume checkpoint)” is checked.
The guest VM is in a running state.
All the guest VM’s disks have ample free space available for the internal shadow copy to complete. You must have 10% free disk space on each disk.
In the guest VM, the service with name “Hyper-V Volume Shadow Copy Requestor” is running.
The Checkpoint File Location for the VM must be set to be the same volume in the host operating system as the VHDX files for the VM.
The guest VM must have a SCSI controller attached in the VM settings (in Hyper-V Manager). There is no need to have any disks on the controller, but it must be present.
The guest VM must not have any Shadow Storage assignment of a volume explicitly set to a different volume other than itself. This can be checked by running “vssadmin list shadowstorage” through command line.
If the guest OS has a system reserved partition, verify that it has at least 45MB of free space. If less than that is free, ensure that a windows shadow copy can be created as per the screenshot below:
All of the virtual machine’s volumes must be formatted with NTFS/ReFS. The volume that contains the .VHD(s) for the VM must also be formatted with NTFS/ReFS. The guest operating system’s disks must be “Basic”, not “Dynamic” (this is not the same as dynamic vs. fixed VHDs, see screenshot below):
Run the command below in command prompt inside the VM that is crash-consistent:
vssadmin list writers
In the results check that all writers inside the VM are in a “Stable” state and showing “No error”.
Check that the shadowstorage on each drive is not full, ideally set to unbounded. You can set it as unbounded by running the following command in command prompt:
Note: Run the two above commands for each drive, each time replacing the drive letter from C: to the drive in question.
The “COM+ Event System”, “Distributed Transaction Coordinator”, “Remote Procedure Call (RPC)”, and “System Event Notification” services must be running within the VM. By default, these are set to “Automatic” and/or “Automatic (Delayed Start)”. The “COM+ System Application” and “Microsoft Software Shadow Copy Provider” and “Volume Shadow Copy” services must at least be set to Manual, which is the default for these. It is acceptable, but not required, to set them to “Automatic” or “Automatic (Delayed Start)”.
Check if you are getting a “vmicvss” with event ID 13 inside the Application event log of the VM that is specifying that Windows cannot perform an online backup of this system. Event below:
Event ID: 13 Source: vmicvss Description: Windows cannot perform an online backup of this system because scoped snapshots are enabled. To resolve this, disable scoped snapshots by creating the following registry value on this computer: PATH: HKEY_LOCAL_MACHINE\SOFTWARE\Microsoft\Windows NT\CurrentVersion\SystemRestore\ DWORD: ScopeSnapshots Value: 0
If the issue persists check for warnings or errors in the Application and System event logs on the VM that is giving trouble.
Ensure that the latest Windows Updates for the Host and VM are also applied. Please note that “Optional Updates” are usually also important for VSS operations and are suggested as well.
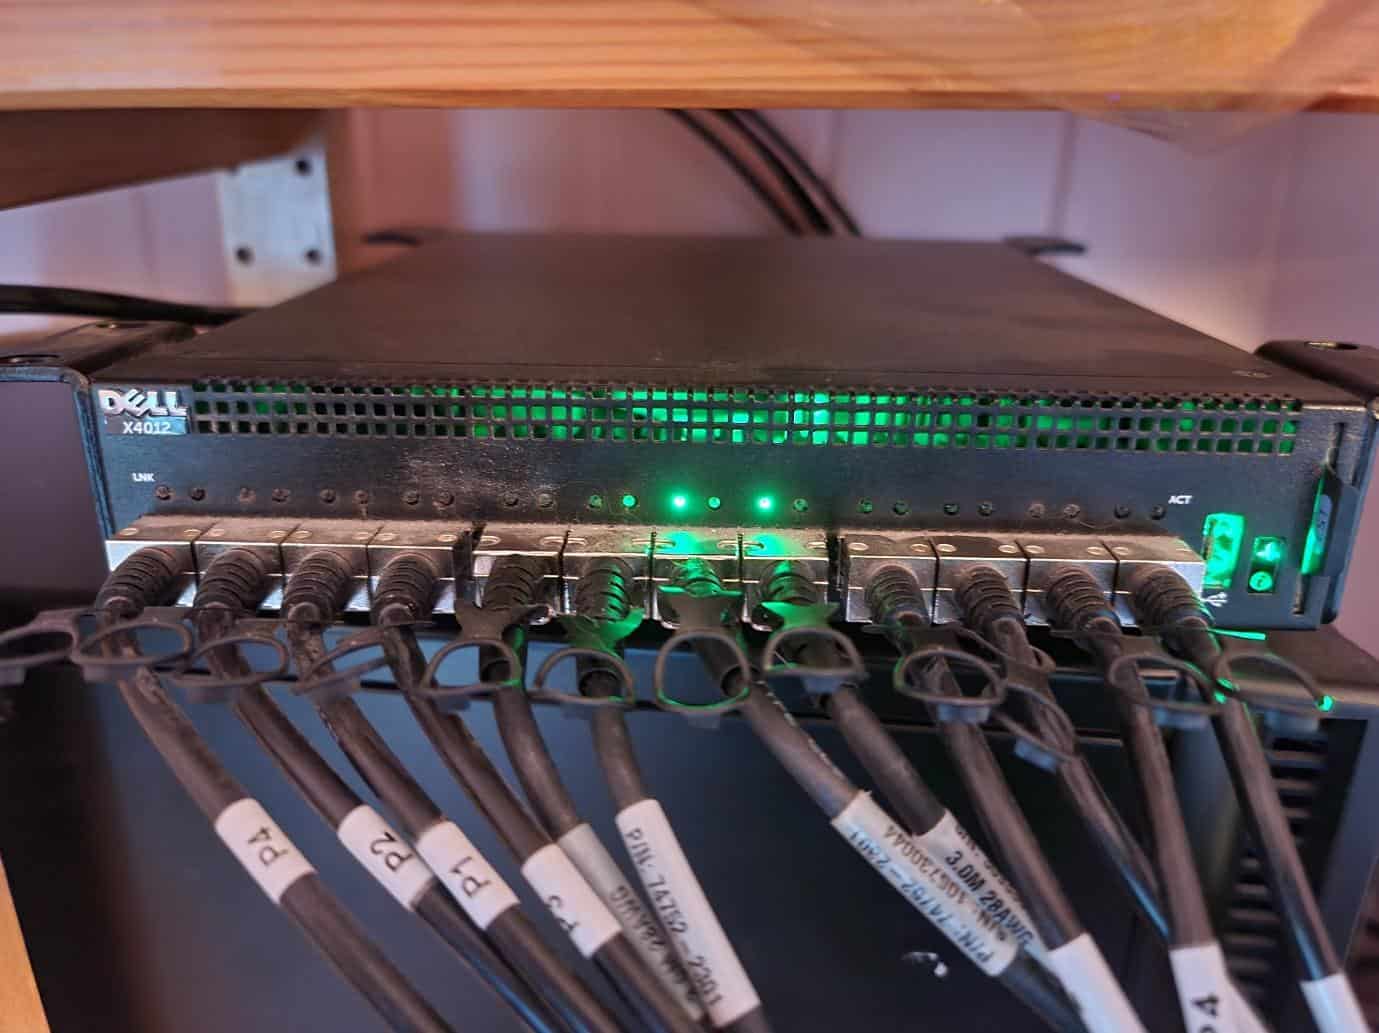
 .
.